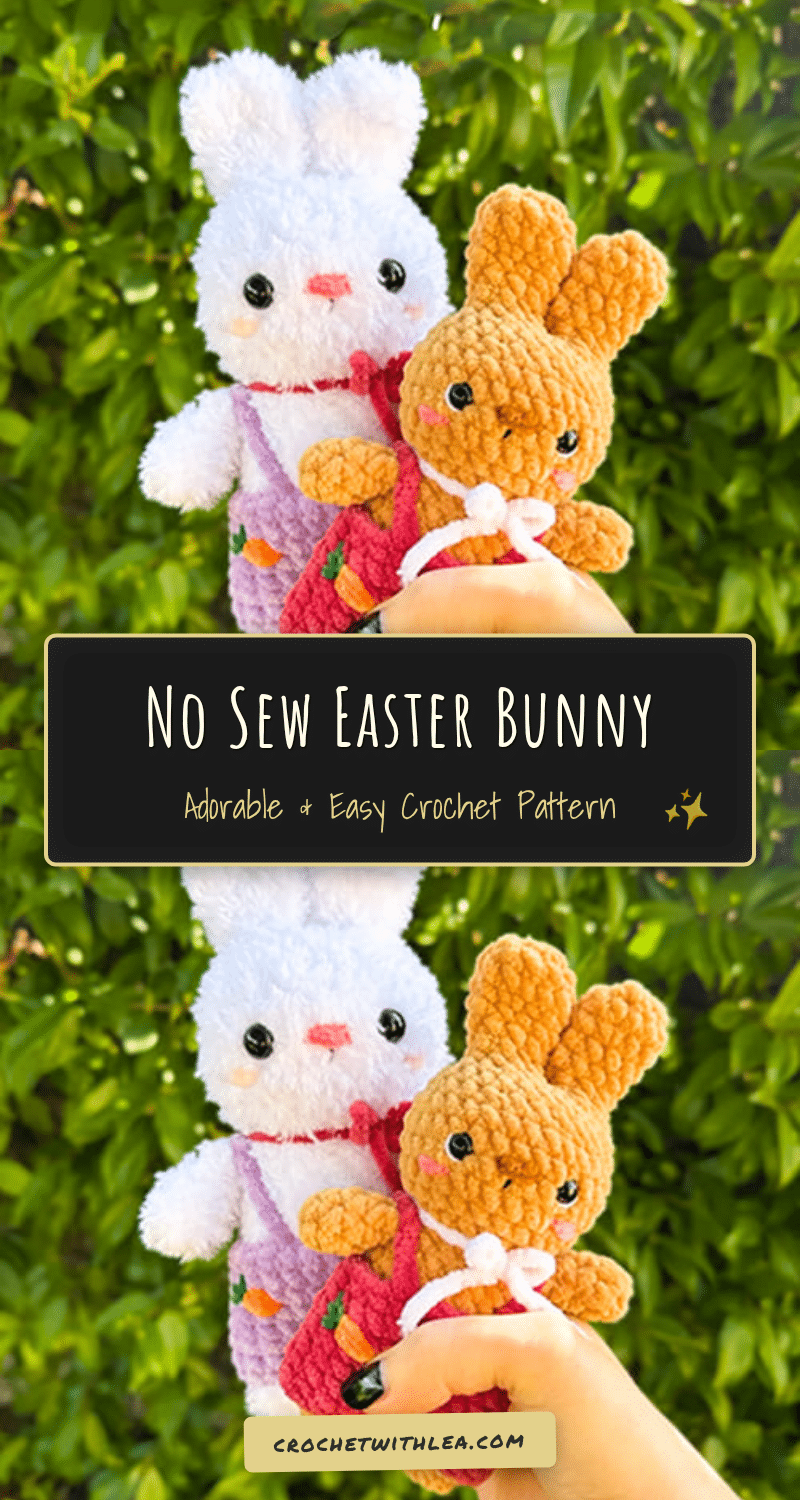
This no sew crochet Easter bunny pattern is a delightful, beginner-friendly amigurumi project that skips the tedious sewing steps, allowing you to focus on the fun of creating a soft, plush companion. Designed with a cheerful outfit and a cozy spring vibe, this bunny is small enough to finish in one sitting yet detailed enough to shine in photos or as a centerpiece for your holiday decor. Whether you are looking for a quick gift for a child or a charming addition to your handmade collection, this pattern offers a smooth, relaxing crafting experience.
Gift and Use Ideas
This bunny is more than just a cute decoration; it is a versatile handmade object that fits perfectly into various gifting and display scenarios. Because of its compact size and sturdy construction, it makes an ideal Easter basket stuffer or a “just because” gift for a little one. The cheerful raspberry pants and embroidered carrot add a playful touch that works wonderfully as a nursery accent or a seasonal table decoration. Additionally, the no-sew construction makes it a safe, durable toy for toddlers who enjoy cuddling, while its photogenic design ensures it stands out in pattern roundups and social media craft shares.
Project Overview
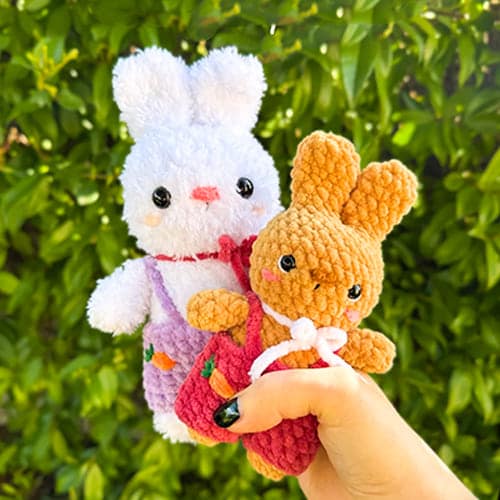
Designed by crochetedbylilas, this amigurumi project features a light brown bunny body with raspberry overalls, complete with embroidered details. The pattern is structured to be beginner-friendly, utilizing standard single crochet stitches and simple assembly techniques. The unique construction allows you to crochet the arms and attach them while working on the body, and the pants are integrated directly into the leg structure to minimize finishing work.
Materials
- Yarn: Hobbii Honey Bunny (or similar chenille/velvet yarn) in the following colors:
- Light Brown (Bunny body, arms, ears)
- Raspberry (Pants)
- Dark Brown (Embroidery)
- Orange (Embroidery)
- Pink (Embroidery)
- Green (Embroidery)
- Black (Embroidery)
- White (Embroidery)
- Crochet Hook: 4 mm
- Safety Eyes: 8 mm
- Notions: Darning needles, stuffing, stitch markers, scissors
Gauge and Finished Size
Specific gauge and finished measurements are not provided in the source pattern. The bunny is designed to be small enough to finish in one sitting. Ensure your tension is consistent to maintain the shape of the ears and the fit of the pants.
Abbreviations
US Terms
- MR: Magic ring
- sc: Single crochet
- inc: Increase
- dec: Decrease
- slst: Slip stitch
- ch: Chain
- FLO: Front loop only
- st(s): Stitch(es)
- Rnd(s): Round(s)
- FO: Fasten off
Pattern Notes
- Arm Construction: Be sure to crochet the arms before the body, as you will attach them while working on the body.
- Ear Stuffing: Do not stuff the ears; leave them flat or lightly filled as preferred, but the pattern specifies not to stuff them.
- Pants Integration: The pants are worked continuously from the legs, so do not cut the yarn between the first and second leg.
Pattern Instructions
Arms (x2)
Note: Crochet both arms before starting the body.
In light brown:
- Rnd 1: 6 sc in MR (6 st)
- Rnd 2-5: (4 rnds): 6 sc (6 st)
Assembly: Stuff. Fold the work in half and make 3 sc by stitching in both layers. FO and weave in the ends.
Legs (x2)
In light brown:
- Rnd 1: 8 sc in MR (8 st)
- Rnd 2-5: (4 rnds): 8 sc (8 st)
First Leg: FO and weave in the ends.
Second Leg: Do not cut the yarn, as we will begin the body by joining the legs.
Body and Head
Rnd 1: Ch 2 on the second leg. Then, join it to the first leg with 1 sc. Mark the last st made (=first st of the Rnd). Next, 7 sc, 2 sc in one side of the chain, 8 sc, 2 sc in the other side of the chain. (20 st).
Rnd 2: *3sc,1inc* x5 (25 st)
Rnd 3-4: (2 rnds): 25 sc (25 st)
Rnd 5: *3sc,1dec* x5 (20 st)
Rnd 6-7: (2 rnds): 20 sc (20 st)
Rnd 8: *3sc,1dec* x4 (16 st). Start stuffing.
Rnd 9: 2sc, 3sc through one arm and the body, 5sc, 3 sc through the other arm and the body, 3 sc (16 st). Attach the arms to the body. Arms attached. Body finished.
Finish stuffing the body before starting the head.
Rnd 10: FLO: *1sc,1inc* x8 (24 st)
Rnd 11: 24 sc (24 st)
Rnd 12: *2sc,1inc* x8 (32 st)
Rnd 13-15: (3 rnds): 32 sc (32 st). Insert the safety eyes between rnds 13 and 14, about 5 sts apart.
Rnd 16: *2sc,1dec* x8 (24 st)
Rnd 17: 24 sc (24 st)
Rnd 18: *2sc,1dec* x6 (18 st). Crochet 1 slst by going through sts 1 and 10 of Rnd 18. You now have the 2 holes where the ears will be. Mark st 11 of Rnd 18 (we’ll use it to start the second ear). Crochet 1 slst.
Ears
Don’t stuff the ears.
First Ear:
After Rnd 19 (a). Start Rnd 20 (a) in the first st of Rnd 19 (a).
- Rnd 19 (a): sc 8 starting in st 2 and ending in st 9 of Rnd 18 (8 st)
- Rnd 20 (a): 8 sc (8 st)
- Rnd 21 (a): *1inc,3sc* x2 (10 st)
- Rnd 22 (a): 10 sc (10 st)
- Rnd 23 (a): *4sc,1inc* x2 (12 st)
- Rnd 24 (a): 12 sc (12 st)
- Rnd 25 (a): *1sc,1dec* x4 (8 st). FO and close the opening by weaving your needle through the FLO of Rnd 25 (a). First ear finished.
Finish stuffing the head.
Second Ear:
We’ll now start crocheting the second ear: Attach light brown yarn in st 11 of Rnd 18 (marked stitch).
- Rnd 19 (b): sc 8 starting in st 11 and ending in st 18 of Rnd 18 (8 st). Attach light brown yarn.
- Rnd 20 (b): 8 sc (8 st)
- Rnd 21 (b): *1inc, 3sc* x2 (10 st)
- Rnd 22 (b): 10 sc (10 st)
- Rnd 23 (b): *4sc,1inc* x2 (12 st)
- Rnd 24 (b): 12 sc (12 st)
- Rnd 25 (b): *1sc,1dec* x4 (8 st). FO and close the opening by weaving your needle through the FLO of Rnd 25 (b).
Face Embroidery
- Using dark brown yarn, embroider the nose between the eyes.
- Add a thin black line under the nose.
- Using thin white yarn, embroider white around the outer side of the eyes.
- Using pink yarn, add cheeks between Rnds 3 and 4.
Pants
Legs (x2): With raspberry yarn, ch 13 and slst into the first chain to form a circle.
- Rnd 1: ch1, 13 sc (13 st)
For the first leg: FO and weave in the ends.
For the second leg: Do not FO or cut the yarn, as we will continue the pants by joining the legs.
Pants body:
- Rnd 1: Ch 2 on the second leg. Then, join it to the first leg with 1 sc. Mark this sc (=first st of the rnd). Next, 12 sc, 2 sc in one side of the chain, 13 sc, 2 sc in the other side of the chain (30 st).
- Rnd 2-5: (4 rnds): 30 sc (30 st)
- Rnd 6: *8sc,1dec* x3 (27 st)
Without cutting the yarn, put the pants on the bunny with the back of the pants at the stitch marker. Next, ch 12 (or adjust as needed) and join the chain to the front of the pants with 1 slst. FO and weave in the ends.
Attach raspberry yarn at the back of the pants, next to the existing chain. Ch12 (or adjust as needed) and join the chain to the front of the pants with 1 slst. FO and weave in the ends. For reference, each of my chains is 3 sc apart at the front.
Assembly and Finishing
Once the main body, head, and pants are complete, finalize the look with the following embroidery and accessories:
- Embroider a carrot on the pants using orange and green yarn.
- Tie a bow around the bunny’s neck using a piece of white yarn.
Tips
- Yarn Choice: The pattern suggests Hobbii Honey Bunny, a chenille-style yarn. This type of yarn creates a soft, plush texture that enhances the cuddly feel of the bunny, but be mindful of tension as it can stretch.
- Ear Placement: When creating the ear holes in Rnd 18, ensure the slip stitches are secure so the ears attach firmly but can still stand upright.
- Pants Fit: If your chain length for the pants’ suspenders feels too tight or loose, adjust the chain count (the pattern suggests ch 12) to fit your bunny’s proportions.
FAQs
Do I need to sew the arms on separately?
No, this is a no-sew pattern for the main assembly. You crochet the arms first, then attach them directly to the body by crocheting through both the arm and the body stitches in Round 9.
Why are the ears not stuffed?
The ears are designed to be flat or lightly filled to maintain a classic amigurumi bunny look. Stuffing them heavily might cause them to droop or look unnatural.
Can I use a different yarn weight?
The pattern is written for Hobbii Honey Bunny (a chenille/velvet yarn) and a 4 mm hook. If you use a different yarn weight, you may need to adjust your hook size and stitch count to achieve a similar size and density.
How do I attach the pants?
The pants are worked continuously from the legs. You put the pants on the bunny’s legs before finishing the top edge, then chain across to create the suspenders, attaching them to the front of the pants.
Is this pattern suitable for beginners?
Yes, the pattern is marked as beginner-friendly. It uses basic stitches (sc, inc, dec) and avoids complex shaping or intricate sewing steps.
Pin This Crochet Pattern!