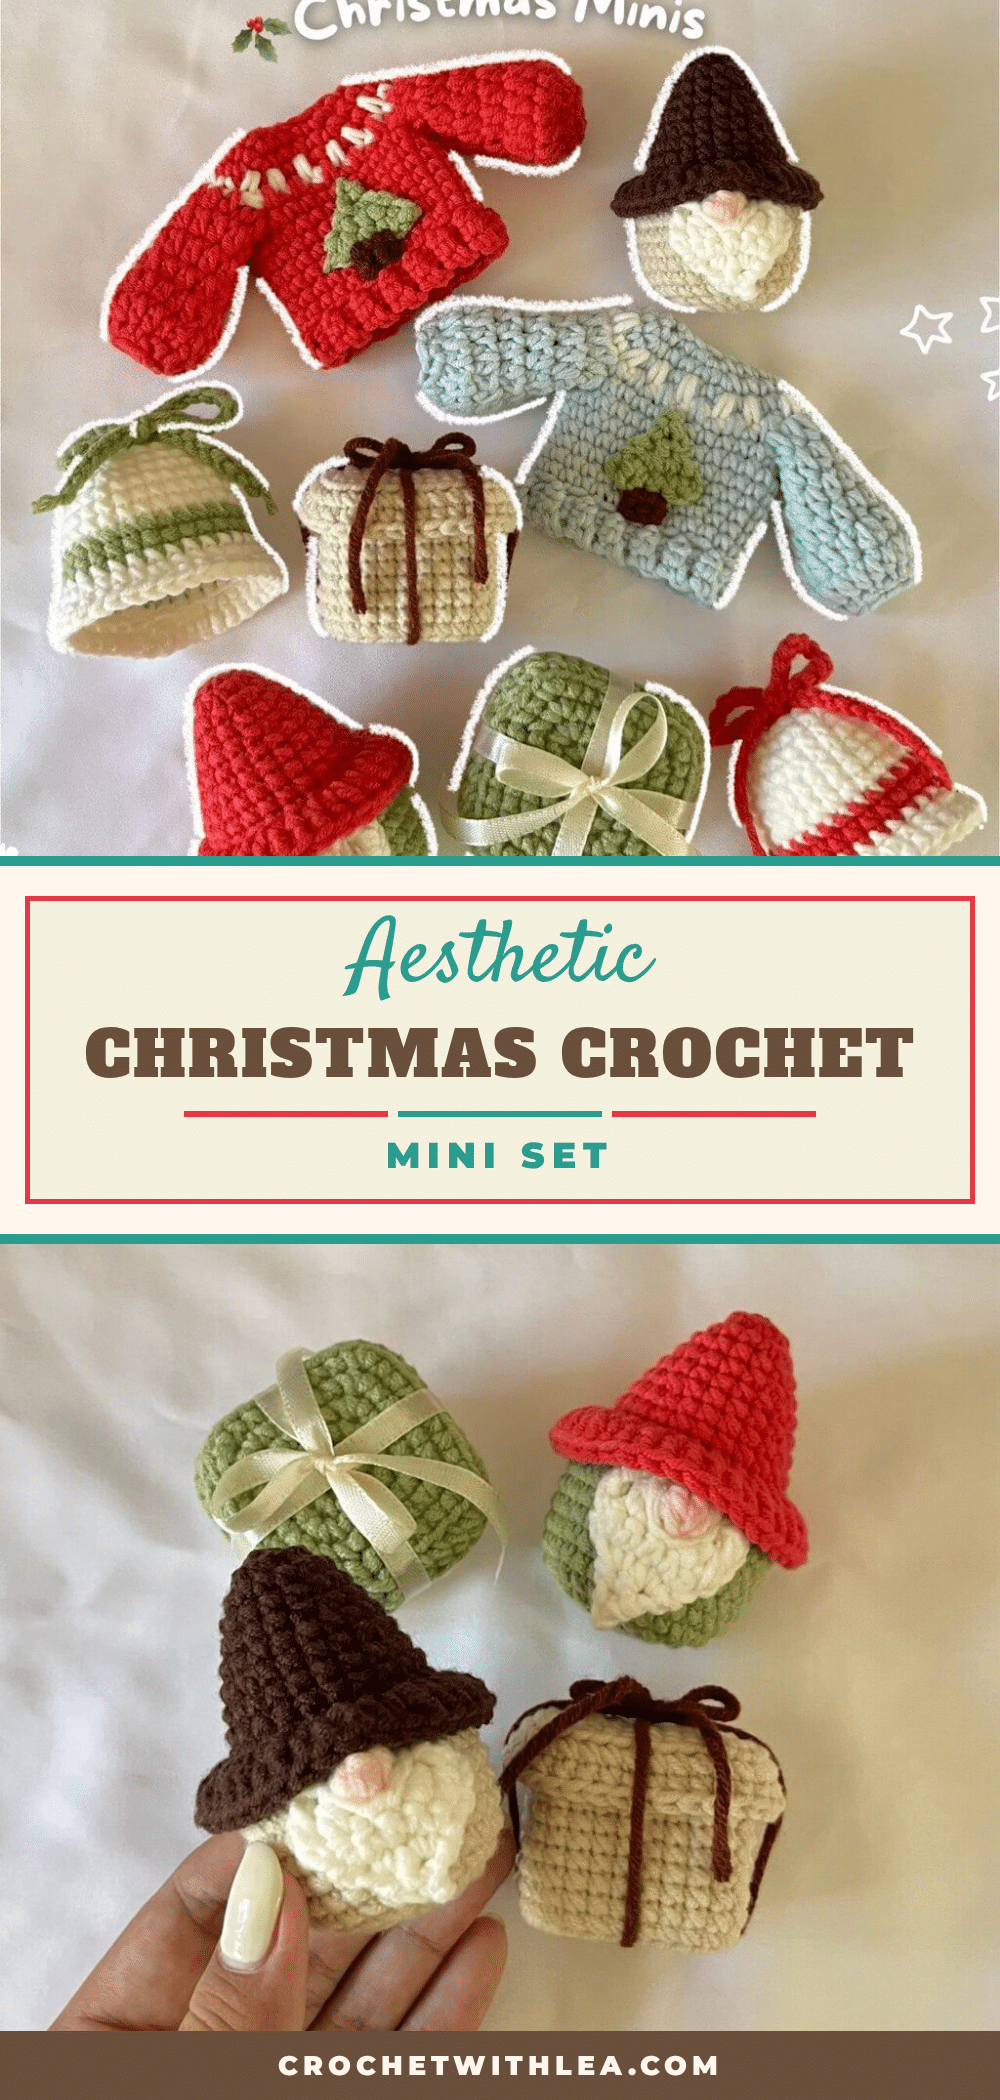
Christmas is just around the corner, and the season of giving is in full swing. If you are looking for a way to add a touch of handmade warmth to your holiday preparations, these aesthetic Christmas minis are the perfect project. Whether you are crafting gifts for loved ones or looking for unique nursery decor, this collection of mini amigurumi items brings a cozy, festive spirit to any space. From a tiny sweater to a charming gnome, these small projects are manageable, quick to make, and incredibly adorable.
Seasonal Styling Ideas
These mini crochet pieces are versatile enough to serve multiple purposes in your holiday decor. The mini Christmas sweater, complete with its tiny tree applique, makes a delightful ornament for your own tree or a sweet accent on a gift box. The present box, with its sturdy cardboard base and satin ribbon, can hold small treats, jewelry, or gift cards, serving as both packaging and decor. The little gnome adds a whimsical touch to a mantelpiece or bookshelf, while the bell works beautifully as a keychain or a hanging decoration. Because they are made from soft cotton or acrylic yarns, they are safe for children’s rooms and add a tactile, inviting element to your seasonal styling.
Project Overview
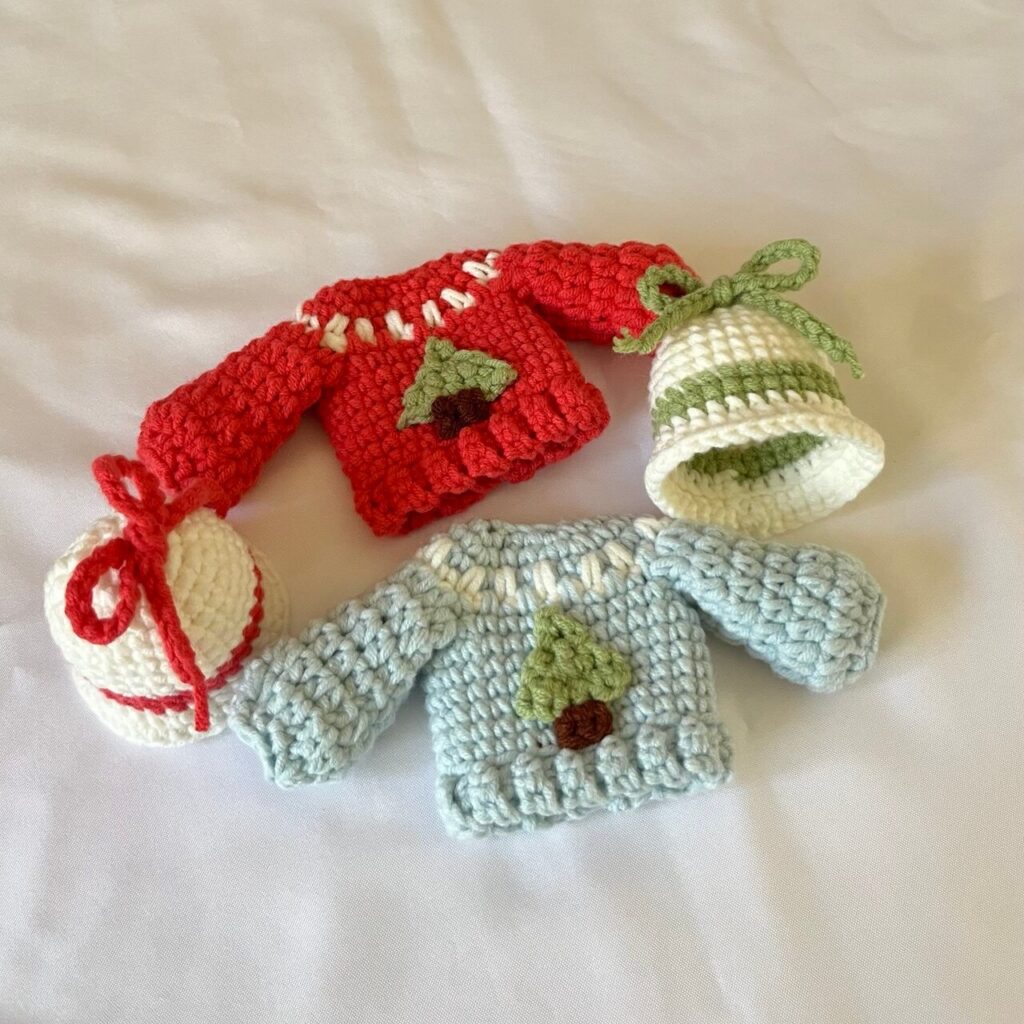
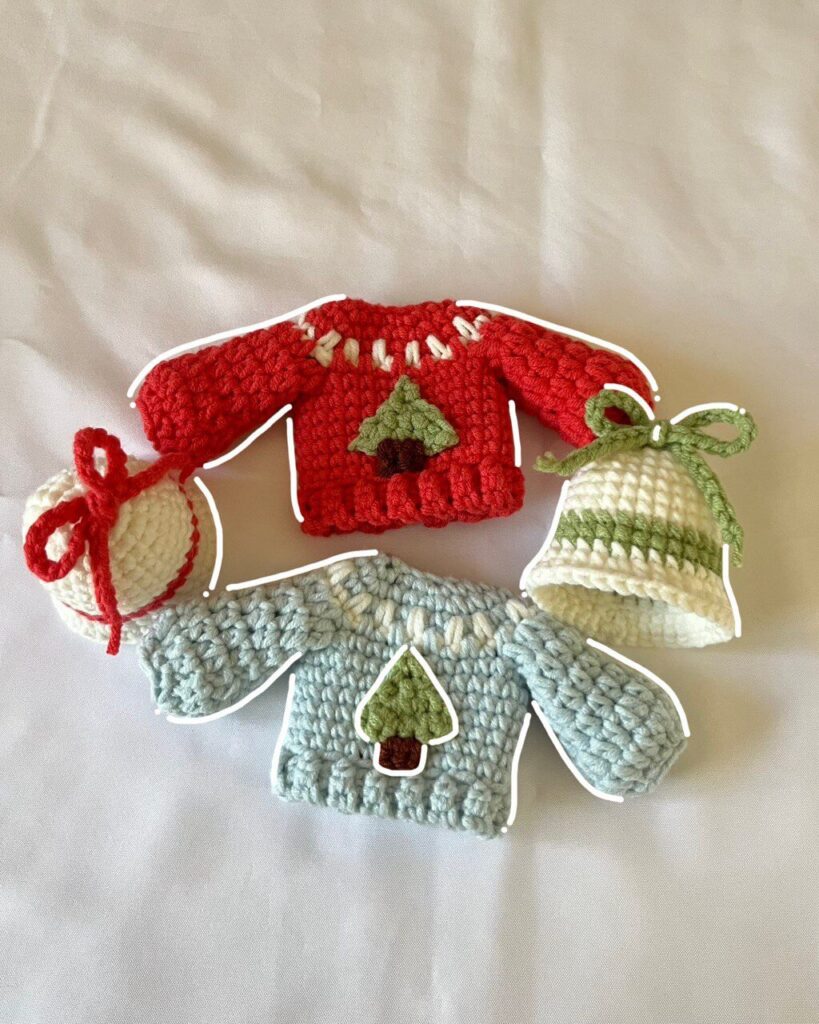
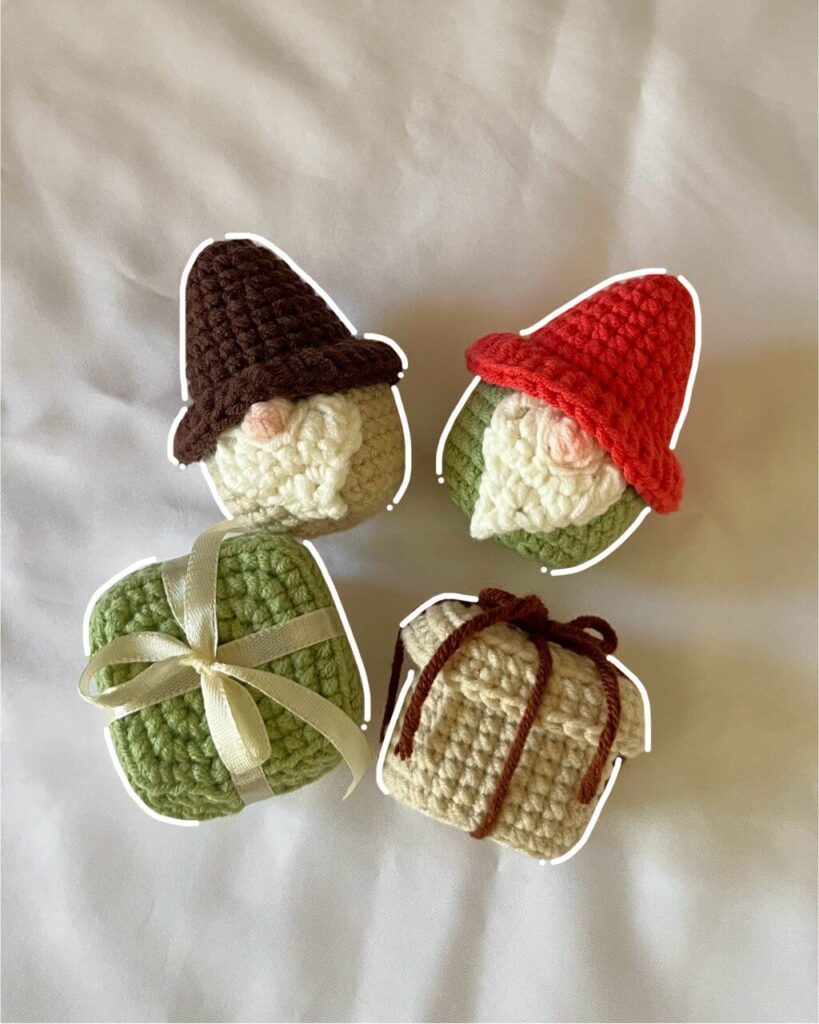
This pattern set includes four distinct amigurumi projects: a Mini Christmas Sweater with a tree applique, a Christmas Bell, a Present Box with a lid, and a Little Gnome. The designs utilize a cohesive color palette of white, red, green, and brown, creating a unified aesthetic suitable for holiday gifting or display. The projects range from simple flat appliques to structured boxes, offering a variety of techniques including joined rounds, spike stitches, and color changes.
Materials
- Yarn: Xuefeier milk cotton yarn is recommended, but any Cotton, Acrylic, or Sport yarn in White, Red, Green, and Brown will work.
- Crochet Hook: 3mm hook.
- Notions: Stitch markers, stuffing materials, darning needle, and scissors.
- Optional: Satin ribbon, glue, and small pieces of cardboard (for the present box structure).
Gauge and Finished Size
Specific gauge and finished size measurements are not provided in the source pattern. These items are designed to be worked to the stitch counts provided to achieve the intended mini proportions.
Abbreviations
Abbreviations are in US terminology.
- Ch – Chain
- st – stitch
- mr – magic ring
- R – round / row
- sc – single crochet
- inc – increase
- dec – decrease
- dc – double crochet
- hdc – half double crochet
- tr – treble crochet
- FLO – front loops only
- BLO – back loops only
- slst – slip stitch
- *- repeat
- [] – total stitch count in each round
Pattern Notes
Joined Rounds: We use joined rounds for all these mini items. At the end of every round, make a slip stitch (slst) into the first single crochet (sc) of that round. Begin each new round with a chain 1 (Ch 1). The first single crochet (sc) of the new round should be made in the same stitch where you just made the slip stitch (the first sc of the previous round). Note that slst and Ch1 are NOT included in our total stitch count.
Spike Stitch: In specific rounds, a spike stitch is used. This is a simple technique that creates elongated stitches using sc by working into rows below the current row.
Pattern Instructions
Mini Christmas Sweater
Start with the Red yarn and make a slip knot. Make 16 ch.
- R1: Starting from 2nd ch from the hook, (2sc, 1inc) *5, 1slst (into the 1st sc) [20]
- R2: Ch1, (3sc, 1inc) *5, 1slst [25]
- R3: Ch1, (4sc, 1inc) *5, 1slst [30]. Change to White yarn at the end of R3.
- R4 (White): Ch1, Turn, 1sc in each st (using the spike stitch), 1slst [30]. Change back to Red yarn at the end of R4.
- R5: Continue using the Spike stitch. Ch1, 5sc, 4ch, skip 5sc, 10sc, 4ch, skip 5sc, 5sc, 1slst [20sc, 8ch]
- R6: Ch1, 5sc, 1sc each into each ch, 10sc, 1sc each into each ch, 5sc, 1slst [28]
- R7-R12: Ch1, 1sc into each st, 1slst (6 rounds) [28]. Cut the yarn and weave in the ends.
Hem Detail (R13): Ch3, starting from 2nd ch from the hook, 2sc, skip the 1st sc and make 1slst into the 2nd. Repeat the following sequence (a) & (b) alternatively until the end: (a) Ch1, Turn, go back into the 2sc we just did, in BLO, 2sc; (b) Ch1, Turn, go back into the 2sc we just did, in BLO, 2sc, skip 1st and make 1slst into the next.
Sleeves
Go back to the holes we left between R5 & R6, start from the middle of the ch place.
- R1: Ch1, 2hdc (into each ch), 1hdc into corner, (2hdc, 1hdc inc, 2hdc on each sc), 1hdc into corner, 2hdc (on each ch), 1slst [12]
- R2-R4: Ch1, 1hdc into each st, 1slst (3 rounds) [12]
- R5: Ch1, (2hdc, 1hdc inc) *4, 1slst [16]
- R6: Ch1, 1hdc into each st, 1slst [16]
- R7: Ch1, 8sc dec, 1slst [8]. Cut the yarn and weave in the end. Do the same for another sleeve.
Mini Christmas Tree Applique
Start with the Green yarn and make 2ch.
- R1: Starting from the 2nd ch from the hook, 1sc [1]
- R2: Ch1, Turn, 1inc [2]
- R3: Ch1, Turn, 2inc [4]
- R4: Ch1, Turn, 1inc, 2sc, 1inc [6]. Cut the yarn leaving a long tail.
Trunk: Into the middle 2sc of R4, bring the Brown yarn and make 2sc for the tree trunk. Cut the yarn leaving a long tail. Sew the Christmas tree on the center of the sweater.
Christmas Bell
Start with the White yarn and make a magic ring.
- R1: 7sc in mr, 1slst [7]
- R2: Ch1, 1inc, 4ch, skip 2st, 1inc, 4ch, sk 2st, 1inc, 1slst [6sc, 8ch]
- R3: Ch1, (1sc, 1inc) *7, 1slst [21]
- R4: Ch1, 21sc, 1slst [21]
- R5: Ch1, (1sc, 1inc, 1sc) *7, 1slst [28]
- R6-R8: Ch1, 28sc, 1slst (3 rounds) [28]. Change to Red yarn at the end of R8!
- R9-R10: In Red, Ch1, 28sc, 1slst [28]. Change back to White yarn at the end of R10!
- R11: Ch1, 28sc, 1slst [28]
- R12: FLO, (3sc, 1inc) *7, 1slst [35]
- R13: Ch1, 35sc, 1slst [35]. Cut the yarn and weave in the ends.
Ribbon: To make the ribbon, make 50ch, bring it through the holes at the top and tie it to get a ribbon!
Present Box (Body)
Use White yarn for the body and start with a magic ring!
- R1: 8sc in mr, 1slst [8]
- R2: Ch1, 8inc, 1slst [16]
- R3: Ch1, (3sc, 3sc in one st) *4, 1slst [24]
- R4: Ch1, 4sc, 3sc in one st, (5sc, 3sc in one st) *3, 1sc, 1slst [32]
- R5: Ch1, In BLO, 32sc, 1slst [32]
- R6-R12: Ch1, 32sc, 1slst (7 rounds) [32]. Cut the yarn and weave in the ends.
Lid
Using Green yarn, repeat R1 to R4 of the body!
- R5: Ch1, 5sc, 3sc in one st, (7sc, 3sc in one st) *3, 2sc, 1slst [40]
- R6: Ch1, In BLO, 40sc, 1slst [40]
- R7: Ch1, 40sc, 1slst [40]. Cut the yarn and weave in the ends.
Assembly: Cut four pieces of cardboard to fit each side of the box and insert them for a sturdier, square shape. Wrap white yarn or satin ribbon around the box like a gift, tying a bow on top.
Little Gnome
Start with Green yarn and make a magic ring.
- R1: 7sc in mr, 1slst [7]
- R2: Ch1, 7inc, 1slst [14]
- R3: Ch1, (1sc, 1inc) *7, 1slst [21]
- R4: Ch1, (1sc, 1inc, 1sc) *7, 1slst [28]
- R5-R8: Ch1, 28sc, 1slst (4 rounds) [28]
- R9: Ch1, In Green 13sc, In Skin color 4dc cluster stitch, In Green 14sc, 1slst [28]
- R10: Ch1, 28sc, 1slst [28]. Change to Red yarn at the end of R10 & continue using Red until the end!
- R11: Ch1, (5sc, 1dec) *4, 1slst [24]
- R12: Ch1, In BLO 24sc, 1slst [24]
- R13-R14: Ch1, 24sc, 1slst (2 rounds) [24]
- R15: Ch1, (2sc, 1dec, 2sc) *4, 1slst [20]. Start stuffing the body and continue stuffing after each following round.
- R16: Ch1, 20sc, 1slst [20]
- R17: Ch1, (3sc, 1dec) *4, 1slst [16]
- R18: Ch1, 16sc, 1slst [16]
- R19: Ch1, (2sc, 1dec) *4, 1slst [12]
- R20: Ch1, 6dec [6]. Cut the yarn and close the body.
Hat Brim: On FLO of R12, starting from the last FLO, bring the Red yarn; 2ch, (1dc, 1dc inc)*12, 1slst [36]. Cut the yarn and weave in the ends.
Mustache
Using White yarn, make a slip knot and make 2ch.
- R1: Starting from the 2nd ch from the hook, 1sc [1]
- R2: Ch1, Turn, 1inc [2]
- R3: Ch1, Turn, 2inc [4]
- R4: Ch1, Turn, 1inc, 2sc, 1inc [6]
- R4 (continued): Ch3, Turn, 1tr, 1hdc, 2slst, 1hdc, 1tr [6]. Cut the yarn leaving a long tail and sew the mustache under R9, leaving the nose visible.
Assembly
- Sweater: Sew the Christmas tree on the center of the sweater. Attach sleeves to the armholes created in R5/R6. Make a ribbon by chaining 50, bringing it through the holes at the top, and tying it.
- Present Box: Insert cardboard pieces into the box body for structure. Wrap with yarn or ribbon and tie a bow.
- Gnome: Close the body securely. Attach the mustache under R9, ensuring the nose remains visible.
Tips
- Watch the accompanying video tutorials for detailed explanations on changing colors, making the spike stitch, and closing the amigurumi body securely.
- Pay close attention to the joined round technique to maintain a neat spiral appearance.
- Use stitch markers to keep track of your rounds, especially when working with color changes.
- For the present box, ensure the cardboard fits snugly to maintain the square shape.
FAQs
What type of yarn is best for these minis?
The pattern recommends Xuefeier milk cotton yarn, but any cotton, acrylic, or sport weight yarn in the specified colors will work well.
How do I make the spike stitch?
The spike stitch involves working a single crochet into the rows below the current round to create an elongated effect. Refer to the video tutorial for a visual guide on this technique.
Can I sell items made from this pattern?
Yes, you are welcome to sell finished items made from these patterns for personal use. However, mass production and selling the patterns themselves are not allowed. Please credit the original creator when sharing your creations.
How do I close the gnome body securely?
After the final round, cut the yarn leaving a long tail. Use a darning needle to weave the tail through the front loops of the final stitches, pull tight to close the hole, and weave in the ends securely.
Why is cardboard used in the present box?
Cardboard is inserted into the sides of the box to give it a sturdier, square shape, making it look more like a realistic gift box and helping it hold its structure.
Pin This Crochet Pattern!