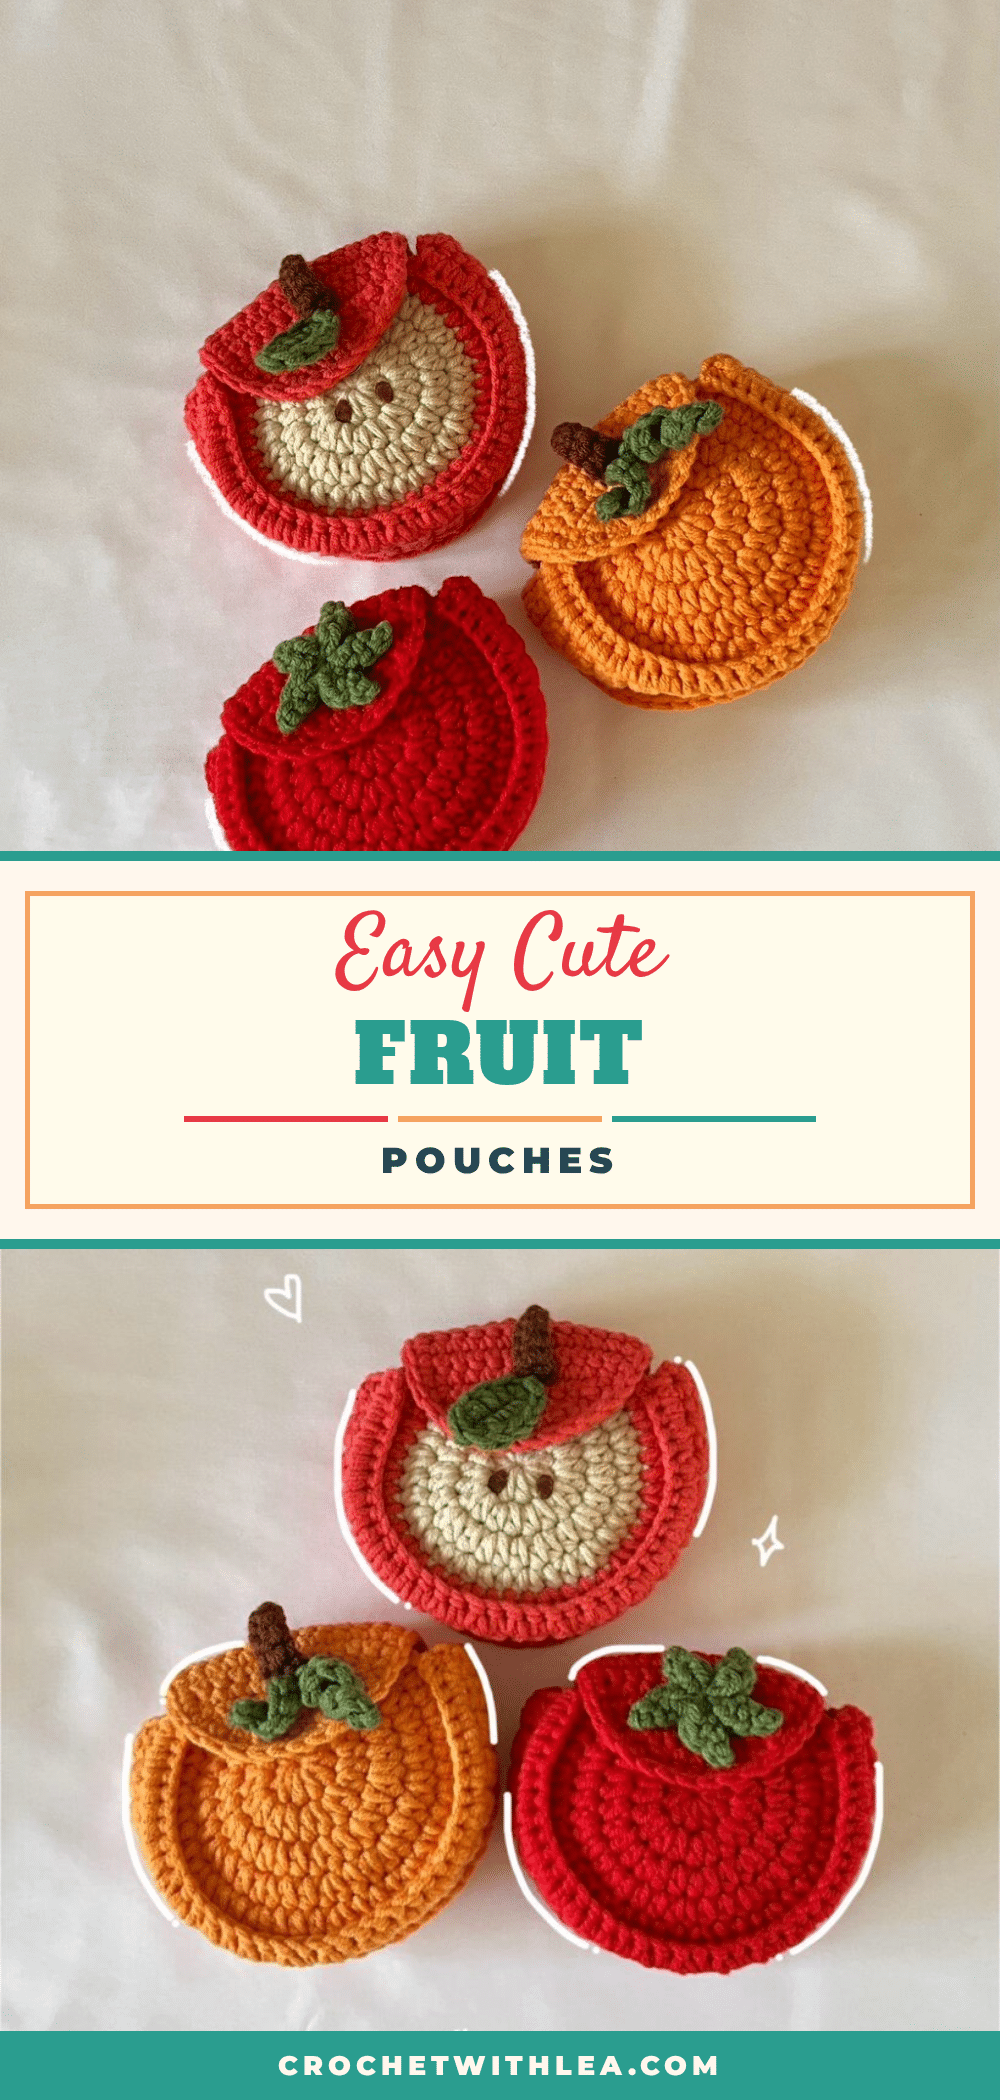
Yarn is draped across the table, the hook is already in hand, and the magic ring is just beginning to tighten. There is a specific kind of calm that comes with starting a new amigurumi project, especially one as delightful as these fruit pouches. You aren’t just making a toy; you are crafting a functional little bag that holds everything from makeup to small treasures. As you work through the rounds, the shape emerges—round, plump, and ready to be filled. This pattern is designed to be quick, easy, and functional, allowing you to create a set of adorable pouches without spending weeks on a single project.
Why This Project Works
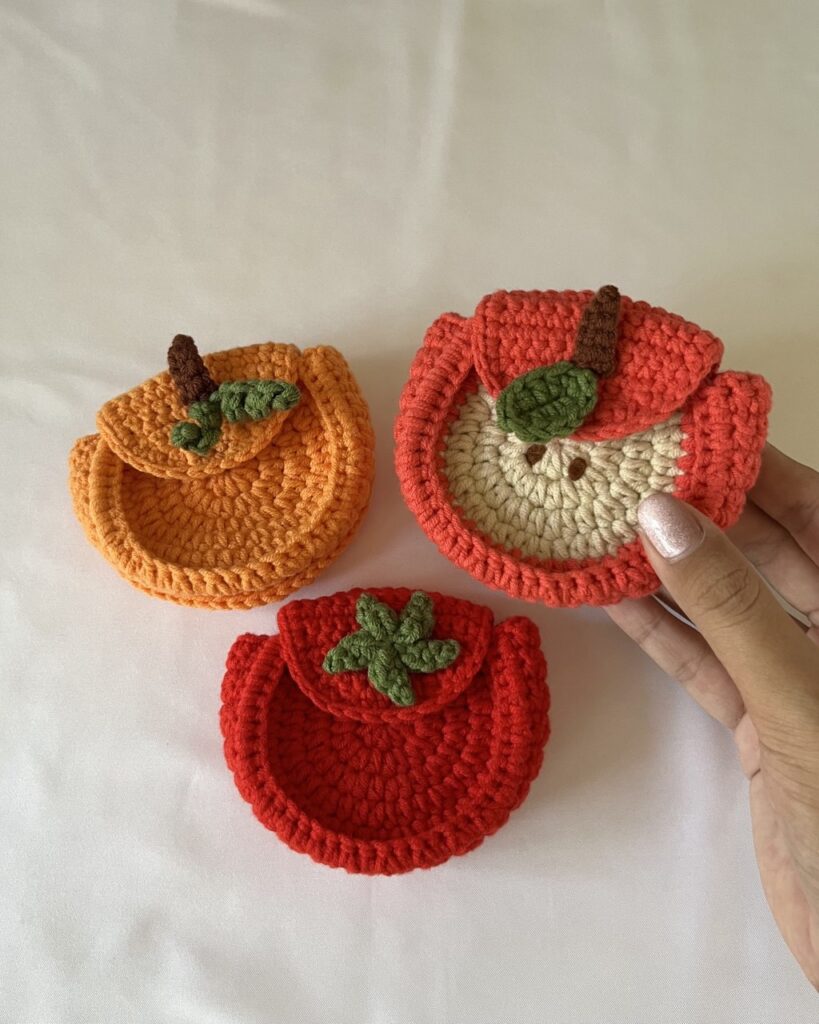
These fruit pouches strike the perfect balance between cute aesthetics and practical use. The design utilizes a unique construction method where two circular appliques are connected by a long strip, creating a pouch body that stands up on its own. The addition of a flap with a secure closure makes these ideal for travel or keeping small items organized. The color palette is vibrant and cheerful, utilizing classic fruit colors like red, green, beige, and brown. Whether you are making a crisp apple, a juicy tomato, or a whimsical pumpkin, the texture of the milk cotton yarn gives each piece a soft, premium feel. It is a wonderful project for using up small scraps of yarn, and the finished size is perfect for gifting or personal use.
Project Overview
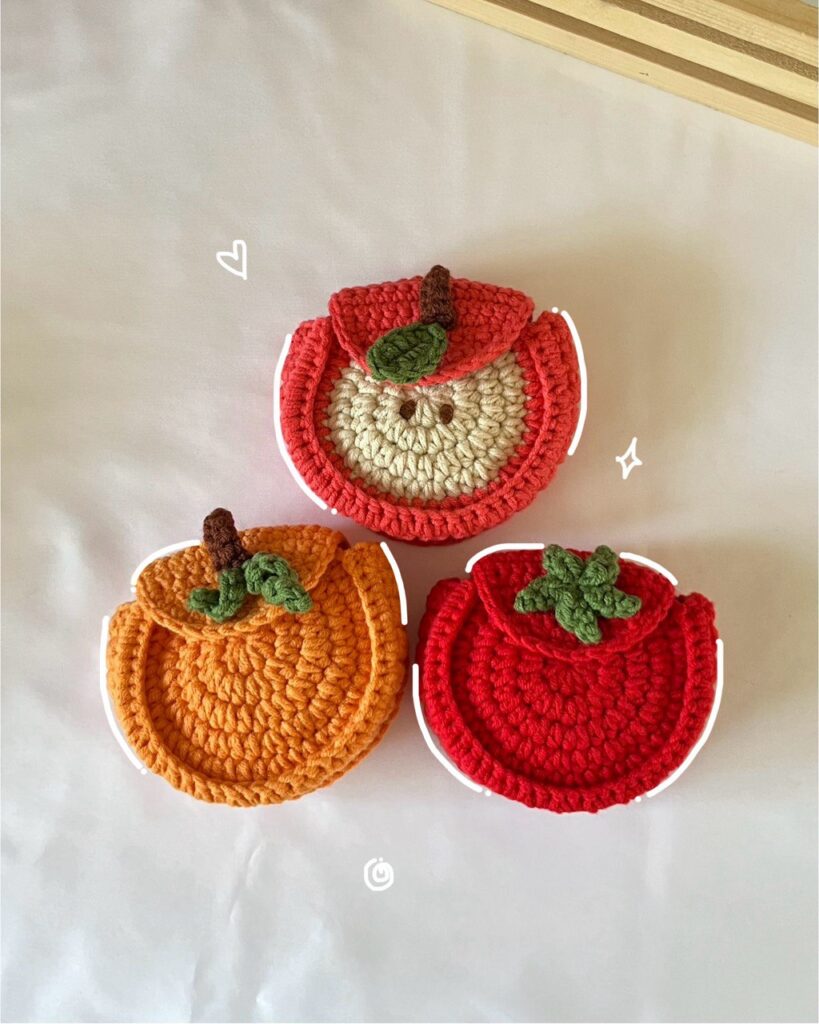
This amigurumi pattern creates a functional fruit-themed pouch using joined rounds for the circular panels and rows for the connecting body. The pattern includes instructions for creating an apple, tomato, or pumpkin variation, complete with specific leaves and stalks. The construction involves connecting two circles with a long strip, adding a flap for closure, and attaching decorative elements.
Materials
- Yarn: Xuefeier milk cotton yarns recommended, or any Acrylic/Cotton or Sport yarn (5ply). Colors needed depend on the fruit: Red, Beige, Green, and Brown.
- Crochet Hook: 3mm
- Stitch Markers: For tracking rounds
- Closure: Snap buttons (optional)
- Tools: Darning needle and Scissors
- Extras: Brown felt cloth (for apple seeds)
Abbreviations
Abbreviations are in US terminology.
- Ch – Chain
- st – stitch
- R – round / row
- sc – single crochet
- inc – increase
- dec – decrease
- hdc – half double crochet
- dc – double crochet
- slst – slip stitch
- * – repeat
- [] – total stitch count in each round
Pattern Notes
Before starting, please review these important instructions to ensure the best results:
- Joined Rounds: For the circle appliques, we use joined rounds. At the end of every round, make a slip stitch (slst) into the first half double crochet (hdc) of that round. Begin each new round with a chain 1 (Ch 1). The first half double crochet (hdc) of the new round should be made in the same stitch where you just made the slip stitch (the first hdc of the previous round).
- Rows: For the connecting applique and flap, we use rows. Begin each new row with a chain 1 (Ch 1). Then, the crochet piece will be turned to work on the next row.
- Stitch Count: Please note that slst and Ch1 are NOT included in our total stitch count.
- Video Reference: For the most effective and time-saving process, it is recommended to open the accompanying video tutorial to follow along with specific techniques like color changes and assembly.
Pattern Instructions
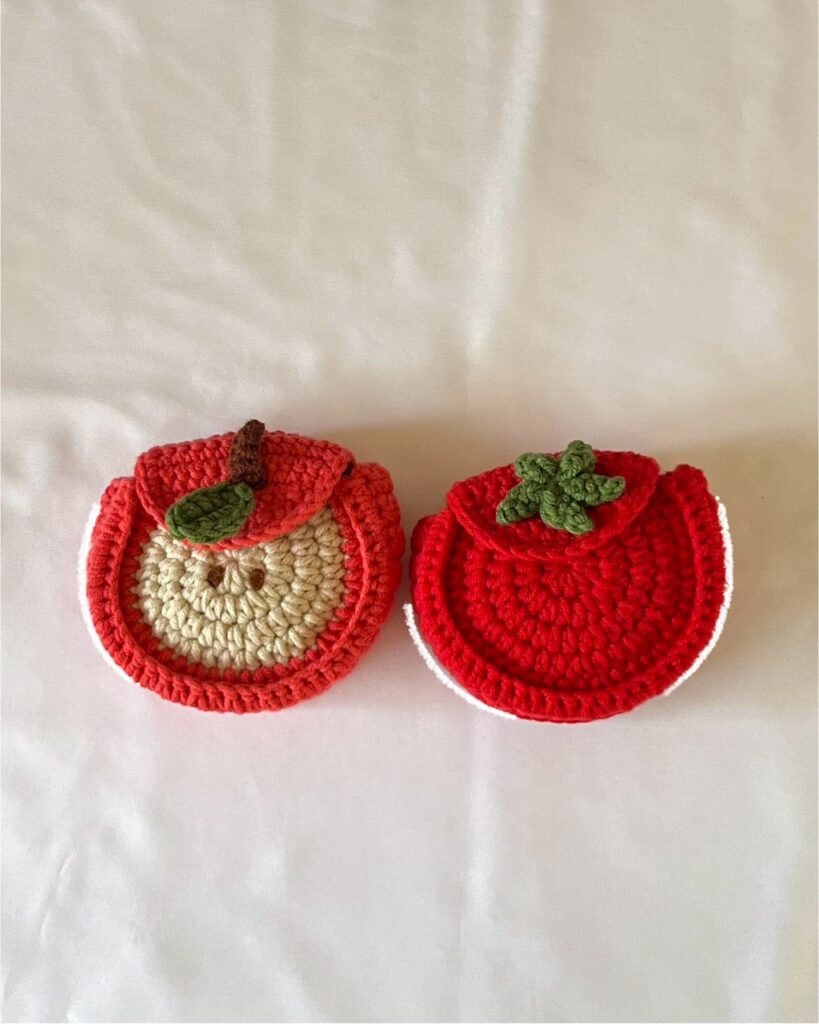
Circle Appliques (make 2)
You will need two colors (Beige and Red) if making the Apple pouch. For other fruits, you may only need one color.
Circle 1 (Beige for Apple, or single color for others):
- Start with a magic ring.
- R1: 10hdc in mr, 1slst (into the 1st hdc) [10]
- R2: Ch1, 10hdc inc, 1slst (into the 1st hdc) [20]
- R3: Ch1, (1hdc, 1hdc inc)*10, 1slst (into the 1st hdc) [30]
- R4: Ch1, (1hdc, 1hdc inc, 1hdc)*10, 1slst (into the 1st hdc) [40]
- Color Change: If making the Apple pouch, change to Red color yarn at the end of R4. Continue working with the same color yarn if making tomato or pumpkin.
- R5: Ch1, (3hdc, 1hdc inc)*10, 1slst (into the 1st hdc) [50]
- Cut the yarn.
Circle 2 (Red for Apple, or single color for others):
- Make another circle following the exact same pattern (R1-R5) but ONLY using Red yarn (or your single chosen color).
The Connecting Applique
Use Red yarn and start with a slip knot.
- R1: Ch7, Starting from the 2nd ch from the hook, 6sc [6]
- R2: Ch1, Turn, 6sc [6]
- R3-R38: Ch1, Turn, 6sc (36 rows) [6]
Connecting the Circles:
DO NOT cut the yarn. We will connect the appliques.
- Start connecting from the last hdc of the last round from the first circle applique, with the Wrong side facing towards you. Ch1, insert the hook into the last row of connecting applique as well as the last hdc of circle applique and make 1sc. Continue making the remaining 37sc in the same way. Ch1 and cut the yarn.
- Join the second circle applique by following the same technique, with the Right side of the circle applique facing towards you.
There will be 12 hdc left on each circle applique after connecting.
Flap
Crochet the flap directly onto the remaining 12hdc of the back panel of the pouch. Starting from the right side of the circle applique, insert the hook into the stitch beside slst, bring the Red yarn and Ch1.
- R1: 1sc into each hdc [12]
- R2-R7: Ch1, Turn, 12sc (6 rows) [12]
- R8: Ch1, Turn, 1dec, 8sc, 1dec [10]
- R9: Ch1, Turn, 1dec, 6sc, 1dec [8]
- R10: Ch1, Turn, 1dec, 4sc, 1dec [6]
Edging the Flap:
Ch1 and cut the yarn. We will continue to crochet along the sides of the flap to smoothen out the edges. From the right side of the flap, insert the hook into the stitch in the first row of the flap, bring the Red yarn and make Ch1. 10sc (on the 1st side), 6sc on the last row of the flap (on the 2nd side), 10sc (on the 3rd side) [26]. Cut the yarn and weave in the ends.
Tomato Leaf
Use Green yarn and start with a magic ring.
- [Ch4, (starting from the 2nd ch from the hook) 1slst, 1sc, 1hdc, 1slst (into the mr)]*5
Ch1 and cut the yarn, leaving a long tail.
Apple Leaf
Use Green yarn and start with a slip stitch.
- Ch6, (starting from the 2nd ch from the hook) 1sc, 1hdc, 1dc, 1hdc, 3sc (in the last ch), (in the lower parts of the ch) 1hdc, 1dc, 1hdc, 1sc, 1slst (into the 1st sc)
Ch1 and cut the yarn.
Stalk
Use Brown yarn and start with a slip knot.
- Ch6, (starting from the 2nd ch from the hook) 1slst, 4sc
Ch1 and cut the yarn.
Pumpkin Leaves
The leaves will be crocheted directly onto the flap of the pouch. Count the 4th row from the bottom of the flap and mark 2 middle stitches. Insert the hook into the first middle stitch and bring the Green yarn.
- Ch13, (starting from the 2nd ch from the hook), (2sc, 1inc)*4, 1slst (into the 1st middle st again), 7ch, (starting from the 2nd ch from the hook), (2sc, 1inc)*2, 1slst (into the 2nd middle st)
Ch1, cut the yarn, and weave in the ends. Twist the two leaves to make them curly.
Assembly
Once all components are complete, assemble your fruit pouch as follows:
- Leaves and Stalk:
- Pumpkin Pouch: Sew the stalk above the leaves.
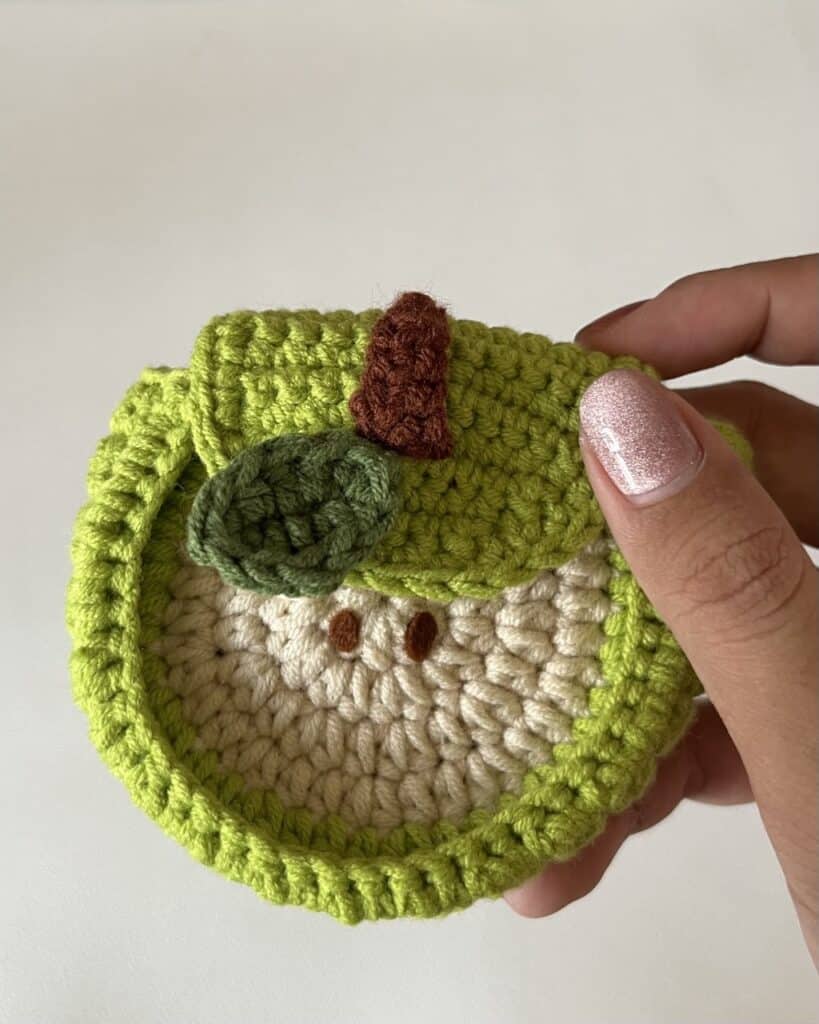
- Apple Pouch: Sew the stalk first and then, the leaf under it.
- Tomato Pouch: Sew the leaf in the middle of the flap.
- Apple Seeds: Cut the brown felt cloth into two tiny seeds and glue them to the middle of the apple.
- Closure: Sew the snap buttons to the pouch for a more secure closure.
Tips
- Refer to the video tutorial for visual guidance on color changes, connecting the appliques, and making the flap.
- Ensure you are working into the correct stitches when joining the circles to the connecting strip to maintain even tension.
- Twisting the pumpkin leaves adds a nice 3D effect that enhances the fruit look.
- Use stitch markers to keep track of your rounds, especially when increasing in the circle appliques.
FAQs
What type of yarn is best for this pattern?
The pattern recommends Xuefeier milk cotton yarns, but any Acrylic, Cotton, or Sport yarn (5ply) will work well. The smooth texture of cotton or milk cotton helps define the stitches nicely.
Can I make this pouch larger or smaller?
The size is determined by the stitch counts provided. To alter the size, you would need to adjust the number of rounds in the circle appliques and the length of the connecting strip, though this may affect the final shape and closure fit.
How do I attach the snap buttons securely?
Position the snap buttons on the flap and the back panel of the pouch where they align when closed. Use a darning needle and a strong thread (or matching yarn) to sew them on securely, ensuring they can withstand being opened and closed.
Why are there two different leaves for the apple and tomato?
The apple leaf is designed with a stem and a specific shape to mimic an apple leaf, while the tomato leaf is a simpler cluster made from a magic ring. This distinction helps each fruit look authentic.
Do I need to stuff the pouch?
No, this is a functional pouch. It is designed to hold items. The structure is maintained by the crochet tension and the connecting strip, so no stuffing is required.
Pin This Crochet Pattern!