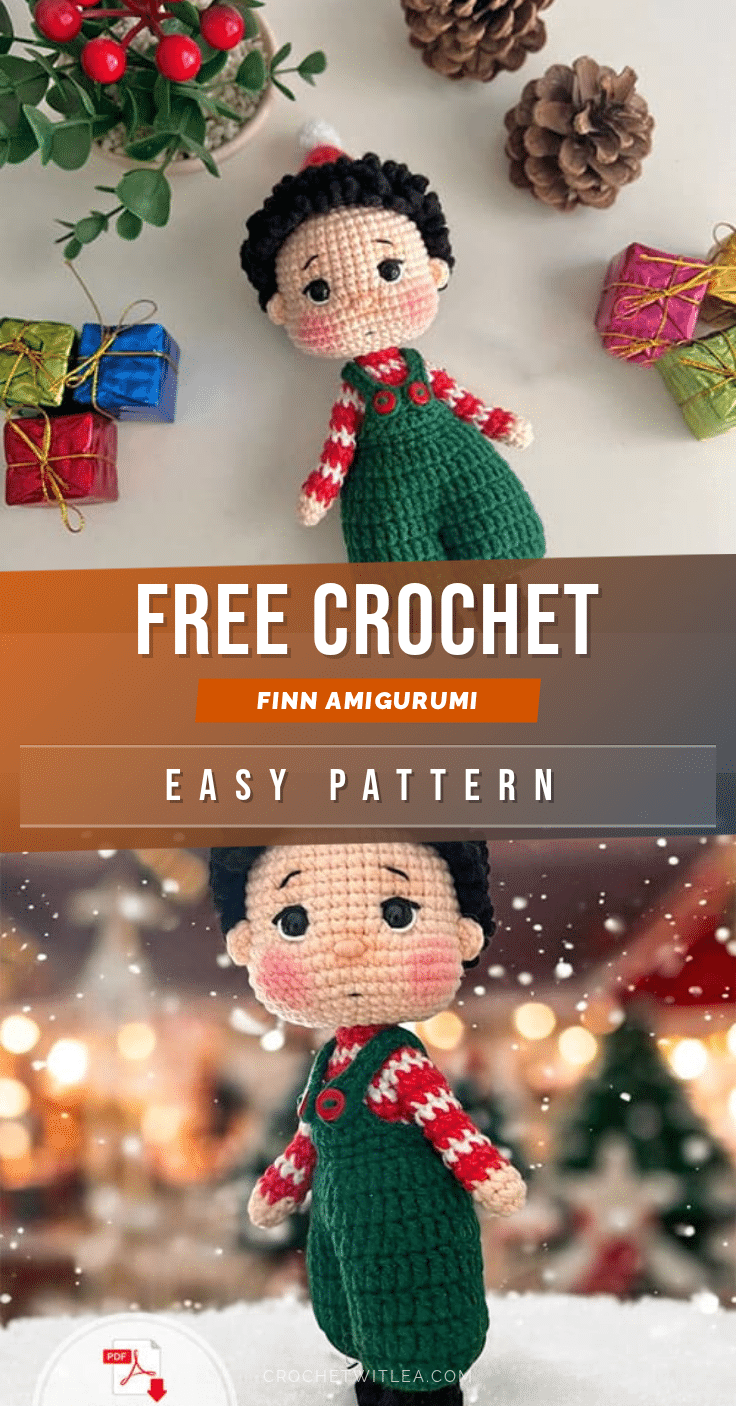
Did you ever start a magic ring and accidentally pull the tail too tight, creating a hole the size of a dime? Or perhaps you worried that crocheting a doll with wire arms would result in a tangled, stiff mess? If so, you are in good company. This Finn amigurumi pattern is designed to be forgiving and straightforward, even if your first few rounds feel a bit wonky. The structured body and clear color changes guide your hands, while the internal wire support ensures your doll stands up straight without requiring complex arm stuffing techniques. It is a project that rewards patience with a charming, huggable result.
Maker Notes
Finn is a delightful character to bring to life, especially with the festive red and white sweater paired with a dark green jumper. The use of copper electrical wires inside the arms is a game-changer; it allows you to pose Finn’s arms however you like, whether he is waving hello or holding a tiny gift. The yarn choice, specifically Yarnart Jeans, provides a denim-like texture that gives the doll a cozy, lived-in feel. When working on the hair, the technique of using slip stitches along the front loops creates a beautiful, wispy fringe that mimics real hair strands without being overly complex. This project is perfect for beginners who want to tackle a slightly larger amigurumi with distinct parts, and the result is a doll that children and adults alike will find irresistible.
Project Overview
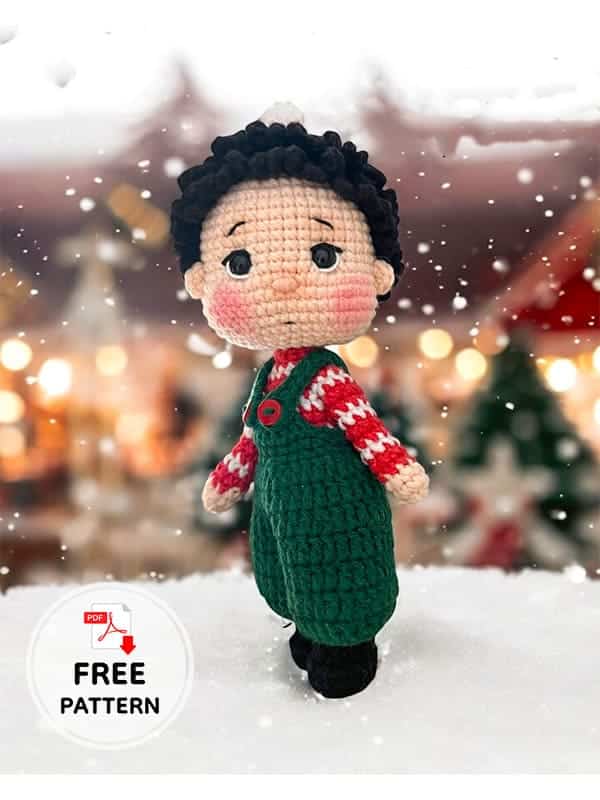
This pattern creates a 20 cm tall amigurumi doll named Finn. The project involves crocheting several distinct components—head, ears, arms, legs, body, jumper, hair, and a Christmas hat—which are then assembled. A unique feature of this pattern is the use of copper wires for the arms and a specific technique for joining the legs to the body. The pattern utilizes color changes to create Finn’s signature sweater and jumper.
Materials
- Yarn:
- Yarnart Jeans 73 (skin color)
- Yarnart Jeans 26 (Red – sweater, hat)
- Yarnart Jeans 62 (white – sweater, hat, jumper decoration)
- Yarnart Jeans 53 (Black – shoes, hair)
- Yarnart Jeans 92 (Dark Green – Jumper)
- Black, brown, and white thinner thread for eyes/eyebrow embroidery
- Notions:
- 2 pieces 7mm buttons for jumper
- Decorative button for hat
- 7 mm Black safety eyes
- 1.5 mm copper electrical wires
- 2.00 mm crochet hook
- Fiberfill
- Needle for sewing
- Scissors
- Paper tape for covering the edges of the wires
Gauge and Finished Size
When made with a 2.00 mm crochet hook, the finished doll will be approximately 20 cm tall. No specific gauge swatch is required, but using the recommended hook size is crucial for achieving the correct proportions.
Abbreviations
- MR: magic ring
- sts(s): stitch(s)
- sc: single crochet
- inc: increase
- dec: decrease
- slst: slip stitch
- ch: chain
- hdc: half double crochet
- dc: double crochet
- hdcinc: half double crochet increase
- dcinc: double crochet increase
- dcdec: double crochet decrease
- BLO: back loop only
- FLO: front loop only
Pattern Notes
- Do not stuff the arms; wire will be inserted later during assembly.
- When joining parts, ensure the beginning of the round is positioned correctly (e.g., on the back side of the doll for leg joining).
- Some steps require leaving yarn tails long for sewing.
Pattern Instructions
Head
Yarnart Jeans 73 (skin color):
- MR, 6 sc (6)
- 6 inc (12)
- (1sc, 1 inc) (18)
- 1 sc, 1 inc, (2sc, 1 inc)*5, 1 sc (24)
- (3sc, 1inc)*6 (30)
- 2 sc, 1 inc, (4sc, 1 inc)*5, 2 sc (36)
- (5sc, 1inc)*5 (42)
- 8-13. (6 rounds): 42 sc (42)
- 14. 17 sc, ch1, skip 1sts, 6 sc, ch 1, skip 1sts, 17 sc (42)
- 15. 14 sc, 4 inc, 6 sc, 4 inc, 14 sc (50)
- 16-19. (4 rounds): 50 sc (50). Insert the safety eyes into the holes at round 14.
- 20. 14 sc, 4 dec, 6 sc, 4 dec, 14 sc (42)
- 21. (5sc, 1dec)*6 (36)
- 22. 2 sc, 1 dec, (4sc, 1dec)*5, 2 sc (30)
- 23. (3sc, 1dec)*6 (24)
- 24. 1sc, 1dec, (2sc, 1dec)*5, 1sc (18)
- 25. (1sc, 1dec)*6 (12)
- 26-31. (6 rounds) 12 sc (12)
Fasten off. Embroider the eyes, eyebrows, nose, and mouth as shown in the pictures.
Ears (make 2)
Yarnart Jeans 73:
- MR, 5 sc. Leave the yarn long at the beginning and end to sew.
Assembly Note: Sew the ears to the head, 5 sc away from the eyes and 1 sc below.
Arms (make 2)
Yarnart Jeans 26 (Red) and 62 (White):
- MR, 6 sc (6)
- (2sc, 1 inc) (8)
- 8 sc (8)
- Change yarn to red color: 4-5. (2 rounds): 8 sc (8)
- Change yarn to white color: 6. 8 sc (8)
- Change yarn to red color: 7-8. (2 rounds): 8 sc (8)
- Change yarn to white color: 9. 8 sc (8)
- Change yarn to red color: 10-11. (2 rounds): 8 sc (8)
- Change yarn to white color: 12. 8 sc (8)
Fasten off. Note: Do not stuff the arms as we will place wire later when we combine them with the body.
Legs (make 2)
Yarnart Jeans 53 (Black) and 73 (Skin):
- Ch 4, starting from the 2nd ch on the hook; 1. 2 sc, 4 sc in the same ch, sc, 1 inc (9)
- 1 inc, 1 sc, 4 inc, 1 sc, 2 inc (16)
- BLO: 16 sc (16)
- 16 sc (16)
- 3 sc, 4 dec, 3 sc, 1 dec (11)
- Change yarn to skin color and put the black color yarn outside (see photo).
- BLO: 11 sc (11)
- 7-14. (8 rounds): 11 sc (11)
- Left leg: 15. 7 sc, and cut the yarn.
- Right leg: 15. 11 sc, and change yarn to white color and crochet 3 sc more with white yarn. Do not cut the yarn, since we’ll join the legs. The joining (the beginning of the round) will be on the back side of the doll. Using the black yarn we left outside before, crochet 1 round of sc on the flo sts of round 6.
Body
Yarnart Jeans 62 (White) and 73 (Skin):
- Ch 1, and continue crocheting sc on the left leg 11 sc, on the ch, 11 sc on the right leg, sc on the ch = 24 sc (24)
- 2-5. (4 rounds) 24 sc (24)
- 6. 1sc, 1dec, (4sc, 1dec)*3, 3sc (20)
- Change yarn to red color: 7-8. (2 rounds) 20 sc (20)
- Change yarn to white color: 9. 20 sc (20)
- Change yarn to red color: 10-11. (2 rounds) 20 sc (20)
- Change yarn to white color: 12. 20 sc (20)
- Change yarn to red color: We’ll join the arms; they should be right on the sides.
- 13. 3sc, 3sc (left arm and body stcs together), 7sc, 3sc (right arm and body sts together), 4sc (20)
- 14. 3sc, 5sc (sts on the left arm), 7sc, 5sc (sts on the right arm), 4sc (24)
- Change yarn to white color; 15. 1sc, 1dec, (2sc, 1dec)*5, 1sc (18)
- Change yarn to red color; 16. (1sc, 1dec)*6 (12)
- Change yarn to skin color and leave the red color yarn outside; 17. Blo(1sc, 1dec)*4 (8)
- 18-27. (10 rounds) 8sc (8)
- Using the red yarn that we left outside before, crochet sc all along the flo stes of round 17.
Jumper
Yarnart Jeans 92 (Dark Green):
We’ll start making the legs of the jumper first. Make 2.
- Ch20, slst to the first stc, ch2 1. (3sc, 1dcinc)*5, slst, ch2 (25)
- 2-3. (2 rounds) 25 dc, slst, ch2 (25)
- Cut the yarn for the first leg, and do not cut the yarn for the second one since we’ll join the legs.
- 4. 4dc (both leg sts), continue crocheting the second leg stcs 21dc, (do not crochet the 4sts we crocheted before and continue crocheting the first leg stcs 21dc, sist to the first sts, ch2 (42) (See the pics on the next page) (we do not count the 4 stcs we crocheted using both legs, it will be crotch).
- 5. (5dc, 1dcdec)*6, slst, ch2 (36)
- 6. 36dc, slst, ch2 (36)
- 7. 2dc, 1dcdec, (4dc, 1dcdec)*5, 2dc, slst, ch1 (30)
- 8. (3sc, 1dec)*6 (24)
- 9. 16sc, turn
- 10. 7sc, turn
- 11. Skip 1stc, 6sc, turn
- 12. Skip 1stc, 5sc, turn
- 13. 5sc, continue crocheting the sides 4sc, and around the waist 8sc, Ch21, starting from the 7th ch on the hook, 15sc, slst in the same sts, slst to the first sts, 2slst, ch21, starting from the 7th ch on the hook, 15sc, slst in the same sts, 7slst, 4sc to the side of the front piece of the jumper and finish.
Hair
Yarnart Jeans 53 (Black):
Hair base:
- MR, 6 sc (6)
- 6 inc (12)
- BLO: (1sc, 1inc)*6 (18)
- 1 sc, 1 inc, (2sc, 1inc)*5, 1 sc (24)
- BLO: (3sc, 1 inc)*6 (30)
- 2 sc, 1 inc, (4sc, 1inc)*5, 2 sc (36)
- BLO: (5sc, 1inc)*6 (42)
- 8-9. (2 rounds): 42 sc (42)
- 10. BLO: 42 sc (42)
- 11. 42 sc (42)
Fasten off, but do not cut the yarn since we’ll continue crocheting the hair strands.
- Ch 7 and slst to the next sts all along the flo sts of the round. (ch7, slst)*42 (42)
- Ch 2 and slst to the first flo sts of round 10. (ch 7, slst)*42 (42)
- Ch 2 and slst to the first flo sts of round 7. (ch7, slst)*36 (36)
- Ch 2 and slst to the first flo sts of round 5. (ch7, slst)*24 (24)
Fasten off.
Christmas Hat
Yarnart Jeans 26 (Red) and 62 (White):
Start with red color yarn:
- MR, 6 dc, slst, ch 2 (6)
- 6 dcinc, slslt, ch 2 (12)
- (1dc, 1dcinc)*6, slst, ch 2 (18)
- 1dc, 1dcinc, (2dc, 1dcinc)*5, 1 dc, slst, ch 2 (24)
- Change yarn to the white color; 5. 24 dc, slst, ch 1 (24)
- BLO: (24 sc), slslt, ch 1 (24)
- 24 sc, slst (24)
Fasten off. Using white color yarn, make a small pompom and sew it on top of the hat.
Assembly
- Arms: Insert the 1.5 mm copper electrical wires into the arms before attaching them. Cover the wire ends with paper tape if necessary to prevent poking through.
- Body Join: Join the arms to the body at round 13 of the body pattern, ensuring they are positioned right on the sides.
- Head: Stuff the head firmly. Embroider facial features.
- Ears: Sew the ears to the head, 5 sc away from the eyes and 1 sc below.
- Hair: Place the hair base on the head. The hair strands created in the pattern instructions should cover the top.
- Hat: Sew the hat on top of the hair where there are no hair strands.
- Jumper: Attach the jumper to the body. Sew the 7mm buttons onto the jumper.
Tips
- When crocheting the legs, keeping the black yarn outside as instructed creates a neat line for the shoe top.
- Use a tapestry needle to weave in ends securely, especially on the hair and hat, to maintain the doll’s shape.
- If the wire in the arms feels too stiff, you can gently bend it into a curve before inserting it to give the doll a more relaxed pose.
FAQs
Can I use a different yarn brand?
While Yarnart Jeans is recommended for the specific texture and weight, you can use a similar cotton blend yarn. However, be aware that this may affect the finished size and the drape of the jumper.
How do I insert the wire into the arms?
Crochet the arms without stuffing. Once finished, insert the 1.5 mm copper wire into the hollow tube. You can fold the top of the wire and cover it with paper tape to prevent it from poking through the yarn when you sew the arm to the body.
Why are the legs joined in a specific way?
The legs are joined by crocheting across the chain spaces and the top of the second leg to create a seamless transition to the body. This method ensures the crotch area is sturdy and the body sits correctly.
What if I don’t have a 2.00 mm hook?
Using a larger hook will result in a larger doll with looser stitches, which might make the stuffing visible. Try to find a 2.00 mm hook, or adjust your yarn weight to match your hook size.
How do I embroider the eyes and eyebrows?
Use the thinner black, brown, and white threads provided in the materials. The pattern suggests following reference pictures for the placement. Use a needle to stitch small dots for the eyes and curved lines for the eyebrows.
Pin This Crochet Pattern!