There is something deeply satisfying about the rhythm of amigurumi. A quiet evening, a small batch of soft yarn, and the gentle click of the hook as you count stitches round after round. It is a ritual that slows down the mind and focuses the hands. This adorable mini duck crochet pattern with a Santa hat fits perfectly into that cozy space. It is a quick, beginner-friendly project that transforms simple loops into a festive companion, perfect for last-minute holiday gifting or adding a touch of whimsy to your own decor.
Small Details That Make It Better
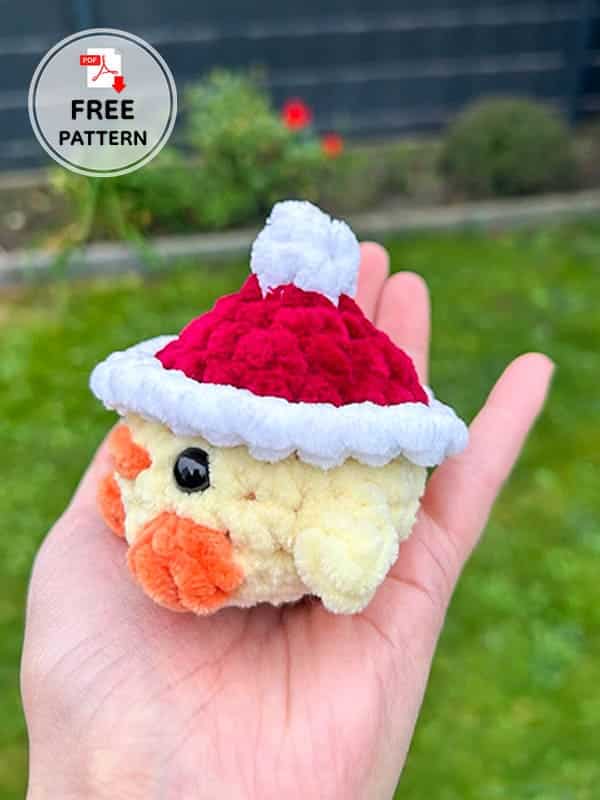
What makes this mini duck truly special is the clever construction of its festive hat. Rather than sewing a separate hat on top, the pattern integrates the Santa hat directly into the body of the duck. By working the hat in white and red first, and then continuing the duck’s body in yellow using the back loops of the hat’s final round, you create a seamless, professional finish. This technique not only saves time but also ensures the hat sits perfectly on the duck’s head without slipping. The addition of the bobble stitch legs adds a playful texture that contrasts beautifully with the smooth single crochet body, making this little bird a standout piece for your Christmas tree or a cheerful keychain.
Project Overview
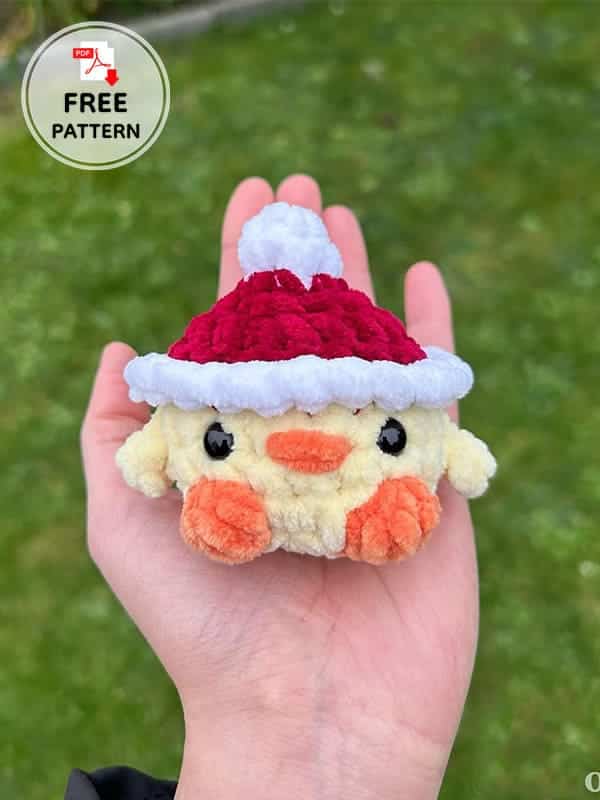
This beginner-level amigurumi pattern creates a mini duck wearing a Christmas hat. The project is designed to be quick and simple, making it ideal for holiday crafting sessions. You can easily adapt the finished piece into a keychain or a standalone decoration. The pattern utilizes standard amigurumi techniques with one special stitch (bobble) for the feet.
Materials
- Yarn: Yellow, orange, white, and red.
- Crochet Hook: 6 mm
- Notions: Safety eyes, yarn needle, scissors, stuffing.
Abbreviations
The following abbreviations are used in this pattern:
- R: Round
- St: Stitch
- Sc: Single crochet
- MR: Magic ring
- Dec: Decrease
- Inc: Increase
- BLO: Back loop only
- FLO: Front loop only
- FO: Fasten off
- BOB: Bobble stitch
Pattern Notes
- Construction Order: We start by making the Christmas hat first and then make the crochet duck body in the same continuous piece.
- Hat Construction: The Santa hat is made completely in one piece, without any seams.
- Important Stitching Detail: Round 7 is divided into two sections. First, you work in FLO (front loop only), followed by BLO (back loops only). It is highly recommended to place a stitch marker in the back loop of the first stitch to make it easier to locate later.
- Difficulty: This is a very simple amigurumi pattern, suitable for beginners.
Pattern Instructions
Santa Hat and Duck Body (Joined)
Start in white:
- R1: 4 sc in a MR (4)
- R2: sc around (4)
Change color to red.
- R3: inc x4 (8)
- R4: (sc, inc) x4 (12)
- R5: (sc, inc) x6 (18)
- R6: sc around (18)
Change color to white.
- R7: In FLO (2sc, inc) x6 (24). Fasten off.
Continue in yellow:
- R7 (continued): In BLO sc around (18). Note: You are now working into the back loops of the previous round to form the base of the duck’s body.
- R8: 5 sc, wing (ch2, hdc into the second chain from the hook and hdc into the side of the sc that the chain is connected to), 9 sc, wing, 4 sc (18)
- R9: Next, crochet the legs (BOB) using orange yarn. 7 sc, BOB, 3 sc, BOB, 6 sc (18)
Assembly of Features:
- Place the eyes between R8 and R9, about 3 stitches apart.
- Embroider a beak in between the eyes.
- Start stuffing the body firmly.
Finishing the Body:
- R11: (sc, dec) x6 (12)
- R12: dec x6 (6)
- Fasten off, leave a long tail for sewing and weave the ends.
Assembly
Once the final round is complete, fasten off and leave a long tail for sewing. Use the yarn needle to close the opening at the bottom of the duck. Weave in all remaining ends securely to ensure the stuffing stays in place and the piece remains durable.
Tips
- Marker Placement: As noted in the pattern instructions, place a stitch marker in the back loop of the first stitch of Round 7. This helps you easily identify where the FLO section ends and the BLO section begins.
- Keychain Option: If you wish to turn this cute crochet duck into a keychain, simply attach a keyring to the top of the Santa hat before fastening off the final round.
- Bobble Stitch: Ensure your bobble stitches for the legs are tight enough so they do not unravel, but loose enough to maintain the fluffy texture.
FAQs
Is this pattern suitable for beginners?
Yes, this is a very simple amigurumi pattern designed for beginners. It uses basic stitches like single crochet, increases, and decreases, along with one bobble stitch for the feet.
How do I attach the hat to the duck?
The hat is not attached separately. It is crocheted as the first part of the body. You work the hat in white and red, then change to yellow and continue the body using the back loops of the hat’s final round, creating a seamless join.
What size hook should I use?
The pattern recommends using a 6 mm crochet hook. Using a smaller hook may result in a tighter, smaller duck, while a larger hook may make the stuffing visible.
Can I make this duck larger?
This pattern is designed for a mini duck. To make it larger, you would need to adjust the stitch counts and rounds proportionally, which is beyond the scope of this specific free pattern.
How do I make the wings?
The wings are created in Round 8. The instruction is: ch2, hdc into the second chain from the hook and hdc into the side of the sc that the chain is connected to. This creates a small, flat wing shape on each side.
Pin This Crochet Pattern!