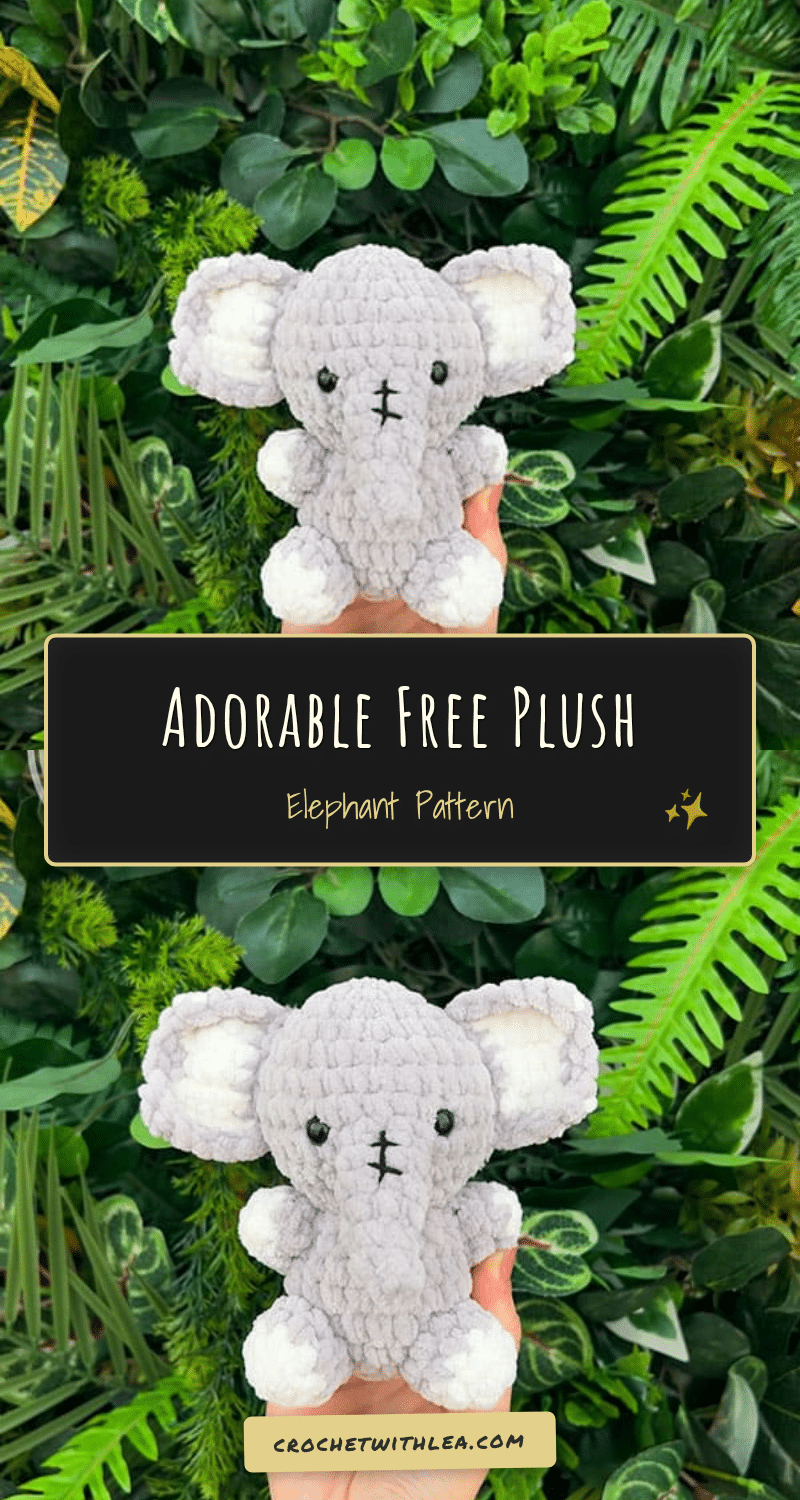
There is something undeniably heartwarming about holding a freshly finished amigurumi elephant. Its soft, squishy body and gentle expression make it the perfect companion for cuddling or a charming addition to a nursery shelf. This plush elephant pattern is designed to be approachable for beginners, allowing you to create a delightful safari friend in just a few short sessions. With its simple construction and adorable proportions, this project is not only a joy to make but also a thoughtful, handmade gift that brings a smile to anyone’s face.
Why the Finished Piece Stands Out
What makes this elephant particularly special is the texture provided by the recommended yarn. Using Himalaya Dolphin Baby yarn gives the finished toy a plush, cloud-like softness that elevates it above standard amigurumi. The contrast between the baby gray body and the white accents on the ears, arms, and legs adds a touch of classic charm without overwhelming the design. Because the parts are assembled separately, you have full control over the stuffing firmness, ensuring the elephant holds its shape while remaining huggable. It is a tidy, well-proportioned project that looks professional yet remains accessible for crocheters of all levels.
Project Overview
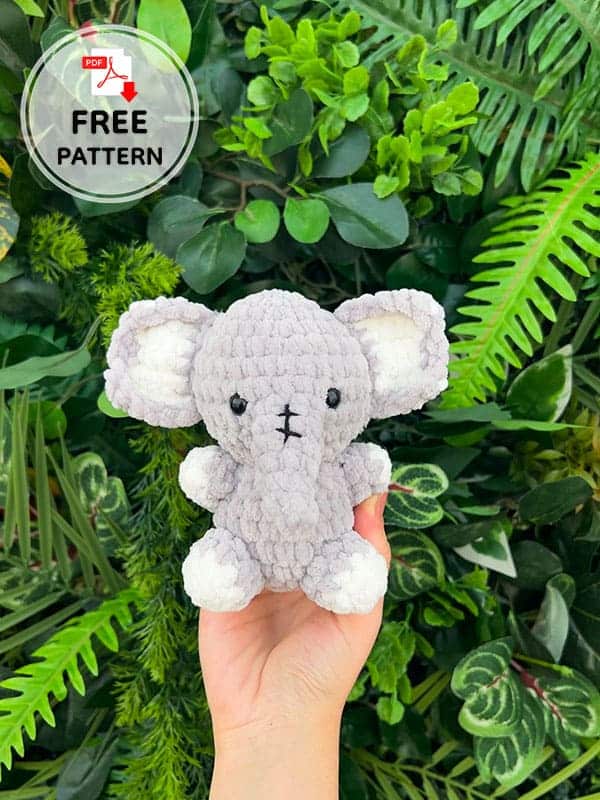
This free plush elephant crochet pattern is categorized as a beginner-level amigurumi project. It features a safari animal theme and is designed to be worked quickly. The construction involves making each body part separately and then sewing them together, which allows for precise placement of features like the trunk, ears, and limbs.
Materials
- Yarn: Himalaya Dolphin Baby (Colors: Baby Gray and White)
- Crochet Hook: 4.5 mm
- Notions: Stitch markers, scissors, 10 mm plastic safety eyes
- Filling: Bead fiber (polyester stuffing)
Gauge and Finished Size
Finished Size: Approximately 14 cm tall.
Note: Specific gauge measurements are not provided in the source pattern. The size is achieved by following the stitch counts exactly.
Abbreviations
The following standard crochet abbreviations are used in this pattern:
- MR: Magic Ring
- sc: Single Crochet
- inc: Increase (2 sc in the same stitch)
- dec: Decrease (2 sc together)
- ch: Chain
Pattern Notes
- All parts are made separately and then assembled.
- When changing colors, ensure you cut the yarn and leave a long tail for sewing the piece into place.
- Use stitch markers to keep track of the beginning of each round.
Pattern Instructions
Body
Use Gray yarn.
- Row 1: Make 6 sc in MR (6)
- Row 2: inc in each st around (12)
- Row 3: (1 sc, inc) * 6 (18)
- Row 4: (2 sc, inc) * 6 (24)
- Rows 5-7: 24 sc
- Row 8: (2 sc, dec) * 6 (18)
- Row 9: (7 sc, dec) * 2 (16)
- Cut yarn and pull through.
Head
Use Gray yarn.
- Row 1: Make 6 sc in MR (6)
- Row 2: inc in each st around (12)
- Row 3: (1 sc, inc) * 6 (18)
- Row 4: (2 sc, inc) * 6 (24)
- Row 5: (3 sc, inc) * 6 (30)
- Rows 6-7: 30 sc
- Row 8: 15 sc, ch 3, skip 3 sts, 12 sc (Sew the nose here)
- Row 9: (3 sc, dec) * 6 (24)
- Row 10: (1 sc, dec) * 6 (18)
- Attach the eyes 5 stitches apart between the 7th and 8th rows.
- Cut yarn, leaving a long tail for sewing.
Nose
Use Gray yarn.
- Rows 1-3: sc in each st around (8)
- Row 4: (2 sc, dec) * 2 (6)
- Row 5: 6 sc
- Row 6: (1 sc, dec) * 2 (4)
- Row 7: 4 sc
- Sew the nose on the 8th row of the head.
- Cut yarn and pull through.
Ears (Make 2)
Start with White yarn.
- Row 1: Make Chain 6, starting in the second chain from the hook, make 5 sc, ch 1, turn.
- Row 2: 3 sc, dec, ch 1, turn.
- Row 3: 4 sc, ch 1, turn.
- Row 4: 3 sc, inc, ch 1, turn.
- Row 5: 5 sc
- With Gray yarn, sc all around, cut the yarn, leave a long tail for sewing.
Arms (Make 2)
Start with White yarn.
- Row 1: Make 6 sc in MR (6)
- Change to Gray yarn:
- Rows 2-3: 6 sc
- Cut the yarn, leave a long tail for sewing.
Legs (Make 2)
Start with White yarn.
- Row 1: Make 6 sc in MR (6)
- Row 2: (1 sc, inc) * 3 (9)
- Change to Gray yarn:
- Rows 3-4: 9 sc
- Cut the yarn, leave a long tail for sewing.
Tail
Use Gray yarn.
- Row 1: Make 6 sc in MR (6)
- Rows 2-3: 6 sc
- Cut the yarn, leaving a long tail for sewing.
Assembly
Once all components are completed, assemble the elephant as follows:
- Ears: Sew the ears between rows 4 and 8 of the head.
- Arms: Sew the arms between rows 7 and 9 of the body.
- Legs: Sew the legs between rows 3 and 5 of the body.
- Tail: Sew the tail between rows 3 and 4 on the body.
- Nose: Ensure the nose is securely attached to the 8th row of the head.
- Eyes: Verify the eyes are attached 5 stitches apart between the 7th and 8th rows of the head.
Tips
- Yarn Choice: The pattern recommends Himalaya Dolphin Baby for its plush texture. If you substitute yarn, keep in mind that the finished size may vary.
- Stuffing: Use bead fiber for filling to maintain a soft, squishy feel that matches the plush nature of the yarn.
- Color Changes: When switching from white to gray (or vice versa), weave in ends neatly or use the loose tails to help secure the pieces during assembly.
FAQs
Is this pattern suitable for beginners?
Yes, this free elephant crochet pattern is designed at a beginner level, making it quick and easy to complete.
What yarn is recommended for this project?
The source pattern recommends Himalaya Dolphin Baby yarn in baby gray and white for the best plush effect.
How big is the finished elephant?
The finished elephant measures approximately 14 cm in height.
Do I need to use a 4.5 mm hook?
The pattern specifies a 4.5 mm crochet hook. Using this size helps achieve the intended finished size and stitch definition.
How do I attach the eyes?
Attach the 10 mm plastic safety eyes 5 stitches apart, positioned between the 7th and 8th rows of the head.
Pin This Crochet Pattern!