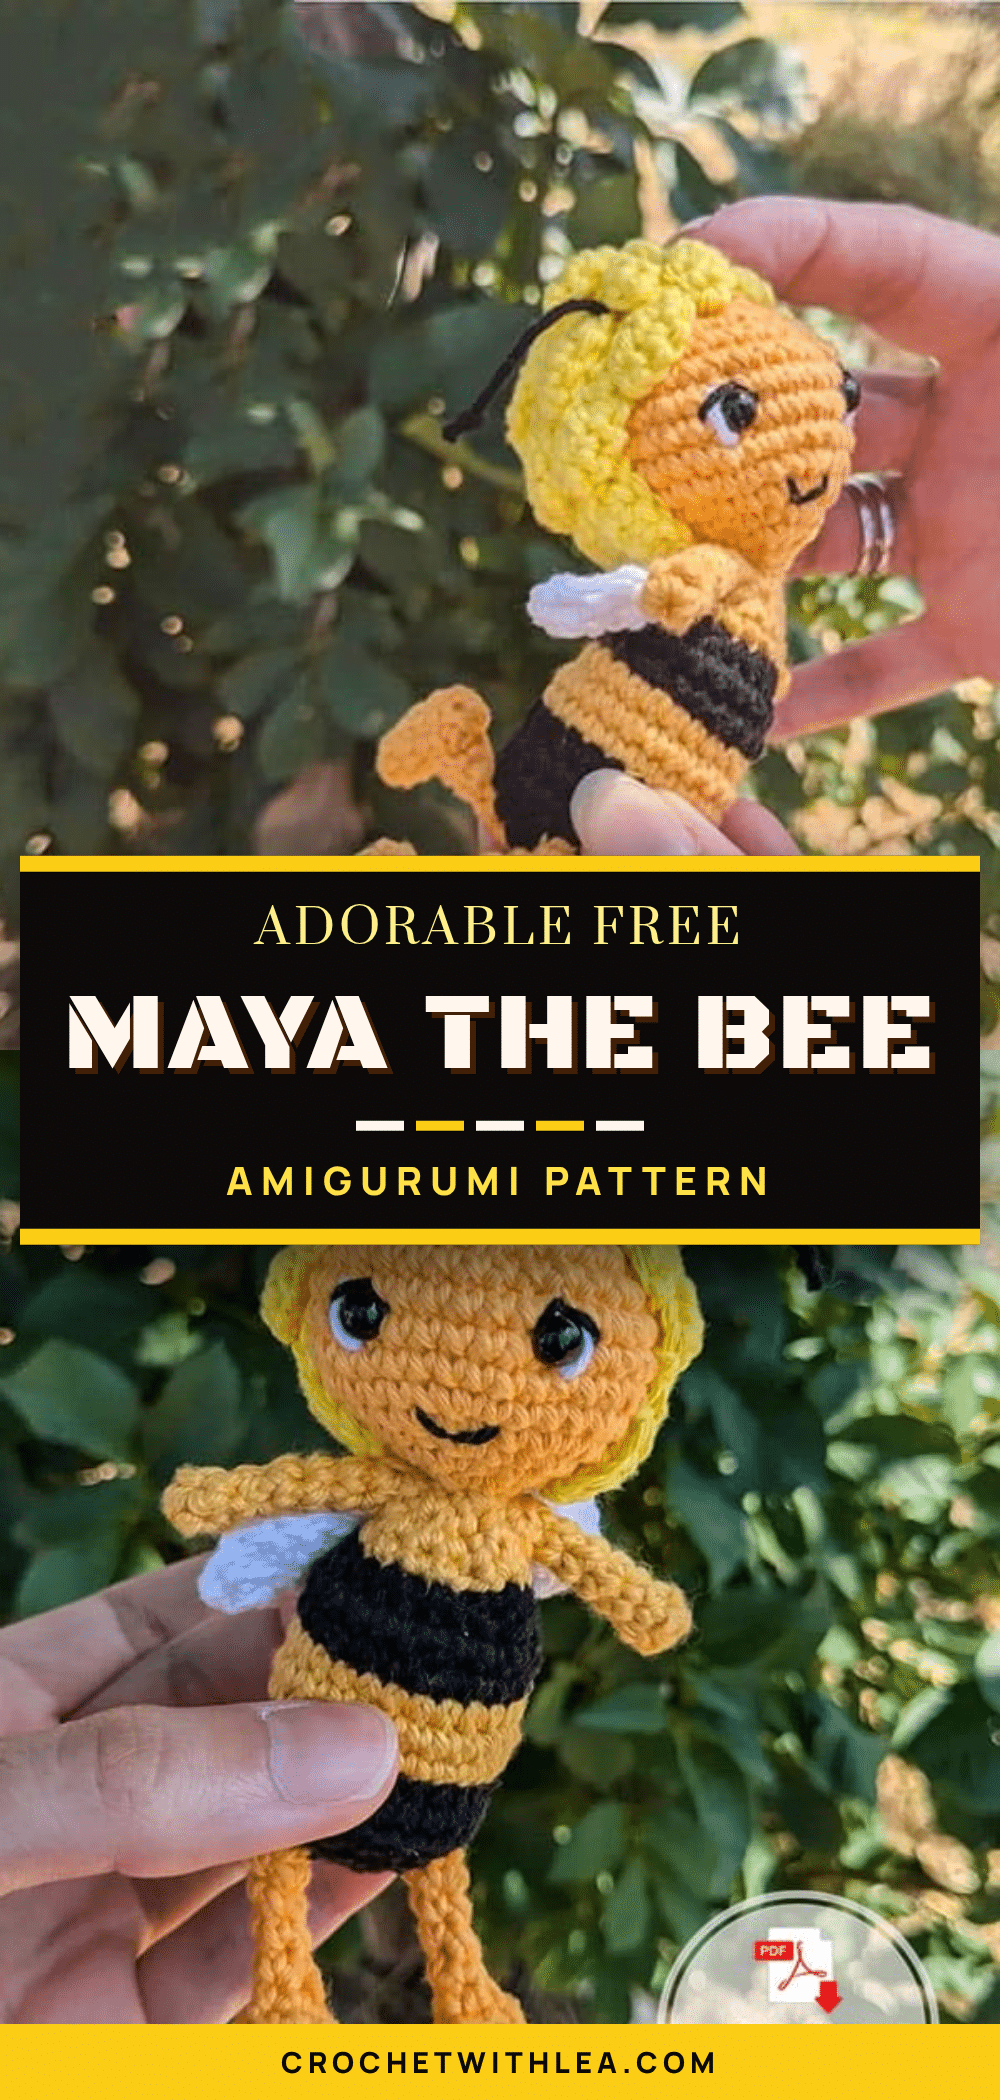
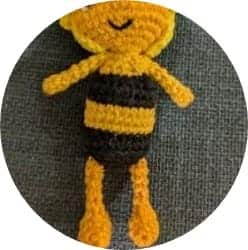
Bring the magic of the meadow into your home with this adorable free Maya the Bee amigurumi pattern. This charming crochet project is perfect for gifting to children who love classic cartoons, adding a whimsical touch to a nursery shelf, or creating a delightful addition to a handmade toy collection. With its distinct yellow and black stripes and cute embroidered features, this bee captures the essence of the beloved character while remaining a fun and achievable project for crocheters of various skill levels.
Gift and Use Ideas
Maya the Bee is a character that evokes nostalgia and joy, making this amigurumi an excellent choice for a variety of occasions. It serves as a comforting companion for young children, a sweet decoration for a child’s bedroom, or a unique gift for a baby shower. The soft, stuffed nature of the toy makes it safe and cuddly, while the detailed hair and wings add a collectible quality that appeals to adult fans of the series as well. Whether displayed on a desk or used as a plaything, this handmade bee brings a sunny disposition to any space.
Project Overview
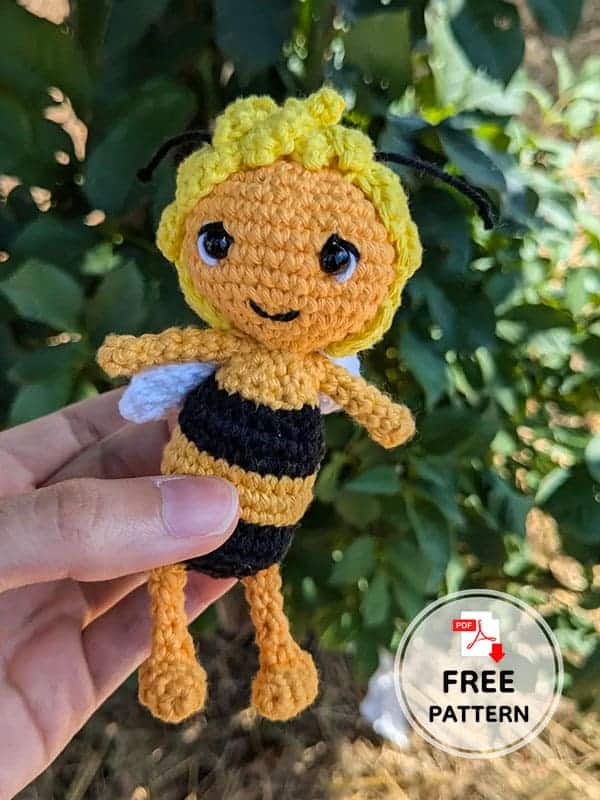
This pattern guides you through creating a complete Maya the Bee amigurumi, including the body, head, hair, legs, arms, wings, and antennae. The design features clean color changes to achieve the iconic striped look and includes specific instructions for assembling the various components to form the character’s recognizable shape.
Materials
- Yarn Colors: Dark yellow, white, light yellow, and black.
- Safety Eyes: One pair (to be added between rounds 23 and 24 of the head).
- Embroidery Thread: Black thread for antennae and white/black yarn for facial embroidery.
- Stuffing: Polyester fiberfill.
- Hook: Appropriate hook size for your yarn weight (not specified in source).
Gauge and Finished Size
Specific gauge and finished size measurements are not provided in the source pattern. It is recommended to check your tension to ensure your bee matches the intended proportions, particularly when working the striped sections.
Abbreviations
- sc = single crochet
- ch = chain
- hdc = half double crochet
- dc = double crochet
- inc = increase
- dec = decrease
- tr = triple crochet
- sl st = slip stitch
Pattern Notes
To achieve clean stripes and sharp color changes, it is important to join each round properly. Start each round with a chain, crochet your round normally, and join with a slip stitch in the first stitch of the round (not in the starting chain). For clean color changes, begin the final stitch of the previous color round by drawing up a loop with the old color, then yarn over with the new color and pull through both loops to complete the stitch.
Pattern Instructions
Body
Yarn: Black, then Dark Yellow, then Black.
- Rd 1: In black, in a magical loop 6 sc (6)
- Rd 2: 6 inc (12)
- Rd 3: (1 sc, 1 inc) x 6 (18)
- Rd 4: (1 sc, 1 inc, 1 sc) x 6 (24)
- Rd 5: In back loop only 24 sc (24)
- Rd 6: 24 sc (24)
- Rd 7-9: In dark yellow 24 sc (24)
- Rd 10-11: In black 24 sc (24)
- Rd 12: (3 sc, 1 dec, 3 sc) x 3 (21)
- Rd 13: (5 sc, 1 dec) x 3 (18)
- Rd 14: (2 sc, 1 dec, 2 sc) x 3 (15)
- Rd 15: (3 sc, 1 dec) x 3 (12). Stuff.
- Rd 16: 12 dec (6)
Head
Yarn: Dark Yellow.
- Rd 17: 6 inc (12)
- Rd 18: (1 sc, 1 inc) x 6 (18)
- Rd 19: (1 sc, 1 inc, 1 sc) x 6 (24)
- Rd 20: (3 sc, 1 inc) x 6 (30)
- Rd 21: (2 sc, 1 inc, 2 sc) x 6 (36)
- Rd 22-25: 36 inc (36)
- Rd 26: (2 sc, 1 dec, 2 sc) x 6 (30)
- Rd 27: (3 sc, 1 dec) x 6 (24)
- Add safety eyes between rd 23 and 24. Embroider eyes and mouth (rd 18-20) with white and black yarn. Start to stuff.
- Rd 28: (1 sc, 1 dec, 1 sc) x 6 (18)
- Rd 29: (1 sc, 1 dec) x 6 (12)
- Rd 30: 6 dec (6)
Hair (x19 strands total)
Yarn: Light Yellow.
- 6 strands: Ch 7, starting in 2nd st from hook: 1 sc, 1 hdc, 2 dc, 1 hdc, 1 sc.
- 7 strands: Ch 5, starting in the 2nd st from hook: 1 sc, 2 dc, 1 sc.
- 6 strands: Ch 4, starting in the 2nd st from hook: 1 sc, 1 hdc, 1 sc.
Legs (x2)
Yarn: Dark Yellow.
- Rd 1: In a magical loop 4 sc (4)
- Rd 2: (1sc, 1inc)x2 (6)
- Rd 3: (1sc, 1inc, 1sc)x2 (8)
- Rd 4: 6 sc, 2 ch, skip 2 (8)
- Rd 5: 2 sc, 1 dec, 2 sc in back loop only 2 sc (7). Close.
- Insert the hook in the first ch made in rd 4 and start the leg in the 4 stitches forming a hole: Rd 1-5: 4 sc.
Arms (x2)
Yarn: Dark Yellow.
- Rd 1: In a magical loop 5 sc (5)
- Rd 2: 3 sc, 1 dec (4)
- Rd 3-7: 4 sc (4)
Wings
Yarn: White.
- Ch 15. Starting in the 3rd st from the hook: inc of dc (2 dc in one st), 2 dc, 1 hdc, 2 sc, 1 sl st, 2 sc, 1 hdc, 2 dc, 5 dc in the same last st of the ch. Continue on the other side of the ch: 2 dc, 1 hdc, 2sc, 1 sl st, 2 sc, 1 hdc, 2 dc, 3 dc on the same last stitch.
Antennae
Yarn: Black thread.
- Pass a black thread across the top of the head, knot both ends and cut flush.
Assembly
- Attach Hair: Sew the light yellow hair strands to the head: sew 6 strands above rd 24, 7 strands above rd 27, and 6 strands above rd 29.
- Attach Legs: Insert the hook in the first ch made in rd 4 of the leg pattern and start the leg in the 4 stitches forming the hole. Secure firmly.
- Attach Arms: Sew the arms to the sides of the body/head junction.
- Attach Wings: Sew the white wings to the back of the body.
- Final Details: Ensure the black thread antennae are secure at the top of the head. Embroider facial features if not done during the head rounds.
Tips
- Clean Stripes: Remember to join each round with a slip stitch in the first stitch of the round, not the starting chain, to keep the spiral neat.
- Color Changes: To prevent gaps or messy joins when changing colors (especially for the black and yellow stripes), complete the last yarn-over of the previous color with the new color to finish the stitch.
- Stuffing: Stuff the body firmly before closing round 16. Stuff the head gradually, adding the safety eyes between rounds 23 and 24 as you go.
FAQs
What size safety eyes should I use?
The source pattern does not specify the exact millimeter size for the safety eyes. It is recommended to use eyes that fit securely between rounds 23 and 24 of the head, typically around 6mm or 8mm depending on your yarn weight and hook size.
How do I make the stripes look clean?
Clean stripes are achieved by joining each round properly with a slip stitch in the first stitch (not the chain) and by changing colors at the very end of the round. Start the final stitch with the old color, draw up a loop, then yarn over with the new color to pull through both loops.
Can I use a different yarn weight?
Yes, you can substitute yarn weights, but this will change the finished size of the bee. If you use a thicker yarn, you may need to adjust the number of hair strands or the size of the wings to maintain the character’s proportions.
How do I attach the hair?
The hair strands are sewn directly onto the head. Place 6 strands above round 24, 7 strands above round 27, and 6 strands above round 29 to create the full, fluffy look characteristic of Maya the Bee.
Is this pattern suitable for beginners?
This pattern involves basic amigurumi stitches (sc, inc, dec) and working in the round. However, the multiple color changes, hair assembly, and specific wing construction may make it more suitable for crocheters with some experience or those willing to follow detailed instructions closely.
Pin This Crochet Pattern!