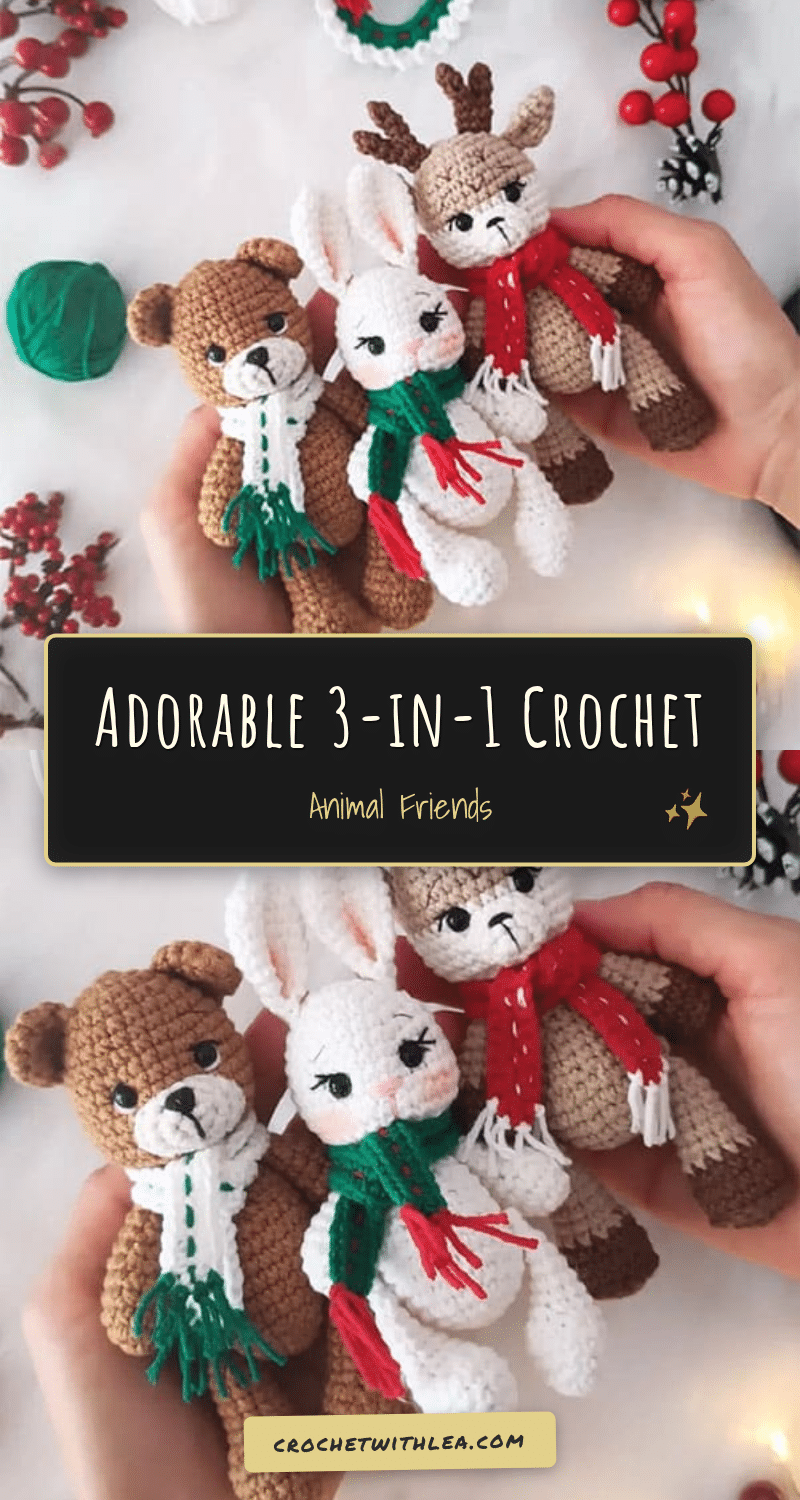
Looking for the perfect handmade gift that brings a smile to everyone’s face? These adorable 3-in-1 crochet animal friends are the ideal solution. Designed specifically for beginners, this collection features a bunny, a teddy bear, and a deer, all ready to be dressed up for the holidays or everyday play. Because their bodies and heads share the same foundational patterns, you can easily mass-produce these charming companions for your holiday market table, gift exchanges, or as a cozy addition to a child’s nursery. With simple stitches and clear instructions, creating a set of these festive friends is an achievable and rewarding project for any crocheter.
Our Touch: Gift and Use Ideas
While the source pattern suggests a Christmas theme with festive scarves, the versatility of these amigurumi animals allows for endless styling possibilities. The shared body and head structure means you can create a matching set quickly, making them perfect for sibling gifts or classroom treats. The scarves are a standout feature; while the pattern suggests green/red, white/green, and red/white combinations for the holiday season, you can swap yarn colors to match any theme. Think pastel scarves for Easter bunnies, bright primary colors for a playroom, or neutral tones for a modern nursery decor set. The soft texture of the yarn and the cute facial features make these toys excellent for sensory play, while the sturdy construction ensures they can withstand the love of little hands.
Project Overview
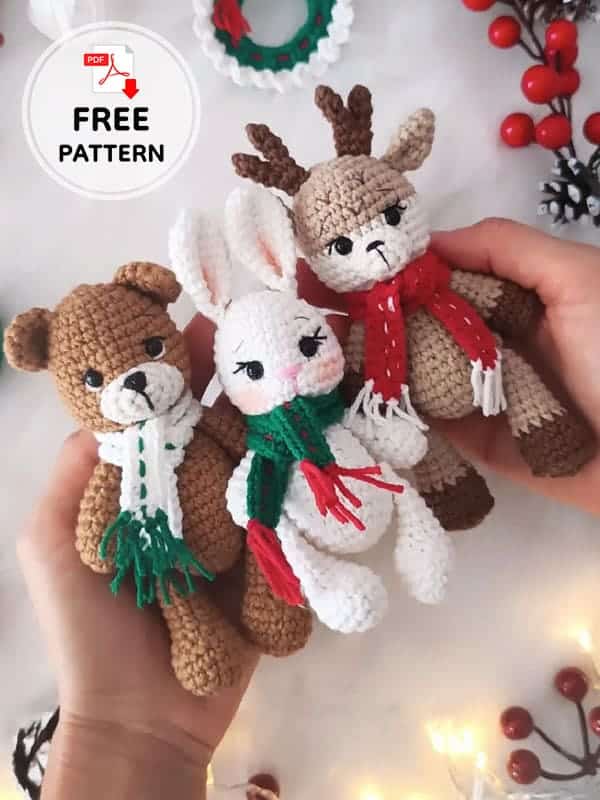
This project features three distinct amigurumi animals: a crochet bunny, a crochet teddy bear, and a crochet deer. Despite their unique accessories and facial details, the bunny, bear, and deer share identical body and head structures. This design choice simplifies the learning process, allowing you to master the core shapes before adding character-specific details like ears, horns, or muzzles. Each animal is completed with a unique scarf, adding a pop of color and personality. The patterns are designed to be accessible, making them highly recommended for beginner amigurumi lovers.
Materials
- Yarn: Any type of yarn you want. The designer used YarnArt Jeans (50g/160m). You will need different colors for the body, accents, and scarves.
- Hook: 2.5 mm crochet hook.
- Notions: Fiberfill, sewing needle.
- Features: Safety eyes 5 mm.
Gauge and Finished Size
Specific gauge and finished size measurements are not provided in the source pattern. The finished size will depend on your personal tension and the specific yarn weight used. Ensure you maintain consistent tension to keep the stuffing hidden and the shape round.
Abbreviations
- Ch: Chain
- Slst: Slip stitch
- Sc: Single crochet
- Inc: Increase
- Dec: Decrease
- BLO: Back loop only
- FLO: Front loop only (sc,inc)*N- Repeat N times
Pattern Notes
- These patterns are designed to be very easy to make.
- The bodies and heads for the bunny, bear, and deer are exactly the same.
- Each animal comes with a scarf in different colors as an accessory, but you can add different accessories if you want.
- Design by: knittoys_cy
Pattern Instructions
Crochet Bunny
Head
- 6 sc in MR (6)
- 6 inc (12)
- (1sc,1inc)*6 (18)
- (2sc,1inc)*6 (24)
- 5-6. 24 sc (2 rows)
- (3sc,1inc)*6 (30)
- 8-12. 30 sc (5 rows)
- (1dec,1sc)*10 (20)
- 10 dec (10)
Assembly Note: Insert the eyes between 8-9 rows at a distance of 5 sc. Embroider eyelashes, eyebrows, nose and mouth.
Ears (make 2)
- 5 sc in MR (5)
- 5 inc (10)
- (1sc,1inc)*5 (15)
- 4-6. 15 sc (3 rows)
- (2sc,1dec)*3 (12)
- 8-9. 12 sc (2 rows)
- Fold the ear in half, close both sides together 6 sc.
- Fold the ear one more time and make 3 sc.
Assembly Note: Sew the ears to the head for the 4th row.
Body
- 6 sc in MR (6)
- 6 inc (12)
- (1sc,1inc)*6 (18)
- (2sc,1inc)*6 (24)
- 24 sc (1 row)
- (5sc,1inc)*4 (28)
- 7-8. 28 sc (2 rows)
- (1dec,1sc)*6, 10 sc (22)
- (9sc,1dec)*2 (20)
- (3sc,1dec)*4 (16)
- 16 sc (1 row)
- (2sc,1dec)*4 (12)
Legs (make 2)
- 6sc in MR (6)
- 6 inc (12)
- (2sc, 1inc)*4 (16)
- 4-5. 16sc (2 rows)
- 4dec, 8sc (12)
- 2dec, 8sc (10)
- 8-11. 10sc (4 rows)
- 5dec (5)
Assembly Note: Stuff as you go to the middle of the leg. Sew up the hole. Sew it to the body.
Hands (make 2)
- 6sc in MR (6)
- 6 inc (12)
- 3-4. 12 sc (2 rows)
- 2dec, 8sc (10)
- 1 dec, 8sc (9)
- 7-9. 9sc (3 rows)
- (1sc, 1 dec)*3 (6)
Assembly Note: Stuff as you go to the middle of the hand. Sew up the hole. Sew it to the body.
Tail
- 6 sc in MR (6)
- 6 sc (1 row)
Assembly Note: Sew the tail to the body.
Scarf
Work with green yarn.
- 51 ch
- Start to crochet in the 2nd chain from the hook: 49sc, 1 inc3, continue to crochet on the next stitches on the opposite side of the chain: 48 sc, 1 inc2
Decorate the scarf with red yarn.
Crochet Bear
Head
- 6sc in MR (6)
- 6 inc (12)
- (1 sc, 1inc)*6 (18)
- (2sc, 1 inc)*6 (24)
- 5-6. 24sc (2rows)
- (3sc,1inc)*6 (30)
- 8-9. 30sc (2 rows)
- (9sc, 1inc)*3 (33)
- 11-13. 33sc (3rows)
- (1 dec, 9sc)*3 (30)
- 15dec (15)
- (2sc, 1 dec)*3 (12)
Assembly Note: Insert the eyes between 9-10 rows at a distance of 5sc. Embroider eyelashes and eyebrows.
Ears (make 2)
- 6 sc in MR (6)
- (1sc,1inc)*3 (9)
- (2sc,1inc)*3 (12)
- 12 sc (1 row)
- Fold the ear in half, close both sides together 6 sc.
Muzzle
- 6 sc in MR (6)
- 6 inc (12)
- (5sc,1inc)*2 (14)
Assembly Note: Sew the muzzle to the head. Stuff it slightly. Embroider nose and mouth.
Hands (make 2)
- 6sc in MR (6)
- 6 inc (12)
- 3-5. 12 sc (3 rows)
- 2dec, 8sc (10)
- 10sc (1 row)
- 1 dec, 8sc (9)
- 9-10.9sc (2 rows)
Assembly Note: Stuff as you go to the middle of the hand. Sew up the hole. Sew it to the body.
Body
- 6sc in MR (6)
- 6 inc (12)
- (1sc, 1inc)*6 (18)
- (2sc, 1 inc)*6 (24)
- (3sc,1inc)*6 (30)
- 30sc (1 row)
- (9sc,1inc)*3 (33)
- 8-9. 33sc (2 rows)
- (9sc,1 dec)*3 (30)
- (1sc,1dec)*4, 18sc (26)
- 2sc, 1dec, 2sc, 1dec, 18sc (24)
- (4sc,1dec)*4 (20)
- 3sc, 1 dec, 8sc, 1 dec, 5sc (18)
- (4sc,1dec)*3 (15)
- (3sc, 1 dec)*3 (12)
Tail
- 6 sc in MR (6)
- 6 sc (1 row)
Assembly Note: Sew the tail to the body.
Legs (make 2)
- 6sc in MR (6)
- 6 inc (12)
- (1sc, 1inc)*6 (18)
- 4-6. 18sc (3 rows)
- 2sc, 4dec, 8sc (14)
- 2sc, 2dec, 8sc (12)
- 9-12. 12sc (4rows)
- 2sc, 1 dec, 4sc, 1 dec, 2sc (10)
- 10sc (1 row)
- 5dec (5)
Assembly Note: Stuff as you go to the middle of the leg. Sew up the hole. Sew it to the body.
Scarf
Work with white yarn.
- 51 ch
- Start to crochet in the 2nd chain from the hook: 49 sc, 1 inc3, continue to crochet on the next stitches on the opposite side of the chain: 48 sc, 1 inc2.
Decorate the scarf with green yarn.
Crochet Deer
Head
Start with light brown.
- 6sc in MR (6)
- 6 inc (12)
- (1sc,1inc)*6 (18)
- (2sc, 1 inc)*6 (24)
- 5-6. 24sc (2rows)
- (3sc,1inc)*6 (30)
- 8-9. 30sc (2 rows)
Change the yarn to beige colour.
- 10-14. 30sc (5 rows)
- 14. 15dec (15)
- (3sc, 1 dec)*3 (12)
Assembly Note: Insert the eyes between 10-11 rows at a distance of 5sc. Embroider eyelashes, eyebrows and spots on the top of the head.
Muzzle
- 6sc in MR (6)
- 6 inc (12)
- 12sc (1 row)
Assembly Note: Sew the muzzle to the head. Stuff it slightly. Embroider nose and mouth.
Horns (make 2)
- 4sc in MR (4)
- 2-3. 4sc (2 rows)
- Make 2 details and conect it together: 4sc on 1st detail and 4sc on 2nd detail (8)
- 8sc (1 row)
Assembly Note: Sew the horns to the head in 2-3 rows.
Ears (make 2)
- 4sc in MR (4)
- (1sc, 1inc)*2 (6)
- (2sc,1inc)*2 (8)
- (3sc,1inc)*2 (10)
- (4sc,1inc)*2 (12)
- 6dec (6)
Assembly Note: Sew the ears to the head in 6-7 rows.
Body
- 6sc in MR (6)
- 6 inc (12)
- (1sc, 1inc)*6 (18)
- (2sc, 1 inc)*6 (24)
- 24sc (1 row)
- (3sc,1inc)*6 (30)
- 7-8. 30sc (2 rows)
- (1 dec, 1sc)*4, 18sc (26)
- 26sc (1 row)
- (11sc,1dec)*2 (24)
- 24sc (1 row)
- (4sc, 1 dec)*4 (20)
- (8sc, 1 dec)*2 (18)
- (4sc, 1 dec)*3 (15)
- (3sc, 1 dec)*3 (12)
Hands (make 2)
Start with dark brown.
- 6sc in MR (6)
- 6 inc (12)
- BLO 12 sc (1 row)
- 12sc (1 row)
Change yarn to light brown colour.
- 12sc (1 row)
- (1 dec, 4sc)*2 (10)
- 7-8. 10sc (2 rows)
- 1 dec, 8sc (9)
- 9sc (1 row)
- (1sc,1dec)*3 (6)
Assembly Note: Stuff as you go to the middle of the hand. Sew up the hole. Make FLO 12slst on the 3 row. Sew it to the body.
Legs (make 2)
Start with dark brown.
- 6sc in MR (6)
- 6 inc (12)
- (2sc, 1inc)*4 (16)
- BLO 16 sc (1 row)
- (2sc, 1 dec)*4 (12)
Change yarn to light brown colour.
- 6-8. 12sc (3 row)
- 1dec, 10sc (11)
- 11sc (1 row)
- 1dec, 9sc (10)
- 12-13. 10sc (2 row)
- 5dec (5)
Assembly Note: Stuff as you go to the middle of the leg. Sew up the hole. Make FLO 16slst on the 4 row. Sew it to the body.
Scarf
Work with red yarn.
- 51 ch
- Start to crochet in the 2nd chain from the hook: 49sc, 1 inc3, continue to crochet on the next stitches on the opposite side of the chain: 48 sc, 1 inc2.
Decorate the scarf with white yarn.
Tail
- 4sc in MR (4)
- 2-3. 4sc (2 rows)
Assembly Note: Sew the tail to the body.
Assembly
Follow the assembly notes included in each component section above. Key steps include inserting safety eyes at specific row intervals, embroidering facial features (eyelashes, eyebrows, nose, mouth), stuffing parts as you go to the middle of limbs, and sewing components to the body. For the deer hands and legs, ensure you make the Front Loop Only (FLO) slip stitches on the specified rows to create the foot details before sewing.
Tips
- Consistent Tension: Since the pattern relies on specific stitch counts to shape the head and body, maintaining consistent tension is crucial for a neat finish.
- Eye Placement: Pay close attention to the row numbers provided for eye insertion. This ensures the face looks proportional and cute.
- Yarn Choice: The designer used YarnArt Jeans, which has a slight sheen and durability. If you substitute yarn, check the yardage to ensure you have enough for all three animals and their scarves.
- Scarf Decoration: The pattern suggests decorating the scarves with contrasting yarn. You can use embroidery floss or a thin yarn to add stripes or patterns for extra detail.
FAQs
Can I make these animals without the Christmas theme?
Yes! While the pattern suggests festive colors, you can use any yarn colors you prefer. The structure remains the same regardless of the color scheme.
Why do the bunny, bear, and deer share the same body and head?
Sharing the base shapes simplifies the pattern for beginners. It allows you to practice the core amigurumi techniques once and apply them to three different characters.
What size hook should I use?
The pattern recommends a 2.5 mm hook. Using a larger hook may result in loose stitches that show stuffing, while a smaller hook may make the fabric too stiff.
How do I attach the deer horns?
Crochet two small horn details, connect them by working stitches into both, and then sew them securely to the top of the head between rows 2-3.
Do I need to stuff the tail?
No, the tail is typically sewn directly to the body without stuffing, as indicated by the simple assembly instructions.
Pin This Crochet Pattern!