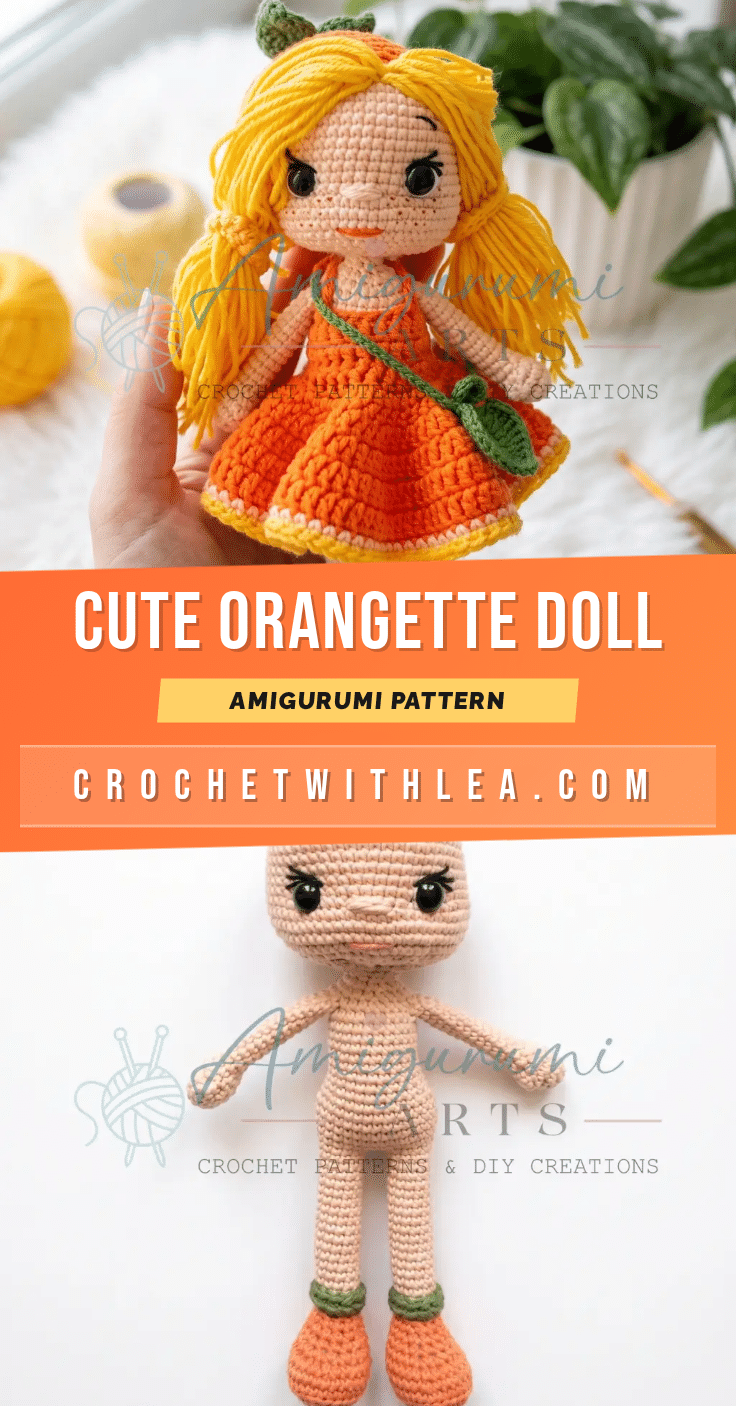
Yarn on the table, hook in hand, and the project beginning to take shape. There is a specific kind of magic in watching a simple magic ring expand into a defined shape, especially when you are crafting something as expressive as Orangette. This isn’t just a doll; it is a study in texture and form, moving from the smooth peach of her skin to the structured ruffles of her dress. As you work through the rows, you will find that the tight tension and careful sculpting required for this pattern transform standard stitches into a character with genuine personality.
Why This Project Works
Orangette stands out because she balances the whimsy of amigurumi with the structural integrity of a fashion doll. The use of Vita Coco mercerized cotton for the face sculpting is a brilliant technical choice; its slight firmness compared to the standard cotton-blend yarn allows for defined cheek pulls that give her a soft, lifelike expression. The design also invites creativity through its modular components—the dress, hat, and hair are distinct elements that can be styled or adjusted. Whether you are making a gift for a child or adding a pop of citrus color to your own collection, the intermediate skill level provides a satisfying challenge without being overwhelming.
Project Overview
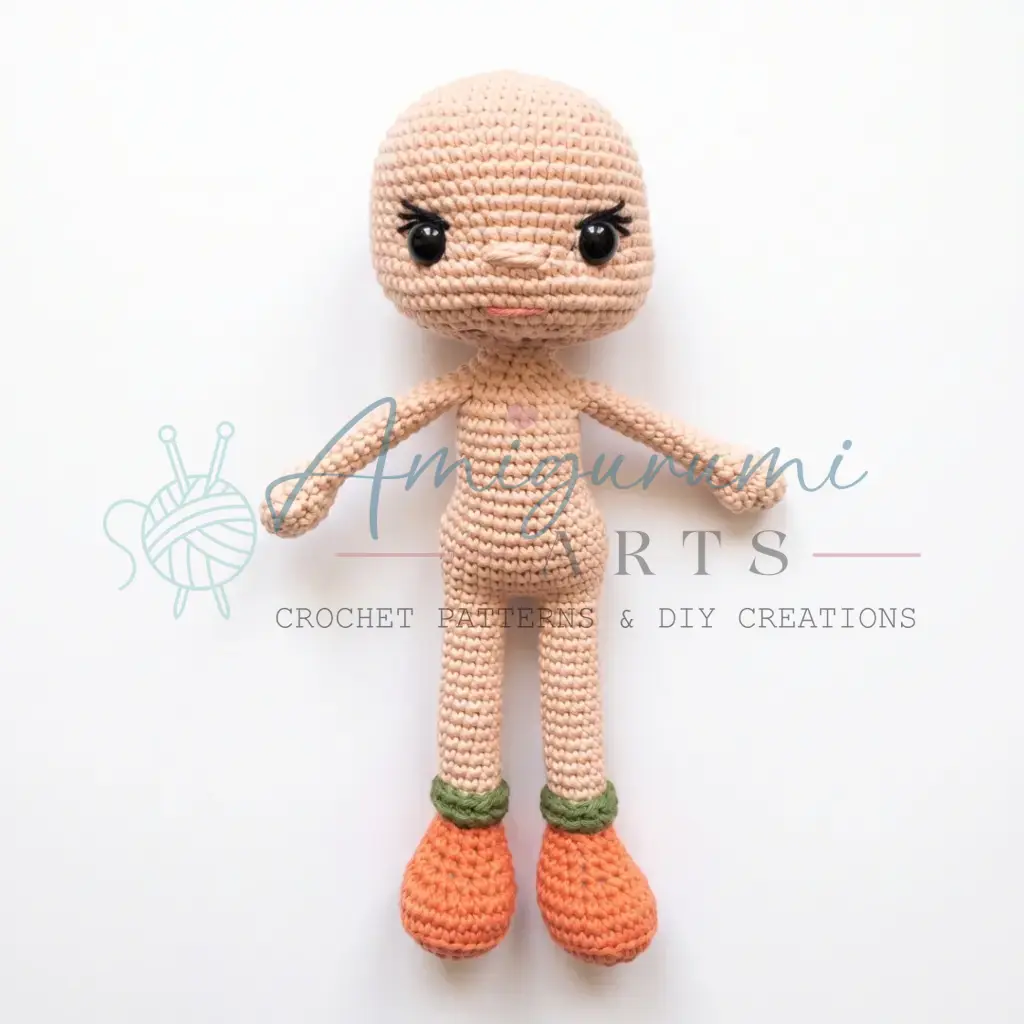
Orangette is a little doll with big personality, arriving in a pop of citrus color, dressed in a ruffled skirt with leafy green trim and crowned with a snug orange hat. She is the kind of handmade gift that immediately tells the person receiving her that someone spent real, loving time on every stitch. This amigurumi doll pattern is rated intermediate: you will be working a shaped body, joined legs, an attached dress, and a needle-sculpted face, so a little experience with the magic ring and invisible decrease will carry you a long way.
Finished Size
The finished Orangette doll will measure approximately 7 to 9 inches (18 to 23 cm) tall.
Skill Level
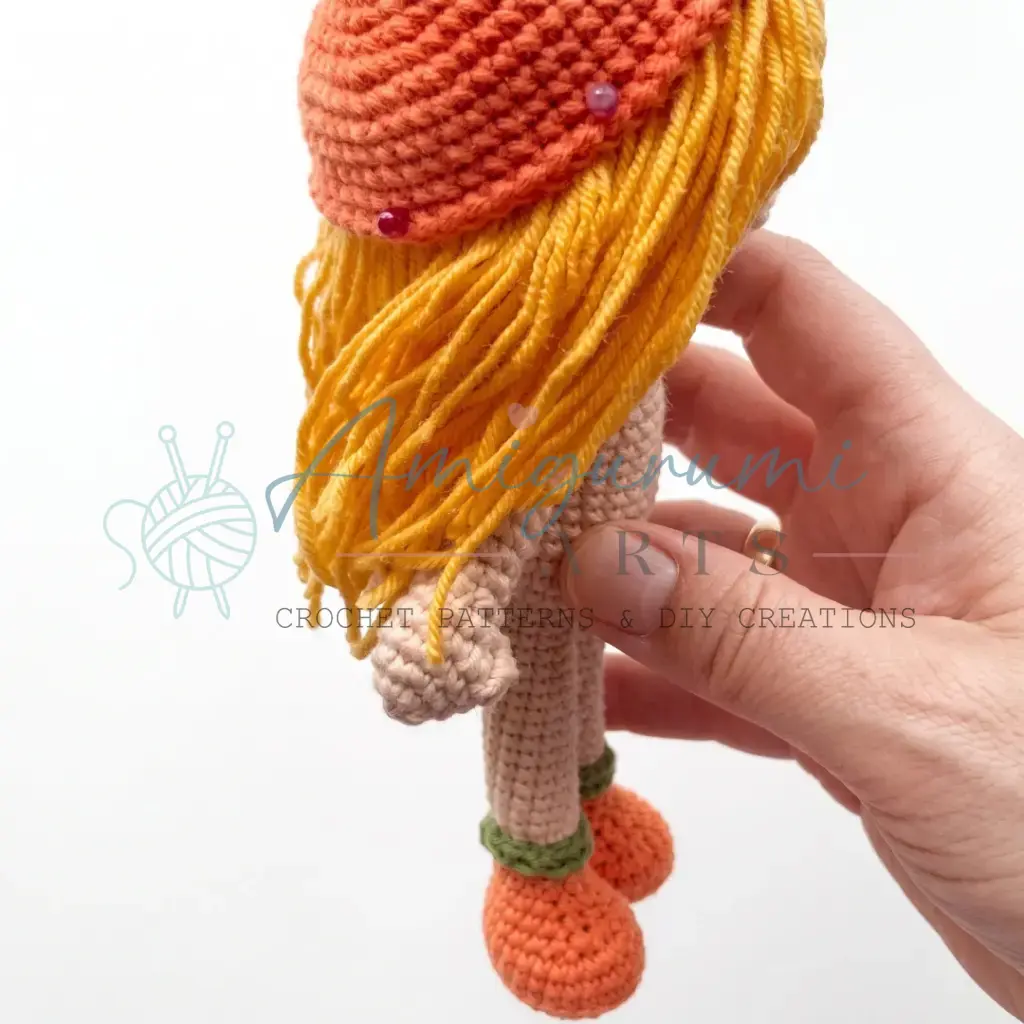
Intermediate
Materials
- Yarn Art Jeans #73 (peach/skin tone) — 50 g / 160 m; 55% cotton, 45% polyacrylic
- Yarn Art Jeans #77 (orange)
- Yarn Art Jeans #69 (green)
- Yarn Art Jeans #35 (yellow)
- Yarn Art Jeans #01 (white)
- Vita Coco #4329 (orange) — 50 g / 240 m; 100% mercerized cotton (used for face sculpting — slightly heavier/firmer than the Jeans yarn)
- Vita Coco (black)
- Vita Coco (beige)
- Crochet hook: Clover 1.75 mm (US steel hook size 6)
- Safety eyes: 8 mm, screw-back (1 pair)
- Blunt-tip yarn needle / tapestry needle
- Straight pins (for marking placement)
- Scissors
- Fiberfill / polyester stuffing
- Stitch marker
Gauge and Finished Size
Gauge is not given, but a tight, dense fabric is essential — you should not be able to see the stuffing through your stitches. Tighten your tension or drop to a smaller hook if needed.
Abbreviations
- ch — Chain
- dc — Double Crochet
- dec — Invisible Decrease (insert hook through front loops of next 2 sts together, pull up a loop, yarn over, pull through all 3 loops)
- hdc — Half Double Crochet
- inc — Increase (2 sc in the same stitch)
- MR — Magic Ring
- sc — Single Crochet
- sk — Skip
- sl st — Slip Stitch
- SM — Stitch Marker
- st / sts — Stitch / Stitches
- BLO — Back Loop Only
- FLO — Front Loop Only
- ch-1 (turning chain) — Turning chain / chain used as a stitch rise at the beginning of a row
Pattern Notes
This Orangette the Crochet Doll pattern is written in US crochet terminology. The body, head, arms, and legs are worked in a continuous spiral (no joining sl st, no turning chain) unless otherwise stated. The dress is worked in turned rows, then joined into the round. The hat is worked in joined rounds with a turning chain.
Gauge is not given, but a tight, dense fabric is essential — you should not be able to see the stuffing through your stitches. Tighten your tension or drop to a smaller hook if needed. Stitch counts are given in parentheses at the end of each round or row: (12).
- Safety eyes are inserted at Round 12 of the Head with 8 sts between them. Insert the eyes before the head is fully closed.
- Stuff the arms as you go, approximately up to the elbow.
- Stuff the legs as you go once instructed.
- Stuff the body firmly — especially the neck — so the head sits upright.
- The dress rows are worked with a turning chain at the start of each dc row (noted in the instructions). When working flat rows, the turning chain counts as the first dc.
- Round markers may need to be shifted mid-project to keep increases and decreases aligned vertically. Where noted, work one extra sc (an offset stitch, not counted in the stitch total) to realign the marker.
Pattern Instructions
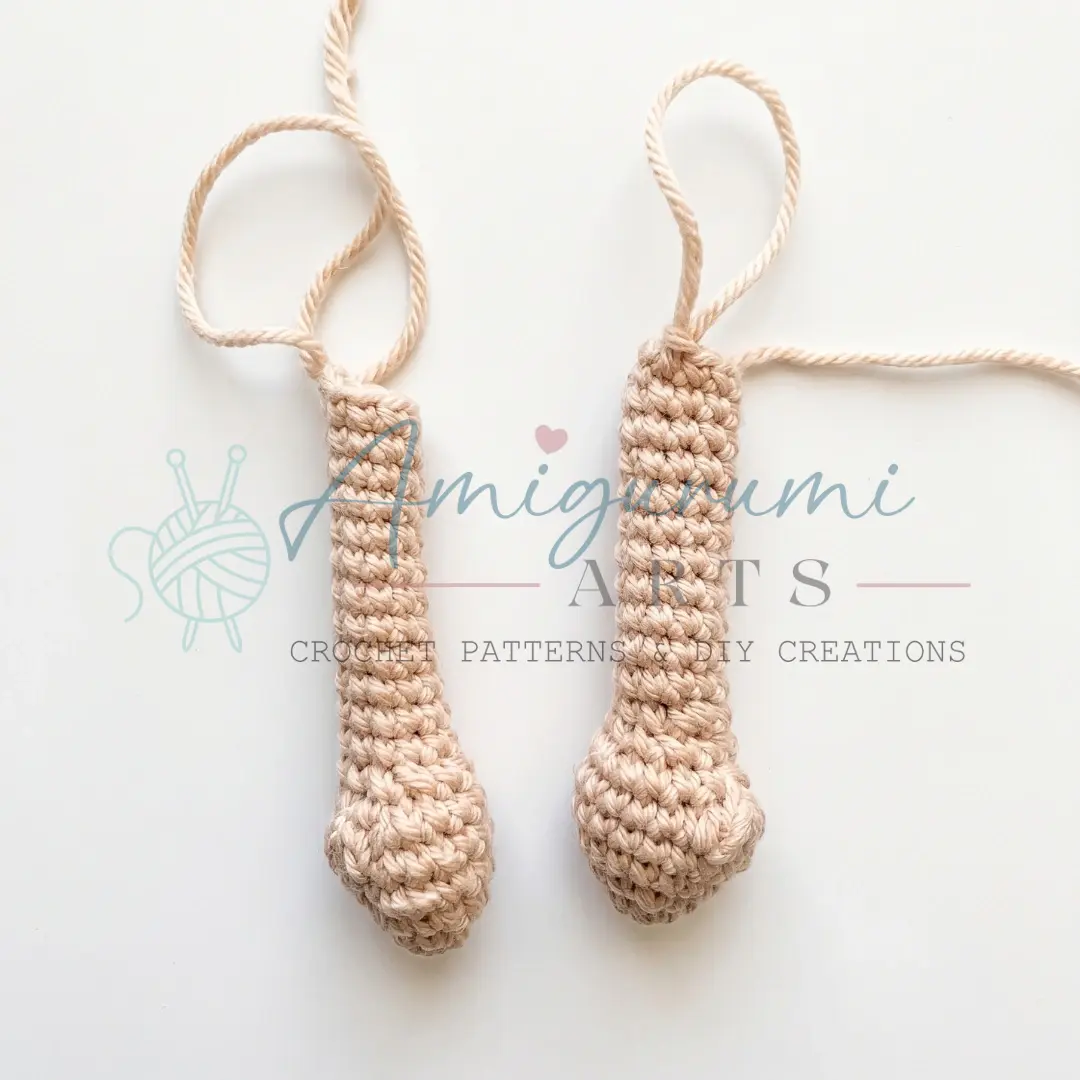
Arms (make 2)
Stuff as you go, approximately up to the elbow. Work in peach/skin-tone yarn throughout.
- Rnd 1: 6 sc in MR. (6)
- Rnd 2: inc in each st around. (12)
- Rnd 3: sc in each st around. (12)
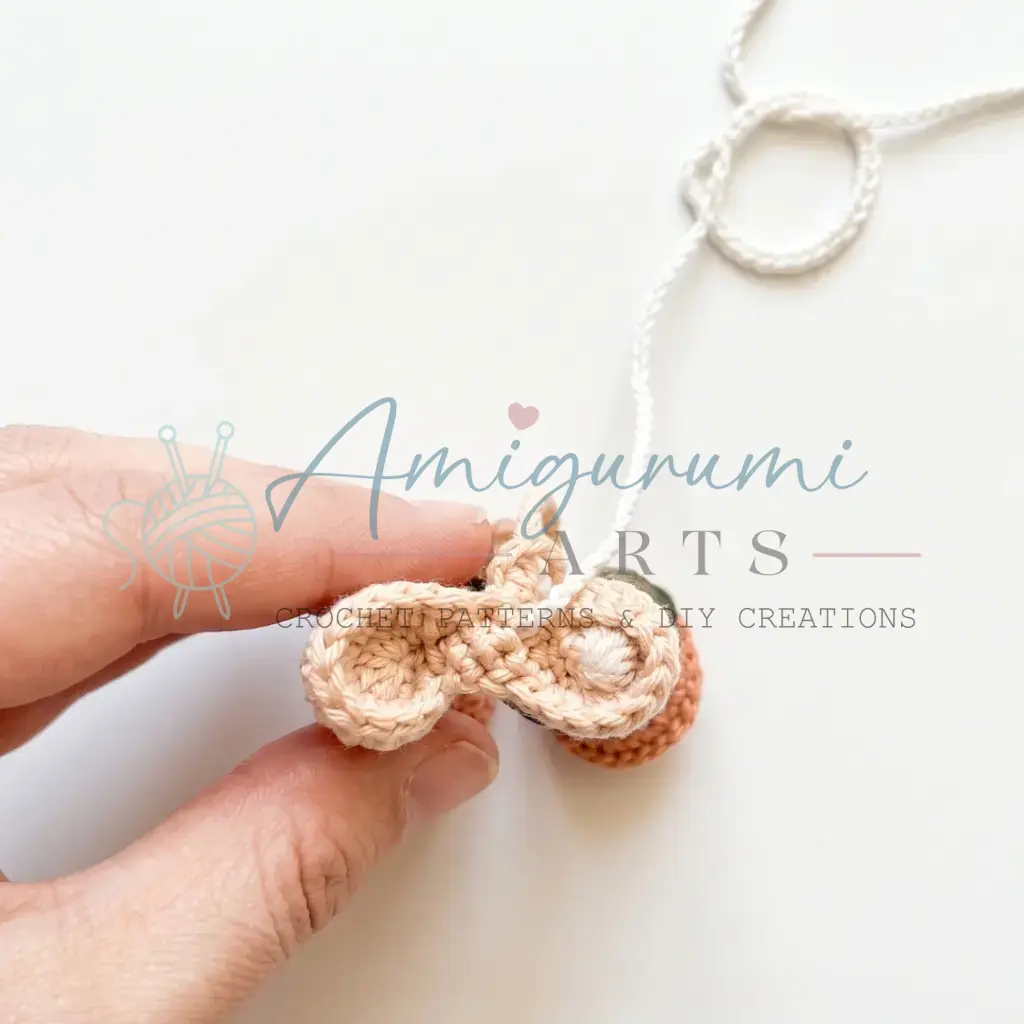
- Rnd 4: 6 sc, 3 dc in one st with a shared top closure (bobble stitch for the thumb), 5 sc. (12)
- Rnd 5: 5 sc, dec, 5 sc. (11)
- Rnd 6: 3 sc, dec repeat 2 times, 1 sc. (9)
- Rnd 7: 1 sc, dec, 6 sc. (8)
- Rnds 8–19: sc in each st around. (8) [12 rounds total]
Fasten off and weave in ends.
Legs (make 2)
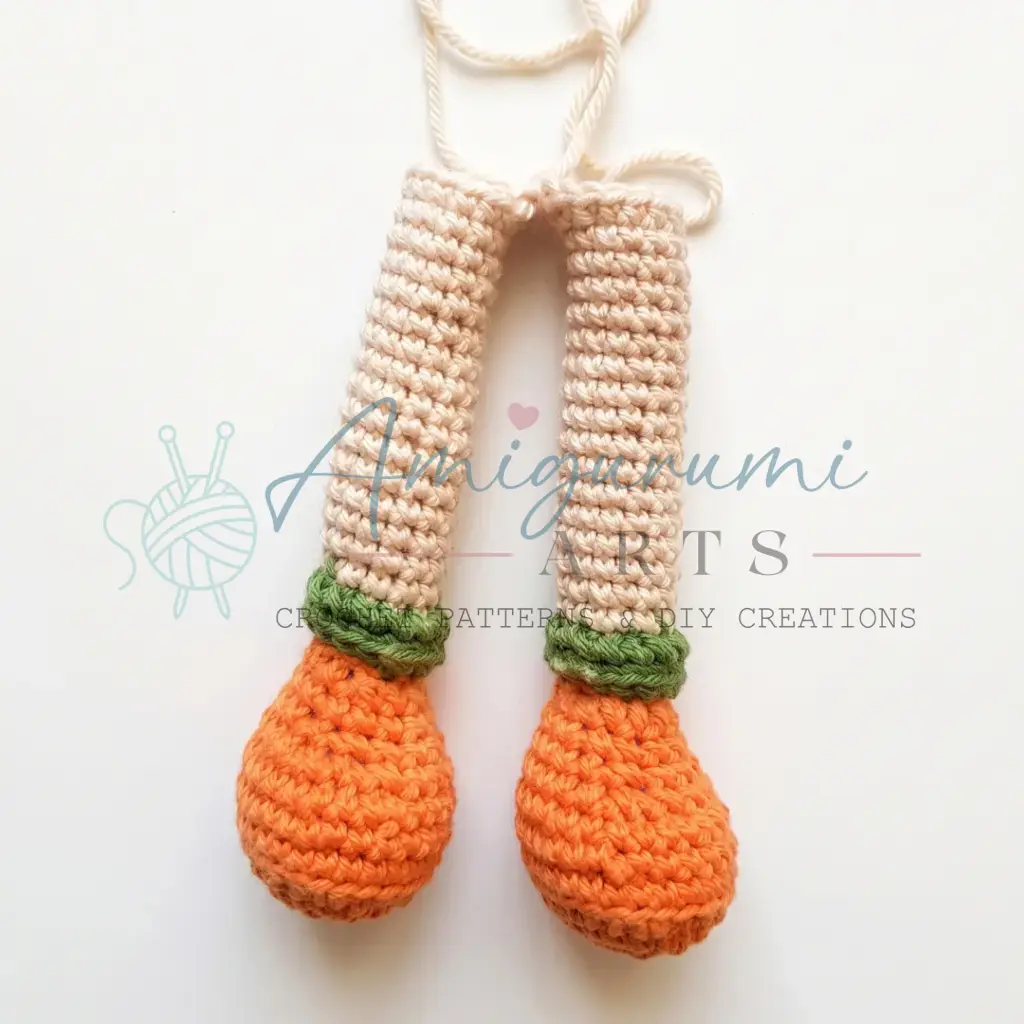
Stuff as you go once instructed. The stitch marker travels up the back of the leg. Begin with orange yarn.
- Rnd 1: Ch 4. Starting in the 2nd ch from hook: 2 sc, 3 sc in the last ch, 1 sc, 1 inc. (8)
- Rnd 2: inc, sc, inc repeat 3 times, sc, inc, inc. (14)
- Rnd 3: inc, 4 sc, inc repeat 3 times, 4 sc, inc, inc. (20)
- Rnd 4: 1 sc, inc, 4 sc, 1 sc, inc repeat 3 times, 4 sc, 1 sc, inc repeat 2 times. (26)
- Rnd 5: 26 sc worked in BLO. (26)
- Rnd 6: 12 sc, dec, 12 sc. (25)
- Rnd 7: 10 sc, dec, 10 sc, dec, 1 sc. (23)
- Rnd 8: 5 sc, dec repeat 6 times, 6 sc. (17)
- Rnd 9: 5 sc, dec, 2 sc, dec, 6 sc. (15)
- Rnd 10: 4 sc, dec, 2 sc, dec, 5 sc. (13)
- Rnd 11: 6 sc, dec, 5 sc. (12)
Begin stuffing the leg now. Switch to green yarn. Cut and weave in the orange yarn.
- Rnd 12: 12 sc in BLO (back half-loop only). (12)
- Rnd 13: 12 sc in BLO. (12)
Switch to peach/skin-tone yarn. Do not cut the green yarn — leave it hanging on the outside of the leg.
- Rnd 14: 12 sc in BLO. (12)
Now set the leg aside and return to the green yarn:
With green yarn, work ch 1, sl st into each front loop (FLO) of Rnd 12 all the way around. Then work ch 1, sl st into each front loop of Rnd 13 all the way around. This creates the ruffled shoe trim. Fasten off green and weave in the end.
Return to the leg and continue with peach:
- Rnds 15–29: sc in each st around. (12) [15 rounds total]
Fasten off the first leg and weave in the end. Do not fasten off the second leg — you’ll use it to join to the body.
Body
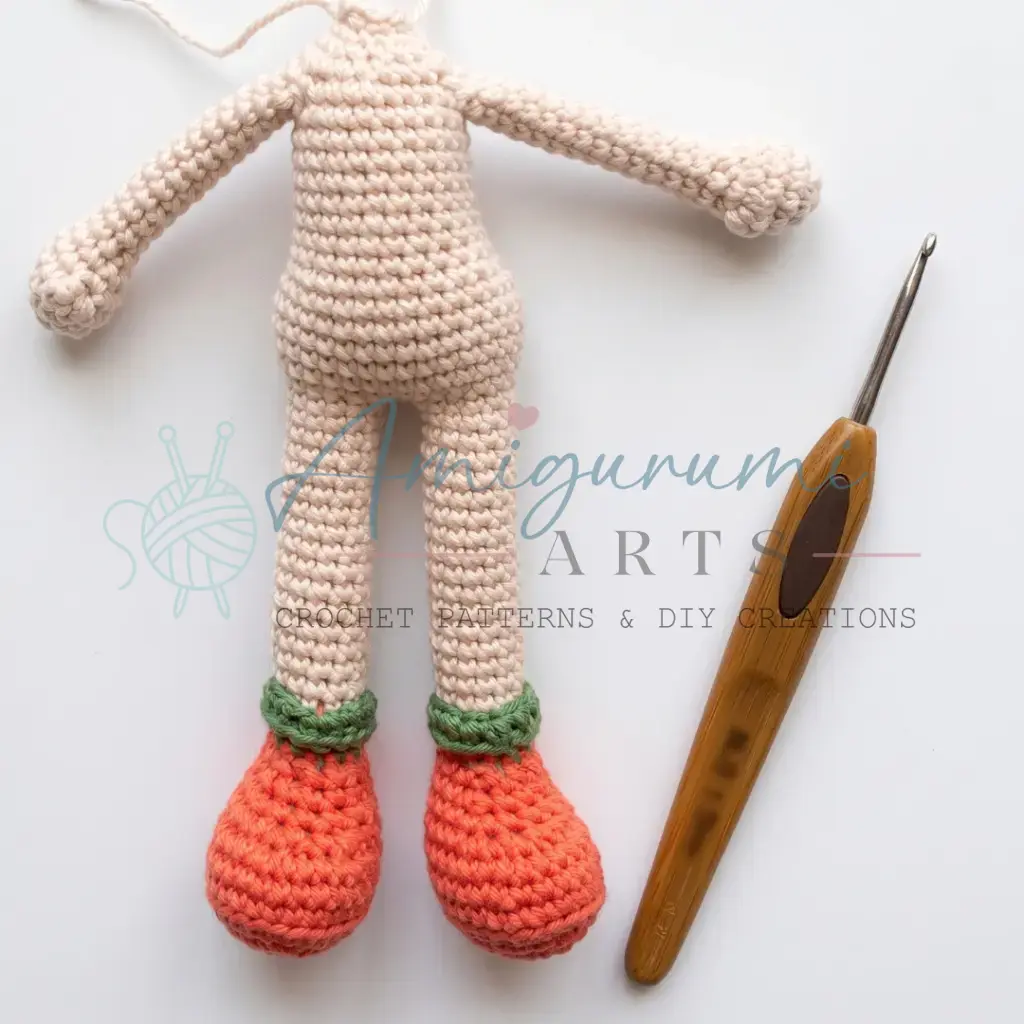
The body is formed by joining both legs with a chain bridge, then working in a continuous spiral. Work in peach/skin-tone yarn.
With the second leg still on your hook, sc 6 sts along the leg until you reach the midpoint of the inner leg (the exact number may vary slightly depending on your tension and marker position — 6 sts is the guide). This becomes the right leg. Ch 2 and join to the left leg.
- Rnd 1: 12 sc around the left leg, 2 sc across the ch-2 bridge, 12 sc around the right leg, 2 sc across the ch-2 bridge. (28)
Place your SM here. This marks the back center of the body.
- Rnd 2: 5 sc, inc, 14 sc, inc, 7 sc. (30)
- Rnd 3: 6 sc, inc, 14 sc, inc, 8 sc. (32)
- Rnds 4–5: sc in each st around. (32) [2 rounds]
Move the SM to the center back. Watch it carefully and work offset stitches as needed to keep it centered — any offset stitch is not counted in the stitch total.
- Rnd 6: 2 sc, dec, 24 sc, dec, 2 sc. (30)
- Rnd 7: 6 sc, dec, 14 sc, dec, 6 sc. (28)
- Rnd 8: 5 sc, dec, 14 sc, dec, 5 sc. (26)
- Rnd 9: 4 sc, dec, 14 sc, dec, 4 sc. (24)
- Rnd 10: 4 sc, dec, 12 sc, dec, 4 sc. (22)
- Rnds 11–15: sc in each st around. (22) [5 rounds]
- Rnd 16: 4 sc, inc, 12 sc, inc, 4 sc. (24)
- Rnd 17: Attach arms here. Check that each arm is centered evenly at the sides; work an offset stitch if needed (not counted). 4 sc, then 4 sc working through both the body stitches and the arm stitches together, 8 sc across the back, then 4 sc working through both the body and the second arm together, 4 sc. (24)
- Rnd 18: 4 sc, 4 sc along the arm stitches, 8 sc, 4 sc along the arm stitches, 4 sc. (24)
- Rnd 19: 3 sc, dec repeat 4 times, 4 sc. (20)
- Rnd 20: 1 sc, dec repeat 6 times, 2 sc. (14)
Stuff the body firmly now, paying special attention to the neck area so the head won’t tilt.
- Rnd 21: dec 7 times. (7)
- Rnd 22: sc in each st around. (7)
Optional: before attaching the head, you can insert a short wooden skewer, a chopstick, or a cotton swab wrapped in medical tape vertically into the neck to help the head sit straight.
Head
Stuff as you go. Work in peach/skin-tone yarn.
- Rnd 1: inc 7 times in MR. (14)
- Rnd 2: inc in each st around. (28)
- Rnd 3: 6 sc, inc repeat 4 times. (32)
- Rnd 4: 4 sc, inc repeat 6 times, 2 sc. (38)
- Rnd 5: 3 sc, inc, 5 sc, inc repeat 5 times, 4 sc. (44)
- Rnd 6: 9 sc, inc repeat 4 times, 4 sc. (48)
- Rnd 7: 5 sc, inc repeat 8 times. (56)
- Rnd 8: 3 sc, inc, 6 sc, inc repeat 7 times, 3 sc. (64)
- Rnds 9–12: sc in each st around. (64) [4 rounds]
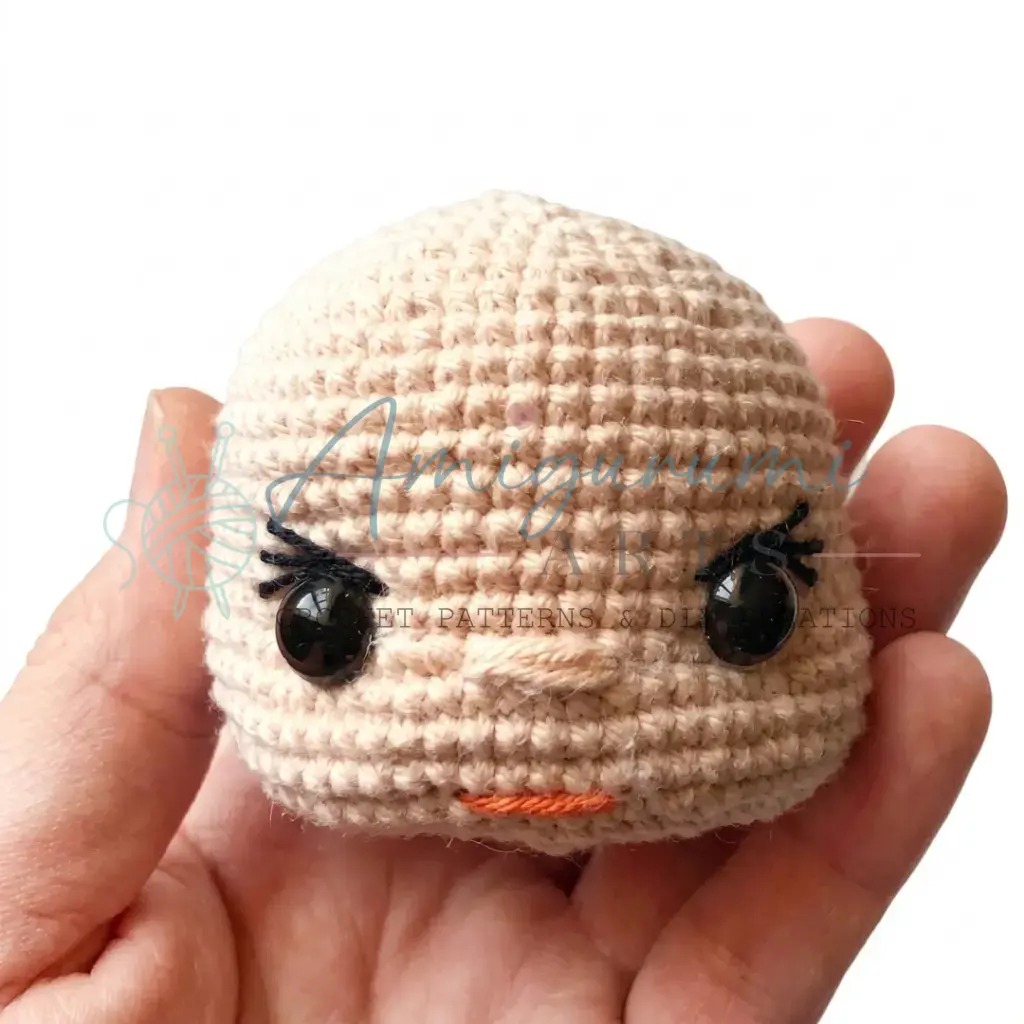
Insert safety eyes at Round 12 with 8 sts between them. Secure the backings firmly.
- Rnd 13: Move the SM to the center back of the head so that decreases fall at the center front of the face. 10 sc, dec, 3 sc, dec repeat 8 times, 10 sc, dec. (54)
- Rnds 14–19: sc in each st around. (54) [6 rounds]
- Rnd 20: 7 sc, dec repeat 6 times. (48)
- Rnd 21: 3 sc, dec, 6 sc, dec repeat 5 times, 3 sc. (42)
- Rnd 22: 5 sc, dec repeat 6 times. (36)
- Rnd 23: 2 sc, dec, 4 sc, dec repeat 5 times, 2 sc. (30)
- Rnd 24: 3 sc, dec repeat 6 times. (24)
- Rnd 25: 1 sc, dec, 2 sc, dec repeat 5 times, 1 sc. (18)
- Rnd 26: dec 9 times. (9)
Pull the opening closed, fasten off, and weave in the end.
Face Sculpting
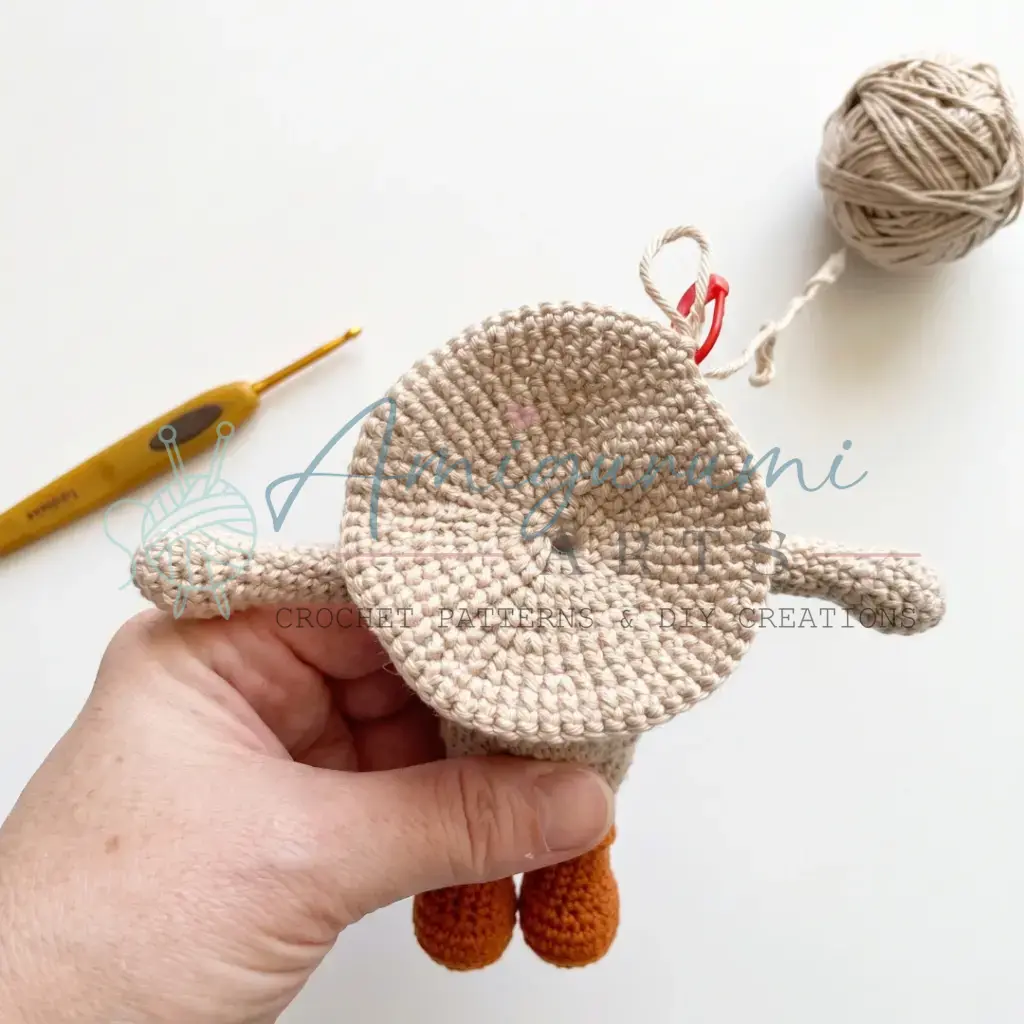
Use a yarn that is slightly heavier or firmer than your main Jeans yarn — the Vita Coco mercerized cotton in beige or peach works well for this.
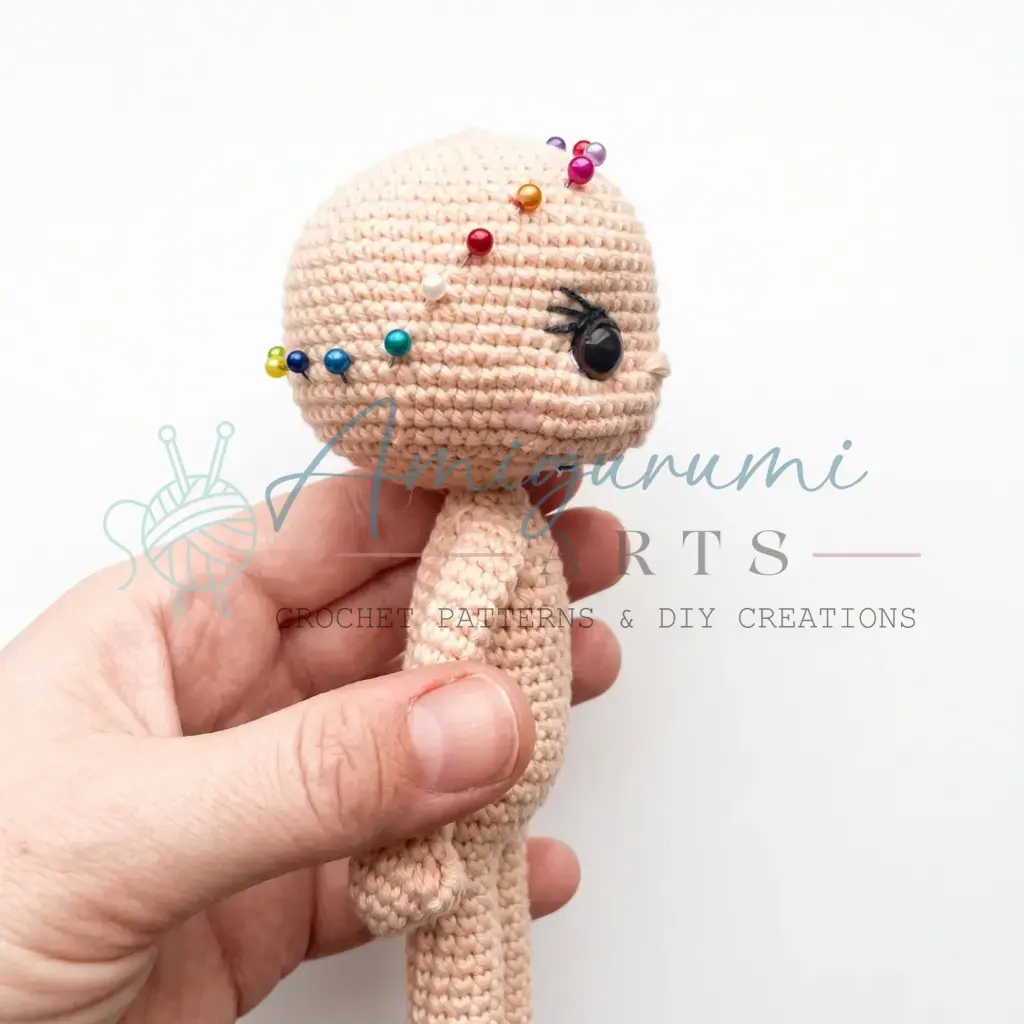
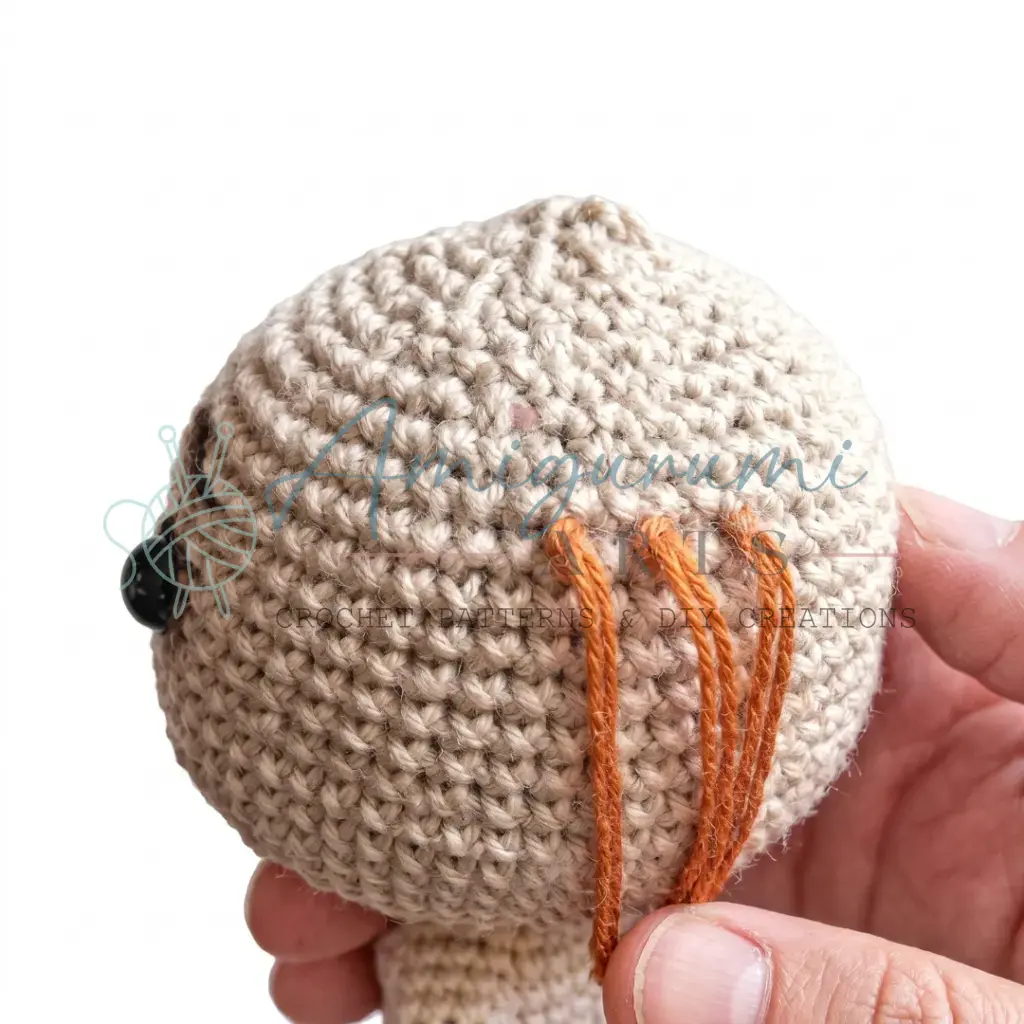
Pin 6 points on the face as reference markers:
- Points 1 and 6 sit at the base of the neck, approximately 4 sts apart from each other.
- Points 2 and 5 sit just below each eye (left cheek and right cheek).
- Points 3 and 4 are the inner reference points for each cheek pull.
Right cheek: Thread a yarn needle and insert it at Point 1. Bring the needle out just below the right eye at Point 2. Insert back in at Point 3 and bring out again at Point 1. Pull both yarn ends gently until the cheek indents to your liking, then knot securely. You can repeat the same path a second time for a deeper indent.
Left cheek: Insert the needle at Point 6. Bring it out below the left eye at Point 5. Insert at Point 4 and bring out at Point 6. Pull and knot as before.
Embroider the nose between the eyes using a few small stitches with the same peach/skin-tone yarn used for the doll.
Leaves (make 4)
Make 4 leaves in green yarn: 2 for the hat, 2 for the dress (optional). Each leaf is worked in a small foundation chain, then stitched along both sides.
Foundation: Ch 1 (slip knot counts as starting point).
Row 1: Working into the chain and back along the other side: 1 sc 1 hdc 1 dc 1 tr (into the tip of the chain for the leaf point) 1 dc 1 hdc 1 sc
Fasten off, leaving a yarn tail for sewing.
Hair
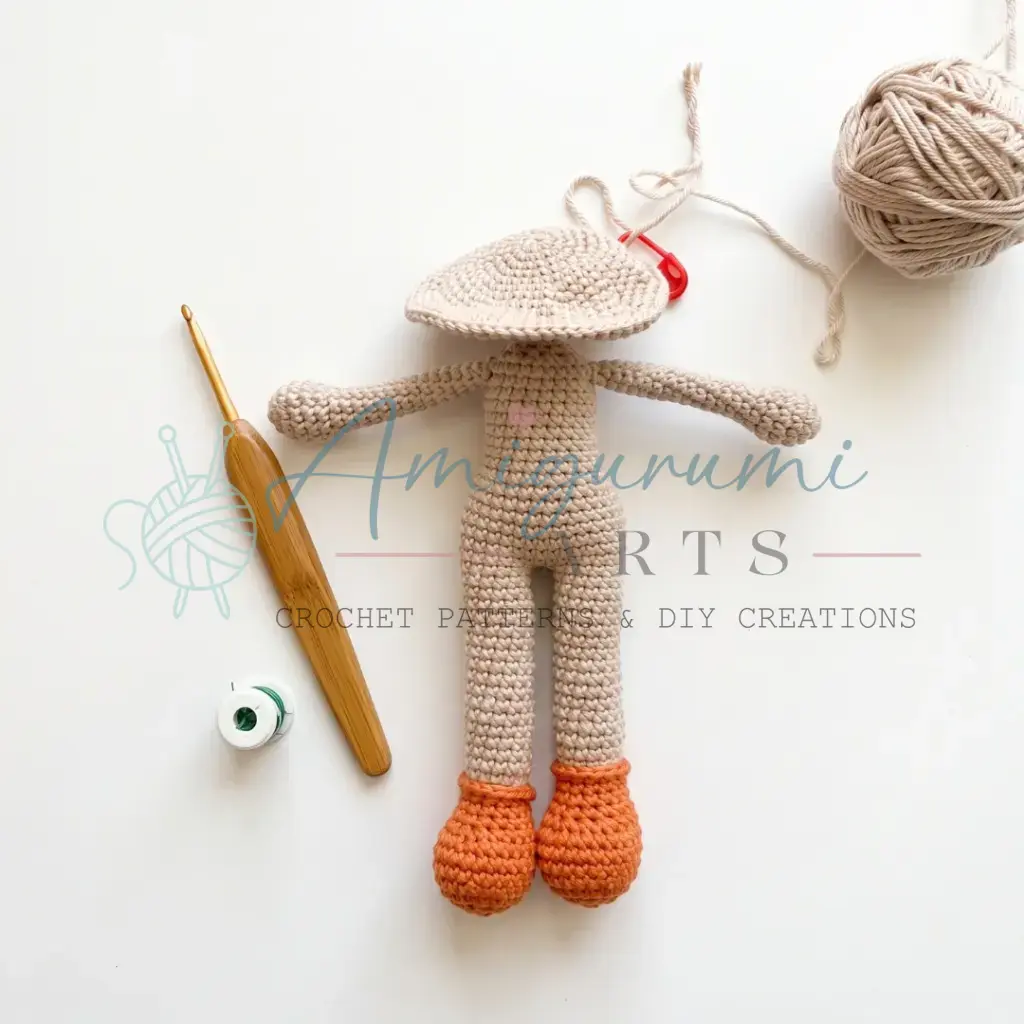
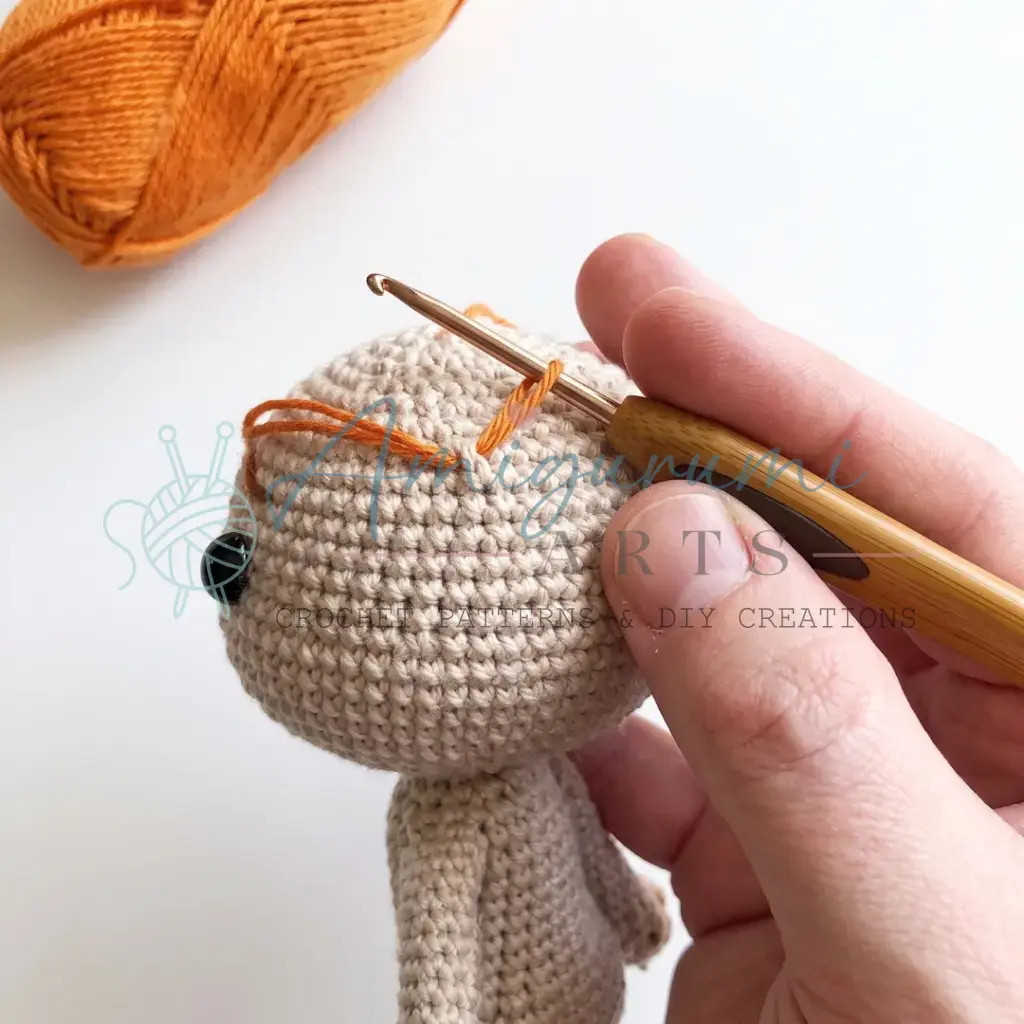
Cut yarn lengths of approximately 8 in (20 cm). Use any yarn color of your choice.
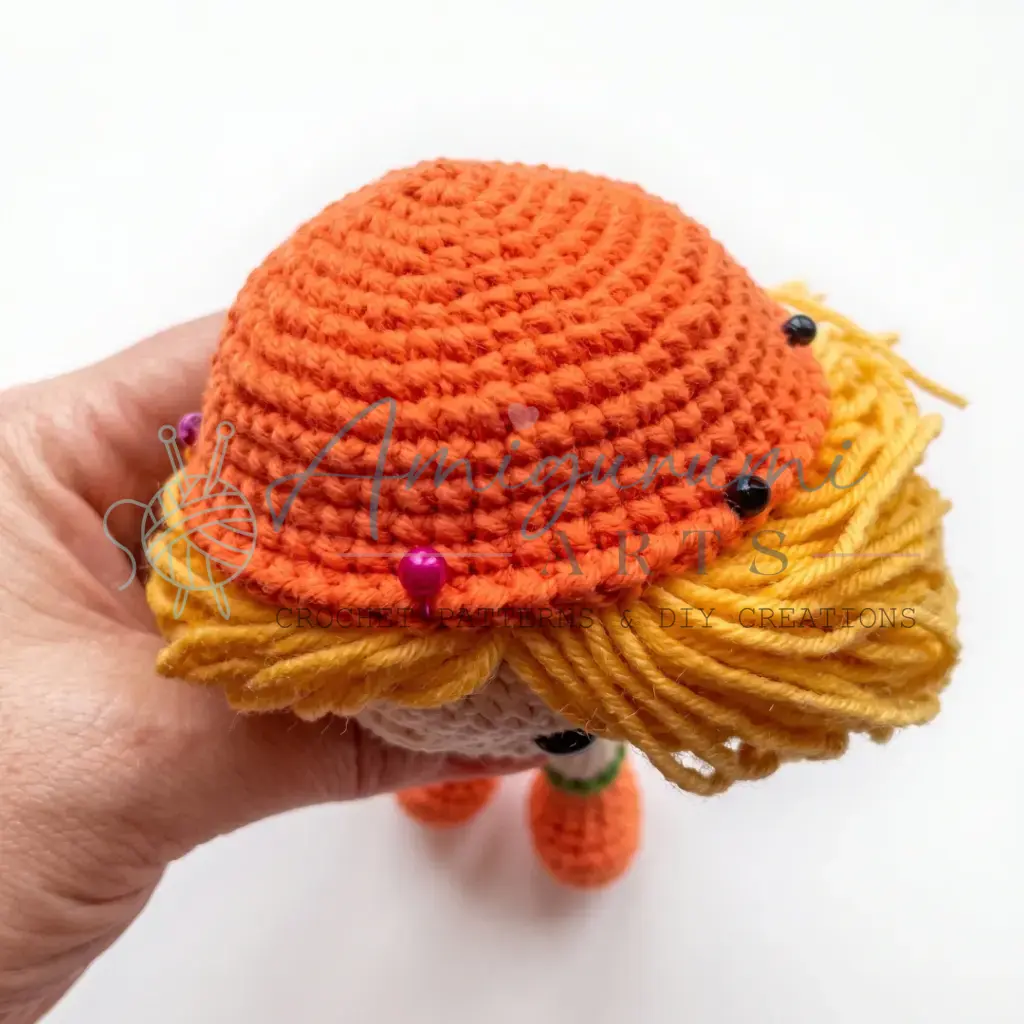
Mark the hairline with straight pins. Since the hat will be sewn on later, you only need to attach hair in the areas that will be visible below the hat — there is no need to cover the entire head.
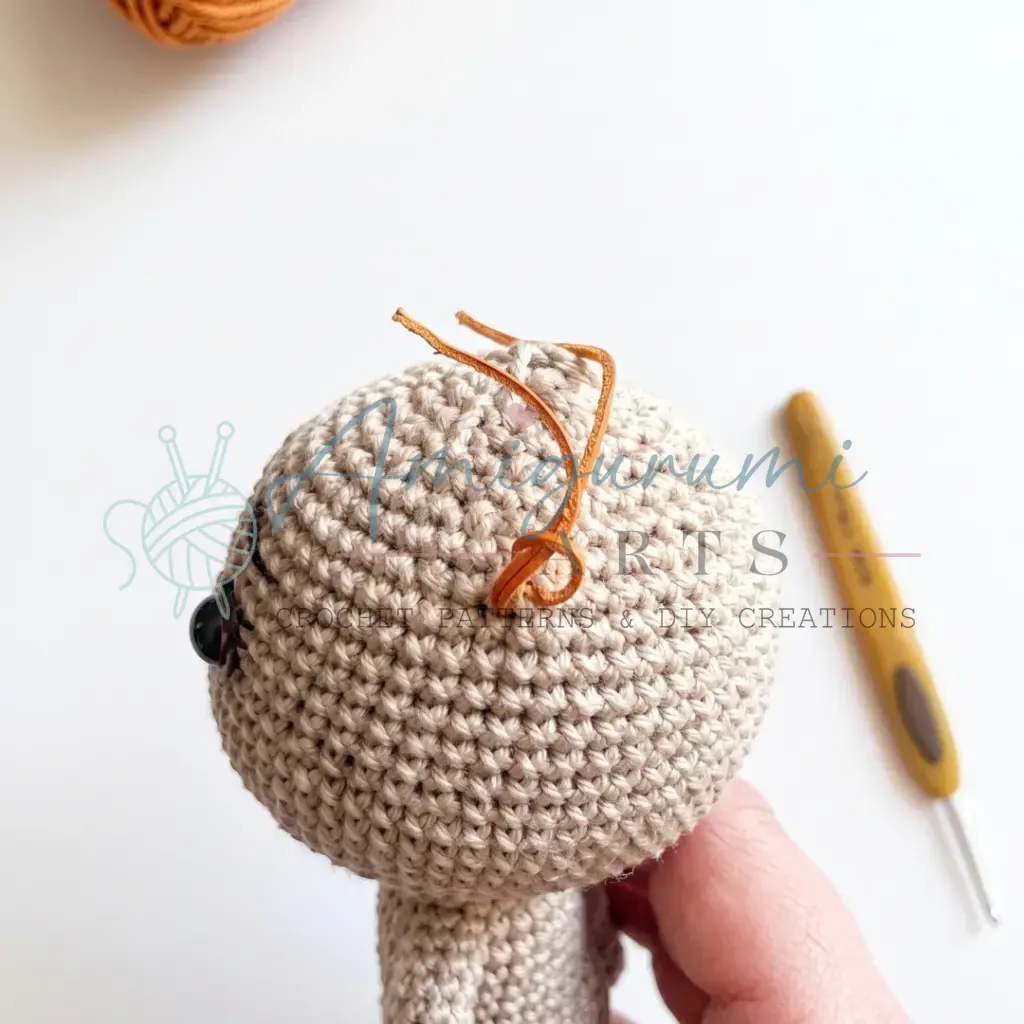
To attach each strand: insert your hook into a stitch on the head. Fold a cut length of yarn in half and draw the folded loop partway through the stitch, leaving the loop accessible. Pull both yarn ends through the loop (a lark’s head knot). Trim the ends to even them out.
Attach one strand for every other stitch (every 2nd sc) along the hairline.
Hat
Work in orange yarn. Use a slightly looser tension or go up one hook size — the hat needs to fit comfortably over the head.
- Rnd 1: 6 sc in MR, inc in each st around. (12) (The MR and the 6 increases are worked as a single starting round.)
- Rnd 2: 1 sc, inc repeat 6 times. (18)
- Rnd 3: 1 sc, inc, 2 sc, inc repeat 5 times, 1 sc. (24)
- Rnd 4: 3 sc, inc repeat 6 times. (30)
- Rnd 5: 2 sc, inc, 4 sc, inc repeat 5 times, 2 sc. (36)
- Rnd 6: 5 sc, inc repeat 6 times. (42)
- Rnd 7: 3 sc, inc, 6 sc, inc repeat 5 times, 3 sc. (48)
- Rnd 8: 7 sc, inc repeat 6 times. (54)
- Rnds 9–12: sc in each st around. (54) [4 rounds — work additional rounds here if you want the hat to sit deeper on the head]
- Rnd 13 (brim): Ch 1, sl st into each st of the previous round. Fasten off and weave in ends.
Sew 2 green leaves to the center front of the hat. Pin the hat to the head and sew it in place.
Dress
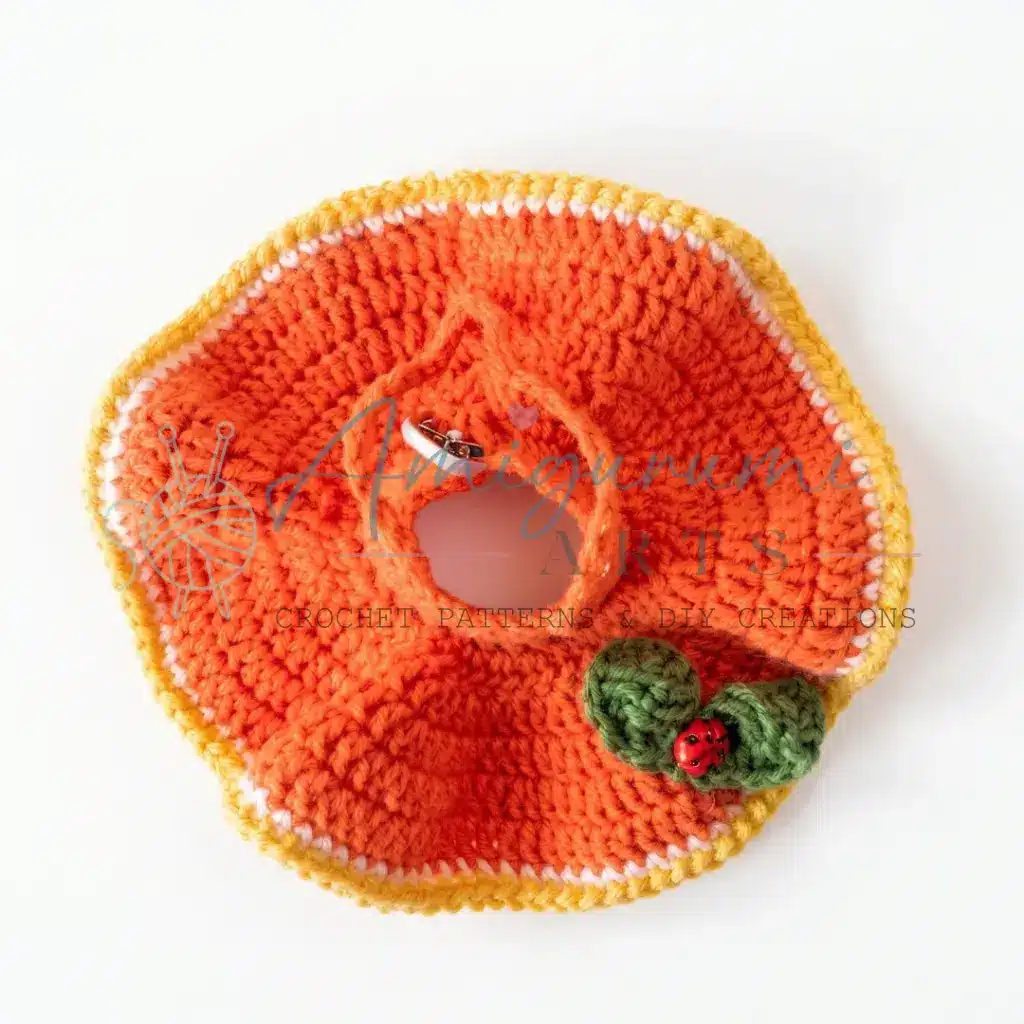
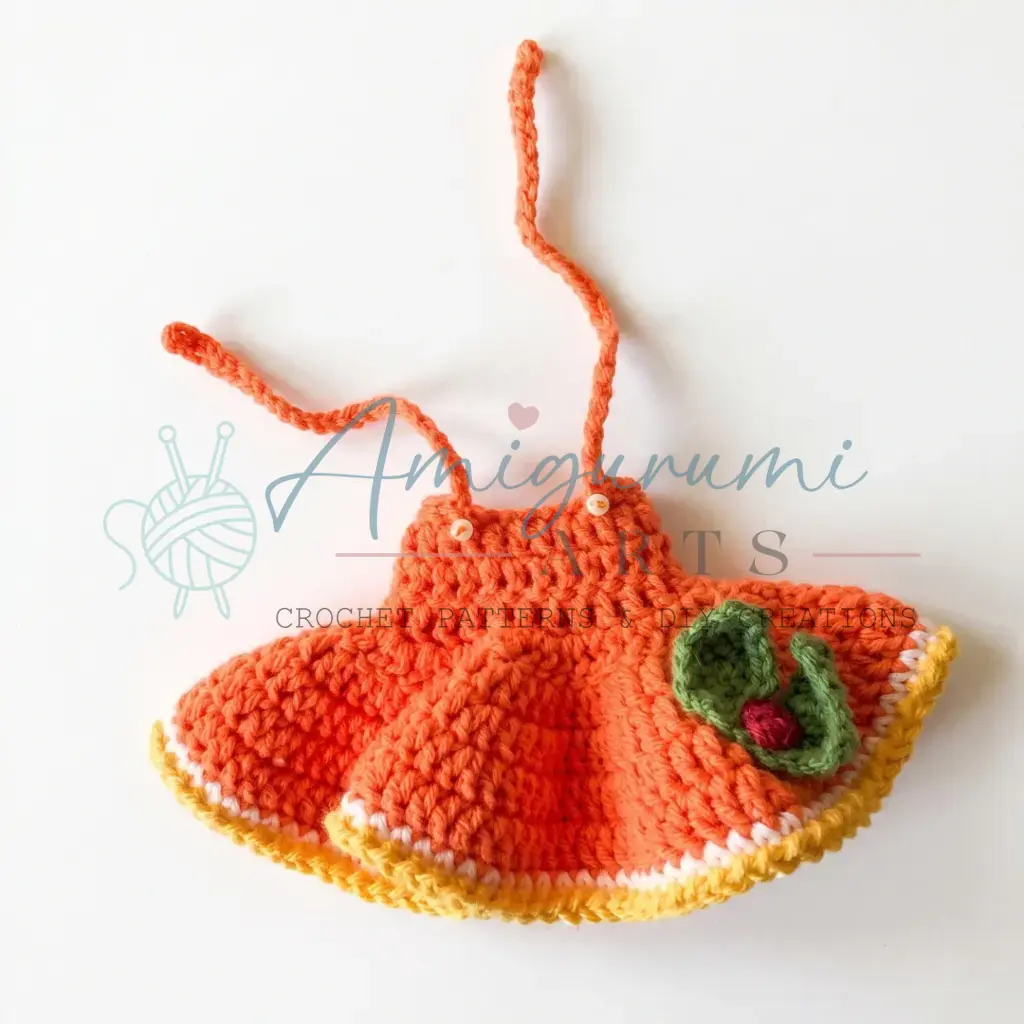
The dress begins flat (turned rows) in double crochet, then joins into the round for the skirt. Work with a turning chain at the start of each dc row.
- Row 1: Ch 26. (This is the bodice foundation — adjust the number of chains to match the doll’s chest circumference if needed.)
- Row 2: Starting in the 4th ch from the hook, dc across: 23 dc. (23)
- Rows 3–4: Ch 1 (turning chain), turn, 23 dc. (23)
- Row 5: Ch 1, turn, inc in each st: 23 dc-inc. (46)
- Row 6: Ch 1, turn, 1 dc, inc repeat 23 times. (69)
Join into the round with a sl st. Continue working in the round with a turning chain at the start of each round, ending each round with a sl st.
- Rnd 7: Ch 1, 2 dc, inc repeat 23 times, sl st to join. (92)
- Rnd 8: Ch 1, 3 dc, inc repeat 23 times, sl st to join. (115)
- Rnd 9: Ch 1, 115 sc, sl st to join. (115)
- Rnd 10: Switch to white yarn. Ch 1, 115 sc, sl st to join. (115)
- Rnd 11: Switch to yellow yarn. Ch 1, sl st into each st of the previous round. Fasten off and weave in ends.
Work a border of sc all the way around the top edge of the bodice. On one side edge, crochet a button loop: ch 4–5 (adjusted to the size of your button), sl st back into the bodice edge to form the loop.
Make 2 straps: ch 20 for each. Pin the strap positions on the doll’s shoulders and sew the straps in place. Weave in the tails. Sew on a button to close. You can also sew the extra 2 leaves to the dress, or decorate with additional buttons or embellishments as you like.
Assembly
Putting Orangette Together
- Attach the legs: The legs are already joined to the body during the body construction (see Body, Rnd 1). Confirm the feet face forward before the join is complete.
- Attach the arms: The arms are crocheted into the body at Rnds 17–18. Check alignment before completing those rounds so each arm sits symmetrically at the sides.
- Sew the head to the body: Using the yarn tail from the head’s final round and a tapestry needle, whipstitch the head to the open neck of the body. The 7 open neck stitches on the body align with the base of the head. Add extra stuffing to the neck before closing if needed.
- Sculpt the face: Complete the face-sculpting steps (cheek pulls and nose embroidery) before attaching the hat, so you have clear access to the whole face.
- Attach the hair: Using lark’s head knots as described, secure the hair strands along the marked hairline.
- Sew the hat on: Sew the 2 leaves to the hat first, then pin the hat in place and sew it securely to the head.
- Dress the doll: Slip the dress over the doll’s body and fasten the button. Sew the shoulder straps to the back of the bodice.
- Final finishing: Weave in all remaining ends. Trim any stray tails.
Tips
- Keep your tension tight throughout. At 1.75 mm with a fingering-weight cotton blend, you’ll naturally be working tighter than usual. This is intentional — a dense fabric prevents the stuffing from showing and gives Orangette her clean, smooth finish. If you can see white fiberfill through your stitches, drop to the smallest hook you’re comfortable using or slow down and focus on keeping each stitch snug.
- The invisible decrease makes all the difference. On a fine doll with safety eyes, a standard (yarn-over) decrease leaves a visible ridge at the front of the face. For the head especially, always use the invisible decrease: insert your hook under the front loop only of the next stitch, then under the front loop only of the stitch after that, and complete the decrease from there. The result is nearly seamless.
- Stuff the neck firmly — it carries the whole head. Rnd 20–21 of the body narrow quickly, and the neck column needs to be stuffed before it closes. If the head still tilts after stuffing, the optional wooden skewer or cotton-swab-and-tape support described in the pattern is a genuinely effective fix and won’t be visible once the head is attached.
- Work the green shoe trim while the green yarn is still live. The lark’s-head shoe edging is much easier to manage before you’ve fastened off the green yarn and it blends into the stuffed leg. The front loops of Rnds 12 and 13 will still be open and easy to pick up at this stage — don’t skip back to them after the fact.
- Match the dress foundation chain to your specific doll. The pattern notes that 26 chains fit the sample doll’s chest, but your gauge may vary — even by a stitch or two. Before beginning Row 2, hold the chain around the doll’s bodice to check the fit. Adjust by one or two chains in either direction if needed; the skirt increase ratios (×2, ×1.5, etc.) will still work out proportionally.
FAQs
Can I use a different yarn for the face sculpting?
While the pattern specifically recommends Vita Coco mercerized cotton for its firmness, you can use any tightly woven cotton yarn. The goal is to have a thread that holds the tension of the cheek pulls without stretching out over time.
How do I fix a head that tilts to one side?
Ensure you have stuffed the neck area (Rnds 20-21 of the body) very firmly before closing. If the head still tilts, insert the optional wooden skewer or cotton swab wrapped in tape vertically into the neck column before attaching the head.
Why are there offset stitches in the body instructions?
Offset stitches are used to realign the stitch marker when it drifts from the center back. These extra stitches are not counted in the final stitch total of the round; they simply ensure your decreases and increases remain symmetrical.
Can I make the dress fit a larger or smaller doll?
Yes. The bodice foundation chain (Row 1) should be adjusted to match the chest circumference of your specific doll. Hold the chain around the doll before starting Row 2 to check the fit.
What is the best way to attach the hair?
Use the lark’s head knot method described in the instructions. This creates a secure anchor point that prevents the hair from pulling out, and you can trim the ends to blend them with the hat.
Pin This Crochet Pattern!