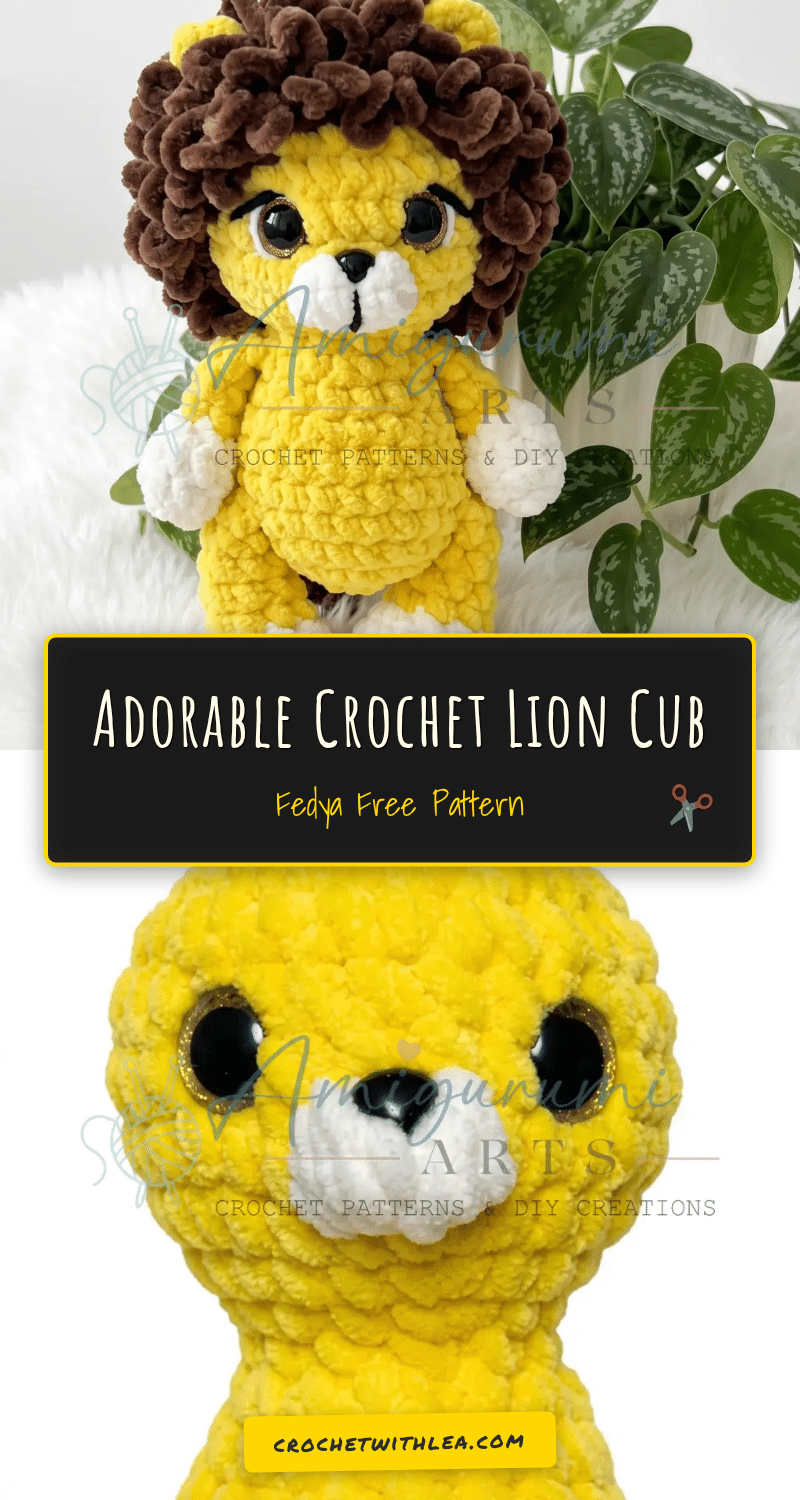
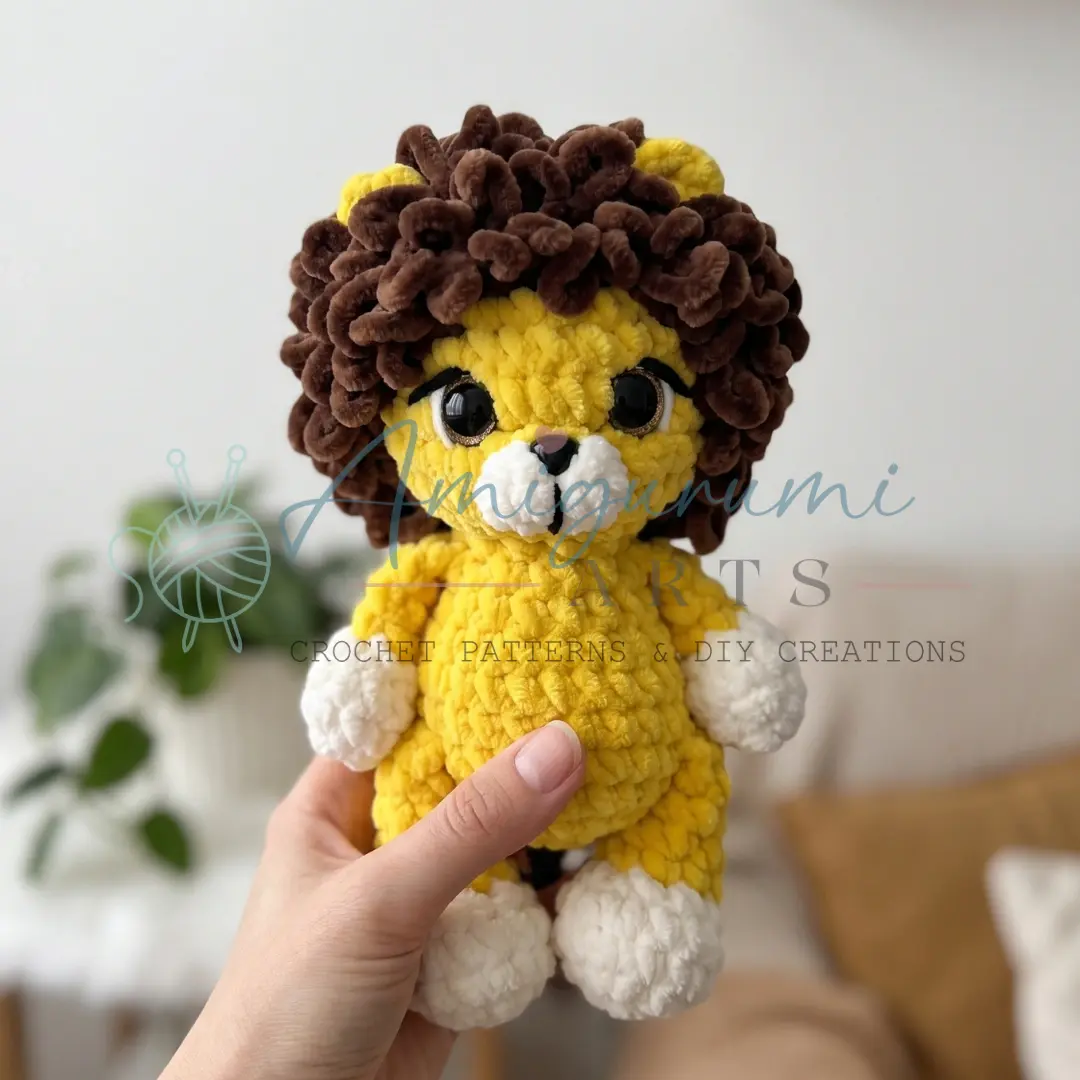
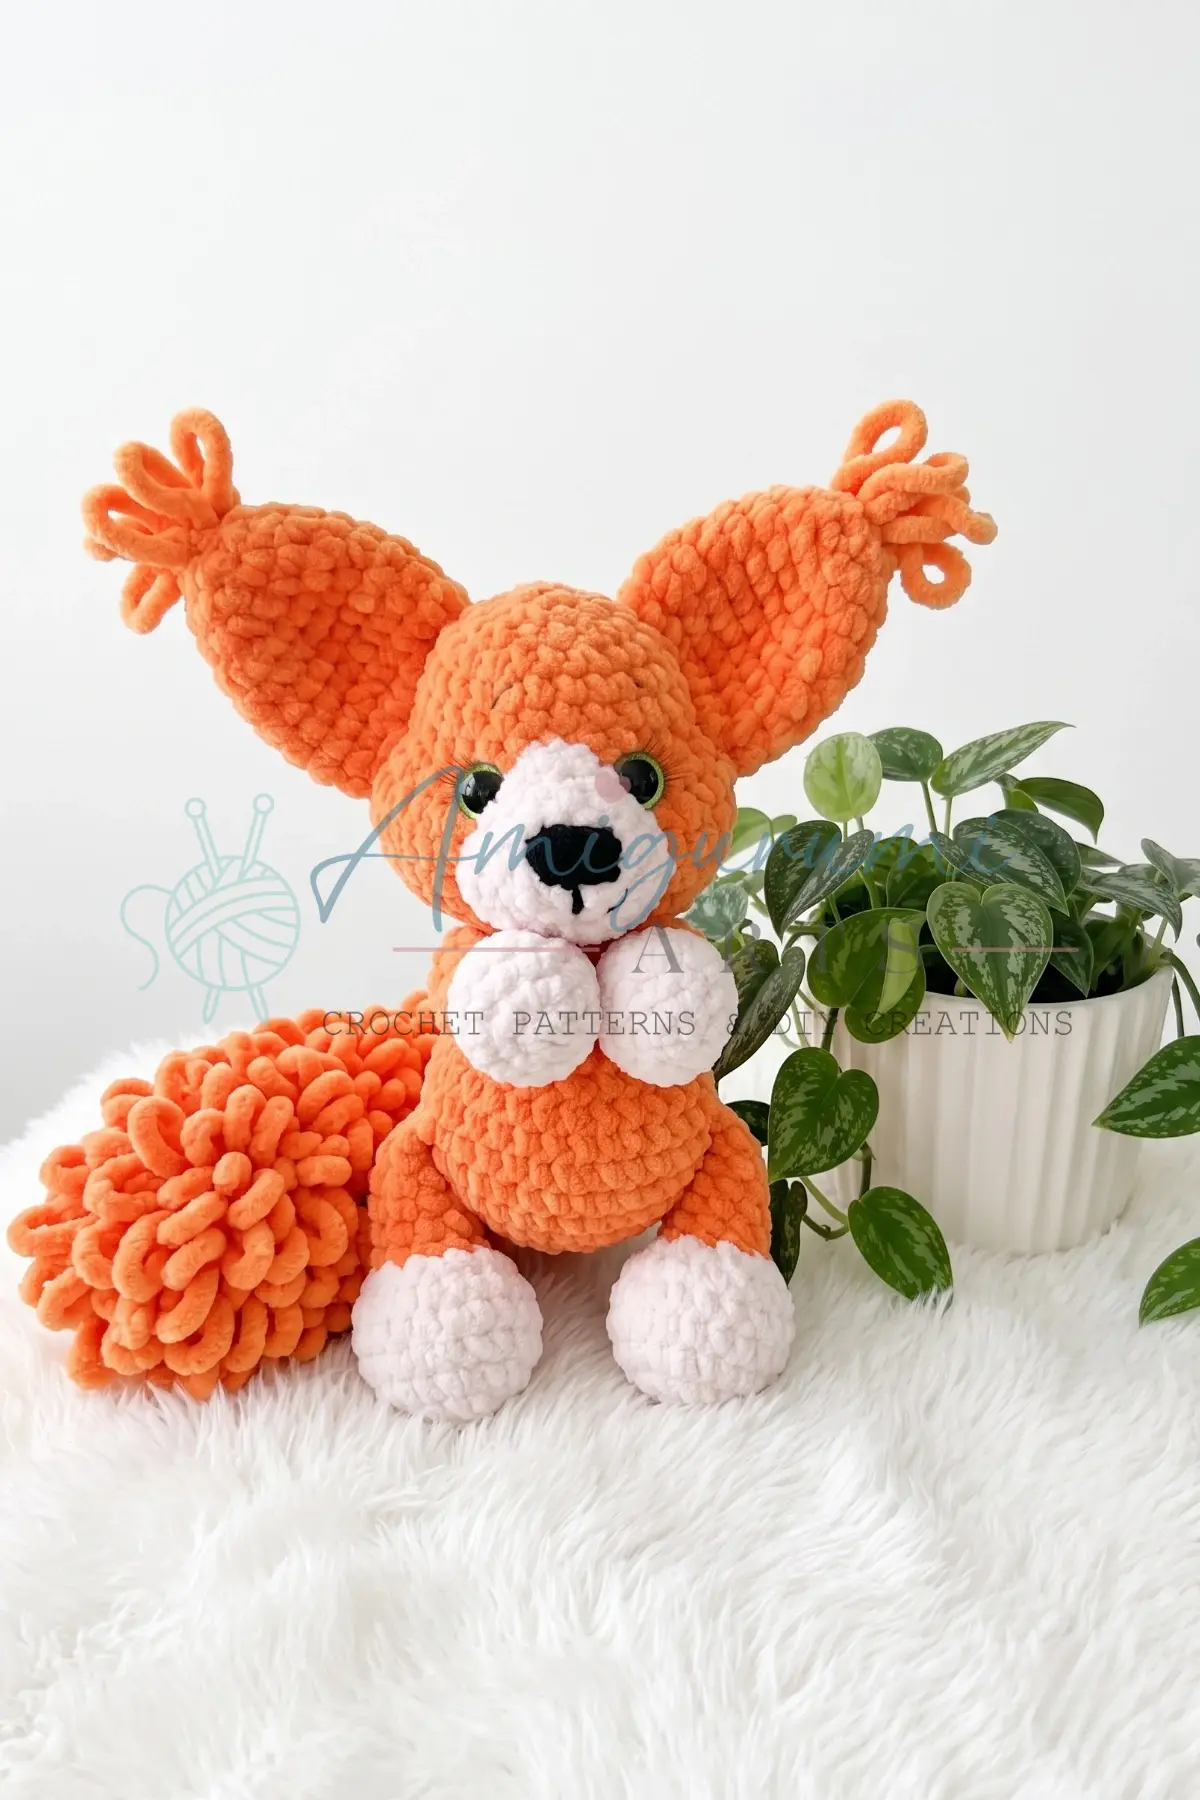
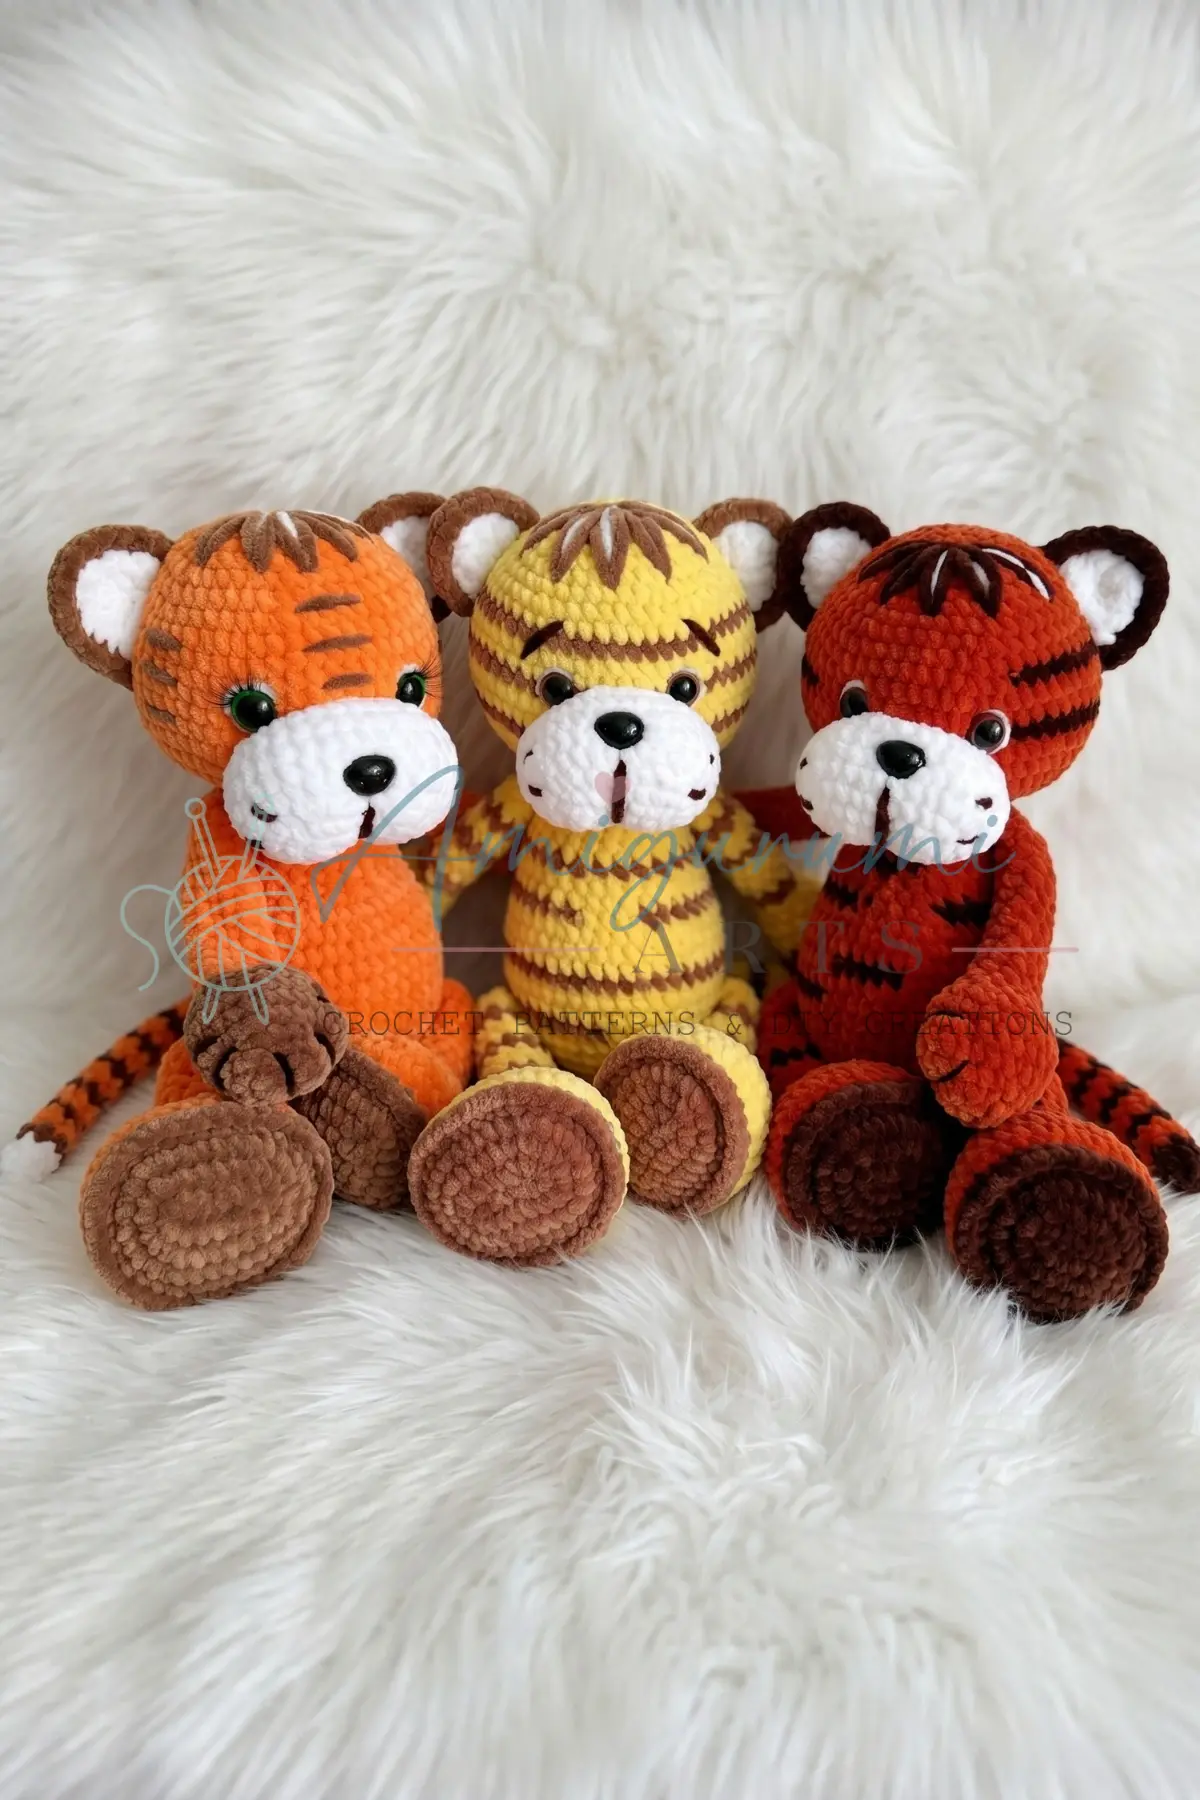
The yarn is soft and plush against your fingertips, the hook ready in your hand, and the magic ring just starting to take shape. There is a quiet satisfaction in watching a simple circle of stitches expand into something with personality and life. This is the moment where the project begins to breathe, and for this adorable lion cub, that breath is golden and fluffy. Fedya is the kind of amigurumi that makes someone gasp the moment they spot him on a shelf—a tiny golden lion with a fluffy bobble muzzle and a loopy mane that you trim to perfection. Standing about 20 cm (roughly 8 inches) tall, this lion cub is worked in soft plush yarn that gives him an irresistibly huggable texture, even at a small scale.
Why This Project Works
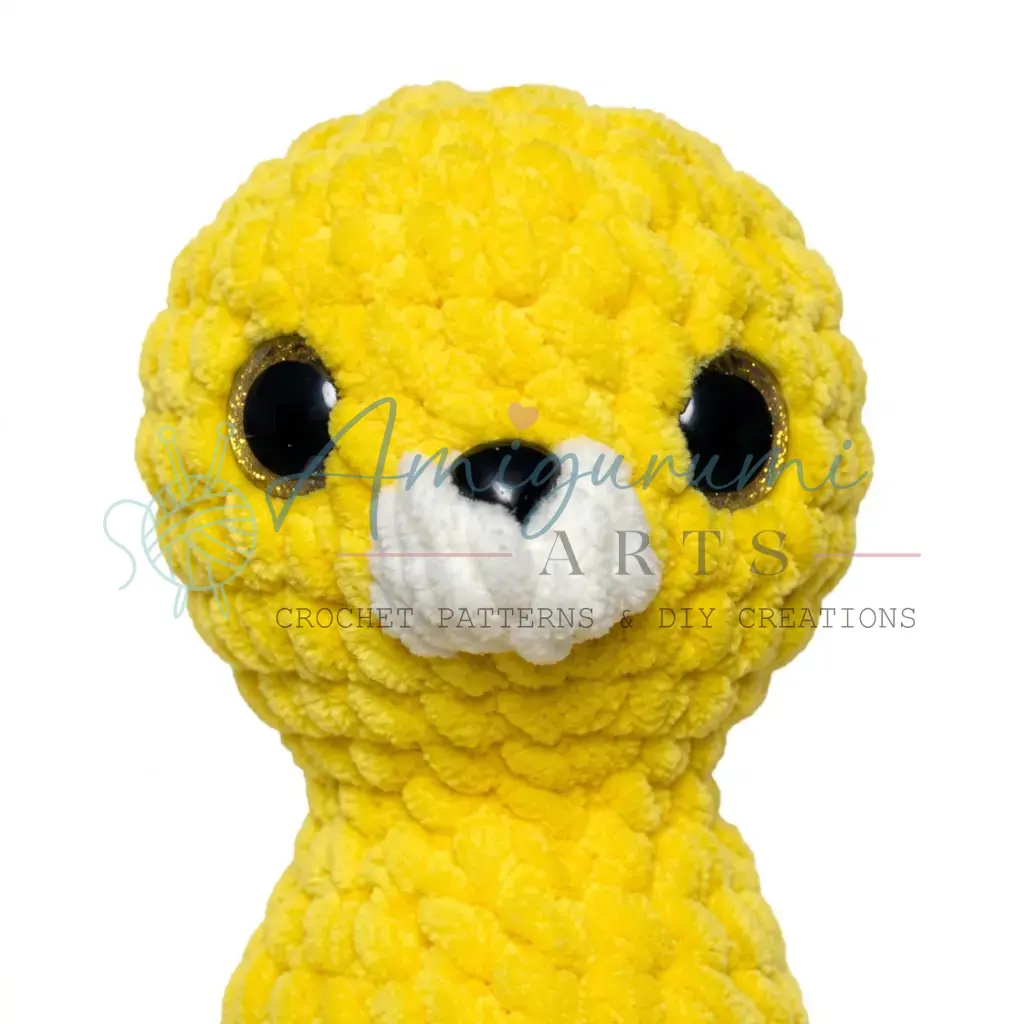
Fedya strikes the perfect balance between approachable construction and high-impact texture. The head and body are worked as a single seamless piece, which keeps construction tidy and the finished silhouette beautifully rounded without the hassle of sewing two large pieces together. The real star, however, is the mane. By using elongated loop stitches, Fedya gets a wild, textured fur that mimics the look of a real cub’s mane. It is a technique that adds significant visual interest and tactile appeal, making him a standout piece for display or play. The bobble stitch muzzle adds a unique, dimensional detail that elevates the face beyond standard embroidery, giving him a distinct, soft-nosed expression.
Project Overview
This free amigurumi pattern is written for crafters who already know the basics of single crochet, increases, decreases, and working in the round, but it is still very approachable for a confident beginner ready for their first character toy. The finished toy measures approximately 20 cm (8 inches) when made with YarnArt Dolce and a 4.0 mm hook. Your gauge may vary slightly depending on your tension.
Materials
- Yarn: YarnArt Dolce plush yarn (or similar bulky-weight plush/velvet yarn) in yellow (shade 761), brown (shade 775), and cream/milk white (shade 745).
- Additional Yarn: A small amount of cotton yarn in a color of your choice for embroidering the face details.
- Hook: US G-6 / 4.0 mm.
- Safety Eyes: 16 mm, 1 pair.
- Safety Nose: 10 × 11 mm, 1 piece.
- Fiberfill stuffing.
- Stitch marker.
- Long tapestry needle / yarn needle.
- Scissors.
- Strong thread or yarn: For needle-sculpting the face.
Abbreviations
- ch — Chain
- dc — Double Crochet
- dec — Invisible Decrease (insert hook through front loops of next 2 sts, yo, pull through both, yo, pull through 2 loops)
- inc — Increase (2 sc in the same stitch)
- MR — Magic Ring
- sc — Single Crochet
- sl st — Slip Stitch
- bo — Bobble Stitch (4 incomplete dc worked into the same stitch, closed together at the top)
Pattern Notes
This pattern is written in US crochet terminology. All pieces are worked in a continuous spiral. Do not join rounds unless instructed. Use a stitch marker to track the beginning of each round. Stitch counts are given at the end of each round in parentheses: (##).
The head and body are crocheted as one continuous piece — no seam between them. The mane is worked using elongated loop stitches (sometimes called loopy or fur stitches). These are worked from the right side and create the textured loopy surface that gives Fedya his mane. If you’re unfamiliar with this technique, practice it on a small swatch before beginning the mane piece.
Insert safety eyes and the safety nose from the inside before closing the head. Placement notes are included within the pattern instructions at the correct rounds. Needle-sculpting the face (pulling yarn through the head with a needle and strong thread to create subtle indentations around the eyes) is done during assembly. Full instructions are in the Assembly section.
Pattern Instructions
Back Legs (make 2)
Work with cream/milk white yarn.
- Rnd 1: 6 sc in MR. (6)
- Rnd 2: inc in each st around. (12)
- Rnd 3: 3 sc, inc repeat 3 times around. (15)
- Rnd 4: sc in each st around. (15)
- Rnd 5: dec 6 times, 3 sc. (9)
Switch to yellow yarn.
- Rnds 6–9: sc in each st around. (4 rounds) (9)
Stuff the piece firmly. Fold flat and single crochet through both layers across — 4 sc through both walls to close. Fasten off, leaving a long tail for sewing. Make the second back leg the same way.
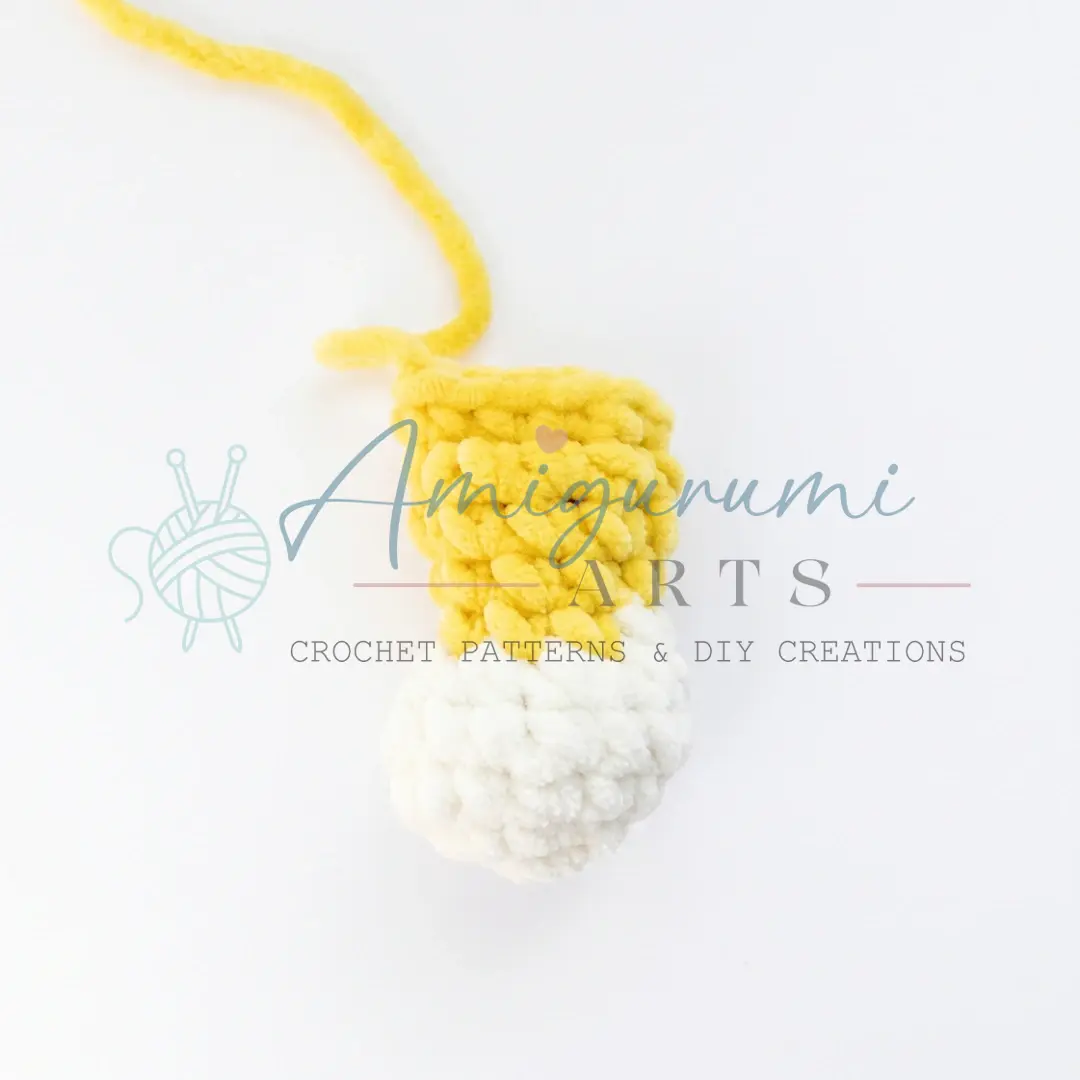
Front Legs (make 2)
Work with cream/milk white yarn.
- Rnd 1: 6 sc in MR. (6)
- Rnd 2: 1 sc, inc repeat 3 times around. (9)
- Rnd 3: sc in each st around. (9)
- Rnd 4: dec 3 times, 3 sc. (6)
Switch to yellow yarn.
- Rnds 5–7: sc in each st around. (3 rounds) (6)
Stuff only the cream-colored section (the paw). Fold flat and single crochet through both layers — 3 sc through both walls to close. Fasten off, leaving a long tail for sewing. Make the second front leg the same way.
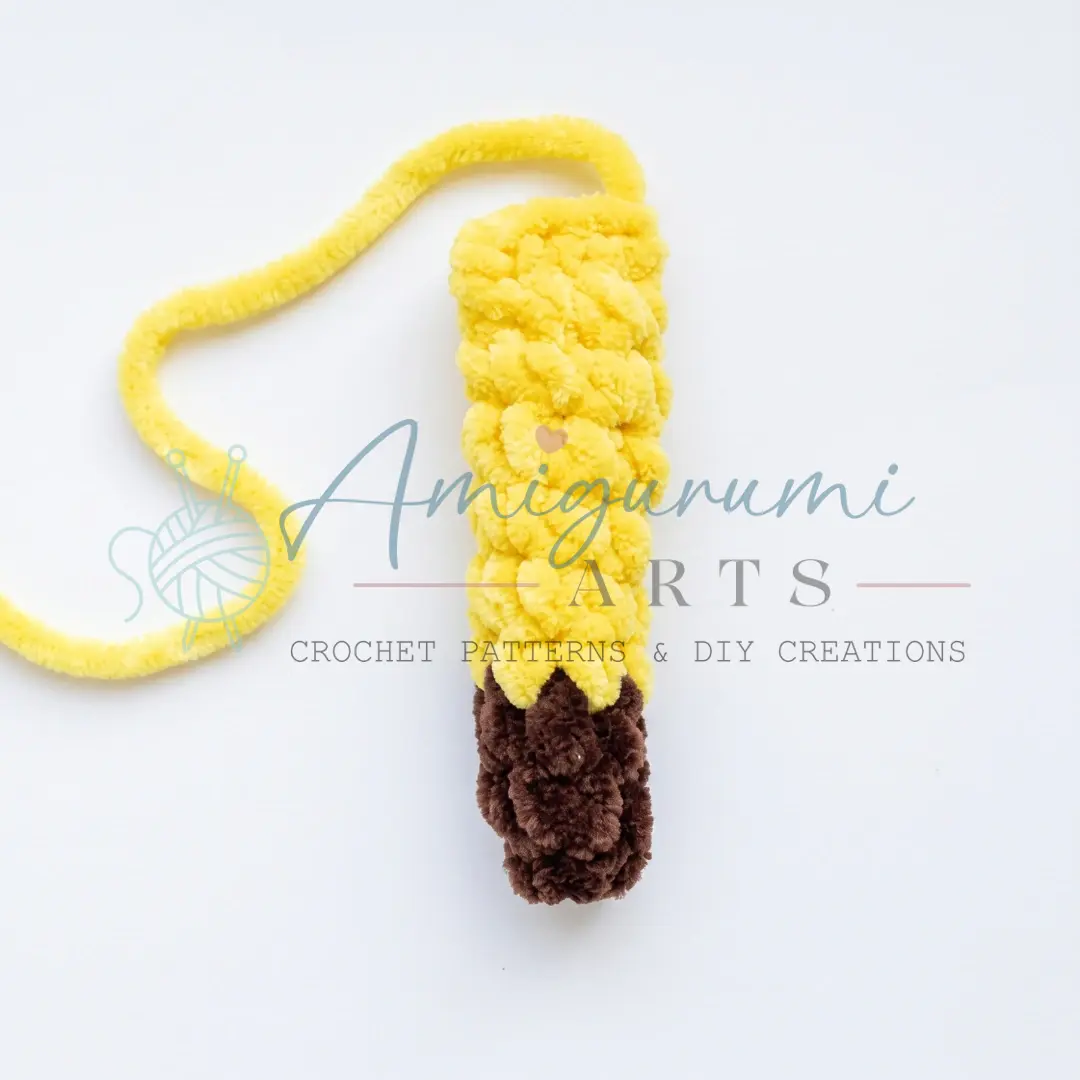
Tail
Work with brown yarn.
- Rnd 1: 4 sc in MR. (4)
- Rnd 2: 1 sc, inc repeat 2 times around. (6)
- Rnd 3: sc in each st around. (6)
Switch to yellow yarn.
- Rnds 4–9: sc in each st around. (6 rounds) (6)
Do not stuff the tail. Fold flat and single crochet through both layers — 3 sc through both walls to close. Fasten off, leaving a long tail for sewing.
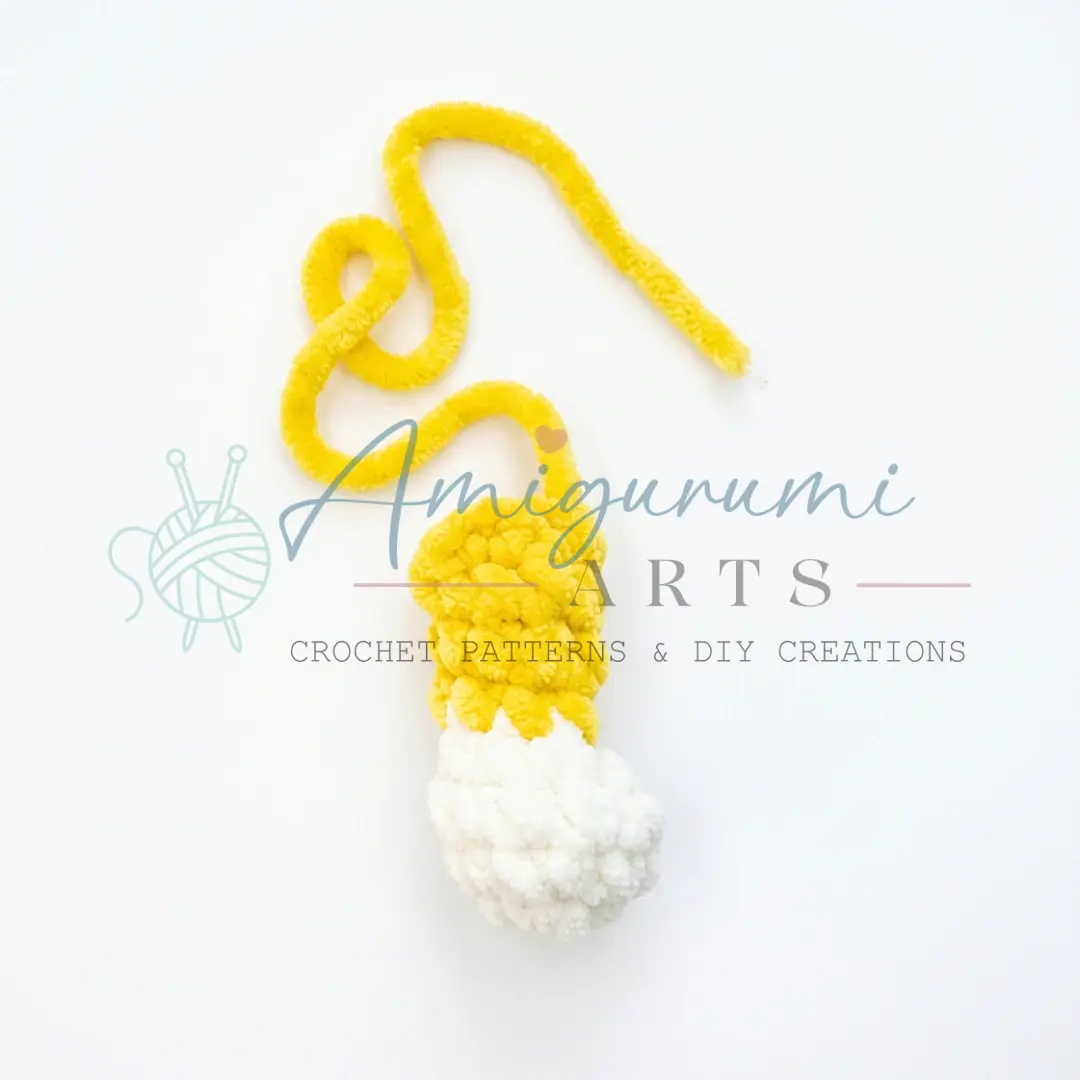
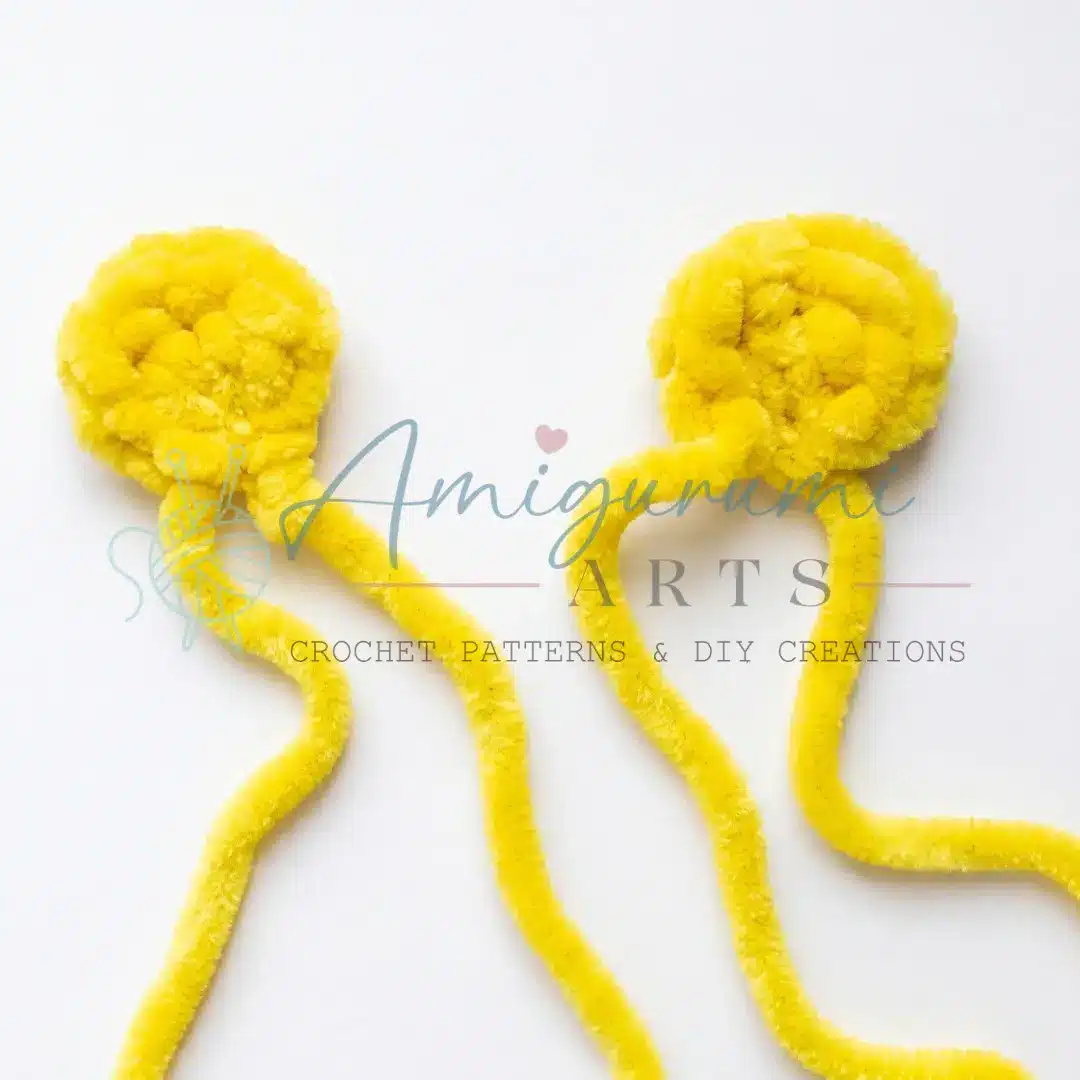
Ears (make 2)
Work with yellow yarn. Leave a yarn tail of about 10 cm (4 inches) before starting.
- Foundation: ch 3. Into the 3rd chain from the hook work: 2 dc, ch 2, sl st.
Fasten off, leaving a long tail for sewing. Make the second ear the same way.
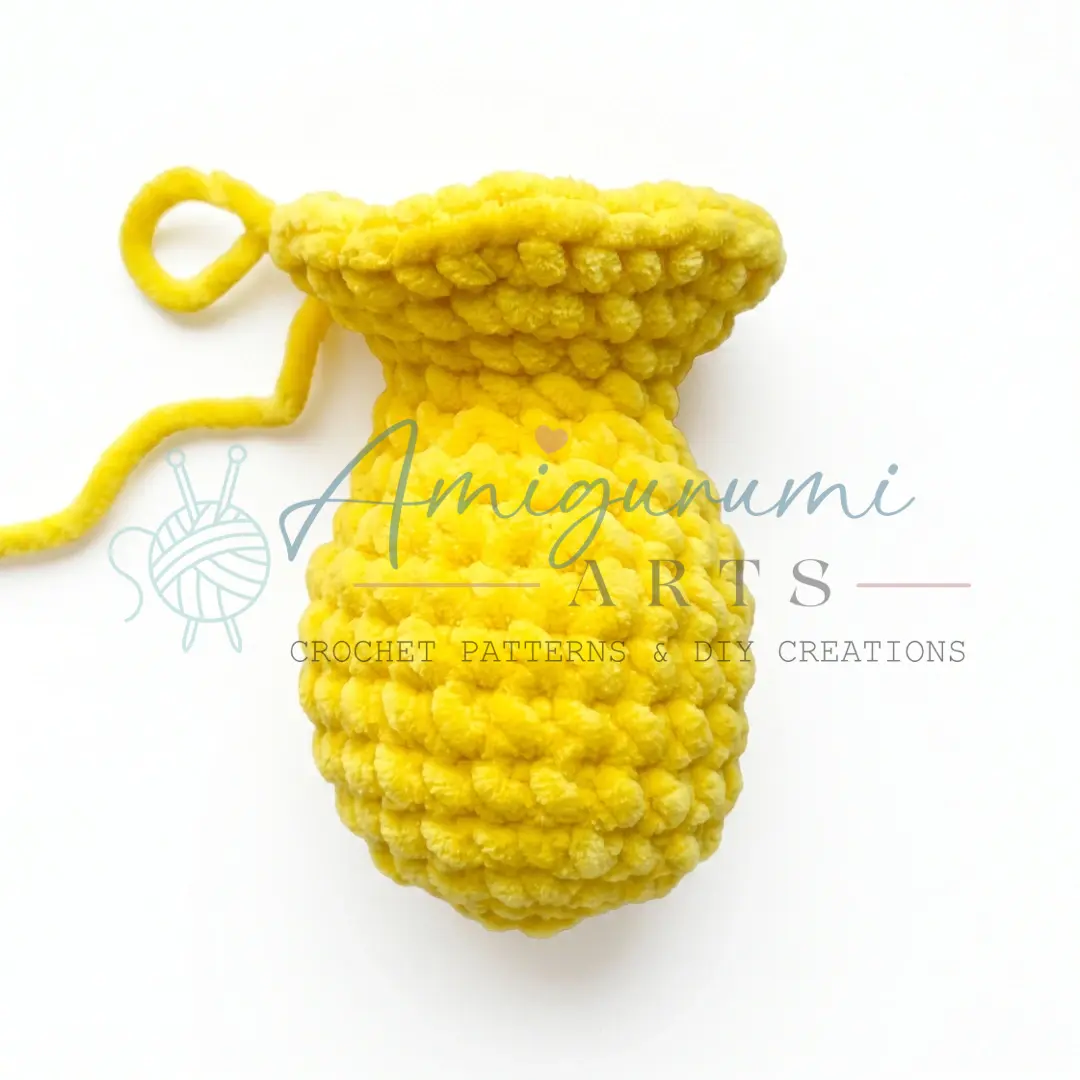
Head and Body (worked as one piece)
Work with yellow yarn. Leave a yarn tail of about 10 cm (4 inches) before starting.
- Rnd 1: 6 sc in MR. (6)
- Rnd 2: inc in each st around. (12)
- Rnd 3: 1 sc, inc repeat 6 times around. (18)
- Rnd 4: 2 sc, inc repeat 6 times around. (24)
- Rnds 5–8: sc in each st around. (4 rounds) (24)
- Rnd 9: 2 sc, dec repeat 6 times around. (18)
- Rnd 10: sc in each st around. (18)
- Rnd 11: 1 sc, dec repeat 6 times around. (12)
- Rnd 12: sc in each st around. (12)
This completes the head. The body begins now, increasing back outward.
- Rnd 13: 1 sc, inc repeat 6 times around. (18)
- Rnd 14: 2 sc, inc repeat 6 times around. (24)
- Rnd 15: 3 sc, inc repeat 6 times around. (30)
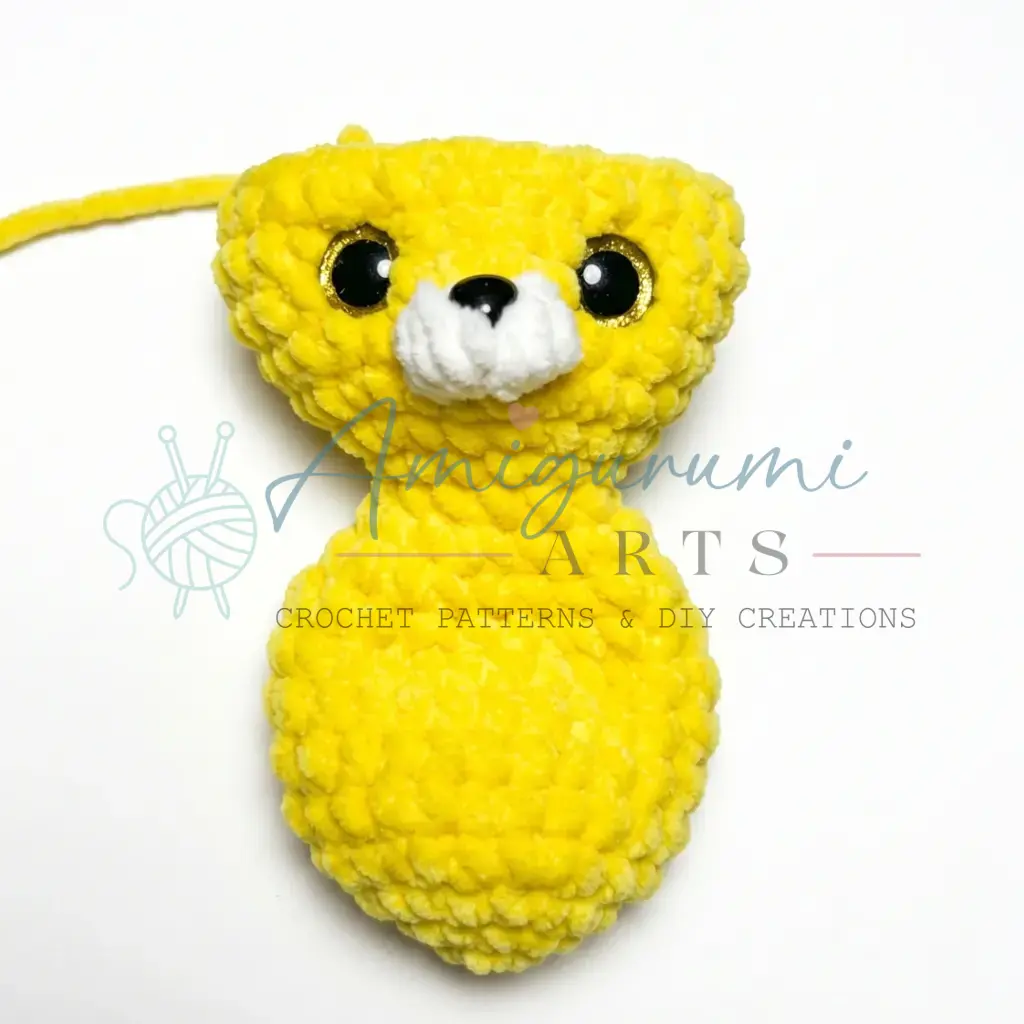
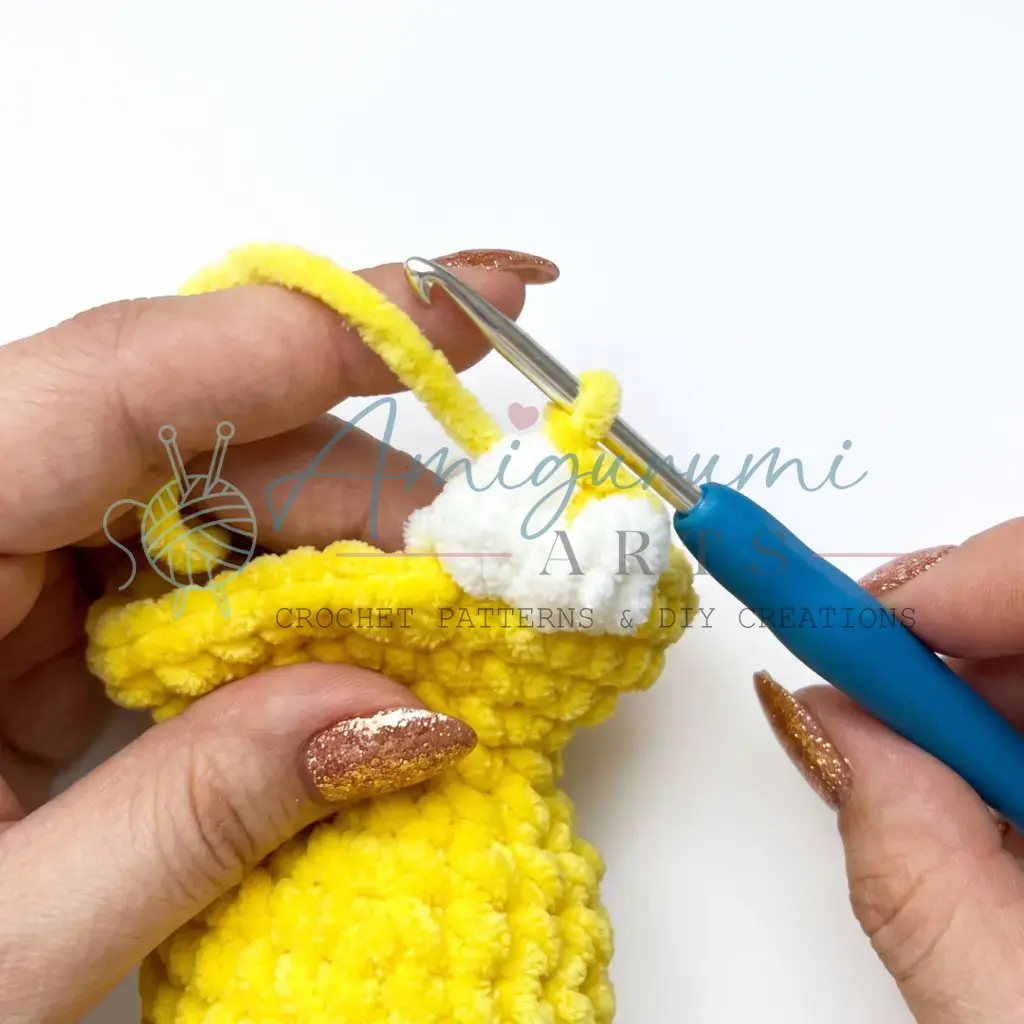
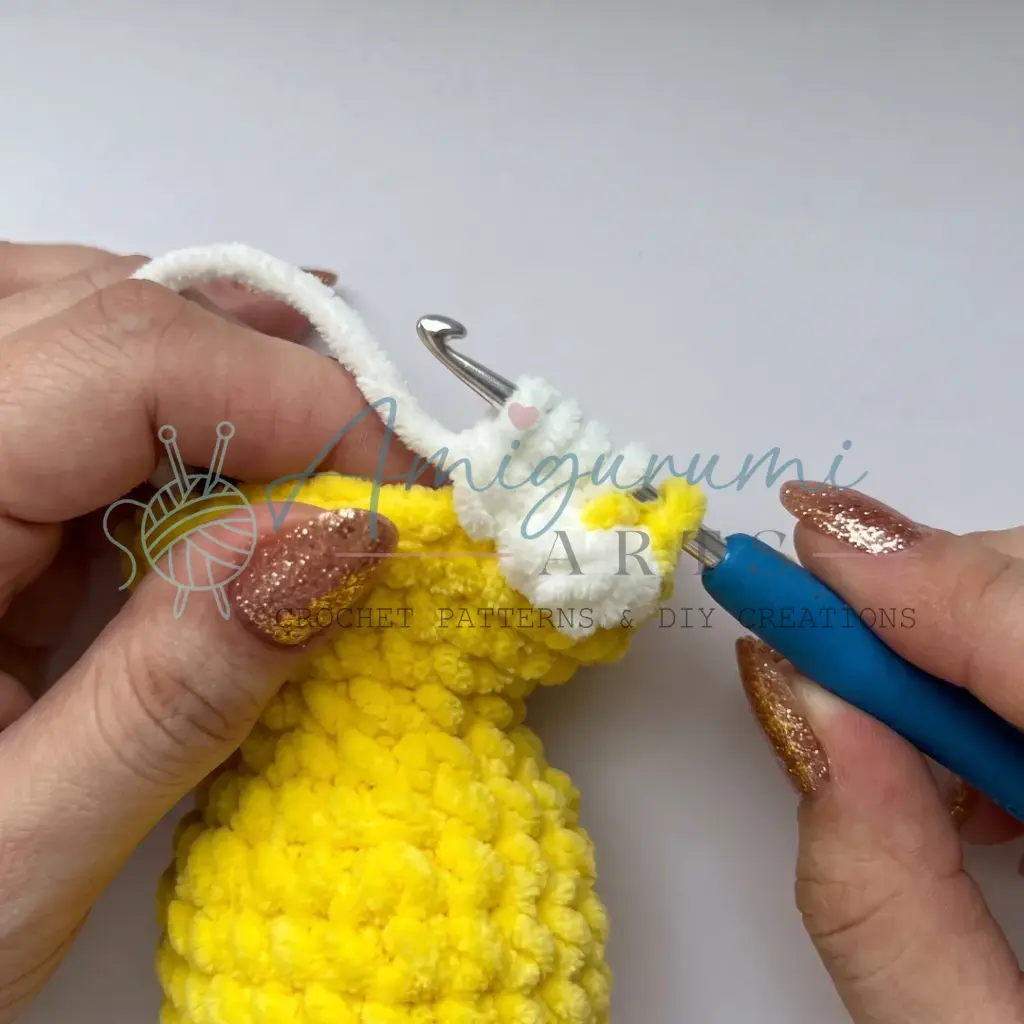
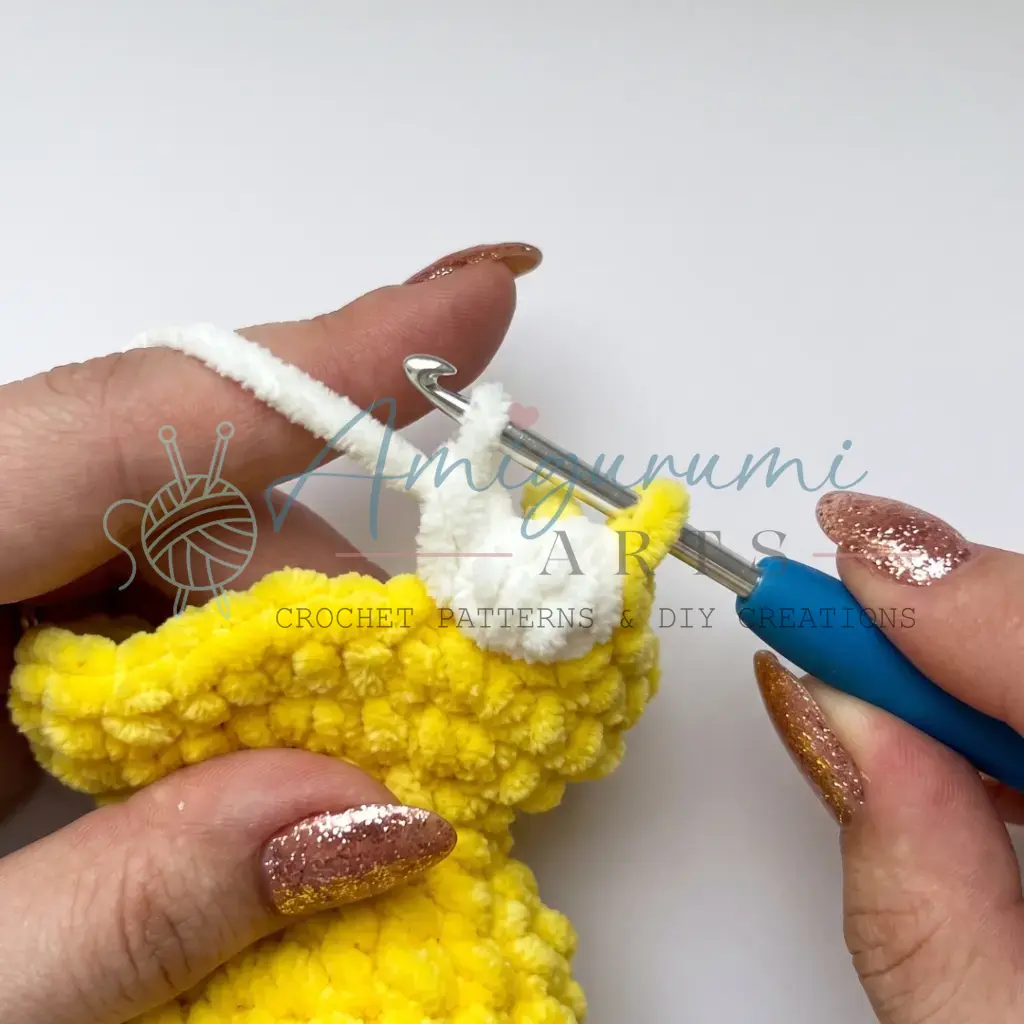
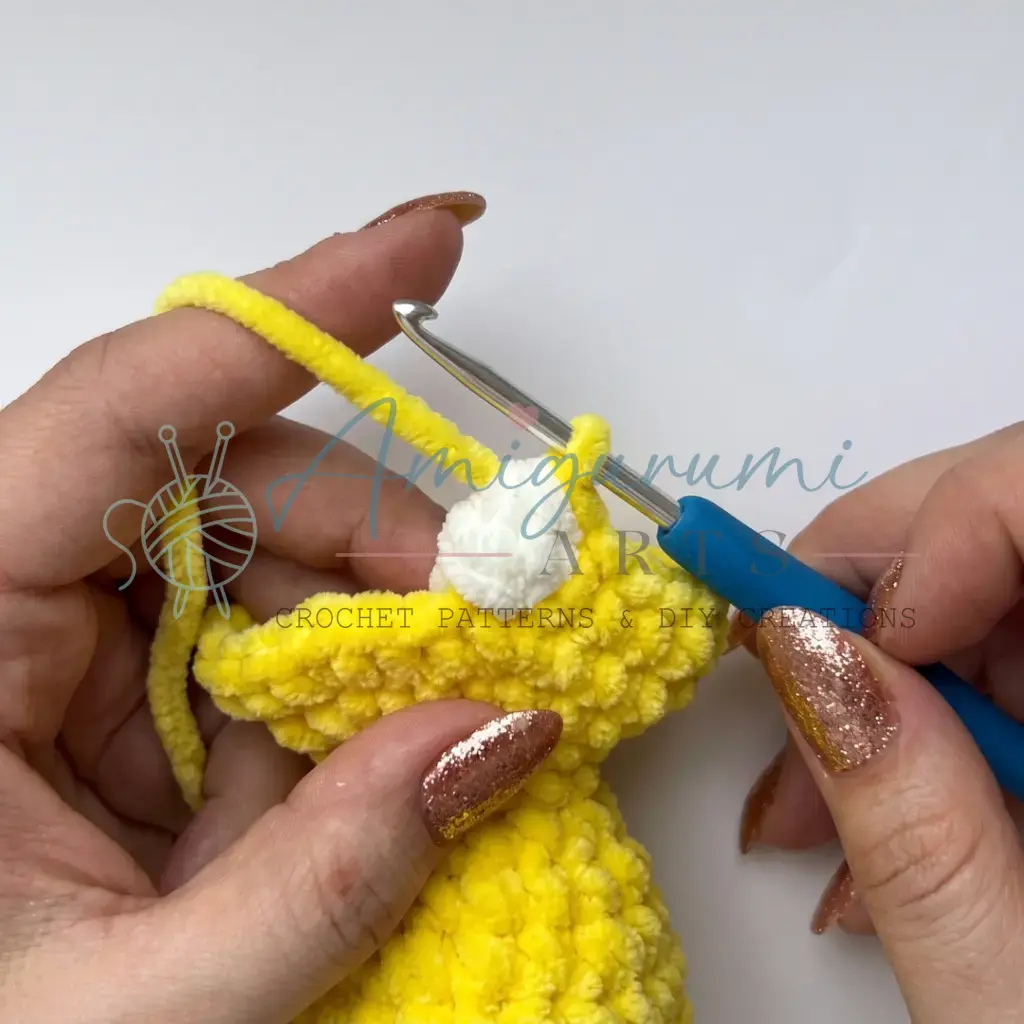
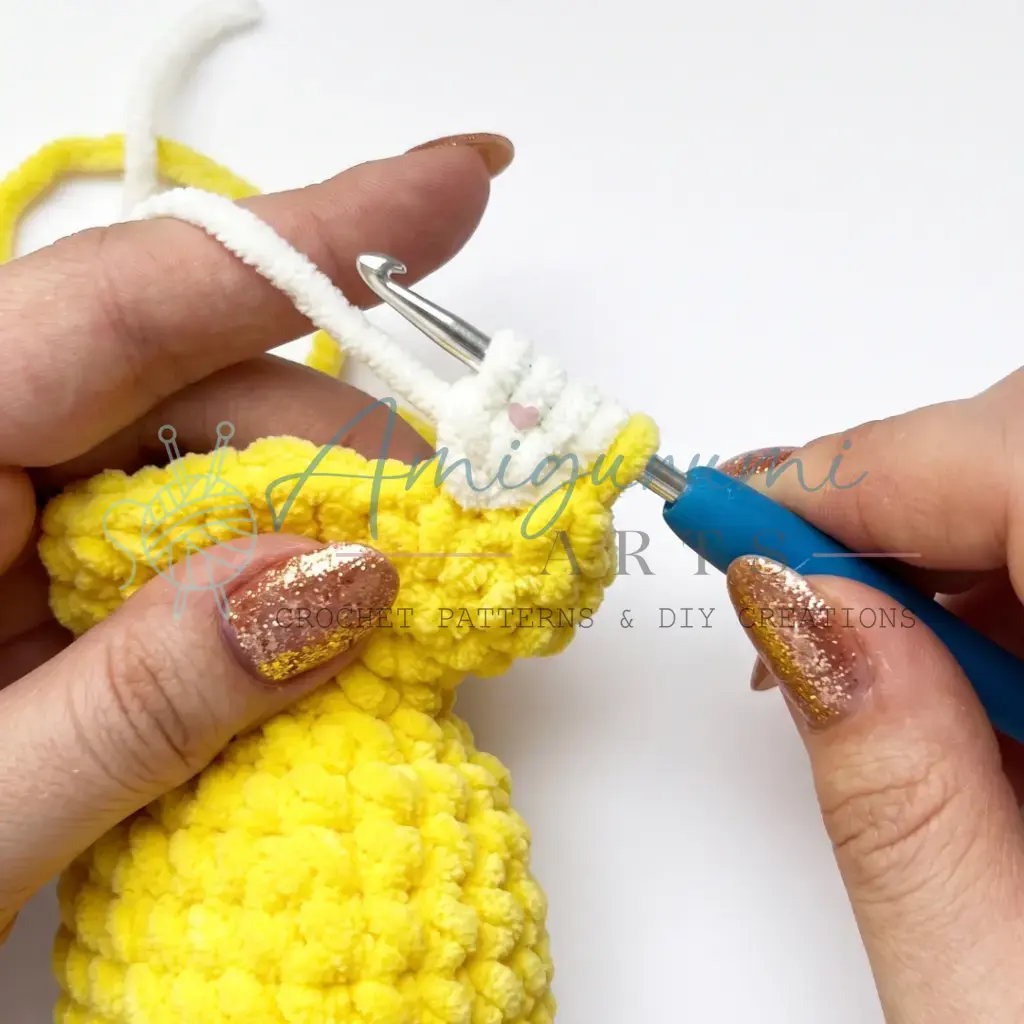
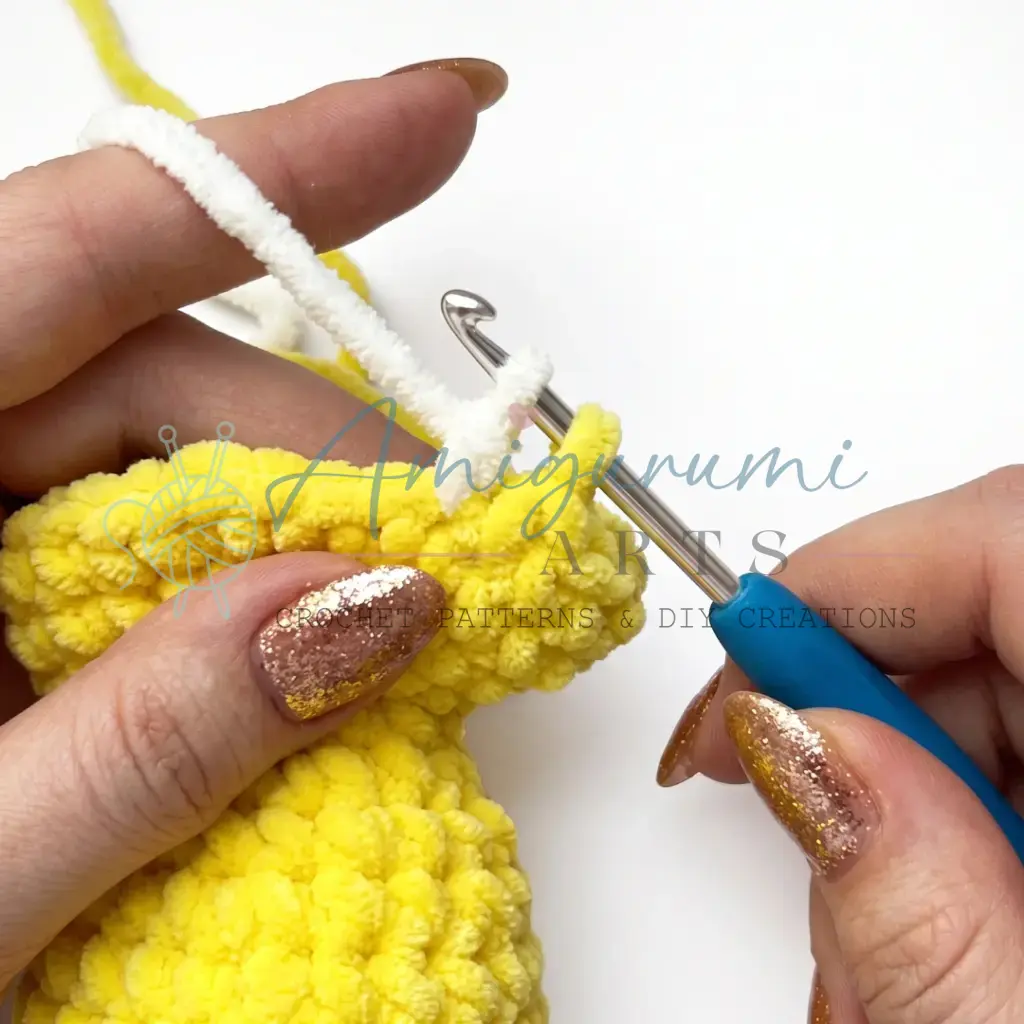
- Rnd 16: 14 sc in yellow; switch to cream/milk white yarn (do not cut yellow). Work a bobble stitch into the next stitch (4 incomplete dc in the same stitch, close all together at the top — use yellow yarn to close the bobble top); work a second bobble stitch the same way into the following stitch; fasten off and cut cream yarn; switch back to yellow yarn; 14 sc. (30)
Insert the safety nose between the two bobble stitches in Rnd 16, centered on the muzzle.
- Rnds 17–18: sc in each st around. (2 rounds) (30)
Insert the safety eyes between Rnds 17 and 18. Space the posts 6 stitches apart.
- Rnd 19: 3 sc, dec repeat 6 times around. (24)
- Rnd 20: 2 sc, dec repeat 6 times around. (18)
Stuff the piece firmly now.
- Rnd 21: 1 sc, dec repeat 6 times around. (12)
- Rnd 22: dec 6 times around. (6)
Pull the remaining stitches closed. Fasten off and weave in the end.
Mane
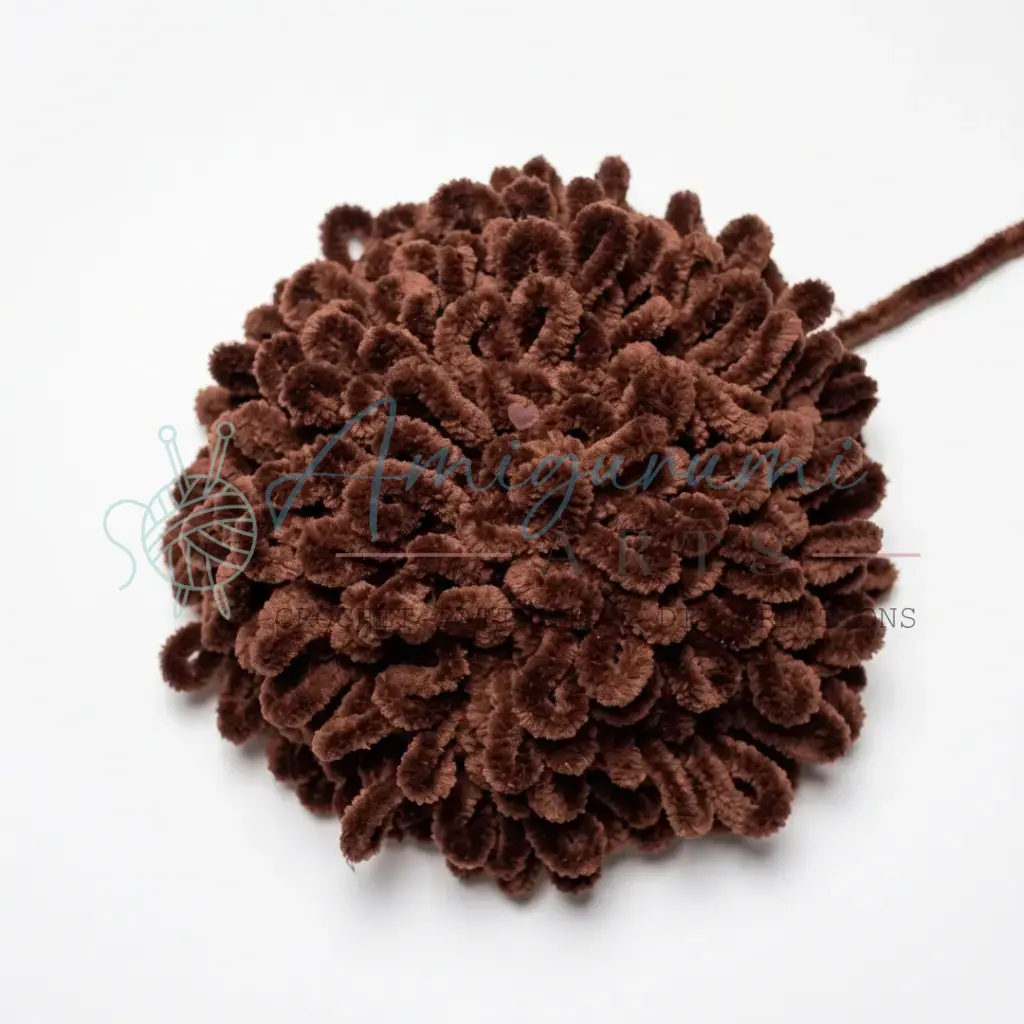
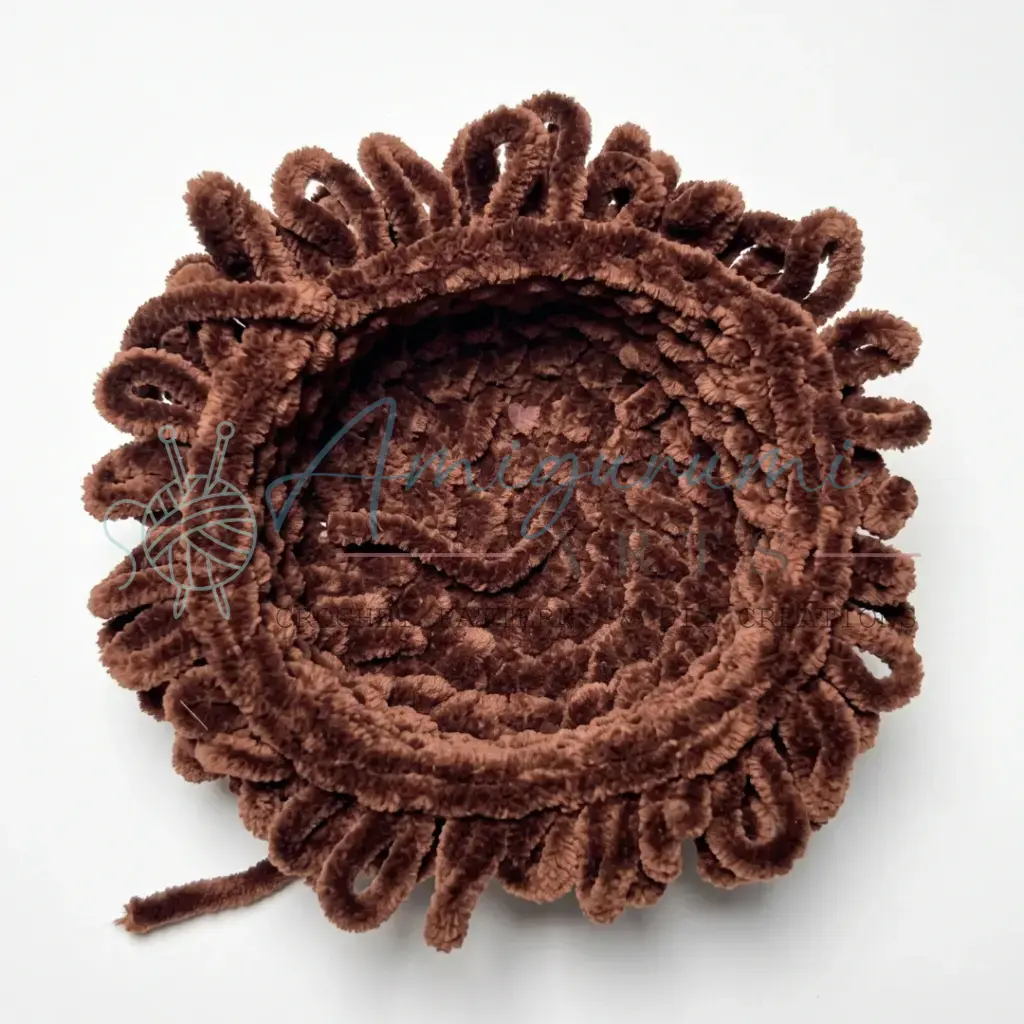
Work with brown yarn using elongated loop stitches throughout to create Fedya’s fluffy mane texture.
- Rnd 1: 6 sc in MR. (6)
- Rnd 2: inc in each st around. (12)
- Rnd 3: 1 sc, inc repeat 6 times around. (18)
- Rnd 4: 2 sc, inc repeat 6 times around. (24)
- Rnd 5: 3 sc, inc repeat 6 times around. (30)
- Rnds 6–7: sc in each st around using elongated loop stitches. (2 rounds) (30)
- Rnd 8: Work 20 sc (elongated loop stitches). Do not complete this round — leave the remaining 10 stitches unworked. These 10 unworked stitches will sit at the forehead area.
Fasten off, leaving a long tail for sewing.
Assembly
Putting Fedya Together
Needle-sculpt the face. Thread a long length of strong thread or yarn onto your tapestry needle. Insert the needle into the head at Rnd 12 (the neck area). Draw it out at Rnd 17 as close as possible to the inner corner of one eye. Re-insert the needle at the inner corner of the second eye and draw it back out at a stitch adjacent to where you first entered at Rnd 12. Pull the thread gently but firmly to create a subtle indentation around the eye area, shaping the muzzle. Secure the thread invisibly inside the head.
Embroider the face. Using cotton yarn, embroider the whites of the eyes, the eyelids, and a small vertical line running from the nose down to the muzzle center, referring to your reference photo for placement.
Attach the mane. Position the mane over the top and sides of the head, keeping the 10 unworked stitches at the forehead as shown in the reference photo. Sew the mane firmly in place using your tapestry needle and the yarn tail.
Attach the ears. Sew one ear to each side of the head above the mane, using the long yarn tails.
Attach the back legs. Sew the back legs to the body at Rnd 5, one on each side.
Attach the front legs. Sew the front legs to the body at Rnd 10, one on each side.
Attach the tail. Sew the tail centered between the two back legs at the base of the body.
Weave in all remaining ends.
Tips
- Keep your tension tight throughout the body. Plush yarn has a tendency to mask gaps, but loose stitches will let fiberfill peek through once the toy is stuffed. Aim for a dense, firm fabric where you cannot see daylight through the stitches.
- Close the bobble stitches with yellow yarn, not cream. The bobble muzzle on Rnd 16 is started in cream but the closing loop should be pulled through in yellow. This gives the muzzle a clean outline that reads as a distinct feature rather than a pale blob.
- Stuff firmly but not rock-hard. The body should feel pleasantly squishy — full enough to hold its round shape but soft enough to squeeze. If the base starts to pucker or the toy won’t stand, you’ve overstuffed; if the surface looks dimpled, add a little more fiberfill before closing.
- Practice the elongated loop stitch before starting the mane. This stitch creates loops of a specific, consistent length — and inconsistent loop height is the most common mane issue. Work a small test swatch in your brown yarn to find a comfortable finger height for wrapping the loops, then stick with it throughout Rnds 6–8.
- Sew parts on with a doubled yarn tail. When attaching the legs, ears, and mane, thread both strands of your yarn tail through the needle together. The doubled thickness fills the seam more completely and keeps heavier parts like the legs from sagging over time.
FAQs
Can I use a different yarn for Fedya?
Yes, you can use any bulky-weight plush or velvet yarn similar to YarnArt Dolce. Keep in mind that different yarns may result in a slightly different finished size, so check your gauge if you want Fedya to be exactly 20 cm tall.
How do I make the elongated loop stitches for the mane?
The elongated loop stitch (or loopy stitch) is worked from the right side. You wrap the yarn around your hook or finger to create a loop of a specific length, then complete the stitch. It is highly recommended to practice this on a small swatch first to ensure your loops are consistent in height.
Why is the head and body worked as one piece?
Working the head and body as one continuous piece eliminates the need to sew a large seam between them, resulting in a smoother, more rounded silhouette and less assembly work.
What is needle-sculpting?
Needle-sculpting is a technique used to shape the face without stuffing it too tightly. By threading a strong thread through the head and pulling it gently around the eye area, you create subtle indentations that give the muzzle definition and character.
How do I attach the safety nose?
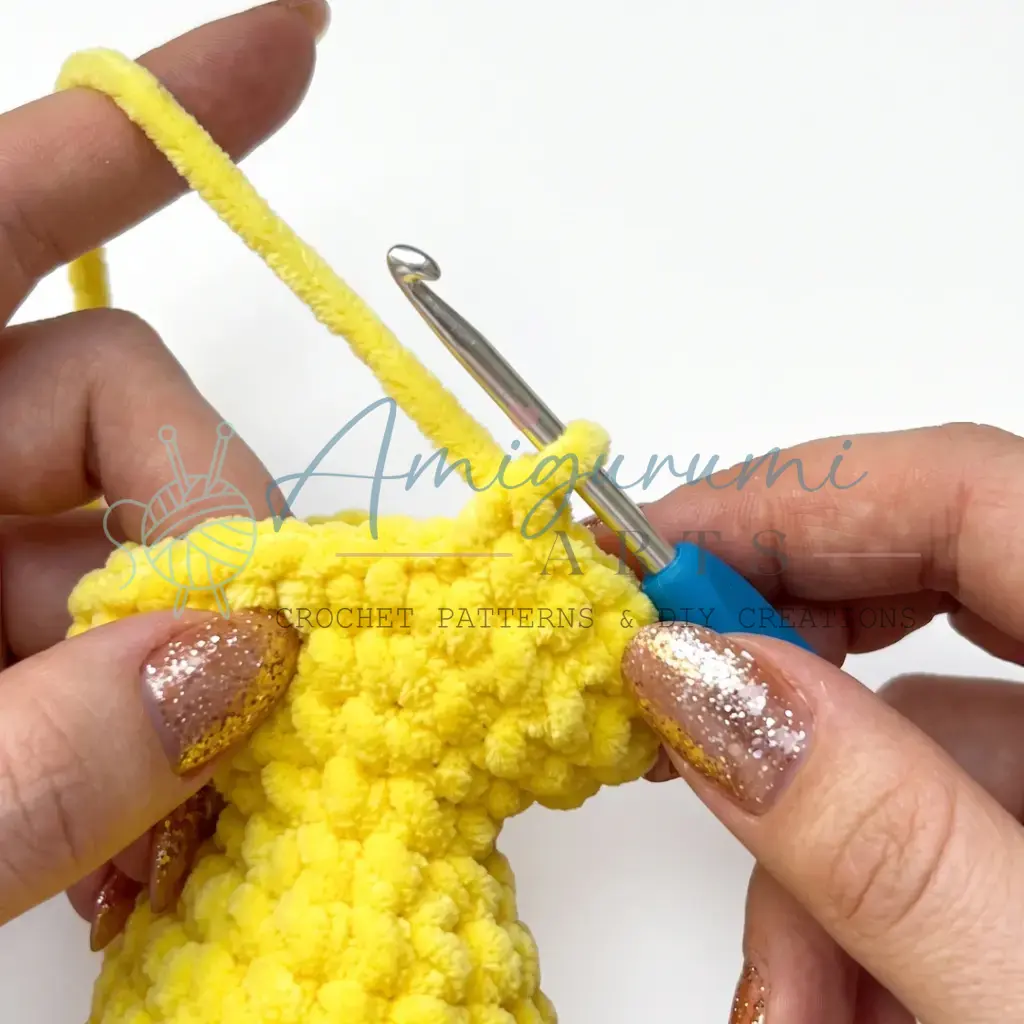
The safety nose is inserted between the two bobble stitches in Round 16 of the head/body piece. It should be centered on the muzzle and inserted from the inside before the piece is fully closed.
Pin This Crochet Pattern!