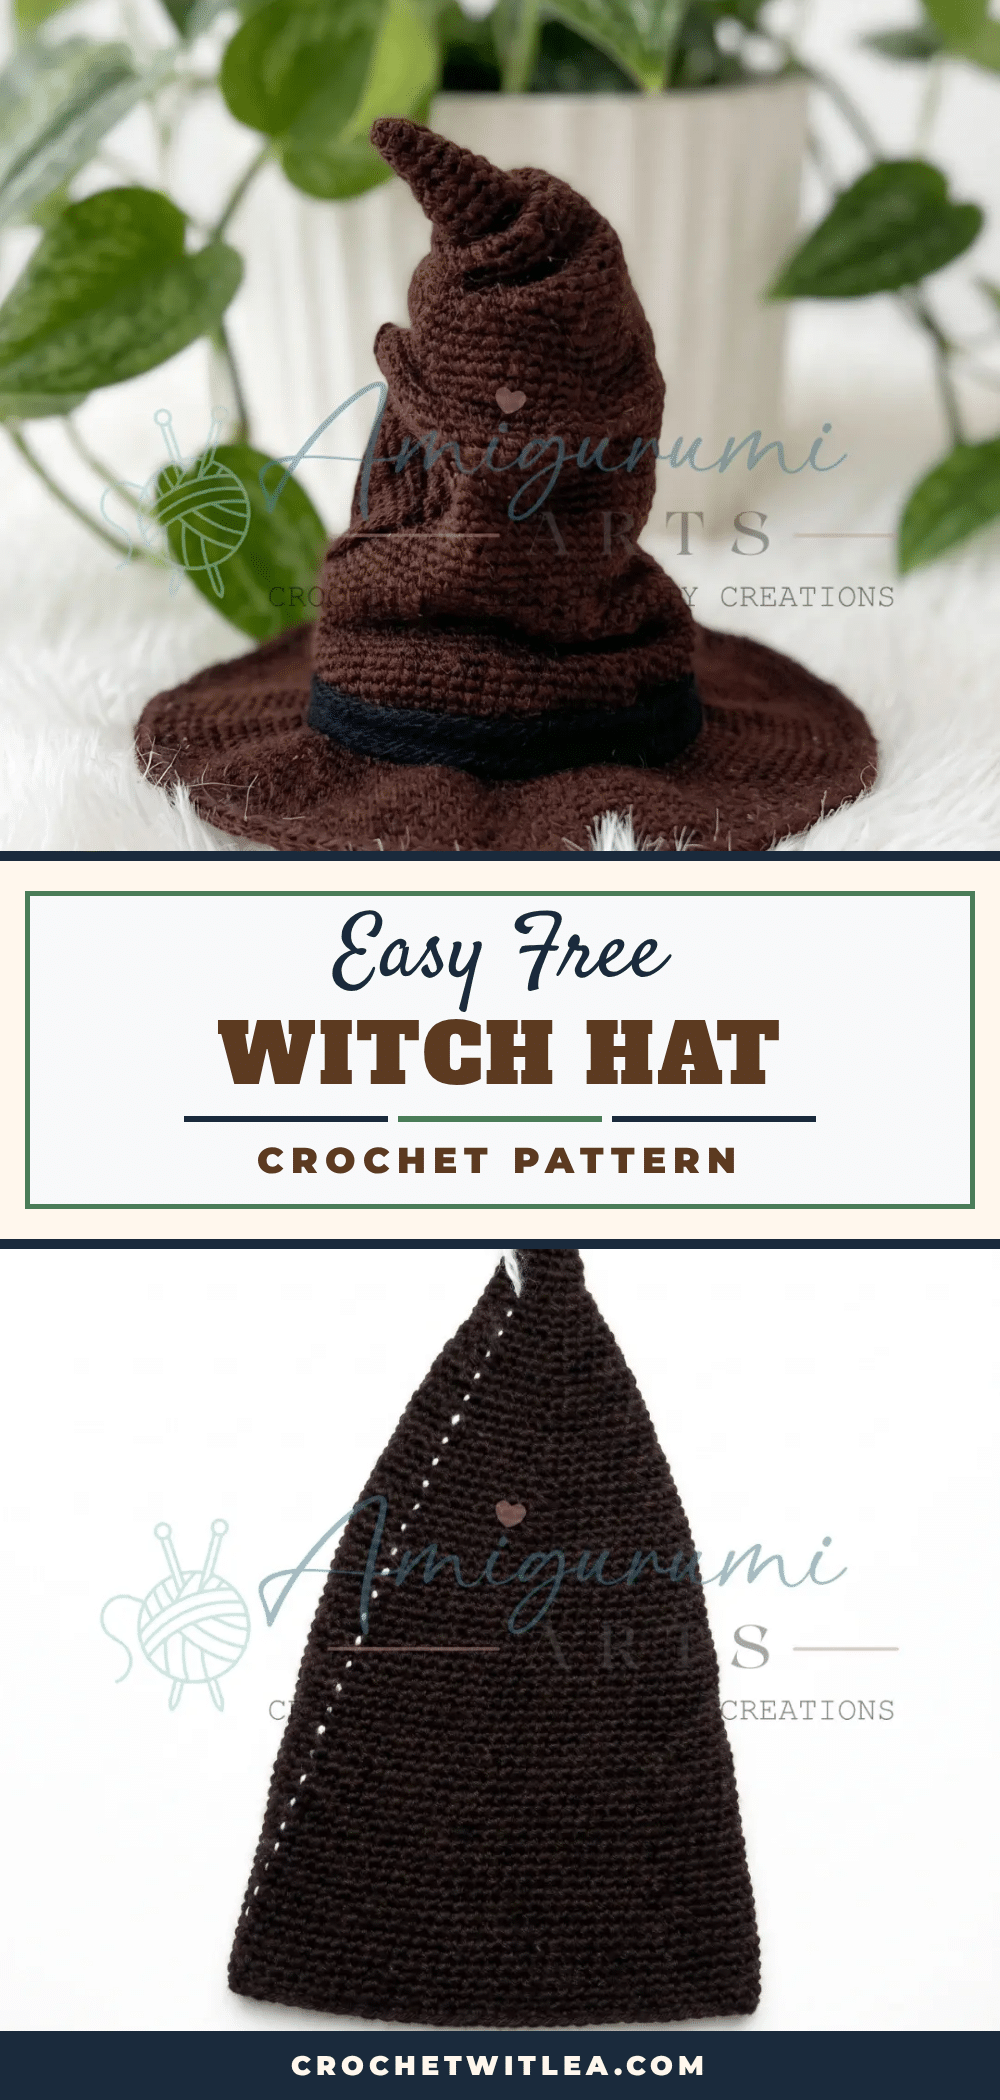
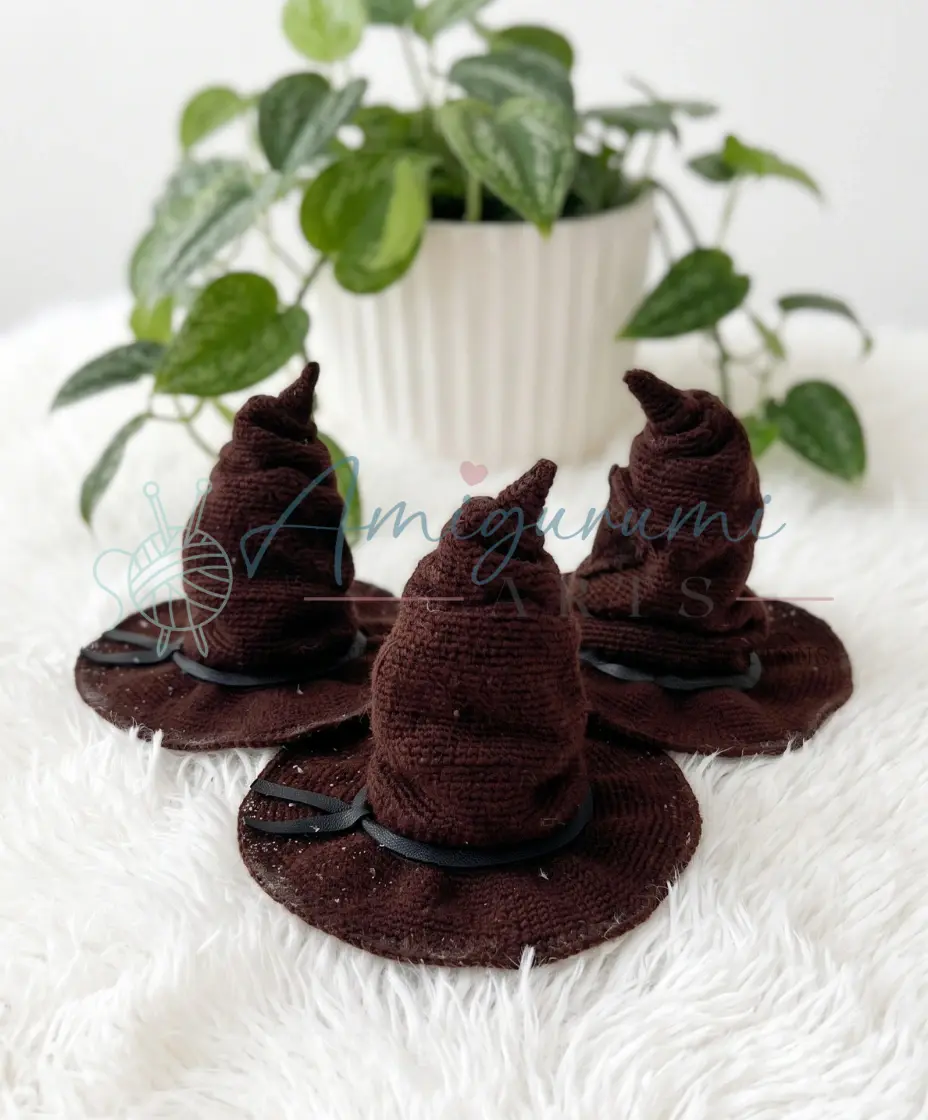
There is a specific kind of magic that happens when you pull a skein of mohair-blend yarn from the back of your stash and decide it is destined for a character piece rather than a simple scarf. For this witch hat, the choice of a brown mohair blend—ideally something like NAKO Mohair Delicate or a similar fingering-weight equivalent—was the first step in bringing this prop to life. The halo of the fiber naturally softens the tight tension required for the 1.25 mm steel hook, creating a texture that feels both ancient and cozy. It is this tactile decision that transforms a standard crochet project into an heirloom-worthy Halloween prop, setting the stage for the dramatic drape and expressive sculpting that follows.
Yarn and Color Notes
Choosing the right yarn is crucial for the “soul” of this hat. The source pattern calls for a brown mohair-blend yarn (approximately 500 m / 100 g). The fuzziness of the mohair is intentional; it helps hide the stuffing and gives the hat a soft, slouchy silhouette that rigid cotton or acrylic might lack. While the original pattern uses a specific brand, any equivalent fingering or lace-weight mohair blend in a warm brown tone will work beautifully. The color palette is kept simple to allow the texture and the sculpted details to take center stage, with the final weathering effect adding depth to the monochromatic base.
Project Overview
This crochet witch hat pattern is rated intermediate. It is not a quick novelty item but a character piece designed to stop people in their tracks. The construction involves a tall, slouchy crown worked in joined rounds and a wide brim worked in a continuous spiral. The brim is reinforced with craft wire to hold its dramatic shape, and the hat’s personality is created through a unique needle-sculpting technique that forms face folds, a “mouth,” and brow ridges. The final touches include leather trim, a fabric patch, and a subtle paint toning to give the hat a weathered, aged look.
Materials
- Yarn: Brown mohair-blend yarn (Fingering/Lace weight, approx. 500 m / 100 g). The original uses NAKO Mohair Delicate or equivalent.
- Hook: 1.25 mm steel hook (no standard US letter equivalent; use the smallest steel hook in your set).
- Stuffing: A small amount of fiberfill.
- Fabric: A small piece of brown fabric, approx. 3 × 3 cm, for the patch detail.
- Leather/Faux Leather: A crescent-shaped piece (cut from a 9 cm diameter circle) for the back neckpiece, plus one strip 5 mm wide × 35 cm long for the hat band.
- Wire: Thin craft wire, enough to run along the full outer edge of the brim.
- Ribbon: Black ribbon, two pieces each approx. 10 cm long, for ties.
- Stitch markers: At least 1.
- Needles: Yarn needle/tapestry needle, including a long doll needle for face sculpting.
- Scissors.
- Paint: White acrylic paint + a stiff brush for the toning/weathering finish.
- Adhesive: Strong craft glue or needle and thread for attaching fabric and leather details.
- Tape: Clear or masking tape for securing wire ends.
Gauge and Finished Size
Gauge is not critical for this decorative prop hat. However, working with a tight tension is highly recommended so the mohair fabric holds its shape and hides the stuffing cleanly. If your work feels loose or floppy, consider going down one hook size.
Abbreviations
- ch: Chain
- dec: Decrease (invisible decrease: insert hook in front loop of next st, then front loop of following st, yarn over, pull through both loops, yarn over, pull through remaining 2 loops)
- inc: Increase (2 sc in the same stitch)
- MR: Magic Ring
- sc: Single Crochet
- sl st: Slip Stitch
Pattern Notes
This pattern is written in US crochet terminology. The hat crown is worked in joined rounds (foundation chain closed into a ring with a slip stitch), then worked in a continuous spiral upward. The hat brim is worked in a continuous spiral outward from a magic ring. Stitch counts are given in parentheses at the end of each round. The crown is stuffed lightly before assembly enough to hold its form, not so firm that it loses the soft, slouchy character of the mohair. Wire is added along the outer edge of the brim after crocheting is complete; single crochet is worked directly over the wire to encase it. All shaping of the face folds, the “mouth,” and the brow ridges is done after assembly using a long doll needle threaded with matching yarn.
Pattern Instructions
Hat Crown
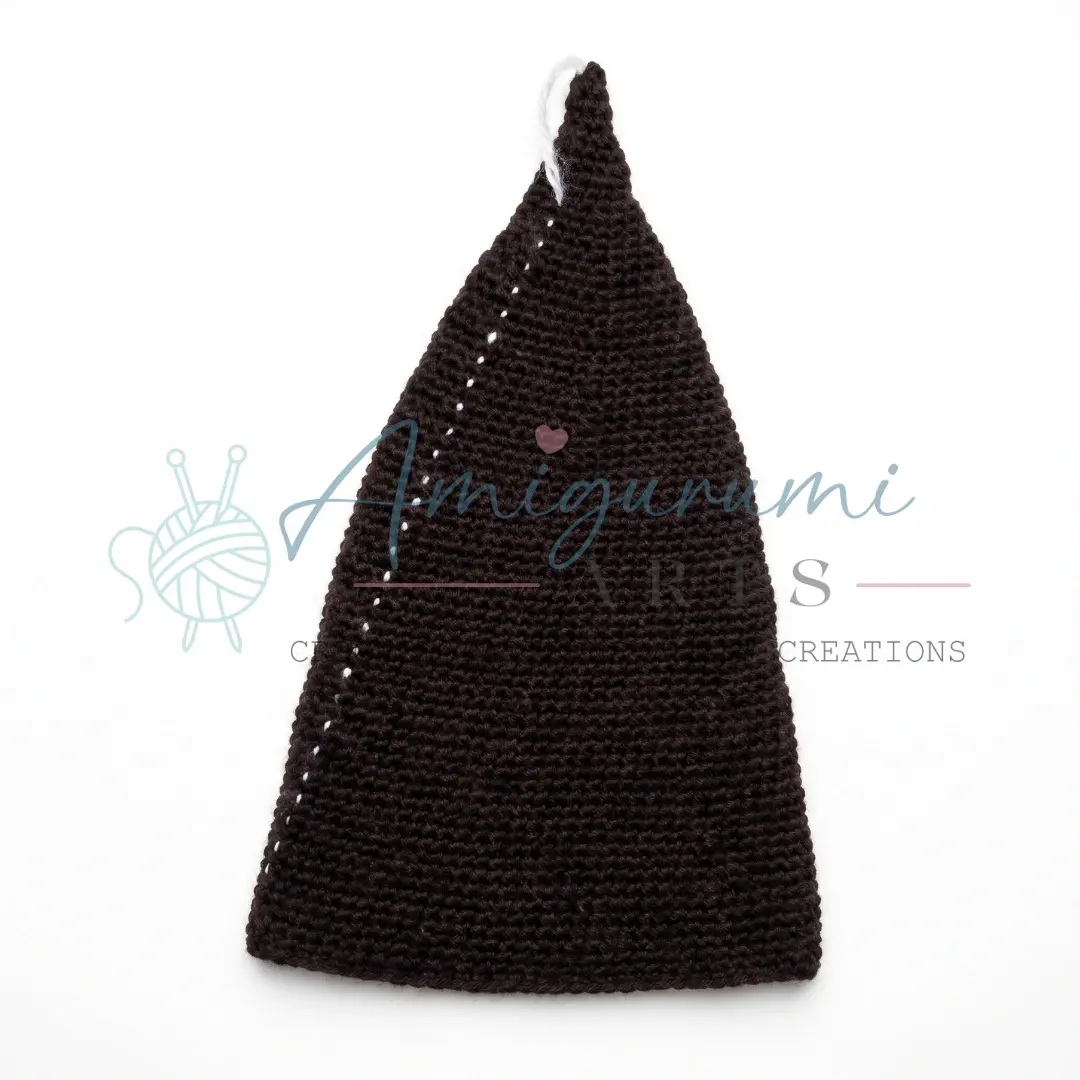
Brown yarn, 1.25 mm hook. Foundation chain closed into a ring.
Chain 70, join with a sl st to form a ring, being careful not to twist the chain.
- Rnds 1–10: sc in each st around. (70)
- Rnd 11: dec, 12 sc repeat 5 times around. (65)
- Rnds 12–21: sc in each st around. (65)
- Rnd 22: dec, 11 sc repeat 5 times around. (60)
- Rnds 23–32: sc in each st around. (60)
- Rnd 33: dec, 10 sc repeat 5 times around. (55)
- Rnds 34–41: sc in each st around. (55)
- Rnd 42: dec, 9 sc repeat 5 times around. (50)
- Rnds 43–44: sc in each st around. (50)
- Rnd 45: dec, 8 sc repeat 5 times around. (45)
- Rnds 46–47: sc in each st around. (45)
- Rnd 48: dec, 7 sc repeat 5 times around. (40)
- Rnds 49–51: sc in each st around. (40)
- Rnd 52: dec, 6 sc repeat 5 times around. (35)
- Rnds 53–54: sc in each st around. (35)
- Rnd 55: dec, 5 sc repeat 5 times around. (30)
- Rnd 56: sc in each st around. (30)
- Rnd 57: dec, 4 sc repeat 5 times around. (25)
- Rnd 58: sc in each st around. (25)
- Rnd 59: dec, 3 sc repeat 5 times around. (20)
- Rnds 60–61: sc in each st around. (20)
- Rnd 62: dec, 2 sc repeat 5 times around. (15)
- Rnds 63–65: sc in each st around. (15)
- Rnd 66: dec, 3 sc repeat 3 times around. (12)
- Rnd 67: sc in each st around. (12)
- Rnd 68: dec, 1 sc repeat 4 times around. (8)
- Rnds 69–71: sc in each st around. (8)
Continue decreasing until the opening closes completely. Fasten off and weave in ends. Stuff lightly with fiberfill — the crown should hold its shape without feeling rigid.
Hat Brim
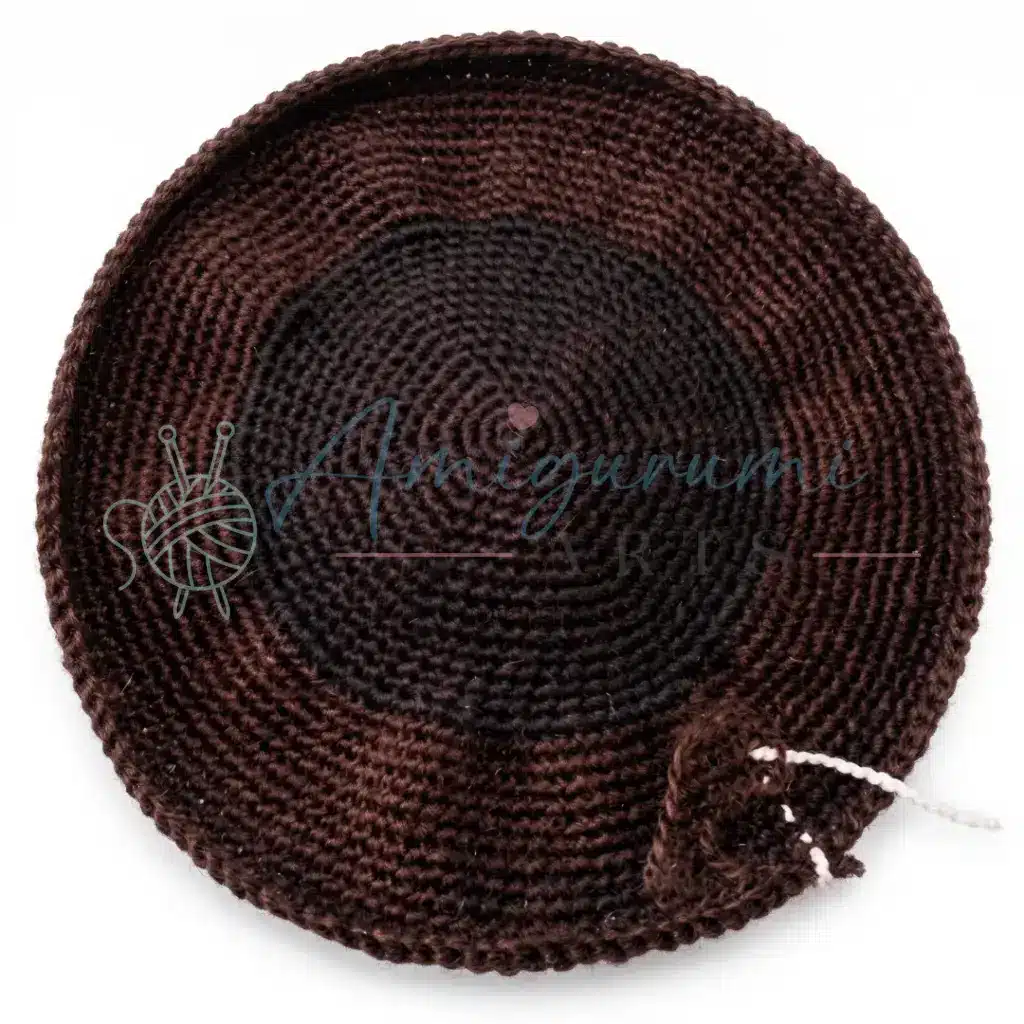
Brown yarn, 1.25 mm hook. Start with a magic ring.
- Rnd 1: 6 inc in MR. Pull ring closed. (12)
- Rnd 2: 1 sc, inc repeat 6 times around. (18)
- Rnd 3: 2 sc, inc repeat 6 times around. (24)
- Rnd 4: 3 sc, inc repeat 6 times around. (30)
- Rnd 5: 4 sc, inc repeat 6 times around. (36)
- Rnd 6: 5 sc, inc repeat 6 times around. (42)
- Rnd 7: 6 sc, inc repeat 6 times around. (48)
- Rnd 8: 7 sc, inc repeat 6 times around. (54)
- Rnd 9: 8 sc, inc repeat 6 times around. (60)
- Rnd 10: 9 sc, inc repeat 6 times around. (66)
- Rnd 11: inc, 15 sc, inc, 16 sc, inc, 15 sc, inc, 16 sc. (70)
- Rnd 12: inc in each st around. (140)
- Rnds 13–25: sc in each st around. (140)
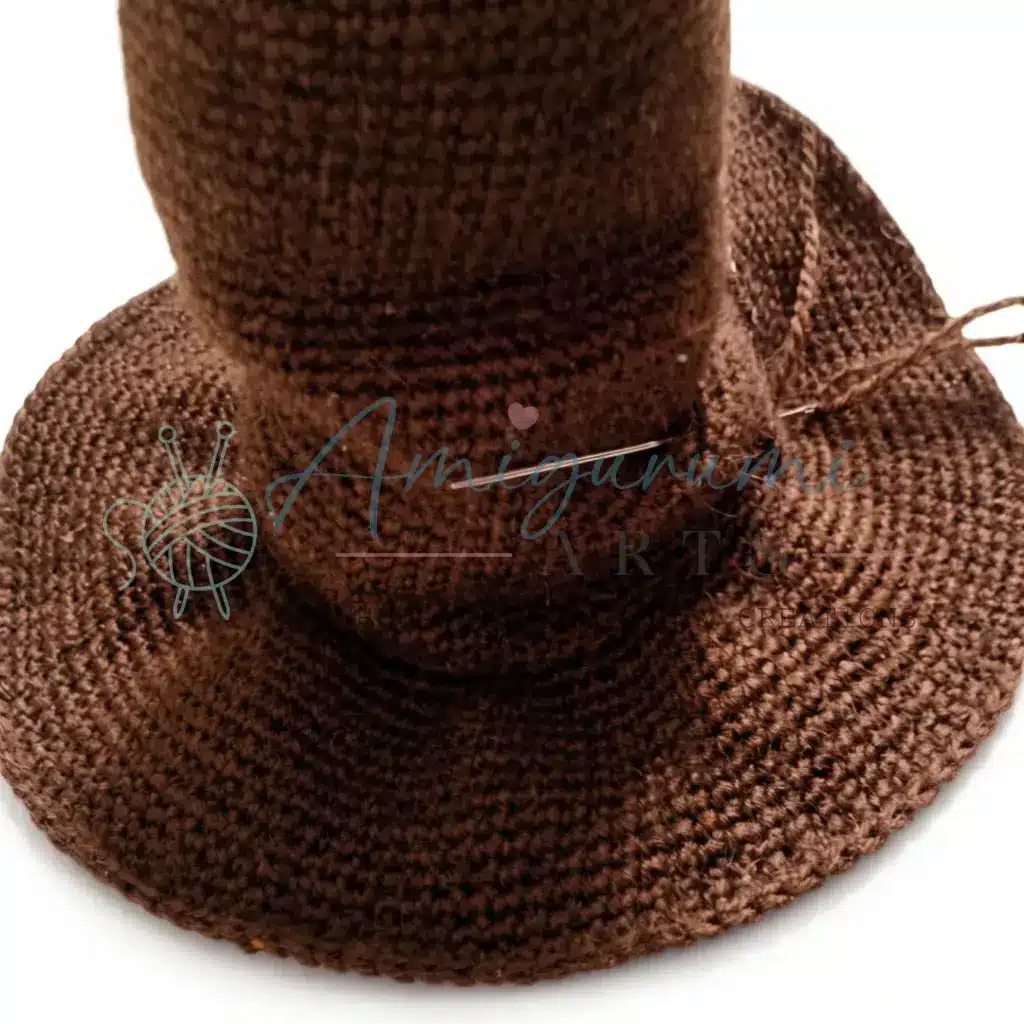
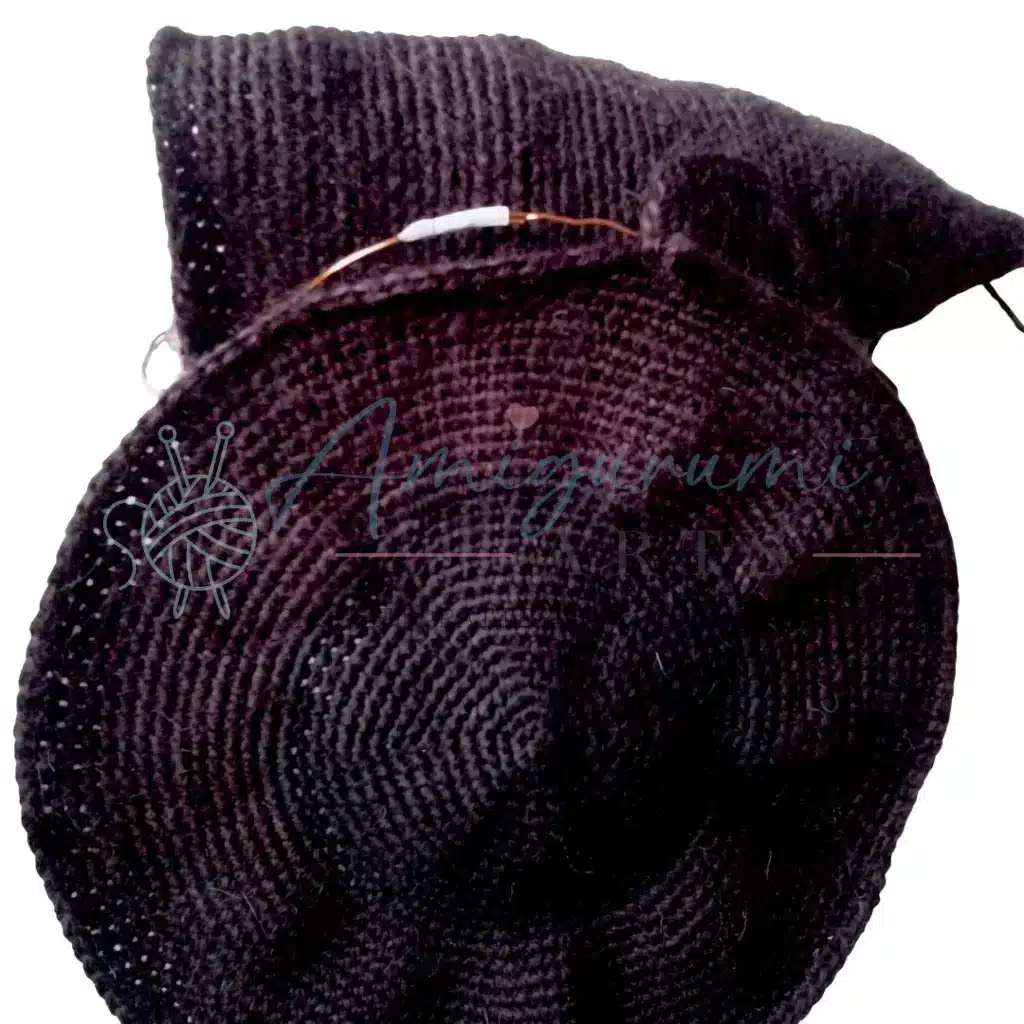
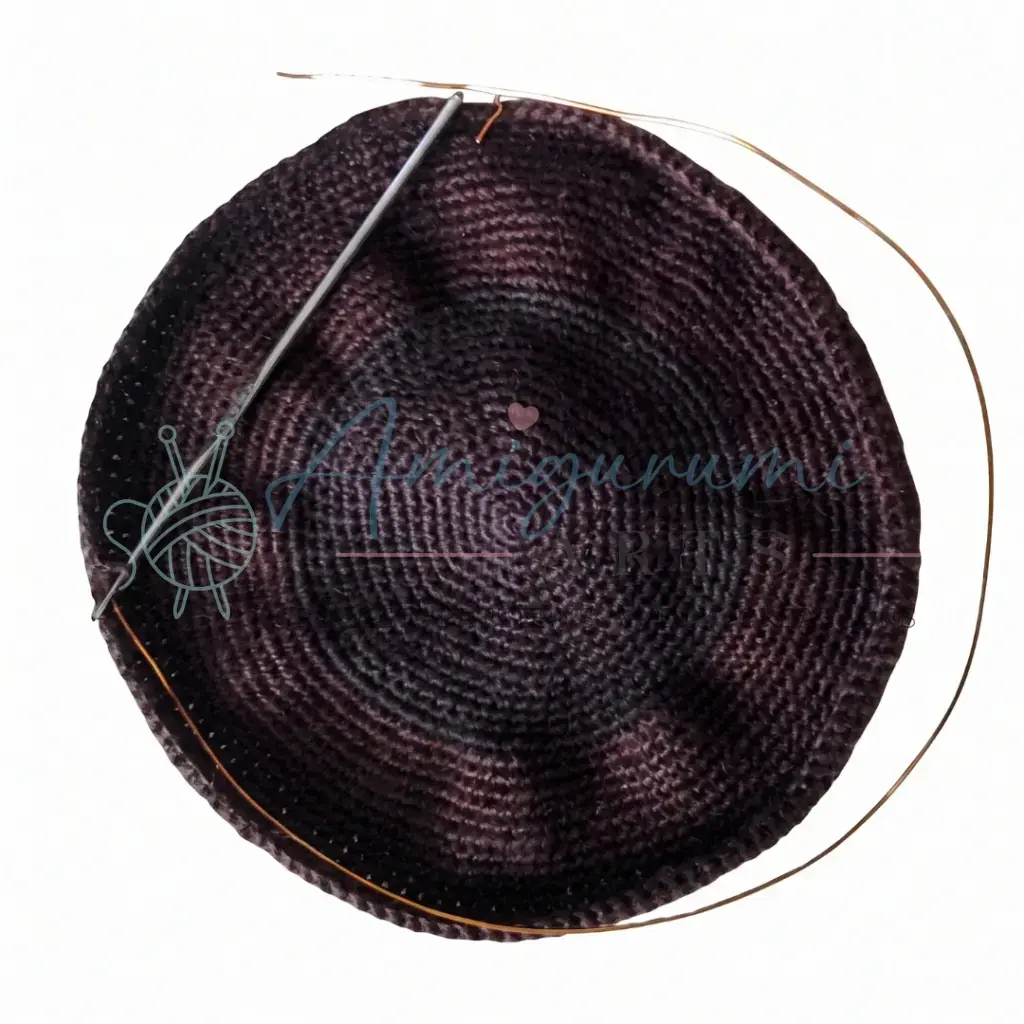
After Rnd 25, do not fasten off. Lay thin craft wire along the entire outer edge of the brim. Work one final round of sc directly over the wire, encasing it within the stitches as you go. When you return to the start, overlap the wire ends slightly and secure them firmly with a small piece of tape before fastening off and weaving in your yarn ends.
Assembly
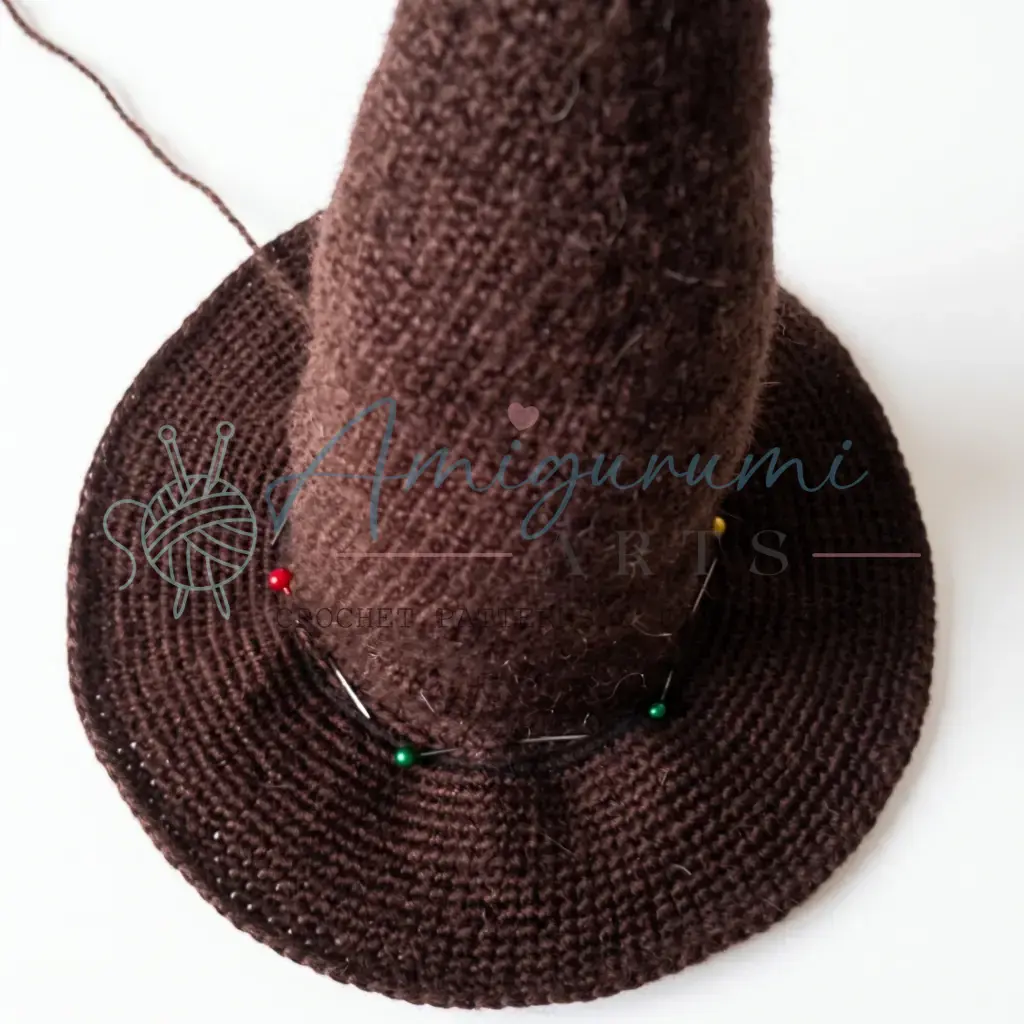
- Attach Crown to Brim: Pin the hat crown to the center of the brim, aligning the base of the crown with the center opening of the brim. The crown should sit upright and centered. Using a yarn needle threaded with brown yarn, whipstitch the crown securely to the brim all the way around. Take your time here — a neat, even seam will make the whole hat look polished.
- Add the Fabric Patch: Cut a 3 × 3 cm square of brown fabric. Fray all four edges slightly by pulling at the threads for a worn, aged look. Sew or glue the patch onto the hat in your preferred position.
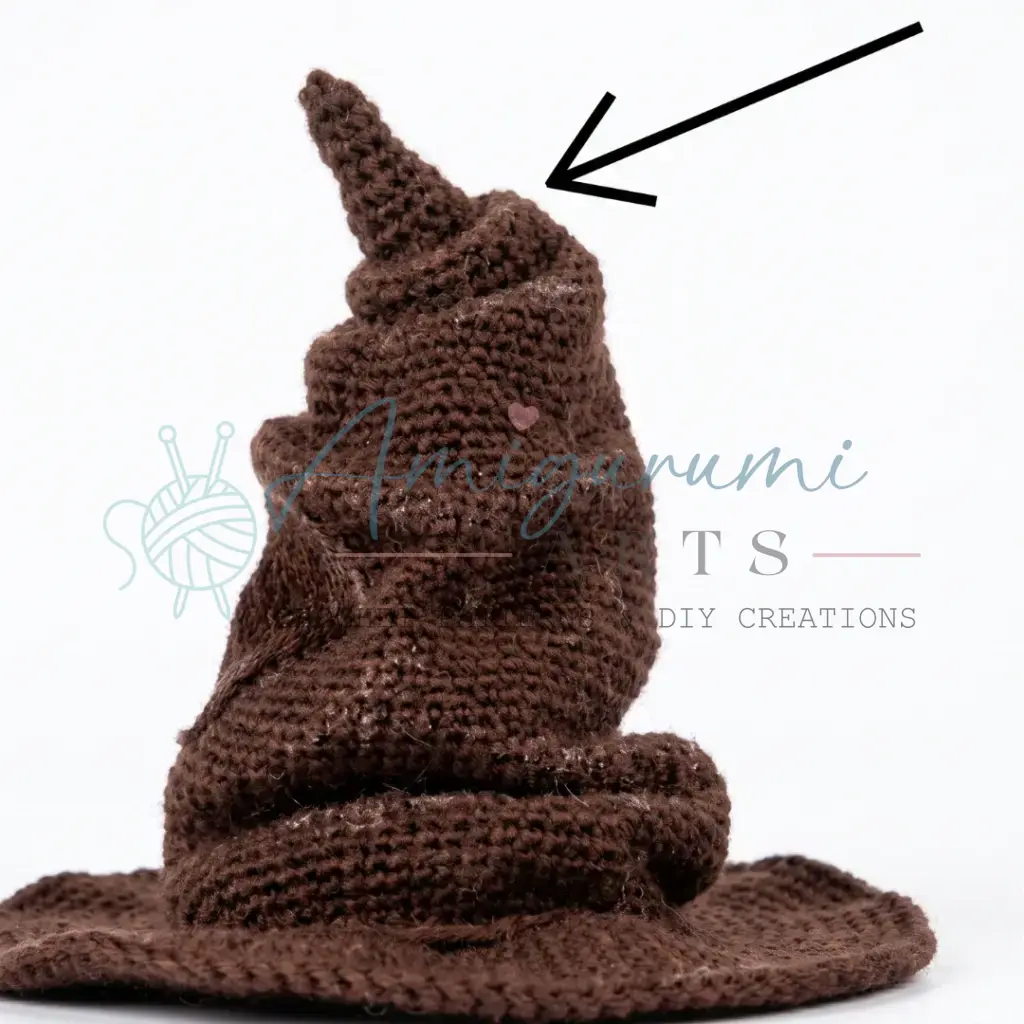
- Needle-sculpt the Face Folds: Thread a long doll needle with a length of matching brown yarn. Starting from the bottom of the hat, push the needle through the hat body and pull it back out nearby, drawing the yarn through to create a pinched fold. Secure each fold with a small anchoring stitch. Work the folds upward to suggest a face — forming a “mouth” area and brow ridges above the eye positions. After each pull, step back and assess the shape from a distance.
- Form the Brow Pinches: Pinch small tucks of fabric above the eye area and secure each one with a stitch, then create one larger fold above the brows and one final fold at the very top of the crown for extra character.
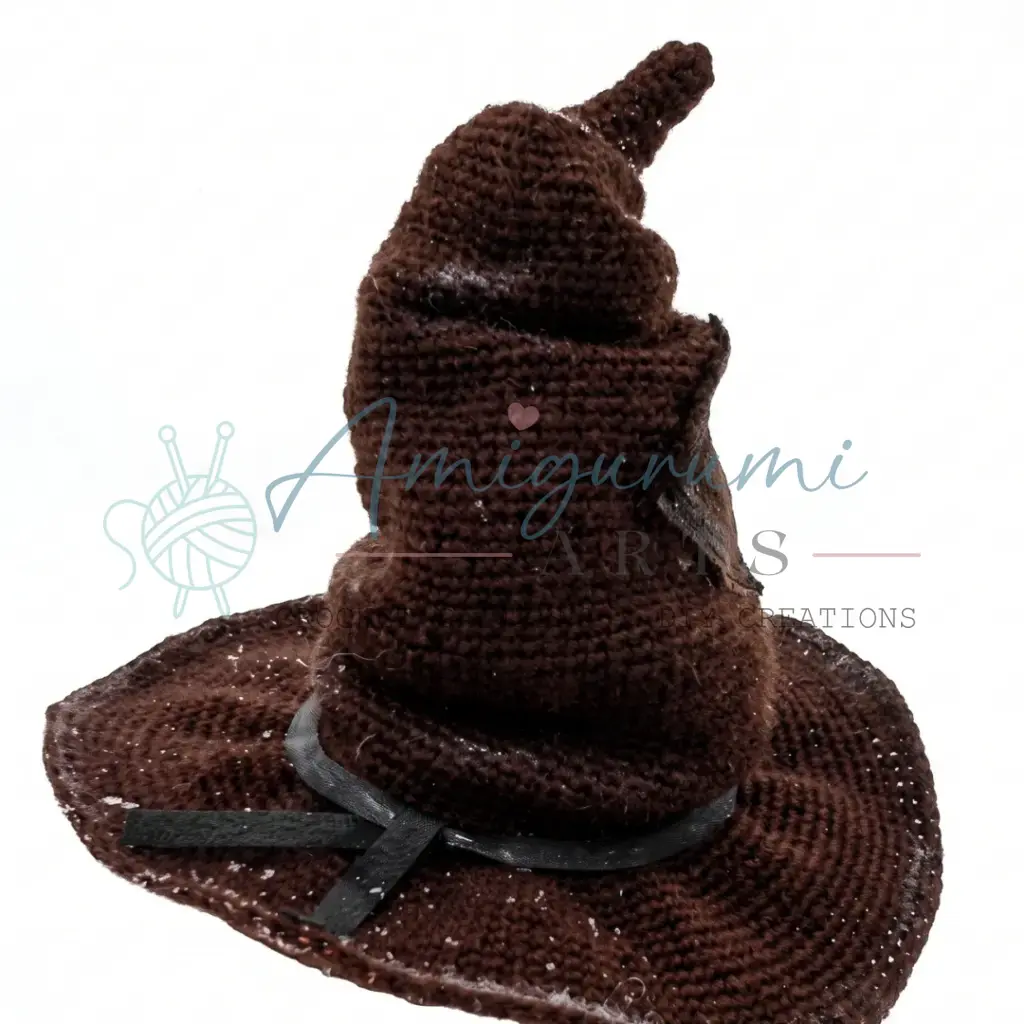
- Attach the Leather Neckpiece: From leather or faux leather, mark a circle 9 cm in diameter and cut a crescent shape from it. Sew or glue this crescent to the lower back of the hat (at the neckline area).
- Attach the Ribbon Ties: Sew two pieces of black ribbon, each approx. 10 cm long, to either side of the lower edge of the hat near the leather neckpiece.
- Attach the Hat Band Strip: Cut a strip of leather or faux leather 5 mm wide and 35 cm long. Glue it around the base of the crown where it meets the brim, trimming as needed for a neat join.
- Apply the Paint Toning: Dip the very tip of a stiff brush into white acrylic paint, then wipe most of the paint off onto a scrap of paper. Using a nearly-dry brush, lightly sweep the remaining paint across all the raised edges and fold lines of the hat. This gives the surface a subtly weathered, aged look. Let dry completely.
- Weave in any remaining yarn ends.
Tips
- Work tightly and consistently with mohair. Mohair-blend yarns are forgiving of small tension variations because the halo hides a lot — but for this hat to hold its shape, you want a firm, even fabric. If your work feels loose or floppy, try going down one hook size.
- Go slow with the needle sculpting. This is the step that turns a hat into a character. Pull each stitch slowly and check from arm’s length before securing it. You can always release an unsecured pull and redo it once it’s anchored with a knot, that fold is permanent.
- Don’t over-stuff the crown. A little fiberfill goes a long way here. You want the hat to keep its tall, slightly slouchy silhouette, not puff out into a cylinder. Fill it lightly if you can feel the stuffing when you gently squeeze the sides, that’s likely enough.
- Pre-shape the wire before attaching it. Before you start encasing the wire in the final brim round, bend it into a rough circle that matches the brim’s outer edge. This makes it far easier to keep the wire on the outer edge as you crochet over it, and the finished brim will drape much more naturally.
- Use a nearly-dry brush for the paint toning. The goal is a whisper of white on raised surfaces, not visible brushstrokes. If you can clearly see wet paint on the hat, there’s too much on your brush. The effect should look like natural wear and light catching the edges blend it gently and build it up in thin layers if needed.
FAQs
What hook size should I use for this pattern?
You will need a 1.25 mm steel hook. Since this size does not have a standard US letter equivalent, use the smallest steel hook available in your set. Tight tension is key to making the mohair hold its shape.
Can I use a different type of yarn?
While you can use other yarns, the mohair-blend is recommended for the specific slouchy, textured look of this prop. If you use a non-mohair yarn, you may need to stuff the crown more firmly to maintain the shape, as the fiber won’t provide the same natural bulk.
How do I keep the brim from flopping over?
The brim is reinforced with thin craft wire. After completing Round 25 of the brim, lay the wire along the outer edge and crochet one final round of single crochet directly over it to encase the wire. This gives the brim its dramatic, structured drape.
What is the needle-sculpting technique?
Needle-sculpting involves using a long doll needle threaded with matching yarn to pull fabric through the hat body. This creates pinched folds that suggest a face, such as a mouth or brow ridges. It is done after assembly to give the hat its unique character.
Is gauge important for this project?
Gauge is not critical for this decorative prop. However, working with a tight tension is highly recommended so the mohair fabric holds its shape and hides the stuffing cleanly.
Pin This Crochet Pattern!