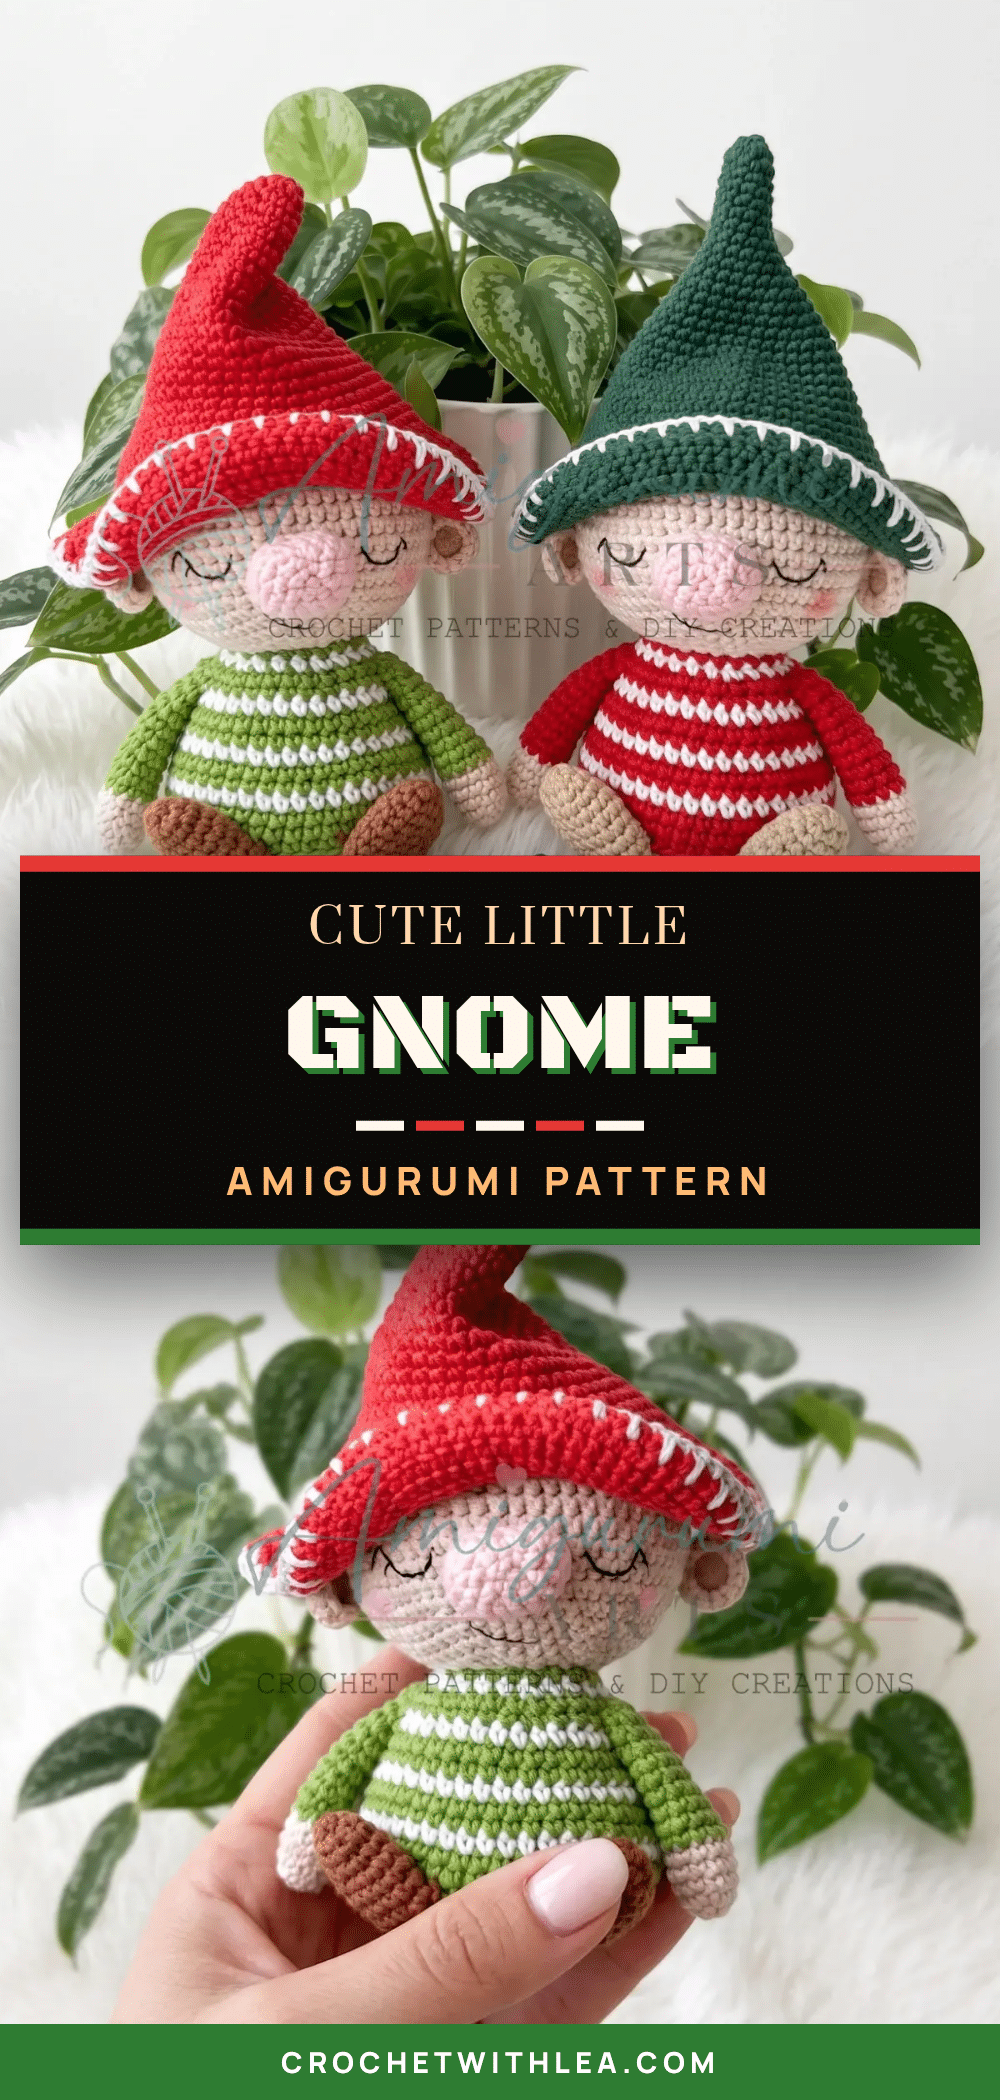
Have you ever finished a round of decreases, turned your work over, and realized you missed a stitch or two? That sinking feeling of a hole appearing in your amigurumi is a rite of passage for many crocheters. It’s easy to worry that your tension is too loose or that your stitch count is off, but this Little Gnome Amigurumi is designed to be forgiving. With a tight gauge and the use of invisible decreases, even the most anxious beginner can create a sturdy, charming friend. This project is approachable, structured, and perfect for building confidence while making a delightful holiday decoration.
Maker Notes
There is something undeniably cozy about a little gnome sitting on a shelf. This pattern uses YarnArt Jeans, a cotton-acrylic blend that provides a smooth finish and excellent stitch definition. The color palette—earthy greens, warm beiges, and a classic red hat—gives the gnome a timeless, whimsical look. I love that the hat brim is worked in a specific way to create a natural, rolled effect without needing extra stuffing or stiffening. It’s a project that rewards patience; the more firmly you stuff the body and head, the better the gnome will stand upright. Whether you are making this for a holiday gift or just to add a touch of magic to your home, the assembly process allows you to tweak the expression by adjusting the nose and eyes.
Project Overview
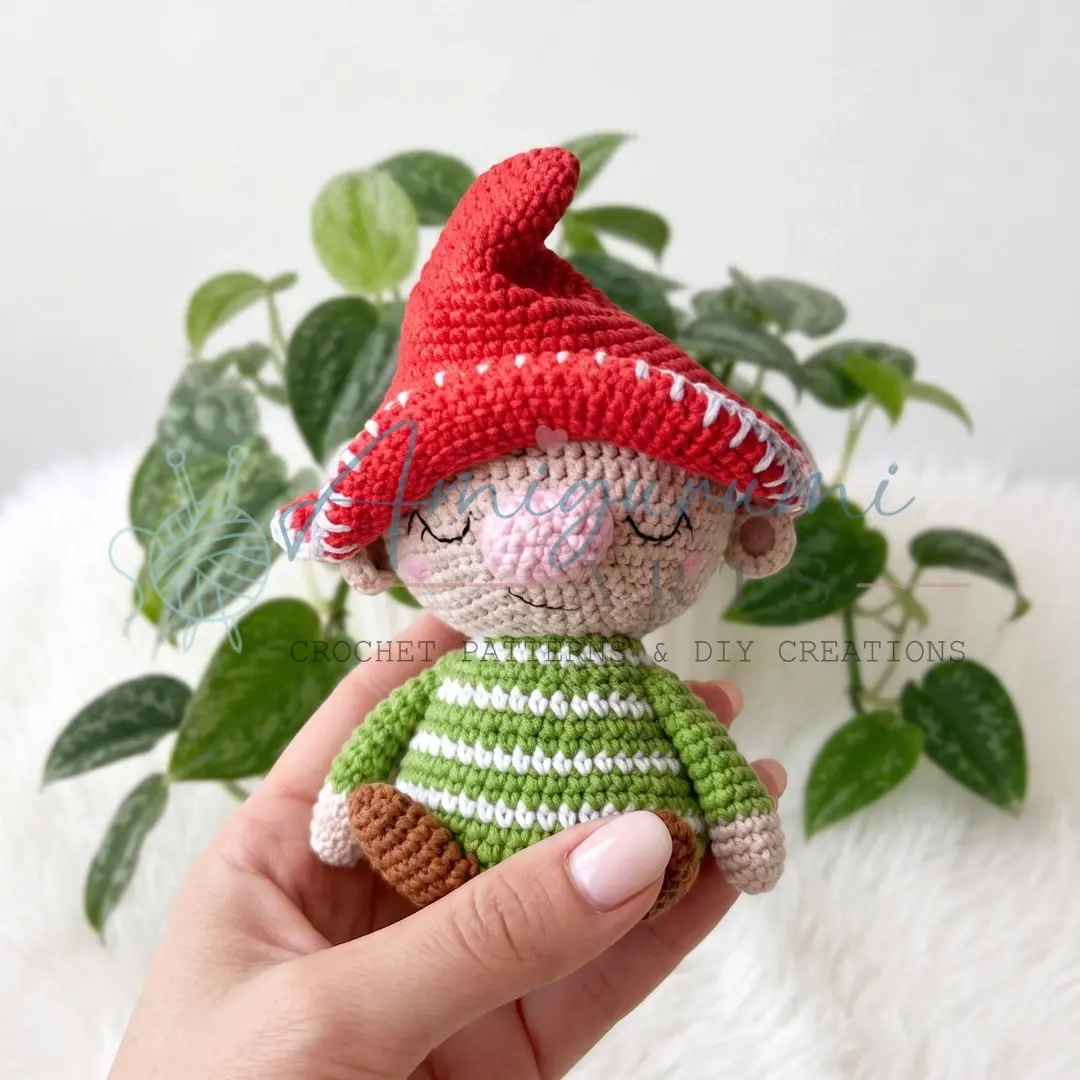
This Little Gnome Amigurumi is a charming, intermediate-level project that features a distinct head, body, legs, and a pointy hat with a folded brim. The pattern is worked in US crochet terminology in continuous spirals, meaning you do not join rounds with slip stitches. The gnome is constructed in separate pieces and assembled at the end, allowing you to customize his expression and ensure a sturdy build.
Materials
- Yarn: YarnArt Jeans (or any fingering/sport weight yarn) in the following colors:
- Green (for the body and arms)
- White (for the body trim)
- Beige (for the head, arms, and ears)
- Brown (for the legs/boots)
- Red (for the hat)
- Gray (for the hat brim)
- Pink (for the nose)
- Hook: US B-1 / 2.0–2.25 mm
- Safety Eyes: Size and quantity as desired (optional — embroider eyes if making for a child under 3)
- Stuffing: Fiberfill
- Notions: Stitch markers, yarn needle / tapestry needle, scissors
Gauge and Finished Size
Gauge is not critical for this project, but your fabric should be tight enough that stuffing does not show through. Adjust hook size down if needed.
Abbreviations
- ch — Chain
- dec — Invisible Decrease (insert hook in front loops of next 2 sts, draw up a loop, yo, pull through all 3 loops)
- inc — Increase (2 sc in same stitch)
- MR — Magic Ring
- sc — Single Crochet
- sl st — Slip Stitch
- st / sts — Stitch / Stitches
- BLO — Back Loop Only
Pattern Notes
- This little gnome amigurumi pattern is written in US crochet terminology.
- All pieces are worked in a continuous spiral unless otherwise noted; do not join at the end of rounds.
- Use a stitch marker to track the beginning of each round.
- Stitch count is given at the end of each round in parentheses: (##).
- Gauge is not critical for this project, but your fabric should be tight enough that stuffing does not show through. Adjust hook size down if needed.
- Install safety eyes before closing the head.
- Stuff the head, body, and limbs firmly before finishing.
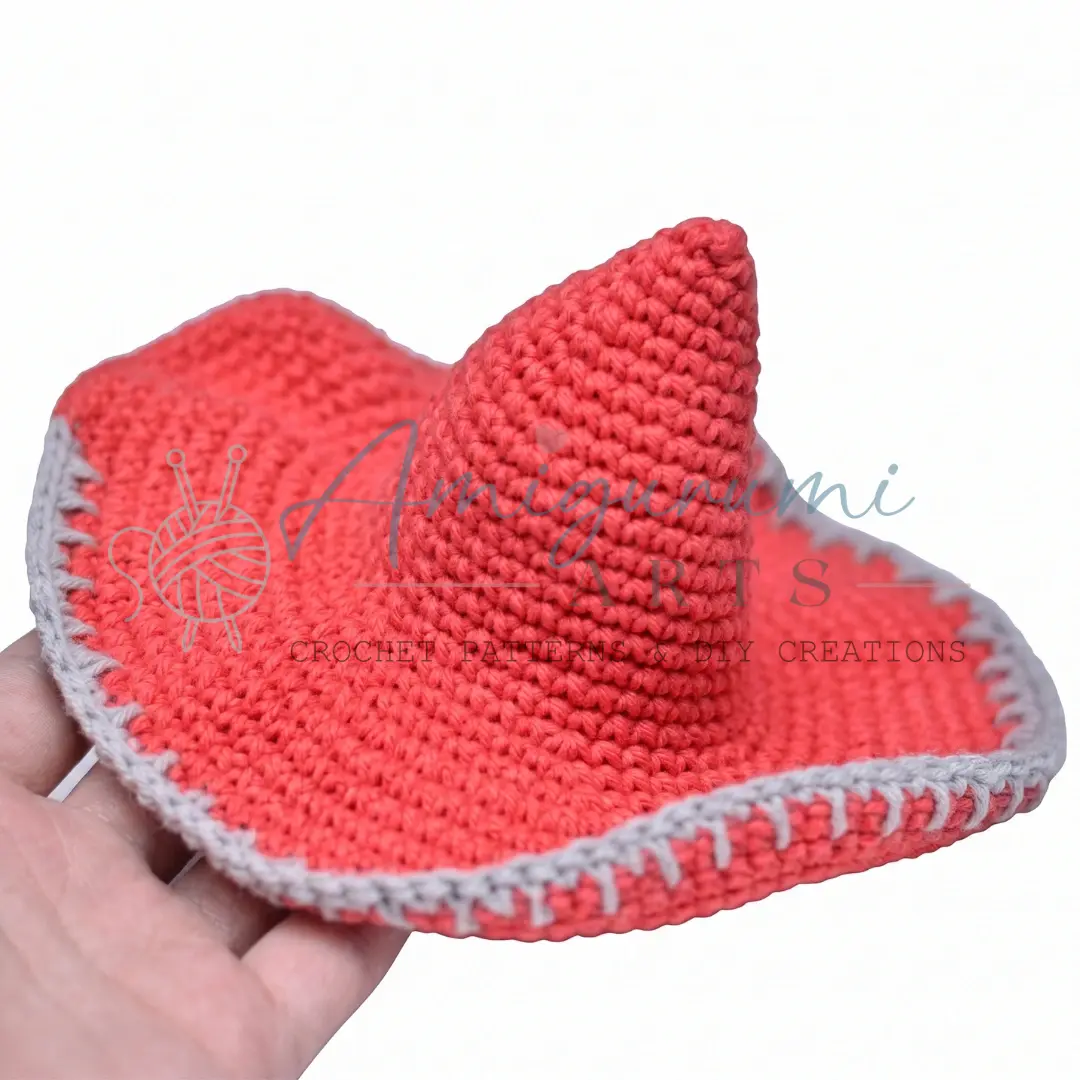
- The hat brim (final round) is worked by alternating into rounds 29 and 28 with gray yarn; see the Assembly section for details.
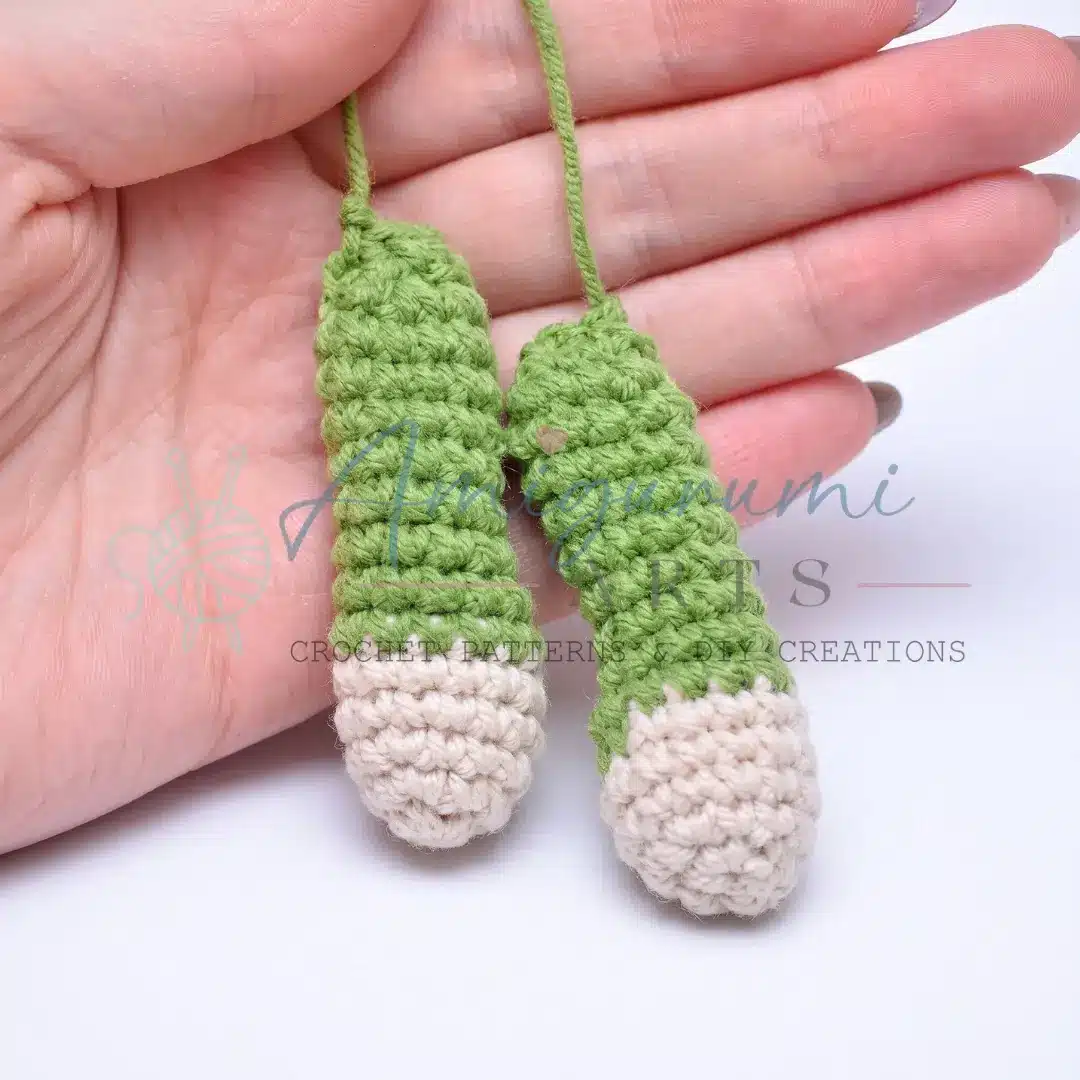
- The legs are closed by working 4 sc through both walls of the piece simultaneously — this flattens the top of the boot for easy attachment.
Pattern Instructions
Head
Work with beige yarn.
- Rnd 1: 6 sc in MR. (6)
- Rnd 2: inc in each st around. (12)
- Rnd 3: inc, sc repeat 6 times around. (18)
- Rnd 4: inc, 2 sc repeat 6 times around. (24)
- Rnd 5: inc, 3 sc repeat 6 times around. (30)
- Rnd 6: inc, 4 sc repeat 6 times around. (36)
- Rnd 7: inc, 5 sc repeat 6 times around. (42)
- Rnd 8: inc, 6 sc repeat 6 times around. (48)
- Rnd 9: inc, 7 sc repeat 6 times around. (54)
- Rnd 10: sc in each st around. (54)
- Rnd 11: inc, 8 sc repeat 6 times around. (60)
- Rnds 12–18: sc in each st around. (60) [7 rounds even]
- Rnd 19: dec, 8 sc repeat 6 times around. (54)
- Rnd 20: dec, 7 sc repeat 6 times around. (48)
- Rnd 21: dec, 6 sc repeat 6 times around. (42)
At this point, install your safety eyes if using them. Stuff the head firmly and continue stuffing as you close.
- Rnd 22: dec, 5 sc repeat 6 times around. (36)
- Rnd 23: dec, 4 sc repeat 6 times around. (30)
- Rnd 24: dec, 3 sc repeat 6 times around. (24)
- Rnd 25: dec, 2 sc repeat 6 times around. (18)
- Rnd 26: dec, sc repeat 6 times around. (12)
- Rnd 27: dec 6 times around. (6)
Close the opening by pulling the yarn tail through the remaining 6 stitches and pulling tight.
Body
Work with green yarn.
- Rnd 1: 6 sc in MR. (6)
- Rnd 2: inc in each st around. (12)
- Rnd 3: inc, sc repeat 6 times around. (18)
- Rnd 4: inc, 2 sc repeat 6 times around. (24)
- Rnd 5: inc, 3 sc repeat 6 times around. (30)
- Rnd 6: inc, 4 sc repeat 6 times around. (36)
- Rnd 7: inc, 5 sc repeat 6 times around. (42)
- Rnd 8: inc, 6 sc repeat 6 times around. (48)
- Rnd 9: Working in BLO, sc in each st around. (48)
- Rnds 10–11: sc in each st around. (48) [2 rounds even]
- Rnd 12: Switch to white yarn. sc in each st around. (48)
- Rnd 13: dec, 22 sc repeat 2 times around. (46)
- Rnd 14: dec, 21 sc repeat 2 times around. (44)
- Rnd 15: Switch to white yarn. dec, 20 sc repeat 2 times around. (42)
- Rnd 16: dec, 19 sc repeat 2 times around. (40)
- Rnd 17: dec, 18 sc repeat 2 times around. (38)
- Rnd 18: Switch to white yarn. dec, 17 sc repeat 2 times around. (36)
- Rnd 19: dec, 4 sc repeat 6 times around. (30)
- Rnd 20: sc in each st around. (30)
- Rnd 21: Switch to white yarn. dec, 3 sc repeat 6 times around. (24)
- Rnd 22: sc in each st around. (24)
- Rnd 23: dec, 2 sc repeat 6 times around. (18)
- Rnd 24: sc in each st around. (18)
Leave a long yarn tail for sewing. Stuff the body firmly before attaching.
Legs / Boots — Make 2
Work with brown yarn.
- Rnd 1: 6 sc in MR. (6)
- Rnd 2: sc, inc repeat 3 times around. (9)
- Rnd 3: 2 sc, inc repeat 3 times around. (12)
- Rnd 4: sc in each st around. (12)
- Rnd 5: 3 sc, inc repeat 3 times around. (15)
- Rnds 6–7: sc in each st around. (15) [2 rounds even]
- Rnd 8: 3 sc, dec repeat 3 times around. (12)
- Rnd 9: sc in each st around. (12)
- Rnd 10: 2 sc, dec repeat 3 times around. (9)
Flatten the top of the leg and work 4 sc through both layers at once to close the top seam. Leave a long yarn tail for sewing.
Nose
Work with pink yarn.
- Foundation: ch 4. Starting in the 2nd ch from hook:
- Rnd 1: (3 sc in same st, sc) repeat 2 times. (8)
- Rnd 2: inc 3 times, sc, inc 3 times, sc. (14)
- Rnd 3: sc, inc repeat 3 times, sc, sc, inc repeat 3 times, sc. (20)
- Rnd 4: sc in each st around. (20)
- Rnd 5: sc, dec repeat 3 times, sc, sc, dec repeat 3 times, sc. (14)
Leave a yarn tail for sewing. Lightly stuff the nose before attaching.
Arms — Make 2
Begin with beige yarn.
- Rnd 1: 6 sc in MR. (6)
- Rnd 2: sc, inc repeat 3 times around. (9)
- Rnd 3: 2 sc, inc repeat 3 times around. (12)
- Rnds 4–5: sc in each st around. (12) [2 rounds even]
Switch to green yarn.
- Rnd 6: dec, 10 sc. (11)
- Rnd 7: dec, 9 sc. (10)
- Rnd 8: dec, 8 sc. (9)
- Rnds 9–13: sc in each st around. (9) [5 rounds even]
- Rnd 14: dec, sc repeat 3 times around. (6)
Leave a long yarn tail for sewing. Do not stuff the arms.
Ears — Make 2
Work with beige yarn.
- Rnd 1: 6 sc in MR. (6)
- Rnd 2: inc in each st around. (12)
- Rnd 3: sc in each st around. (12)
Leave a long yarn tail for sewing. Do not stuff the ears.
Hat
Work with red yarn.
- Rnd 1: 6 sc in MR. (6)
- Rnd 2: inc, sc repeat 3 times around. (9)
- Rnd 3: inc, 2 sc repeat 3 times around. (12)
- Rnd 4: inc, 3 sc repeat 3 times around. (15)
- Rnd 5: inc, 4 sc repeat 3 times around. (18)
- Rnd 6: inc, 5 sc repeat 3 times around. (21)
- Rnd 7: inc, 6 sc repeat 3 times around. (24)
- Rnd 8: inc, 7 sc repeat 3 times around. (27)
- Rnd 9: inc, 8 sc repeat 3 times around. (30)
- Rnd 10: inc, 9 sc repeat 3 times around. (33)
- Rnd 11: inc, 32 sc. (34)
- Rnd 12: inc, 33 sc. (35)
- Rnd 13: inc, 34 sc. (36)
- Rnd 14: inc, 35 sc. (37)
- Rnd 15: inc, 36 sc. (38)
- Rnd 16: inc, 37 sc. (39)
- Rnd 17: inc, 38 sc. (40)
- Rnd 18: inc, 39 sc. (41)
- Rnd 19: inc, 40 sc. (42)
- Rnd 20: 6 sc, inc repeat 6 times around. (48)
- Rnd 21: 7 sc, inc repeat 6 times around. (54)
- Rnd 22: 8 sc, inc repeat 6 times around. (60)
- Rnd 23: sc, inc repeat 30 times around. (90)
- Rnds 24–26: sc in each st around. (90) [3 rounds even]
- Rnd 27: 8 sc, inc repeat 10 times around. (100)
- Rnds 28–29: sc in each st around. (100) [2 rounds even]
- Rnd 30 (Brim): Switch to gray yarn. Working alternately into stitches of Rnd 29 and Rnd 28 in turn, sc around. This creates the folded brim effect — see Assembly notes below. (100)
Assembly
- Legs: Attach the legs to the bottom of the body, positioning them side by side and sewing through the flattened tops. Use the yarn tail and a whipstitch or mattress stitch for a secure join.
- Body to Head: Attach the body to the underside of the head, aligning the centers. Sew around the full opening of the body neck edge to the head, using the yarn tail left from the body.
- Ears: Attach the ears to either side of the head, roughly in line with the eyes. Sew through the flat base of each ear using the yarn tail.
- Nose: Position and sew the nose onto the center of the face — slightly below the eyes. Finish stuffing it lightly before closing the seam completely.
- Arms: Attach the arms to either side of the upper body, one on each side, with the beige hand section facing forward. Use the yarn tail to sew securely.
- Hat: Place the hat on the head, centering it, and sew it into position through the brim stitches if you’d like it fixed in place.
- Hat Brim Detail: The final gray round is worked by alternating each stitch between Rnd 29 and Rnd 28 of the hat. This pulls the brim into a gentle wave or rolled effect. Work one sc into a stitch of Rnd 29, then the next sc into the corresponding stitch of Rnd 28, continuing to alternate all the way around.
- Weave in all ends securely with a tapestry needle.
Tips & Tricks
- Keep your tension tight: YarnArt Jeans is a cotton-acrylic blend that behaves beautifully with a small hook, but if your stitches feel loose, go down to a 2.0 mm hook. Tight fabric means no stuffing peeking through and a much crisper finished shape.
- Use the invisible decrease: Insert your hook through the front loops only of the next two stitches, draw up a loop, and complete the stitch as normal. This eliminates the visible “hole” that a standard decrease leaves, which matters most on the head and body where the fabric is under tension from stuffing.
- Stuff firmly: Stuff the head and body firmly but not rigidly. You want the gnome to hold his shape upright, but overstuffing will distort the rounds and make assembly harder. Add stuffing gradually as you close each piece — don’t wait until the last few stitches.
- Watch the hat increases: The hat’s long increase section (Rnds 11–19) uses single increments rather than evenly distributed increases. Work slowly here and keep your stitch marker moving — it’s easy to lose count. A contrast-color marker for the beginning of the round helps enormously.
- Position the nose: When sewing on the nose, pin it in place first with a straight pin and step back to check the position before committing. The nose placement has a huge effect on the gnome’s expression — centered and slightly low on the face gives a calm, rounded look.
Frequently Asked Questions
Can I make this gnome for a small child?
Yes, but for safety, it is recommended to embroider the eyes instead of using safety eyes if the gnome is intended for a child under 3 years old. The pattern allows for either option.
Why does my hat brim look flat instead of rolled?
The rolled effect is created by the final round (Rnd 30). You must alternate your single crochet stitches between the stitches of Round 29 and Round 28. If you only crochet into Round 29, the brim will not fold correctly.
What yarn weight should I use if I don’t have YarnArt Jeans?
You can use any fingering or sport weight yarn. The key is to use a small hook (US B-1 / 2.0–2.25 mm) to ensure the fabric is tight enough that stuffing does not show through.
How do I close the legs?
After Round 10, flatten the top of the leg piece. Work 4 sc through both layers (both walls) of the piece simultaneously to close the top seam. This creates a flat surface for attaching the legs to the body.
Do I need to join rounds?
No, this pattern is worked in a continuous spiral. Do not join at the end of rounds with a slip stitch. Just move your stitch marker up to the beginning of the new round.
Pin This Crochet Pattern!