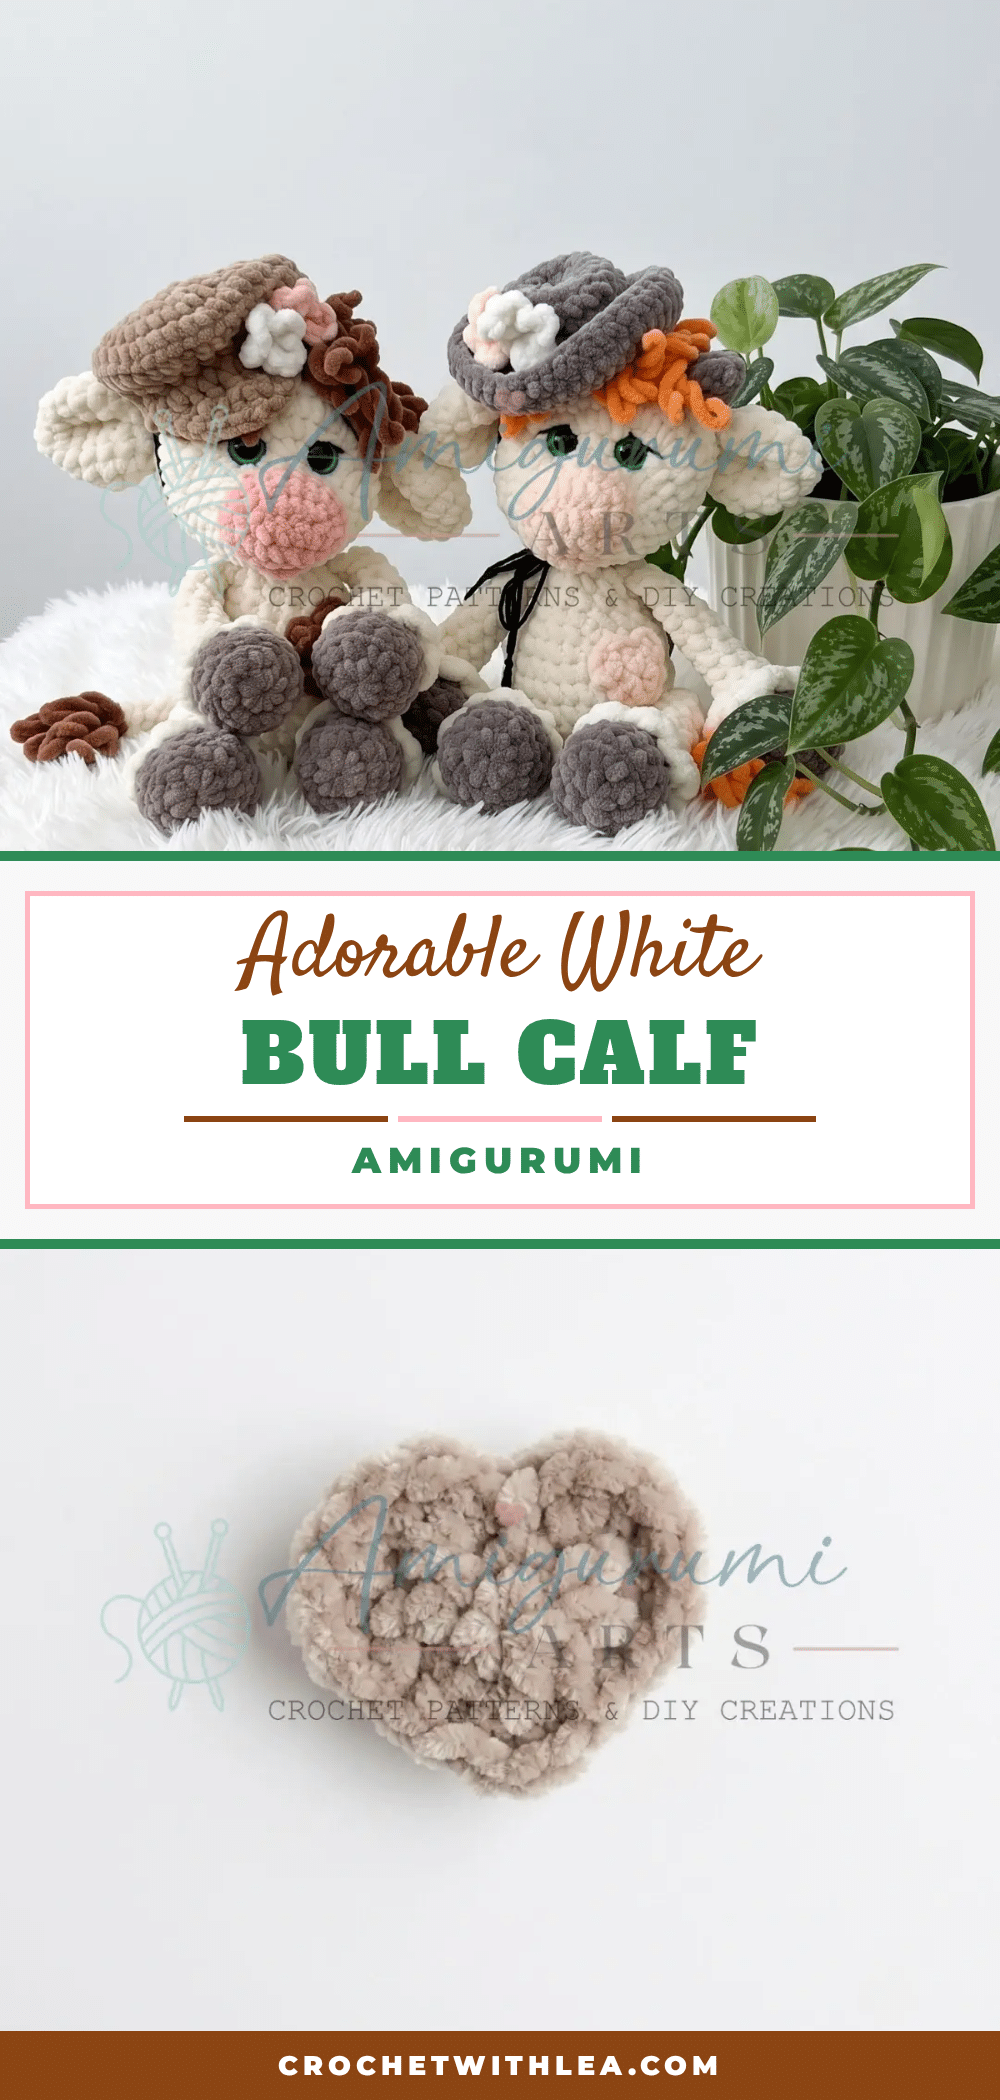
There is something undeniably charming about the moment you pull a skein of plush yarn from your stash and realize it holds the perfect personality for your next project. For this white bull calf, the decision was made in the soft light of the craft room: a milk-white Himalaya Dolphin Baby for the body, paired with a rich brown for the markings and a velvet-textured YarnArt Dolce for the hooves and cap. The tactile contrast between the fluffy main body and the sleek, dark accessories gives this amigurumi a grounded, intentional look that feels both rustic and refined. It is a project that rewards patience, offering a satisfying build that results in a sturdy little companion ready to sit on a shelf or travel in a tote bag.
Yarn and Color Notes
The visual appeal of this bull calf relies heavily on the specific yarn choices. The main body uses a bulky-weight plush yarn in milk white, which provides that signature soft, cloud-like texture. The brown accents are achieved using the same plush weight, creating a cohesive look. For the hooves and the jaunty cap, a bulky-weight chenille or velvet yarn is recommended. This change in fiber adds a sophisticated finish, distinguishing the hardworking parts of the calf (the hooves) from the decorative elements (the cap). The combination of these textures makes the finished piece feel tactile and high-quality, elevating it beyond a standard amigurumi.
Project Overview
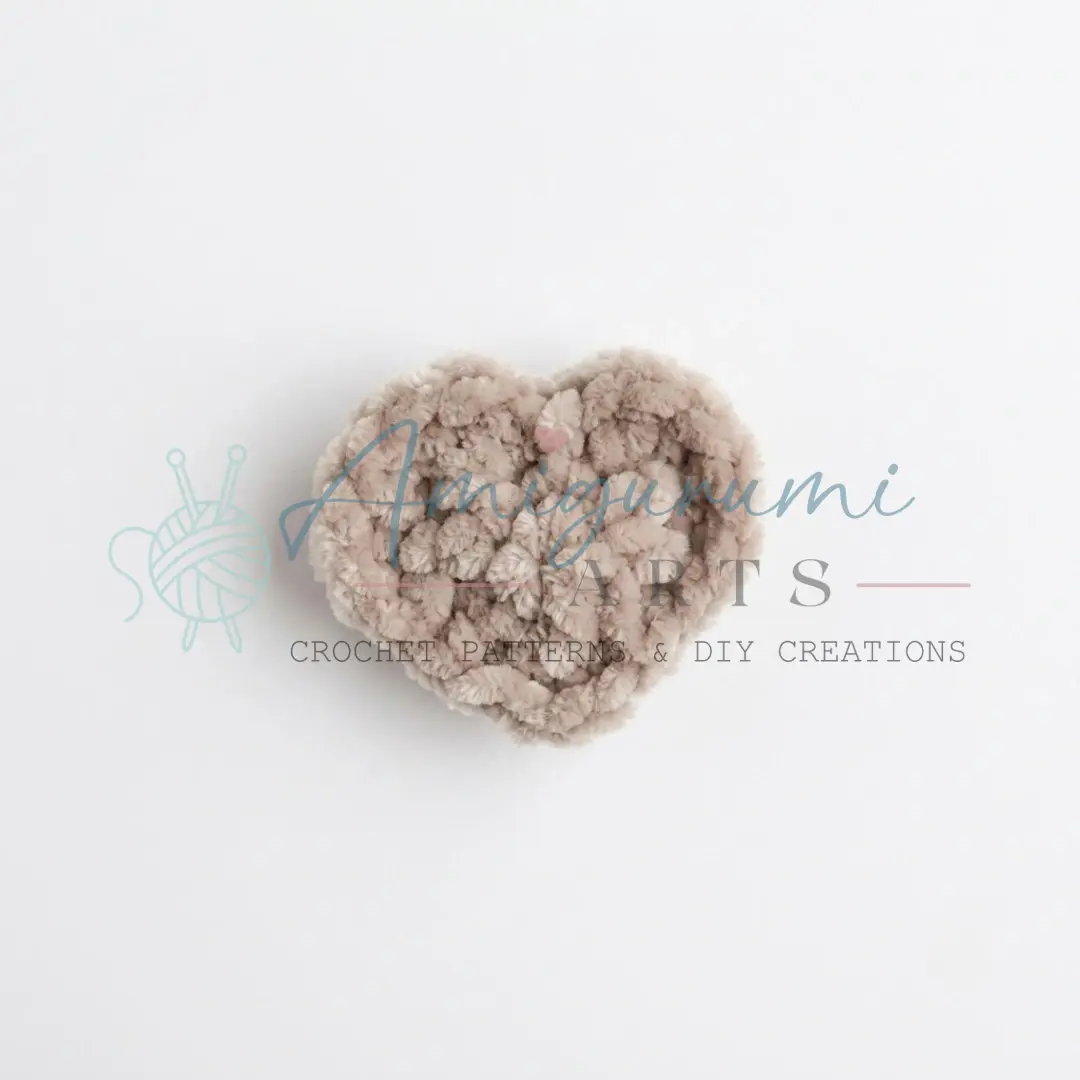
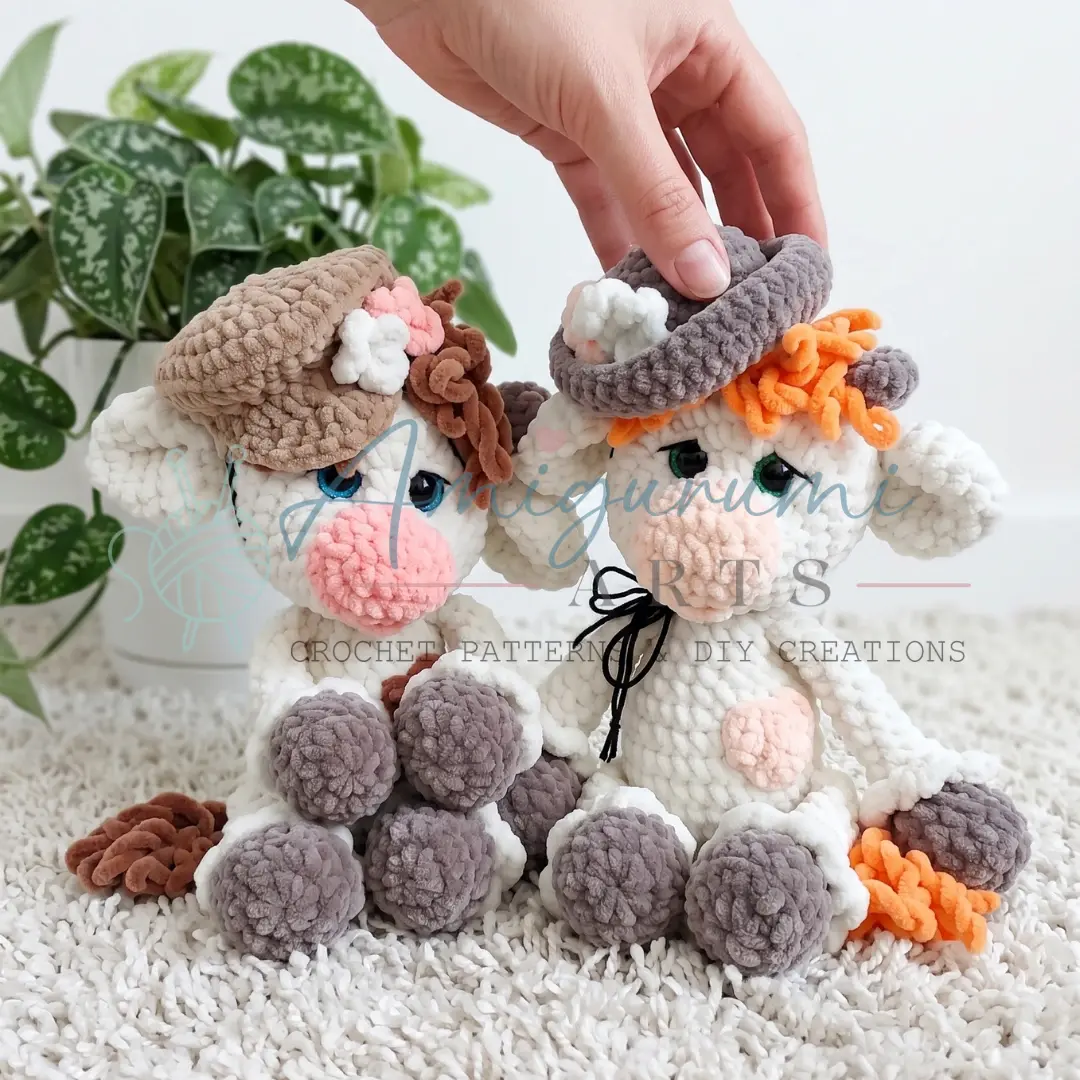
This adorable white bull calf amigurumi pattern is written in US crochet terminology. It is a satisfying project for anyone comfortable with basic amigurumi construction. If you have crocheted a simple animal before, you have everything you need to bring this little guy to life. The pattern utilizes a continuous spiral technique for most pieces, ensuring a seamless finish. The bull features a sturdy body, a tail, arms, legs, horns, ears, and a head adorned with a cap and optional spots.
Materials
- Yarn (Main): Bulky-weight plush yarn — milk white and brown (e.g., Himalaya Dolphin Baby #80308 milk white, #80336 brown, #80346 pink/marshmallow)
- Yarn (Hooves & Cap): Bulky-weight chenille or velvet yarn — dark hoof color #754 and cap color #747 (e.g., YarnArt Dolce)
- Hook: US Size G-6 / 4.0 mm
- Safety eyes: 16 mm, 2 pieces
- Thread: Black embroidery thread (for eyelashes and eyebrows — e.g., cotton thread)
- Stuffing: Fiberfill / stuffing (polyester fiberfill or similar)
- Tools: Stitch marker or contrast yarn, Tapestry needle / blunt-tipped yarn needle, Scissors
Gauge and Finished Size
Gauge is not critical for this project — what matters is that your fabric is tight enough that stuffing does not show through the stitches. The finished size is determined by the specific stitch counts and rounds provided in the instructions below.
Abbreviations
- BLO — Back Loop Only
- ch — Chain
- dc — Double Crochet
- dec — Decrease (invisible decrease — insert hook through front loops only of next 2 sts, yarn over, pull through both, yarn over, pull through remaining 2 loops)
- FLO — Front Loop Only
- hdc — Half Double Crochet
- inc — Increase (2 sc in same stitch)
- MR — Magic Ring
- sc — Single Crochet
- sk — Skip
- sl st — Slip Stitch
- st / sts — Stitch / Stitches
Pattern Notes
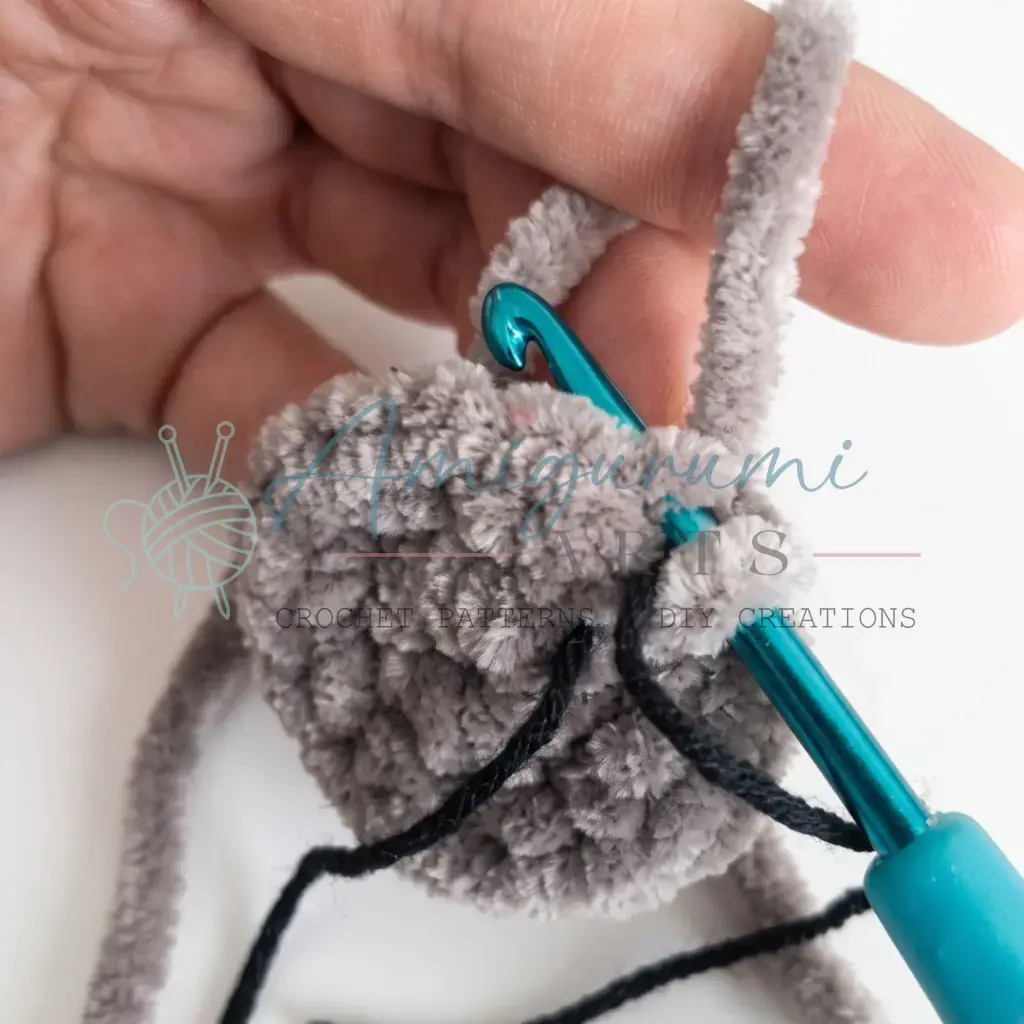
- All pieces are worked in a continuous spiral (no joining slip stitch, no turning chain) unless otherwise stated.
- Stitch counts are given at the end of each round in parentheses: (##)
- The invisible decrease is used throughout: insert hook through the front loop only of the next stitch, then the front loop only of the following stitch, yarn over, pull through both loops, yarn over, pull through remaining 2 loops.
- Safety eyes (16 mm) are inserted between Rounds 5 and 6 of the Head — do not close the head fully before placing them.
- Stuff the Body firmly.
- Stuff the Legs lightly — only the hoof area.
- Do not stuff the Tail, Horns, or Ears.
- Place a stitch marker at the beginning of each round and move it up as you go.
Pattern Instructions
Legs / Arms — Make 4
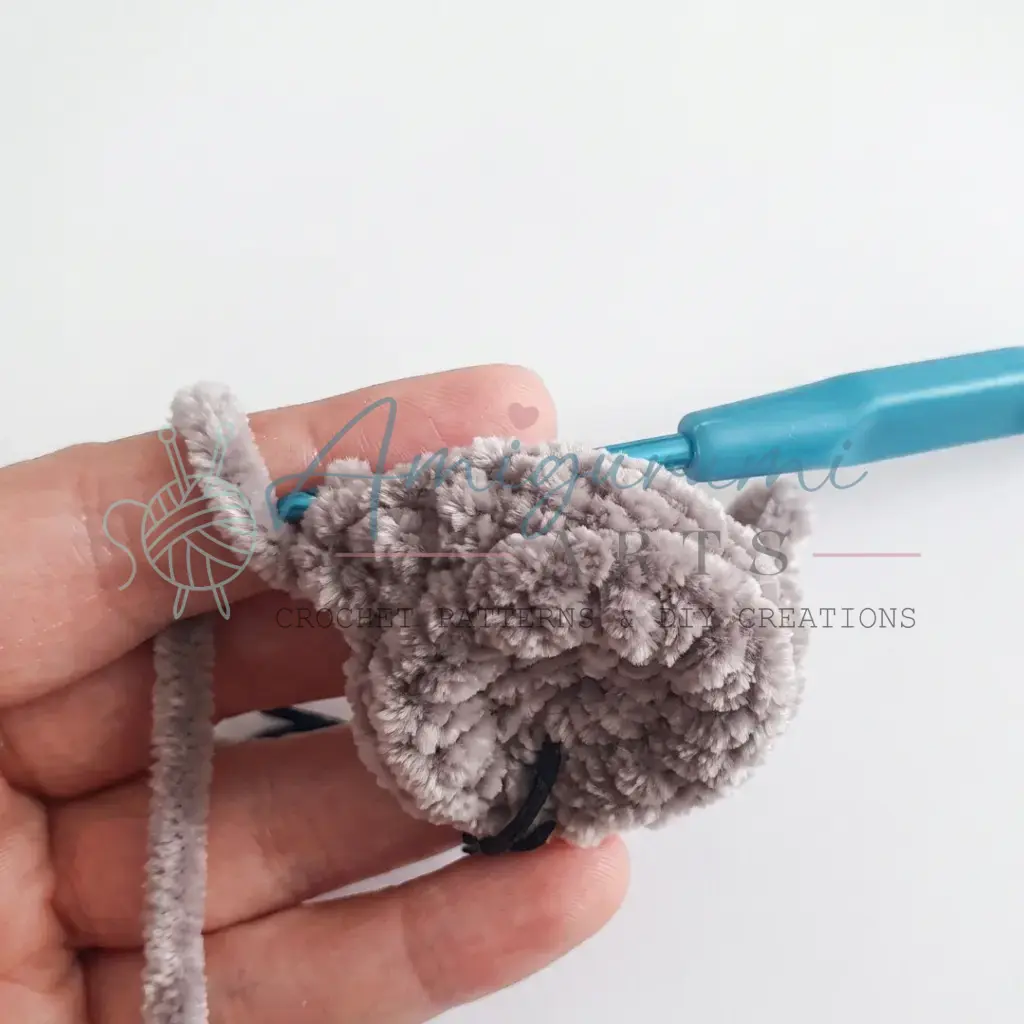
Stuff the hoof section only — lightly. The upper portion of the leg remains unstuffed.
Rnd 1: 8 sc in MR. (8)
Rnd 2: inc in each st around. (16)
Rnd 3: 16 sc in BLO. (16)
Rnd 4: sc in each st around. (16)
Rnd 5: 2 sc, dec repeat 4 times around. (12) Change to main body color on the last stitch of this round.
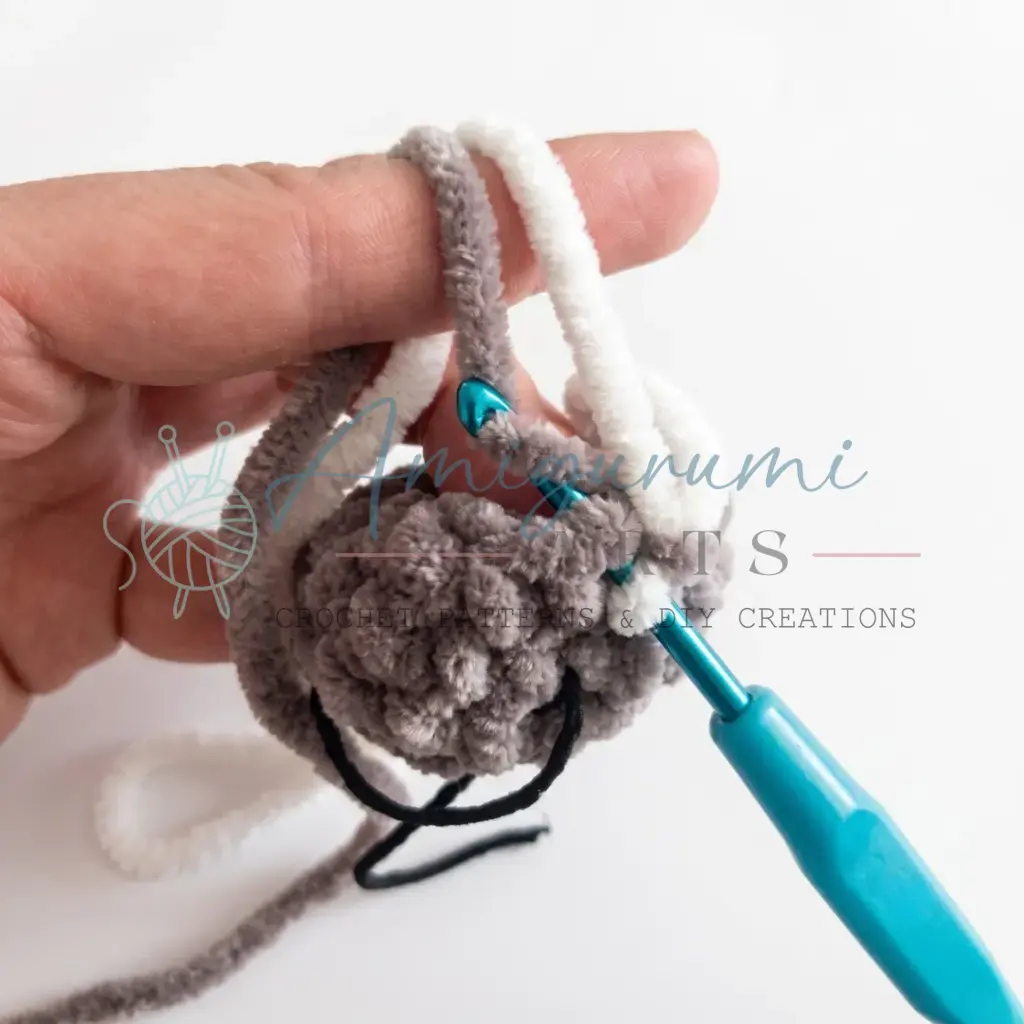
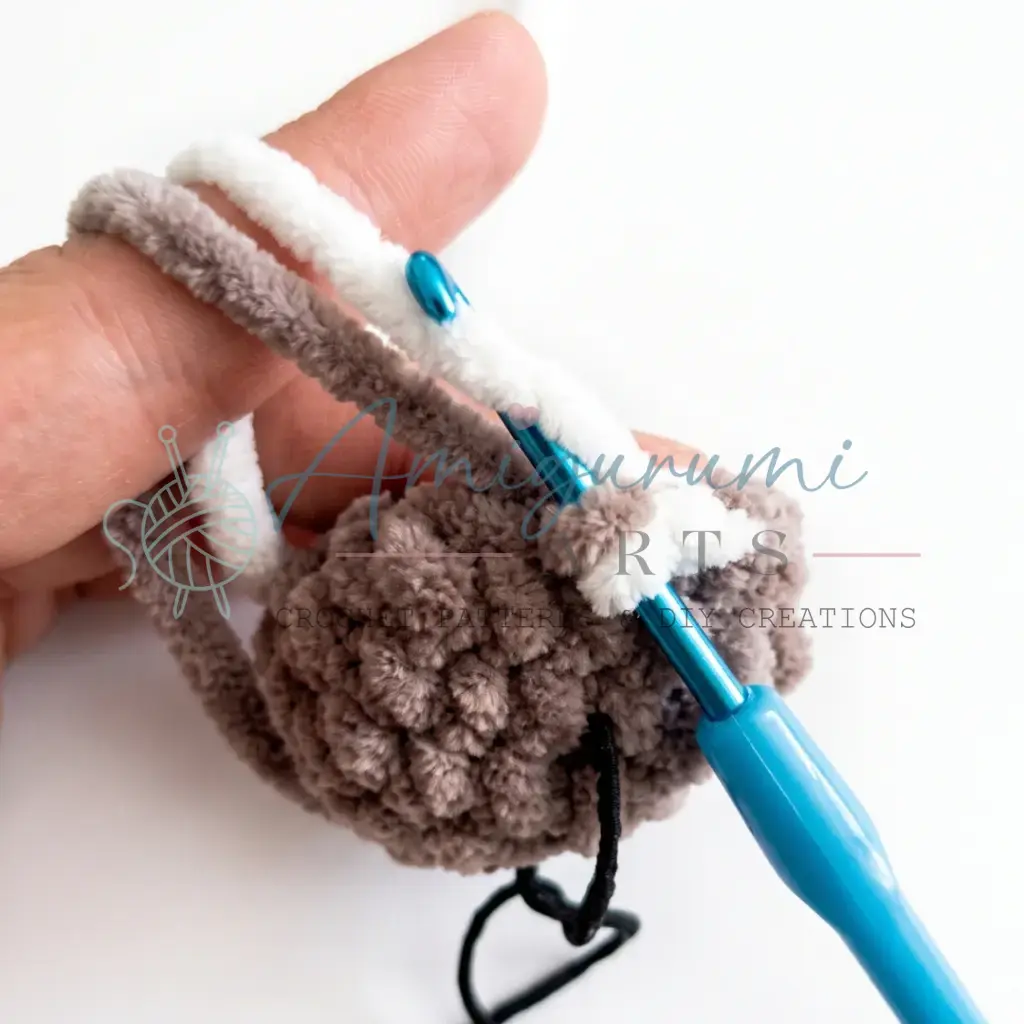
Rnd 6: Working with two strands held together — 12 sc. Bring up the brown strand and work over the milk white strand to carry it.
Rnd 7 (FLO — shell edging): sl st, ch 1, 2 dc in same st, ch 1 repeat 6 times around, then sl st into the first st of this round to join. (Decorative cuff — worked in front loops only.)
Rnd 8 (BLO — continuing the leg): 12 sc in the back loops remaining from Rnd 6. (12)
Rnd 9: 1 sc, dec repeat 4 times around. (8) Stuff the hoof section lightly now.
Rnds 10–16: sc in each st around. (8)
Finishing: Fold the piece flat and work 4 sc through both layers to close. Fasten off, leaving a yarn tail for sewing.
Tail
Do not stuff.
Rnd 1: 4 sc in MR. (4)
Rnds 2–17: sc in each st around. (4) Change color on the last stitch of Rnd 17.
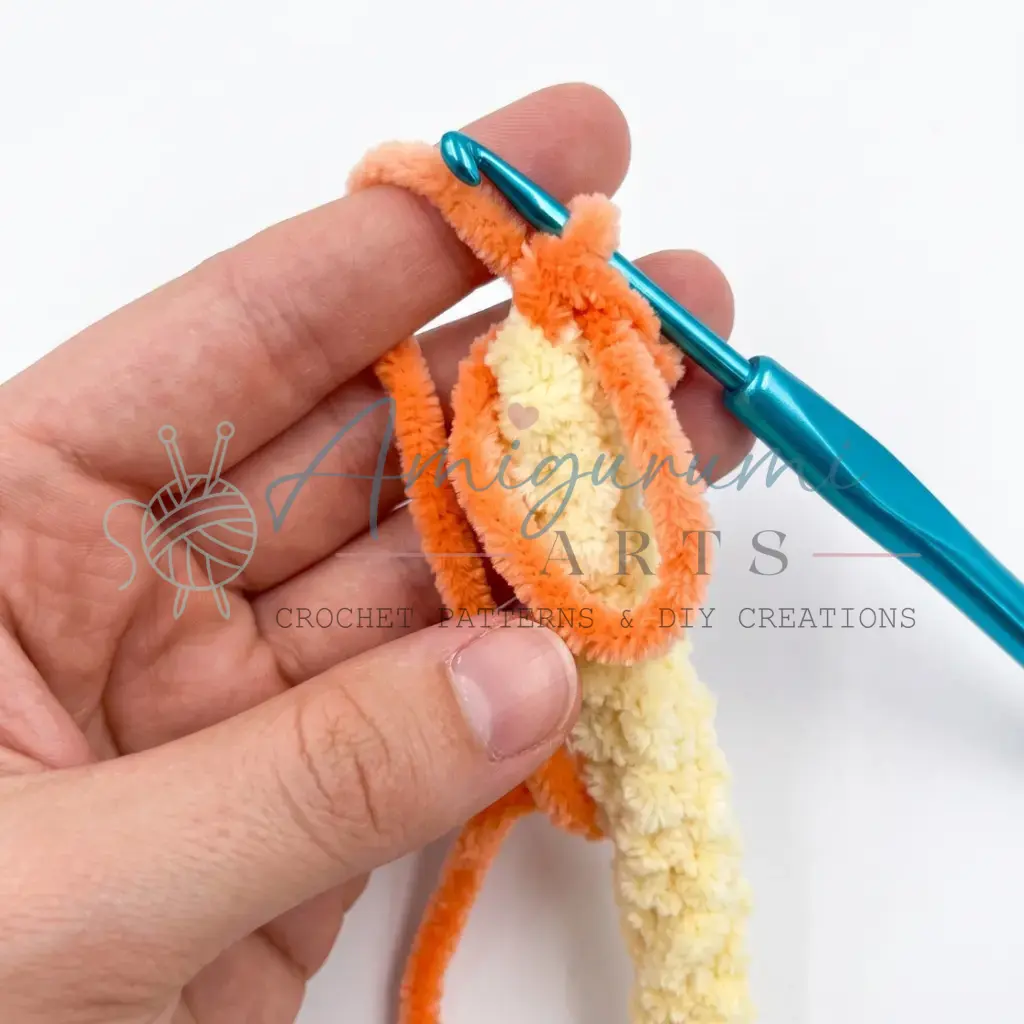
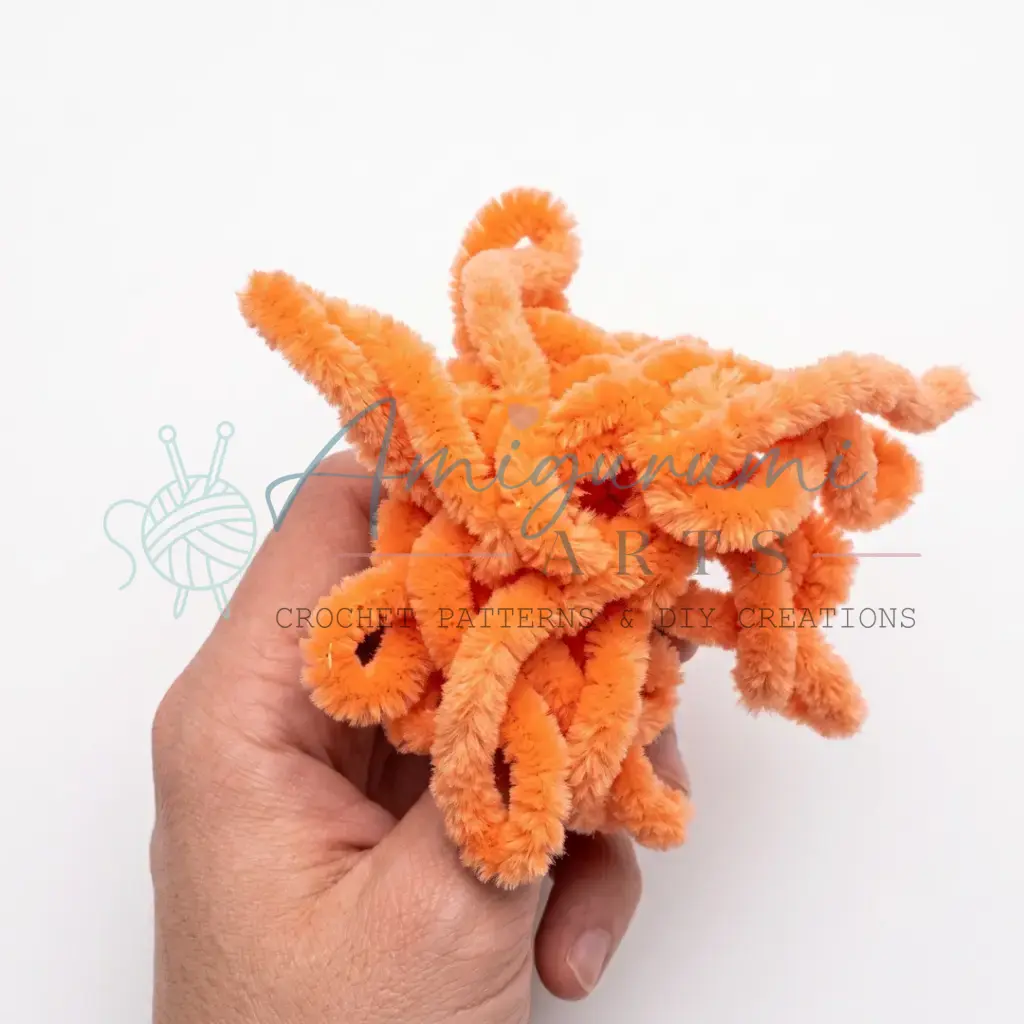
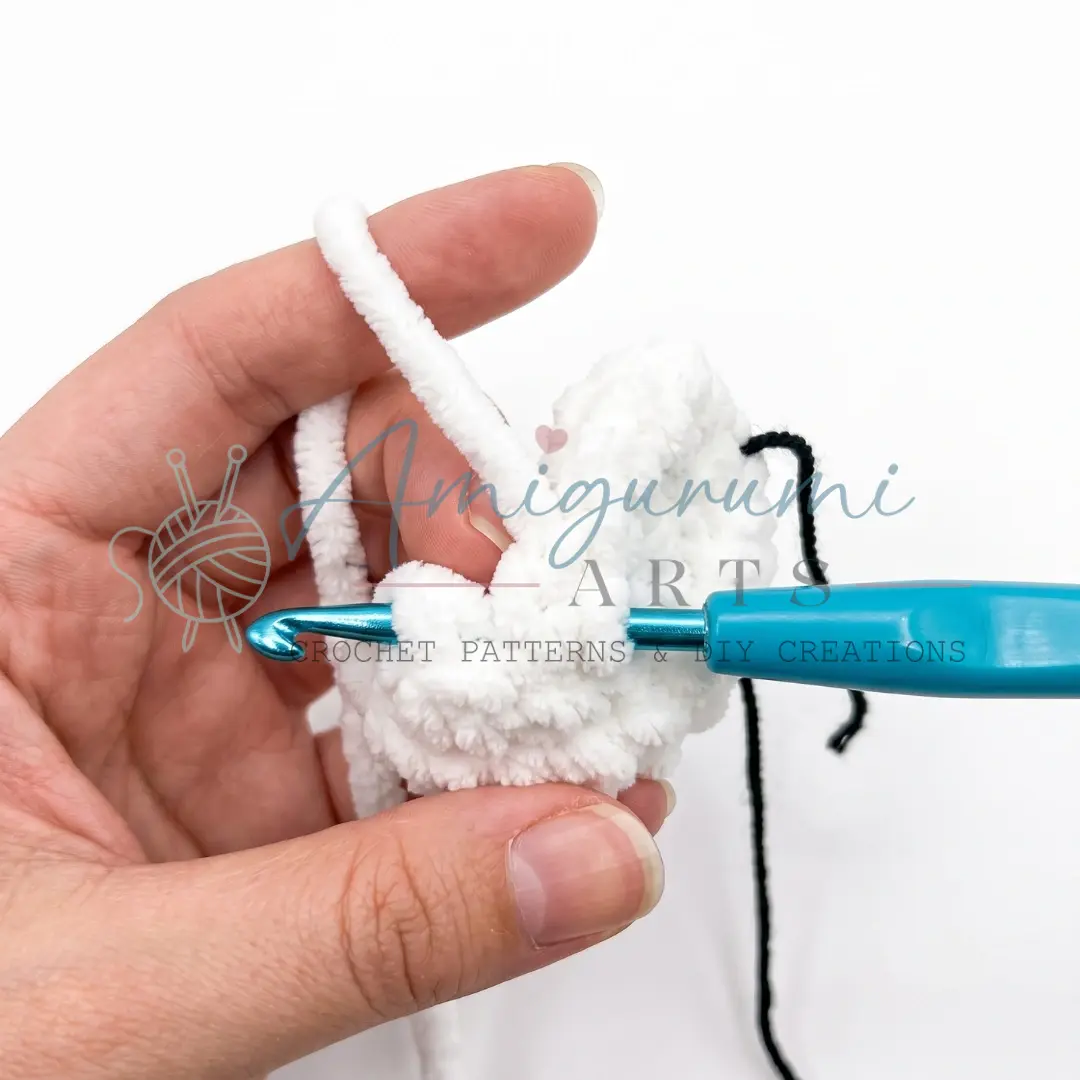
Rnd 18: inc in each st around. (8) As you work each stitch, gently tug the yarn downward before completing the stitch to create a fluffy texture.
Rnd 19: 2 sc, dec repeat 2 times around. (6) Continue tugging the yarn downward on each stitch for texture.
Finishing: Pull the opening closed, weave in ends.
Body
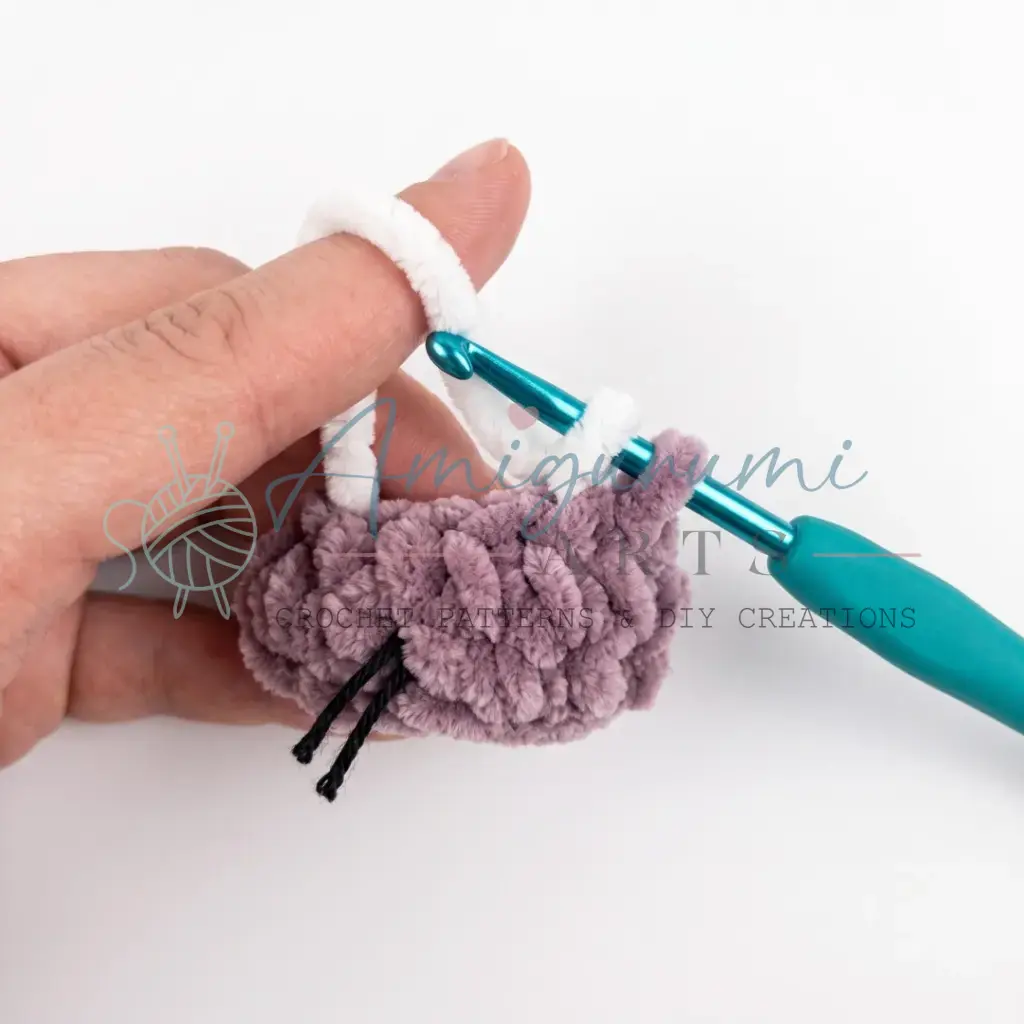
Stuff firmly.
Rnd 1: 6 sc in MR. (6)
Rnd 2: inc in each st around. (12)
Rnd 3: 1 sc, inc repeat 6 times around. (18)
Rnd 4: 1 sc, inc repeat 9 times around. (27)
Rnd 5: 2 sc, inc repeat 9 times around. (36)
Rnd 6: 7 sc, then join the first leg by working 4 sc through both the body stitches and the leg together, 6 sc, join the tail by working 2 sc through both the body and tail together, 6 sc, then join the second leg by working 4 sc through both the body and leg together, 7 sc. (36) Make sure both legs sit evenly relative to each other and the tail. Adjust your starting position slightly if needed.
Rnds 7–8: sc in each st around. (36)
Rnd 9: 2 sc, dec repeat 9 times around. (27)
Rnd 10: sc in each st around. (27)
Rnd 11: 1 sc, dec repeat 9 times around. (18)
Rnds 12–13: sc in each st around. (18)
Rnd 14: 3 sc, join the first arm by working 4 sc through both the body and arm together, 6 sc, join the second arm by working 4 sc through both the body and arm together, 1 sc. (18) Check that the arms sit level with each other and aligned above the legs.
Rnd 15: 4 sc, dec repeat 3 times around. (15) Fasten off, leaving a long yarn tail for attaching the head.
Horns — Make 2
Do not stuff.
Rnd 1: 4 sc in MR. (4)
Rnd 2: 1 sc, inc repeat 2 times around. (6)
Rnd 3: 2 sc, inc repeat 2 times around. (8)
Finishing: Fold flat and work 4 sc through both layers to close. Fasten off, leaving a yarn tail for sewing.
Ears — Make 2
Do not stuff.
Rnd 1: 6 sc in MR. (6)
Rnd 2: inc in each st around. (12)
Rnd 3: 1 sc, inc repeat 6 times around. (18)
Rnd 4: 2 sc, inc repeat 6 times around. (24)
Rnd 5: sc in each st around. (24)
Rnd 6: dec 12 times around. (12)
Finishing: Fold flat and work 3 sc through both layers. Then fold the remaining tip over once more and work 2 sc through all 4 layers. (5 sc total closing seam.) On one ear, fold the tip forward; on the other ear, fold the tip backward — this gives each ear its own natural curve.
Head
Stuff firmly.
Rnd 1 (Foundation Chain Start): Ch 6. Starting in the 2nd ch from hook: work 3 sc into that first ch (corner), sc in each of the next 3 ch, then 3 sc into the last ch (corner). Working along the opposite side of the foundation chain: sc in each of the next 3 ch. (12)
Rnd 2: inc in next 3 sts, sc in next 3 sts, inc in next 3 sts, sc in next 3 sts. (18)
Rnd 3: sc in each st around. (18) Change color on the last stitch of this round.
Rnd 4 (BLO): 4 sc, 6 sc (working in back loops only throughout this round), 8 sc. (24) The front loops left free in this round will be used later when crocheting the lip.
Rnd 5: 3 sc, 1 sc, inc repeat 6 times, 9 sc. (30)
Rnd 6: 3 sc, 2 sc, inc repeat 6 times, 9 sc. (36)
Rnd 7: 5 sc, inc repeat 6 times around. (42)
Rnds 8–10: sc in each st around. (42)
Rnd 11: 8 sc, join the first ear by working 5 sc through both the head and ear together, join the first horn by working 4 sc through both the head and horn together, 6 sc, join the second horn by working 4 sc through both the head and horn together, join the second ear by working 5 sc through both the head and ear together, 10 sc. (42)
Rnd 12: sc in each st around. (42)
Rnd 13: 5 sc, dec repeat 6 times around. (36) Insert safety eyes between Rounds 5 and 6 before continuing.
Rnd 14: 4 sc, dec repeat 6 times around. (30)
Rnd 15: 3 sc, dec repeat 6 times around. (24)
Rnd 16: 2 sc, dec repeat 6 times around. (18)
Rnd 17: 1 sc, dec repeat 6 times around. (12)
Rnd 18: dec 6 times around. (6) Leave the opening open for now — close it after completing all head embellishments.
Head Finishing & Embellishment
Complete all of the following before closing the head opening.
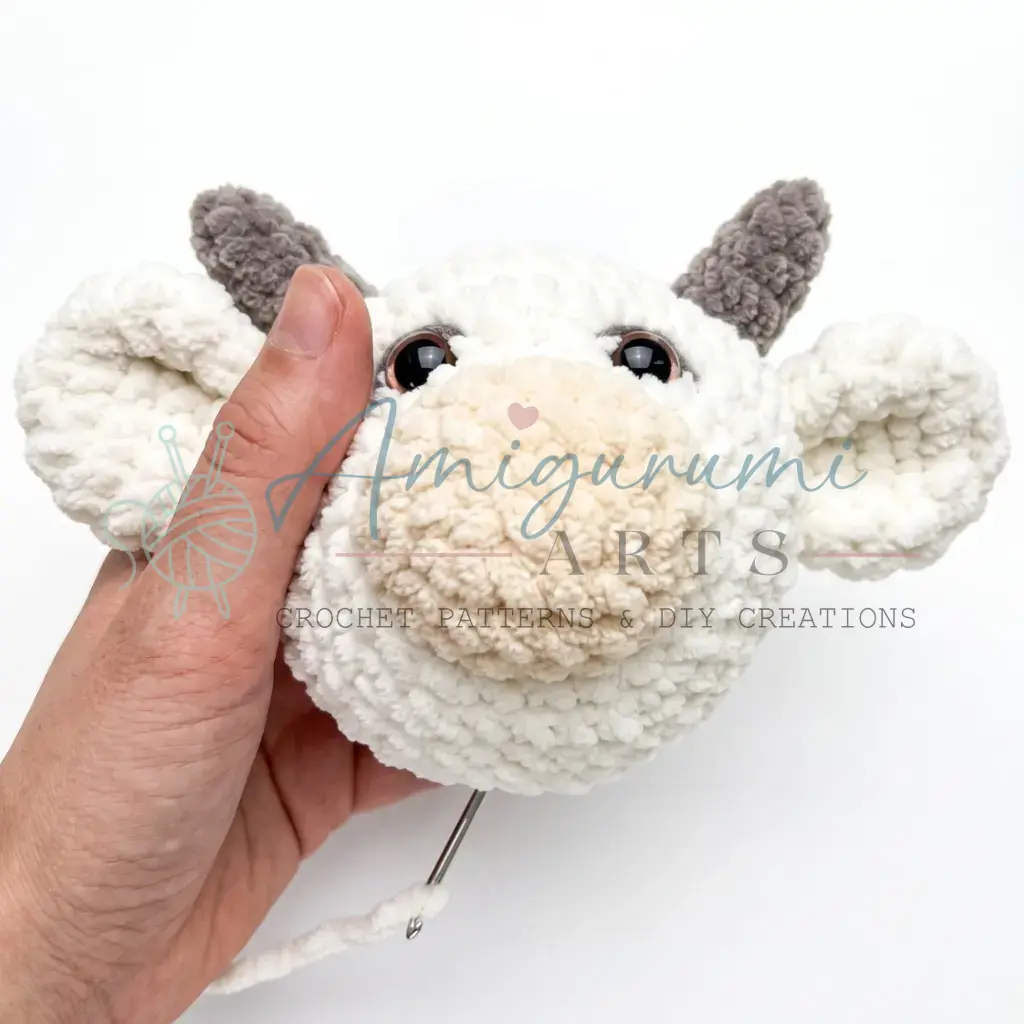
Pulling down the eyes: Thread a needle with a length of skin-tone (milk white) yarn. Insert the needle up through the bottom of the head and bring it out at the outer corner of one safety eye. Draw the thread through (leaving a tail at the bottom for tying), then reinsert at the inner corner of the same eye and bring the needle back out at the bottom of the head. Repeat for the second eye, pulling both evenly to sink the eyes slightly and create a natural depth. Tie the tails together at the bottom and bury the ends inside the head.
Pulling the eyes back: Repeat the same process, but bring the needle out through the open back of the head (the unstuffed opening) to pull the eyes gently inward and back, creating a rounder, more expressive face.
Embroidering eyelids and eyebrows: Using head-color yarn first, embroider a soft curved line above each eye to suggest an eyelid. Then switch to black embroidery thread and stitch the eyelashes and eyebrows.
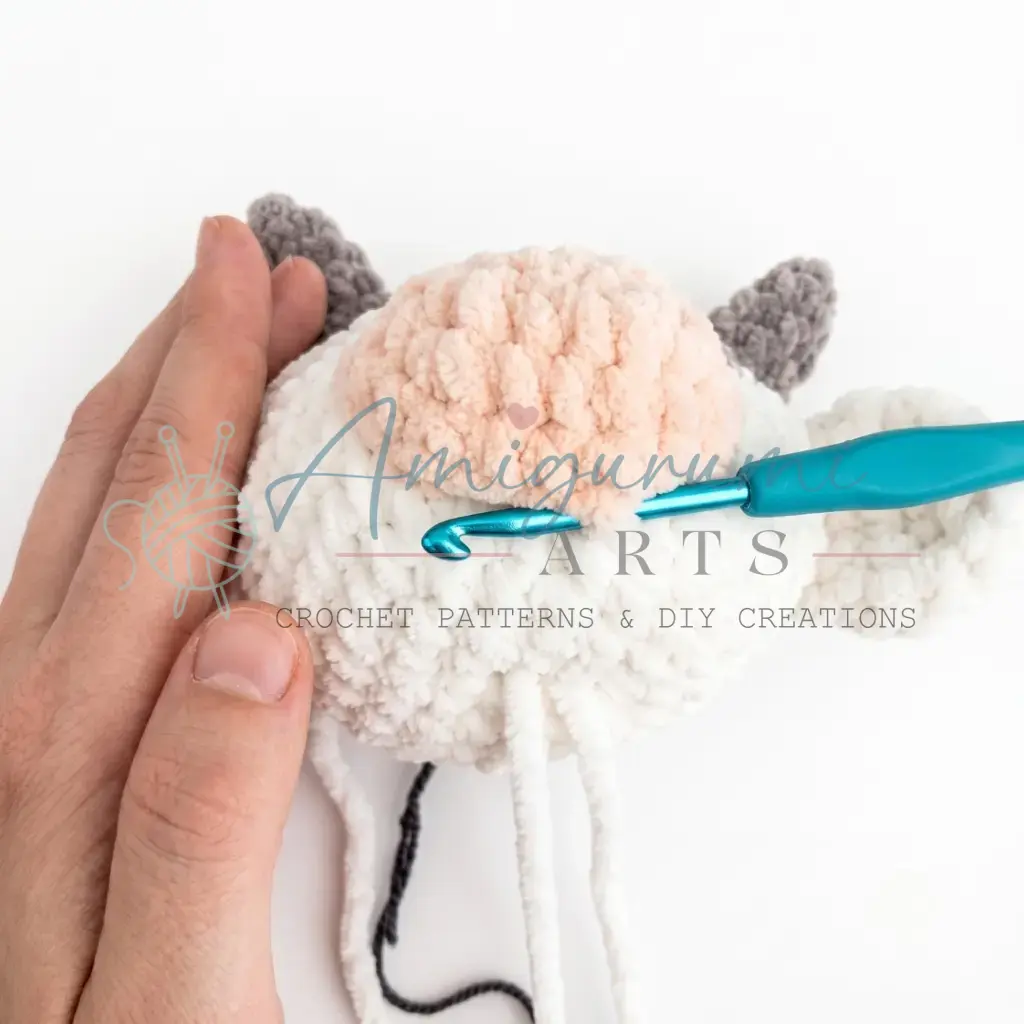
Crocheting the lip: Insert your hook into the stitch at the point where you changed yarn color (Rnd 3/4 boundary, on the muzzle). Ch 1, sc into that same stitch, then work 2 more sc to the right. Fasten off — bring both yarn tails out at the start of the lip, tie securely, and bury the ends inside the head.
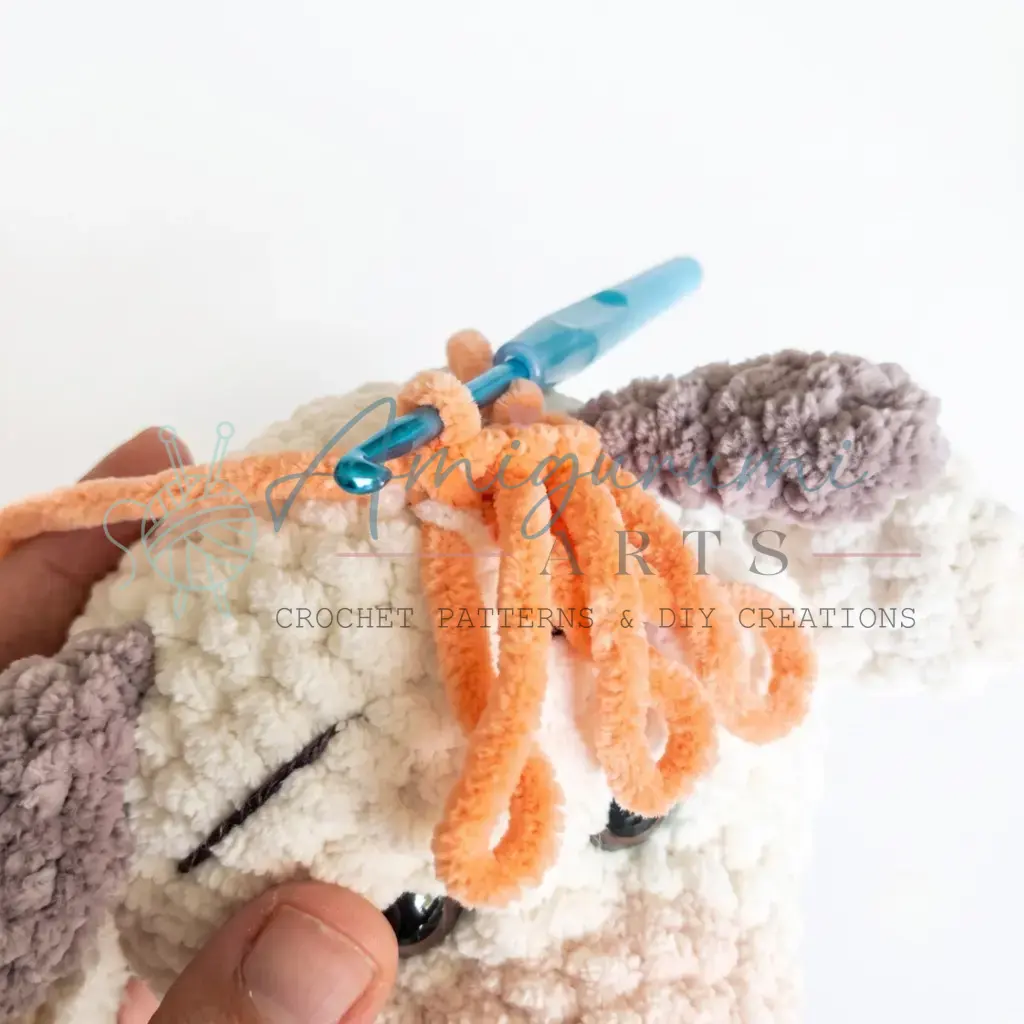
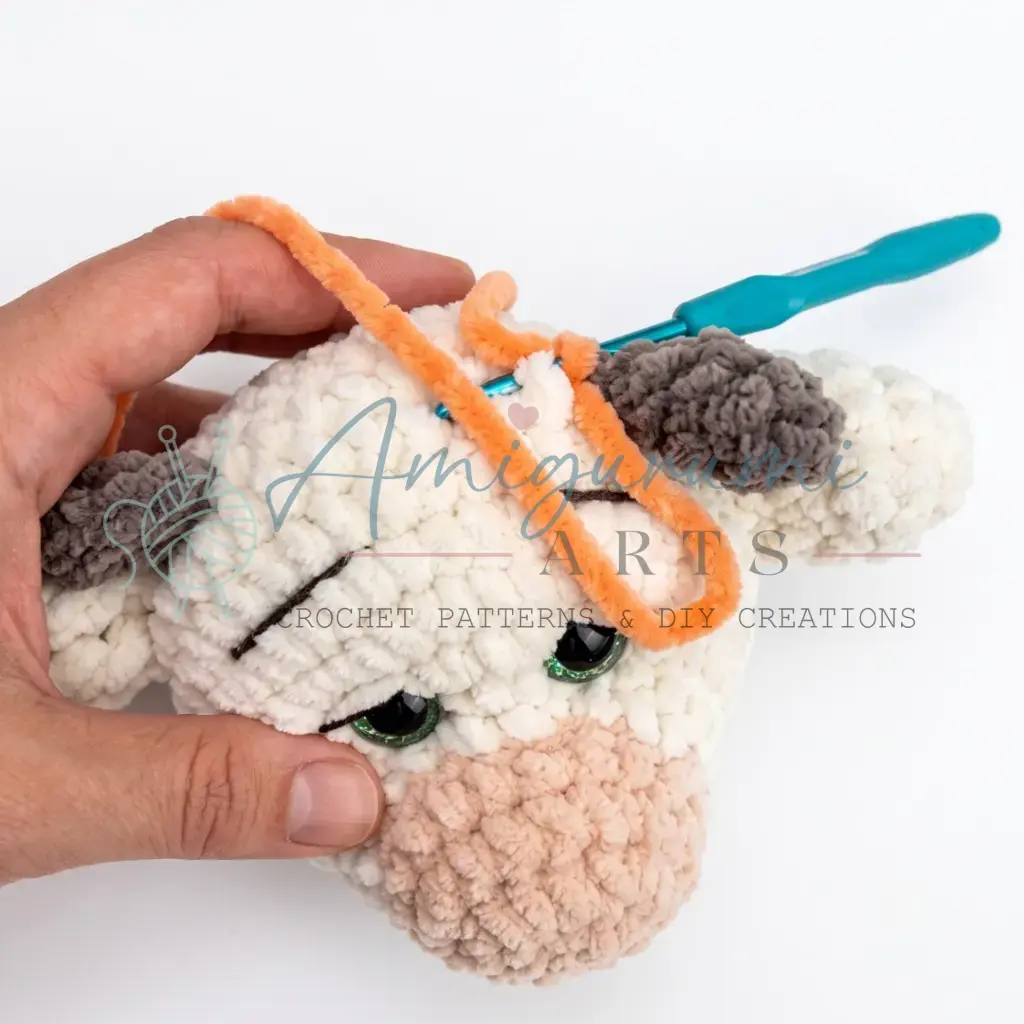
Adding the fringe/forelock: Using the main yarn color, attach yarn at the forehead area. Work sc while pulling each stitch loop downward toward the bull’s face to create a textured forelock fringe. Work 2 short rows on both sides. Fasten off and bury ends.
Small Spot (Optional Decoration)
Rnd 1: 6 sc in MR. Edging: sl st, ch 1, 2 dc in same st, ch 1 repeat 2 times, then: sl st, ch 1, dc, ch 1, sl st.
Large Spot (Optional Decoration)
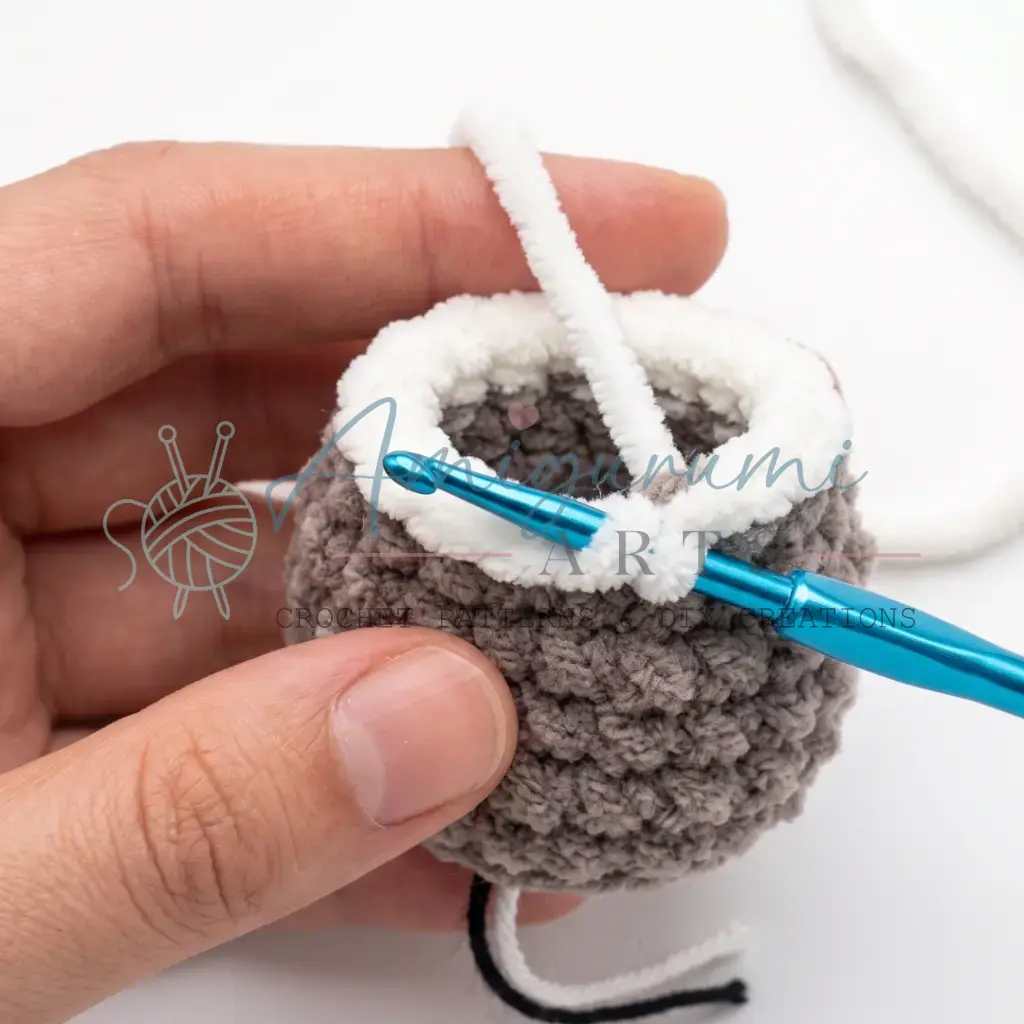
Rnd 1: 6 sc in MR. Edging Row 1: sl st, ch 1, 2 dc in same st, ch 1 repeat 2 times, then sl st, ch 1, dc, ch 1. Edging Row 2: sl st, 2 sc, 2 dc in one st, 2 dc in one st, ch 1, sl st, ch 1, 2 dc in one st, 2 dc in one st, ch 1, 2 sc, sl st, ch 1, dc, ch 1, sl st.
Bull’s Cap
Rnd 1: 8 sc in MR. (8)
Rnd 2: inc in each st around. (16)
Rnd 3: 1 sc, inc repeat 8 times around. (24)
Rnd 4: 2 sc, inc repeat 8 times around. (32)
Rnd 5: 3 sc, inc repeat 8 times around. (40)
Rnd 6: 4 sc, inc repeat 8 times around. (48)
Rnd 7 (BLO): 2 sc, dec repeat 12 times around. (36)
Rnd 8: 1 sc, dec repeat 12 times around. (24)
Rnd 9: sc in each st around. (24)
Rnd 10 — Cap Brim (FLO): sl st, sc, hdc, 2 dc in next st, 2 dc in next st, hdc, sc, sl st. Turn the work and, starting in the 2nd stitch from the hook: Brim Row 2: sl st, sc, hdc, 2 dc in next st, hdc, sc, sl st. Fasten off and weave in ends.
Flower (Optional Decoration)
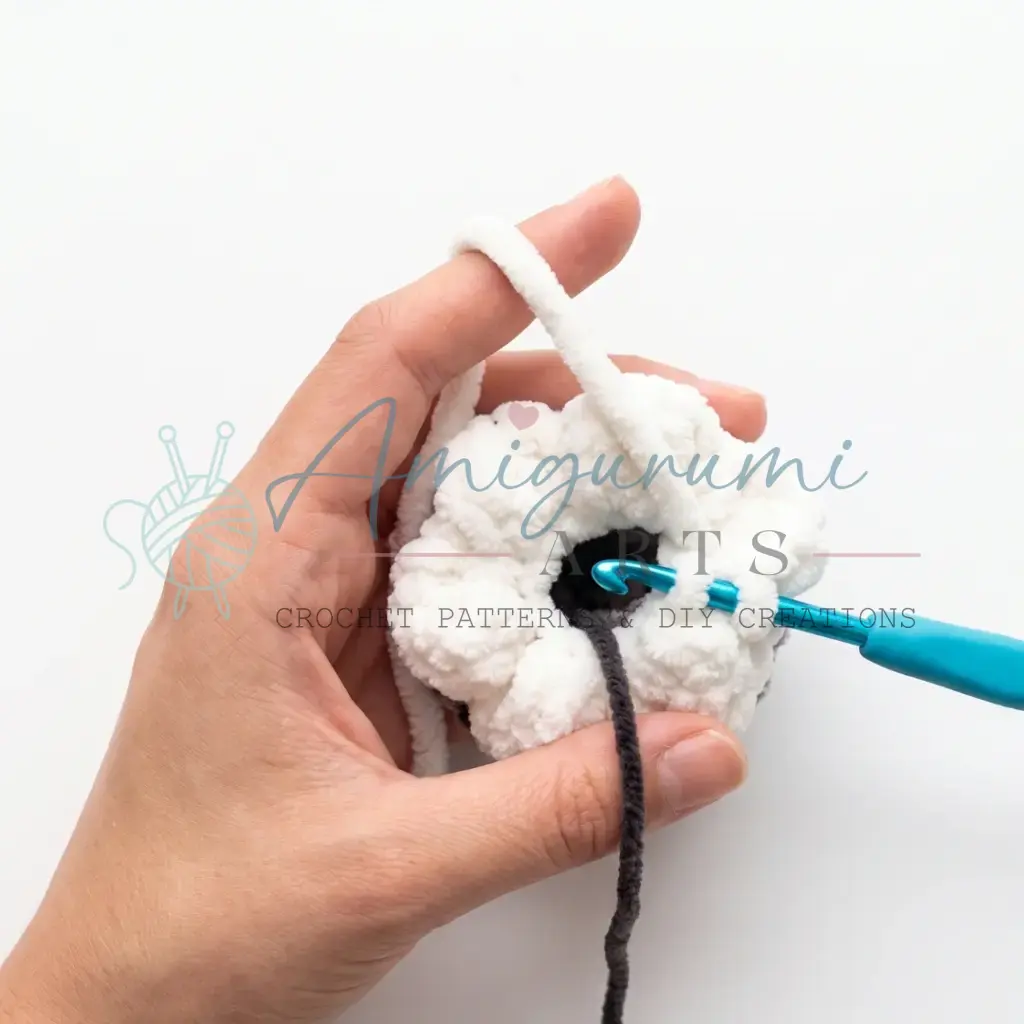
Make MR. Into the ring: ch 1, 2 dc, ch 1, sl st — this completes one petal. Repeat for a total of 4 or 5 petals as desired. Pull the ring closed and fasten off.
Assembly
- Attach the head to the body. Use the long yarn tail left at the top of the Body (Rnd 15) and your tapestry needle. Position the head centrally on the body opening and sew around the neck join using whipstitch, working through the last round of the body and the base of the head. Pull firmly and evenly so the head sits upright.
- Close the head opening. Once the head is sewn on and fully stuffed, draw the 6 remaining stitches closed with the yarn tail. Weave in the end securely inside the head.
- Check all attached limbs. The legs, arms, tail, horns, and ears should already be joined during the crocheting of the Body and Head. Confirm each piece is secure and sitting naturally; reinforce any loose joins with a few extra stitches.
- Attach spots (if made). Position the small and/or large spots on the body or head as desired and sew in place using a tapestry needle and matching yarn. Weave in all ends.
- Place the cap. Set the cap on the bull’s head between the ears and tack it in place with a few invisible stitches if you’d like it to stay put.
- Attach the flower (if made). Sew the flower to the cap or behind one ear using a short yarn tail.
- Final check. Weave in all remaining ends. Gently shape the body, smooth out any stuffing lumps, and adjust the ears and limbs until your little bull looks just right.
Tips
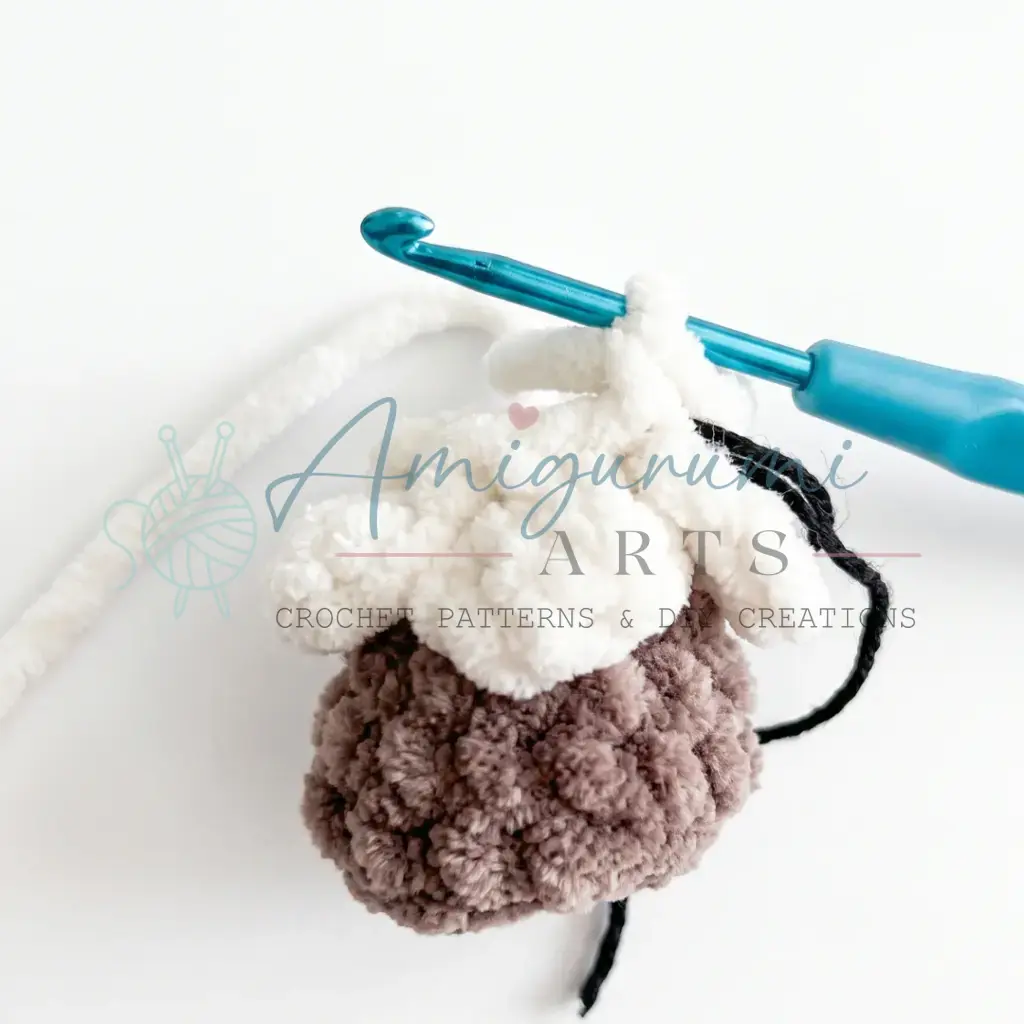
- Keep your tension tight. Plush yarn has a tendency to open up between stitches, which can show stuffing. Work with a slightly smaller hook than you might normally use for this yarn weight — G-6 / 4.0 mm is intentionally snug for Dolphin Baby to keep the fabric dense and smooth.
- Master the invisible decrease. For amigurumi, always decrease by inserting through the front loops only of the next two stitches before completing the stitch. This prevents the telltale horizontal bar that standard decreases leave behind, giving your shaping a much cleaner finish.
- Stuff the hoof firmly before the leg narrows. Once you’ve worked Rnd 9 and the leg begins to draw in, it’s difficult to push stuffing down into the hoof. Add your fiberfill right after Rnd 8 while the opening is still wide enough to work with.
- The two-strand round on the legs. When the pattern calls for working with two strands held together in Rnd 6 of the leg, keep even tension on both strands. This creates a subtle color-blend transition between the hoof and the leg that looks intentional and polished rather than abrupt.
- Joining limbs to the body cleanly. When you work the stitches that join the legs, arms, and tail to the body, make sure each limb is oriented the same direction (toes pointing forward, arms pointing outward). It’s easiest to pin them in place with a stitch marker or locking pin before you crochet them in — repositioning once joined is much harder than a moment of planning beforehand.
FAQs
What hook size should I use for this pattern?
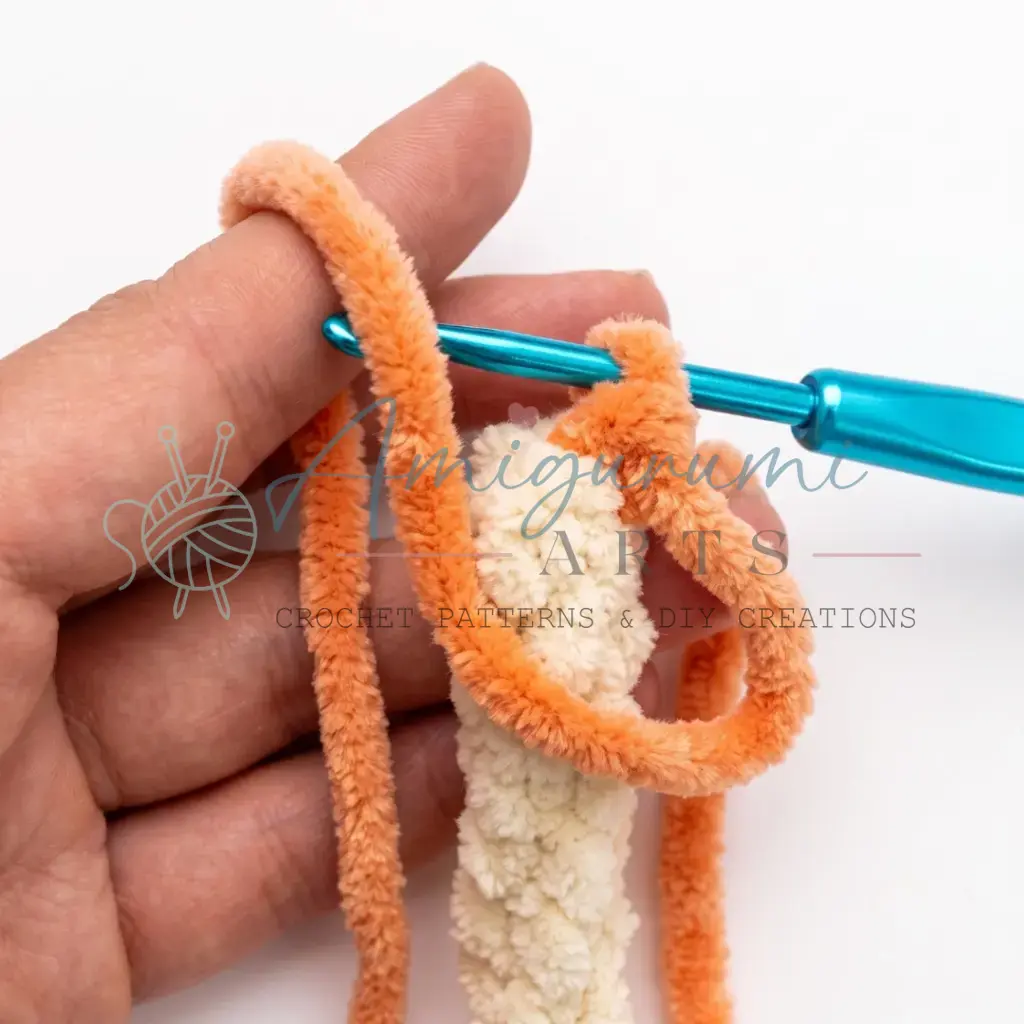
The pattern recommends a US Size G-6 / 4.0 mm hook. This is intentionally a bit snug for bulky plush yarns like Himalaya Dolphin Baby to ensure the fabric remains dense and stuffing does not show through.
How do I insert the safety eyes?
Insert the 16 mm safety eyes between Rounds 5 and 6 of the Head. It is important not to close the head fully before placing them, as you will need to secure them from the inside before the final stuffing and closing.
Can I make the bull larger or smaller?
While the pattern is designed for bulky-weight plush yarn, you can adjust the size by changing the yarn weight and hook size. However, be aware that changing the yarn weight will affect the gauge and the final dimensions of the amigurumi.
How do I create the fluffy texture on the tail?
In Rounds 18 and 19 of the tail, the pattern instructs you to gently tug the yarn downward before completing each stitch. This technique stretches the stitch slightly, creating a textured, fluffy appearance for the tail.
Do I need to stuff the horns and ears?
No, the horns and ears should not be stuffed. They are folded flat and sewn shut to create a natural, flat appearance that mimics real animal features.
Pin This Crochet Pattern!