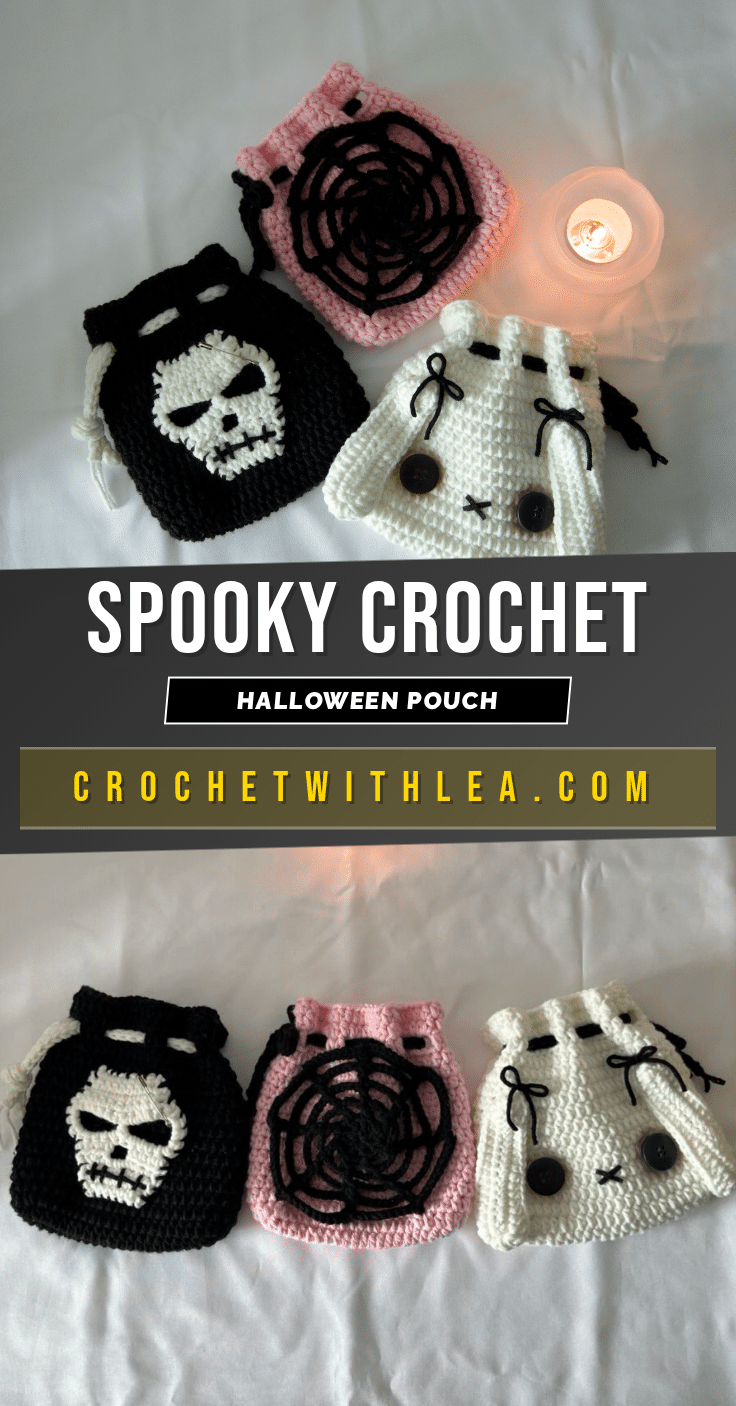
There is something undeniably magical about a finished amigurumi project that is both cute and useful. This spooky Halloween crochet pouch is the perfect example of that sweet spot. It is squishy enough to cuddle, tidy enough to hold your essentials, and display-worthy enough to sit on your desk all season long. Whether you are filling it with candy for trick-or-treaters or using it as a unique gift for a fellow crafter, this pouch brings a playful, festive energy to any space. It is a project that rewards patience with a charming result that feels like a small, handmade treasure.
Why the Finished Piece Stands Out
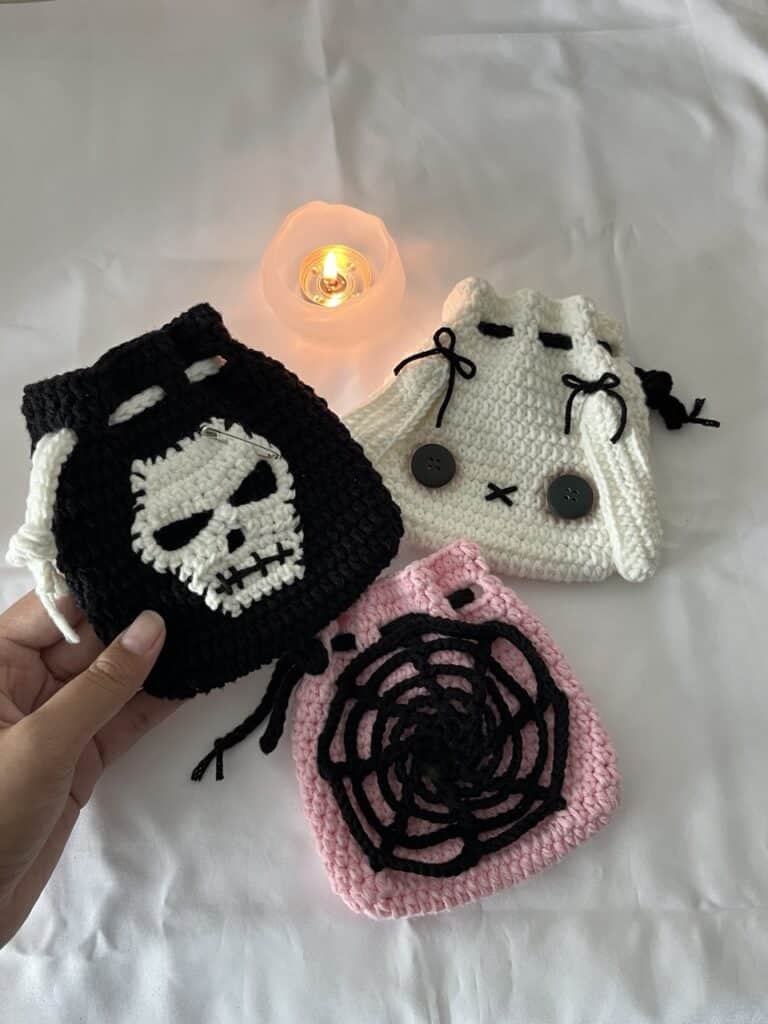
What makes this pouch truly special is its versatility. While many Halloween decorations are strictly for display, this piece serves a functional purpose while maintaining a spooky aesthetic. The design allows for creative freedom with yarn colors, meaning you can match it to your existing home decor or go for a traditional orange and black palette. The addition of the spider web and skeleton applique adds texture and depth, transforming a simple pouch into a conversation starter. It is a project that feels approachable for intermediate crocheters but offers enough detail to keep you engaged. The finished size is perfect for storing small items like makeup, coins, or keys, making it a practical accessory that you will reach for again and again.
Project Overview
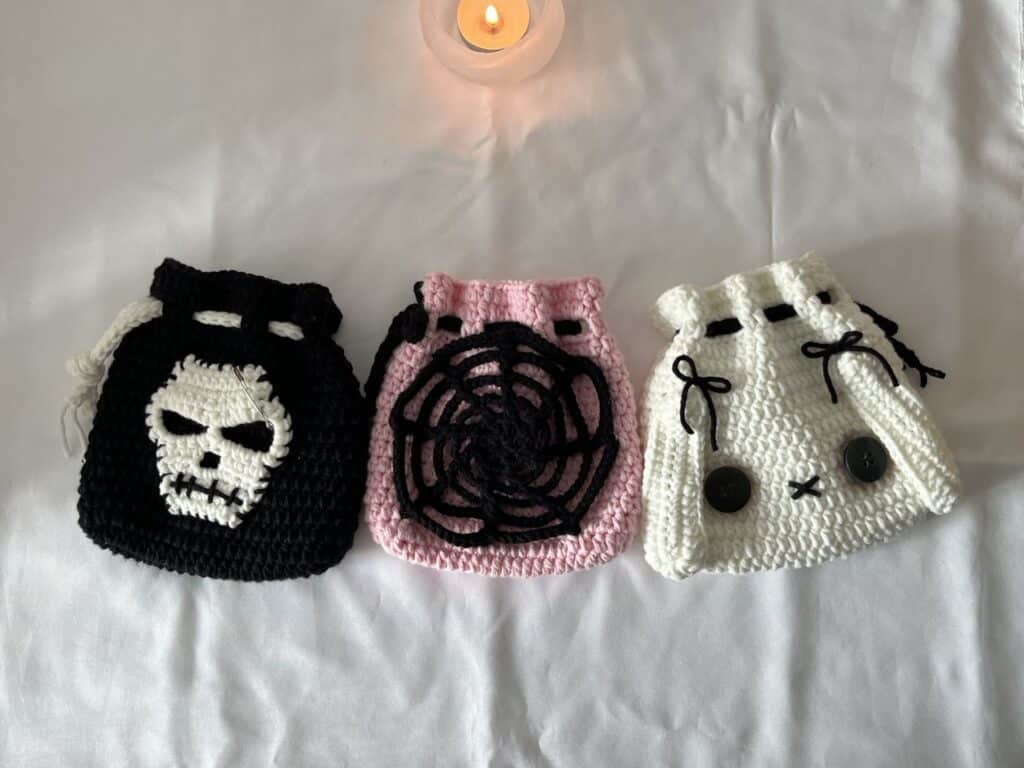
This pattern guides you through creating a Halloween-themed pouch featuring a spider web border, a skeleton applique, and bunny ears. It is designed to be a fun, seasonal project that combines basic crochet stitches with assembly techniques to create a three-dimensional object. The pattern includes instructions for the base pouch, the drawstring, the web border, and the decorative elements.
Materials
- Cotton or Acrylic yarn (sports weight, 5ply) in any color you prefer
- 3mm crochet hook
- 20mm black buttons (for eyes)
- Black felt cloth (for mouth)
- Glue
- Dark eyeshadow or crayons (for eye details)
- Stitch markers
- Darning needle
- Scissors
Gauge and Finished Size
Specific gauge and finished size measurements are not provided in the source pattern. It is recommended to use the specified yarn weight and hook size to ensure the components fit together correctly. If you substitute yarn, be aware that the final size may vary.
Abbreviations
The abbreviations are in US terminology!
- R – round/row
- Ch – chain
- mr – magic ring
- st – stitch
- sc – single crochet
- inc – increase
- dec – decrease
- dc – double crochet
- hdc – half double crochet
- slst – slip stitch
- FLO – front loop only
- BLO – back loop only
- *- repeat
- [] – total stitch count in each round/row
- sk – skip
Pattern Notes
This pattern can be a bit confusing while only reading the text. It is highly suggested to watch the accompanying tutorial video for a more detailed explanation of the assembly and specific stitch placements. Do not miss out on any details in the video to make the process more effective and time-saving.
Pattern Instructions
Base Pouch
Start with a slip knot and make 22ch.
- R1 Starting from 3 rd ch from the hook, 1hdc inc, 18hdc, 4hdc in one ch, 18hdc, 1hdc inc, 1slst [44]
- R2 Ch1, 2hdc inc, 18hdc, 4hdc inc, 18hdc, 2hdc inc, 1slst [52]
- R3-R14 Ch1, 52hdc, 1slst (12 rounds) [52]
- R15 Ch1, (2hdc, sk2, 2ch) *13, 1slst [26hdc]
- R16-R17 Ch1, 52hdc, 1slst (2 rounds) [52]
Cut the yarn and weave in the ends.
String
Start with a slip knot and make 70 or 75 chains.
- 1slst into each back bump of the ch and cut the yarn.
Make two of these and pass it through the holes left in R15 of the pouch. Watch the tutorial for a detailed explanation on threading.
Spider Web
- R1 In mr, ch4, (1dc, 1ch) *7, 1slst into 3 rd ch
- R2 Ch6, (1dc, 3ch) *7, 1slst into 3 rd ch
- R3 Ch8, (1dc, 5ch) *7, 1slst into 3 rd ch
- R4 Ch10, (1dc, 7ch) *7, 1slst into 3 rd ch
- R5 Ch 12, (1dc, 9ch) *7, 1slst into 3 rd ch
Without cutting the yarn, attach the spider web to the pouch. At each corner, crochet it together with the pouch using sc. For the chains between corners, don’t crochet together with the pouch, just make 1slst in each chain to move to the next corner. Repeat around until the web is fully attached.
Skeleton Applique
This section can be confusing while only reading the pattern. It is suggested to watch the tutorial for a detailed explanation.
Start with a slip knot and make 14ch, 1slst into 1 st ch to make a loop. Make 14ch again, 1slst into the 1 st loop, and we get two loops now! Make 15sc each into both loops, 1slst into very 1 st sc at the end [30sc]. Cut the yarn.
Mark 6sc on each upper side of the loop (marked 12sc in total). Introduce the yarn again and work on the marked stitches.
- R1 Ch1 & Turn, 1dec, 8sc, 1dec [10]
- R2 Ch1 & Turn, 10sc [10]
- R3 Ch1 & Turn, 1dec, 6sc, 1dec [8]
- R4 Ch1 & Turn, 8sc [8]
Cut the yarn. Mark 5sc from each loop, on the bottom side again (marked 10sc in total).
- R1 Ch2, 4hdc, sk 2 in the middle, 3ch, 4hdc [8hdc]
- R2 Ch1 & Turn, 1dec, 2sc, 2sc on ch space, 2sc, 1dec [8]
- R3-R4 Ch1 & Turn, 8sc (2 rows) [8]
- R5 Ch1 & Turn, 1dec, 4sc, 1dec [6]
Cut the yarn leaving a long tail. Embroider the teeth using black yarn. Sew or glue it on the body of the pouch.
Bunny Ears
Start with a slip knot and make 17ch.
- R1 Starting from 2 nd ch from the hook, 15sc, 5sc last ch, 15sc, 1slst [35]
- R2 Ch1, 1inc, 9sc, 5hdc, 1dc, 3dc inc, 1dc, 5hdc, 9sc, 1inc, 1slst [40]
Cut the yarn leaving a long tail and make another ear.
Assembly
Follow these steps to complete the look of your pouch:
- Glue 20mm black buttons on R5-6 of the pouch for the eyes.
- Apply some dark paint using eyeshadow or crayon to make them look more dramatic.
- Using black felt cloth, make an X-shaped mouth and glue it between the eyes.
- Sew the ears on R11 on each side.
Tips
- Do not miss out any details! Open the tutorial video as you crochet along to make the process more effective and time-saving.
- Watch the tutorial for a detailed explanation of the skeleton applique and ear placement.
- Watch the tutorial to see how to properly sew the applique and ears for a secure finish.
- Take your time with the spider web attachment to ensure it lays flat against the pouch.
FAQs
What type of yarn should I use?
The pattern recommends cotton or acrylic yarn in sports weight (5ply). You can choose any color you prefer to match your Halloween decor.
How do I attach the spider web?
Without cutting the yarn after the final round of the web, attach it to the pouch. Crochet it together with the pouch using sc at each corner. For the chains between corners, just make 1slst in each chain to move to the next corner.
Can I use a different hook size?
The pattern specifies a 3mm crochet hook. Using a different size may alter the gauge and affect how the components fit together, so it is best to stick with the recommended size.
How do I make the eyes look more dramatic?
After gluing the 20mm black buttons for the eyes, apply some dark paint using eyeshadow or crayons to add depth and a spooky effect.
Is this pattern suitable for beginners?
This pattern is best for crocheters with some experience, particularly those comfortable with hdc, dc, and assembly techniques. The skeleton applique and web attachment may require watching the tutorial for clarity.
Pin This Crochet Pattern!