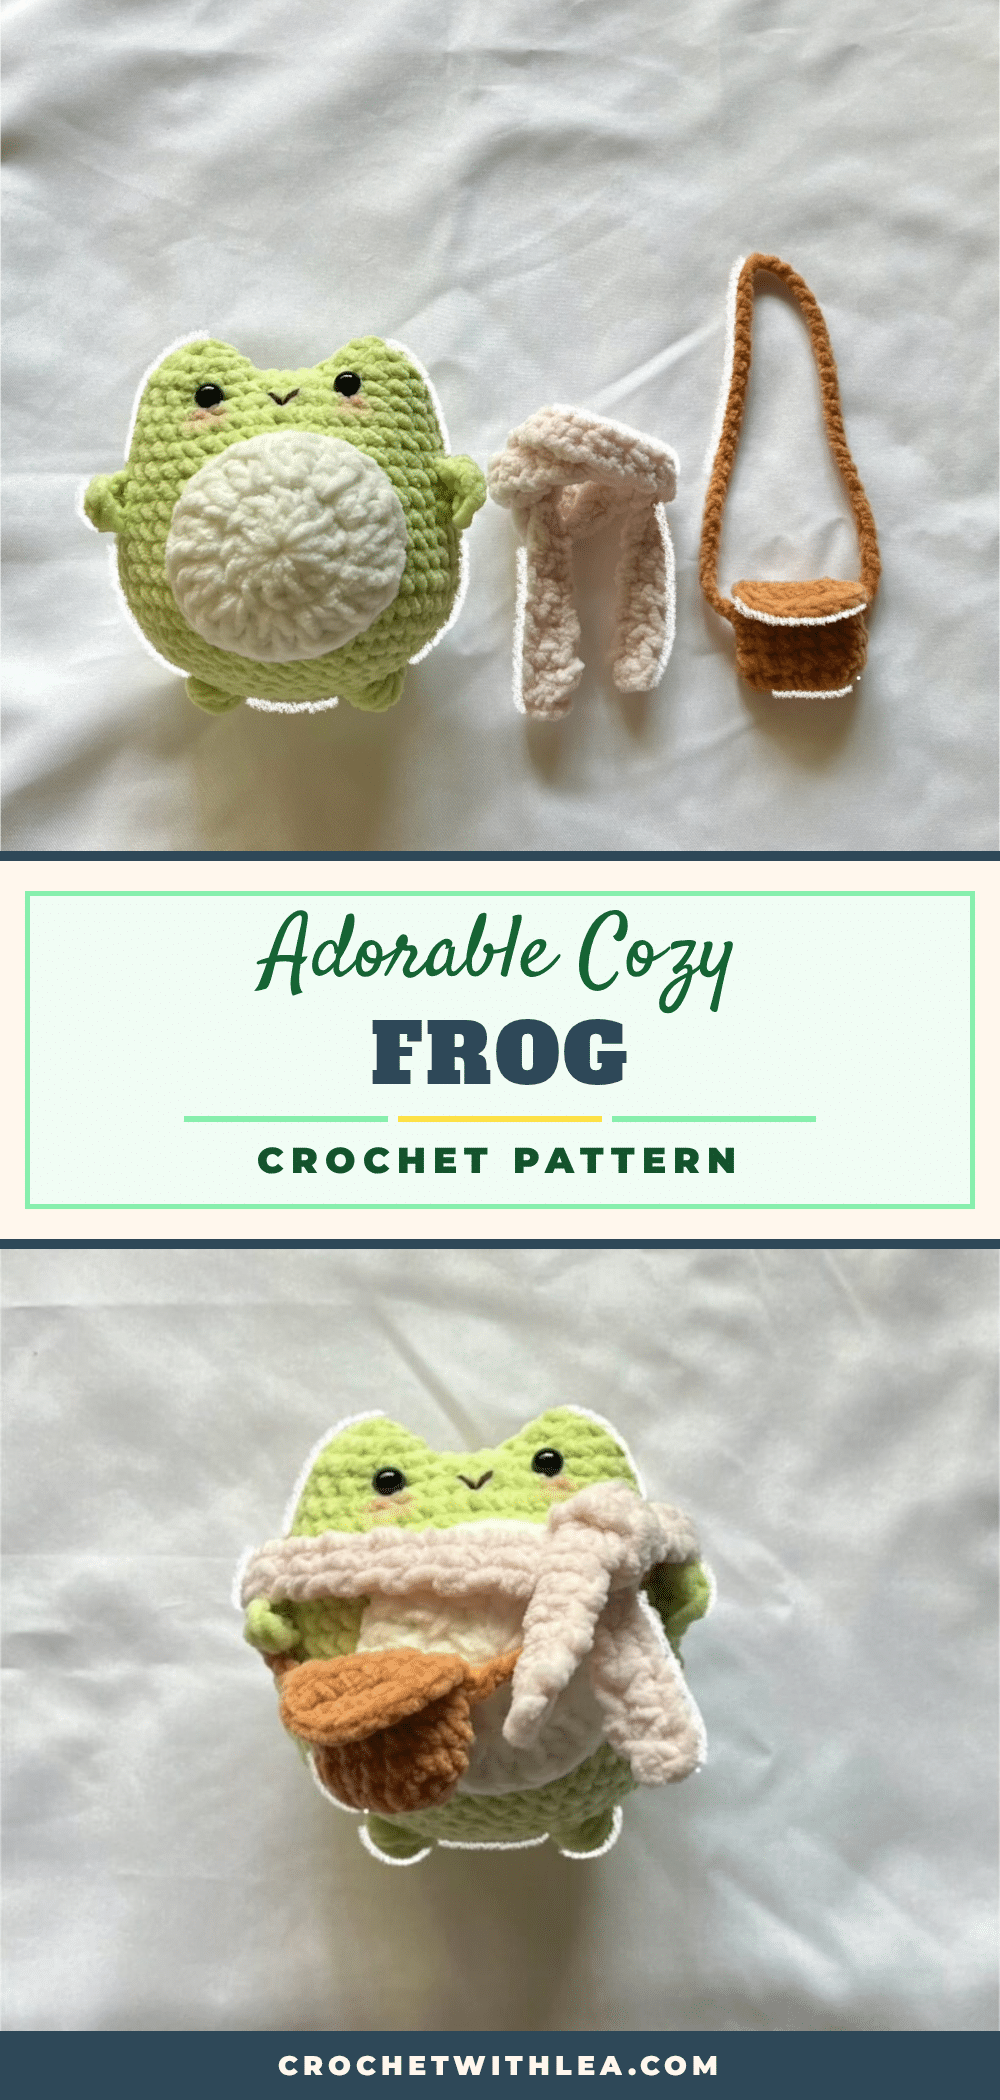
There is something deeply satisfying about the tactile nature of amigurumi, where the rhythm of single crochets builds a shape from nothing but yarn and intention. This project invites you to slow down and appreciate the texture of chenille yarn as it forms a plump, cozy frog. The pattern relies on precise increases and decreases to create that signature round, stuffed silhouette, while the addition of accessories like a scarf and bag adds layers of charm. It is a project that rewards patience with a plush, huggable result that feels as good as it looks.
Texture and Stitch Notes
The choice of thin chenille yarn is central to the appeal of this frog. Chenille has a soft, velvety nap that catches the light, making the individual stitches of the single crochet stand out with a fuzzy, defined texture. This texture helps to hide minor tension inconsistencies, making it a forgiving choice for intermediate crocheters while still looking professional. The bobble stitches used for the feet add a contrasting textural element, breaking up the smooth curve of the body with little nubs that mimic the look of webbed toes. Paying attention to the stitch definition in each round ensures the frog maintains its round shape rather than flattening out.
Project Overview
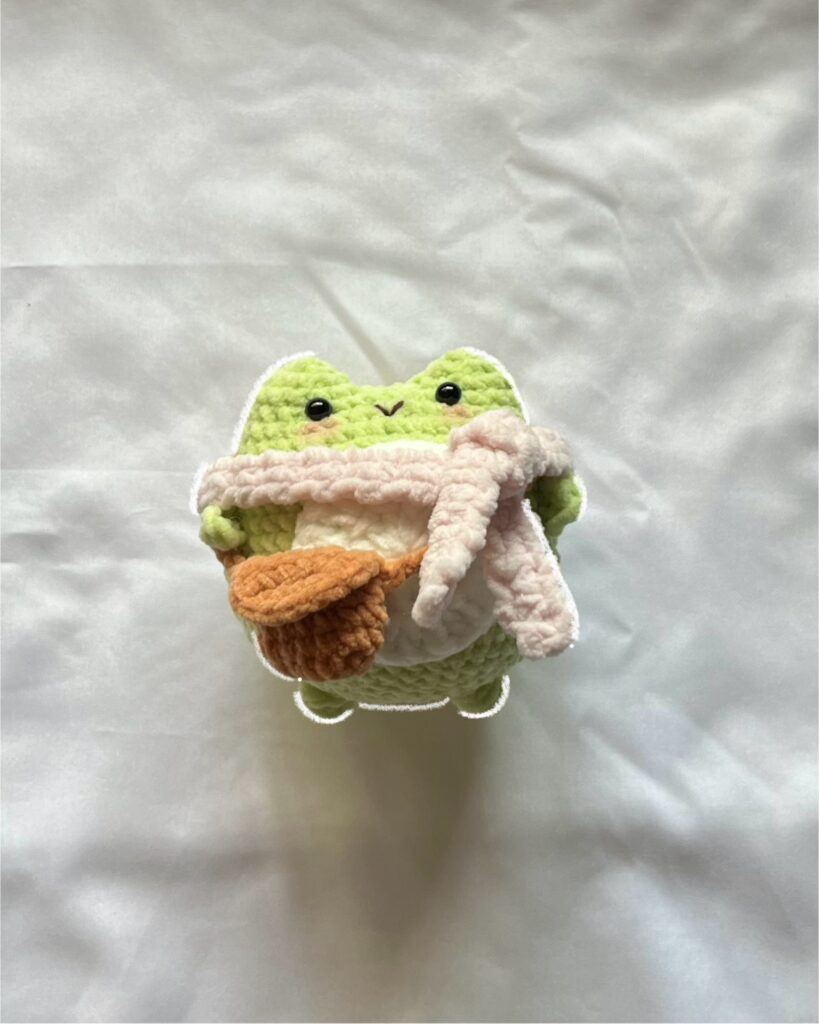
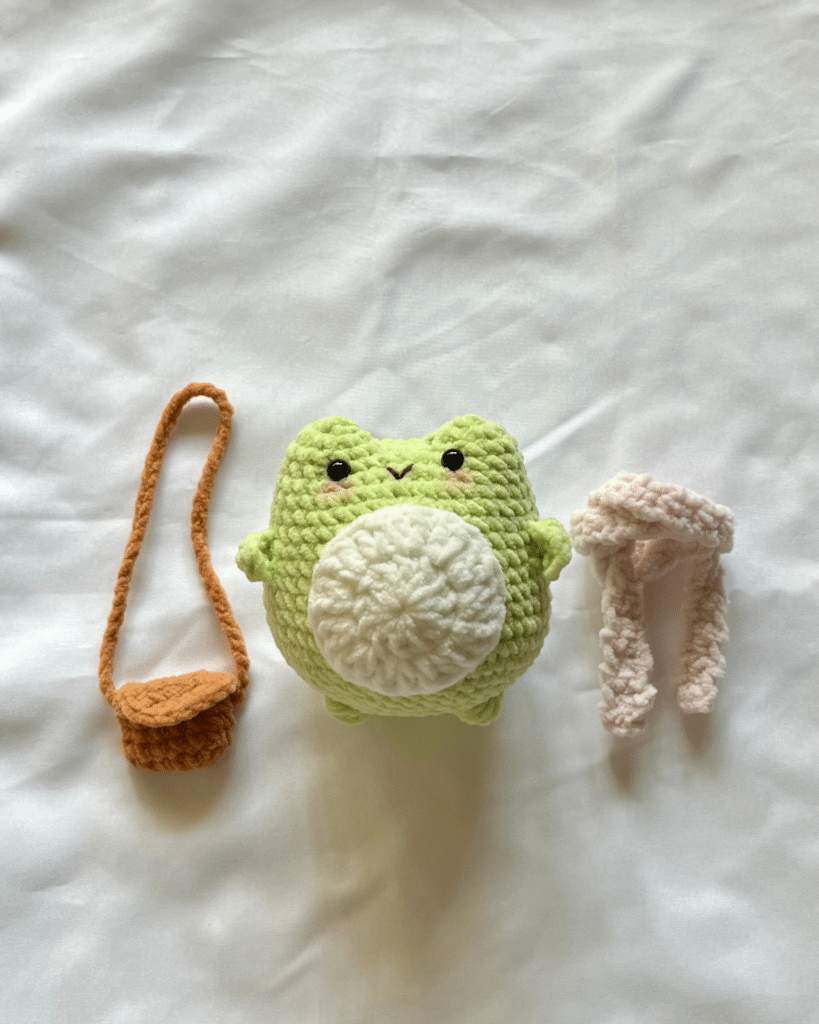
This amigurumi pattern creates a cute and cozy frog complete with a scarf and a small bag. The construction begins with the head and body worked in one continuous piece, starting with the ears and connecting them into the main body. The pattern includes instructions for small hands, a white belly patch, and two accessories: a pink scarf and a brown bag with a strap. The finished piece is assembled using a darning needle for sewing and glue for the eyes, with embroidered details for the face.
Materials
- Thin chenille yarn in Green (for body, ears, hands)
- Thin chenille yarn in White (for belly patch)
- Thin chenille yarn in Pink (for scarf)
- Thin chenille yarn in Brown (for bag)
- 3mm crochet hook
- 5mm safety eyes
- Stuffing materials
- Darning needle
- Glue
- Scissors
- Pink blusher and a brush
Gauge and Finished Size
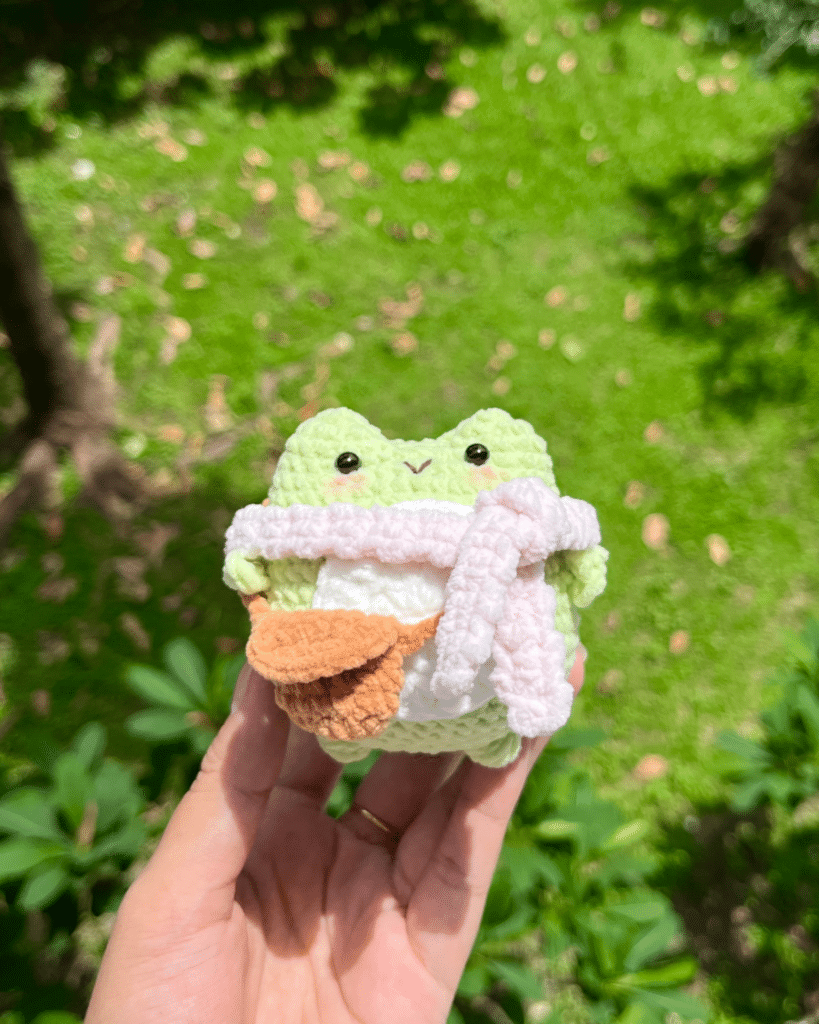
Specific gauge measurements and finished dimensions are not provided in the source pattern. To ensure the frog holds its shape and the accessories fit correctly, it is recommended to use the specified 3mm hook and thin chenille yarn. If your gauge is looser, the frog may become too large and lose its plumpness; if tighter, the fabric may become stiff.
Abbreviations
Abbreviations are in US terminology.
- Ch – Chain
- mr – magic ring
- st – stitch
- R – round / row
- sc – single crochet
- inc – increase
- dec – decrease
- dc – double crochet
- hdc – half double crochet
- slst – slip stitch
- BLO – back loops only
- Bob – bobble stitch
- * – repeat
- [] – total stitch count in each round
Pattern Notes
- Abbreviations are in US terminology.
- Do not miss out any details! Open the accompanying video tutorial as you crochet along to make the process more effective and timesaving.
Pattern Instructions
Ears and Body
Start with green yarn.
Start with a magic ring.
R1 6sc in mr [6]
R2 6inc [12]
Make 2 ears. Cut the yarn after making the first ear. DO NOT cut the yarn after making the second ear and continue to R3.
We will connect the two ears in R3 and continue to the body.
R3 Ch3, 1sc (into the last sc of the 1 st ear), 11sc (on the 1 st ear), 3sc (on upper sides of ch3), 12sc (on the 2 nd ear), 3sc (on lower sides of ch3) [30]
Watch this part of the tutorial to see how to connect the ears.
R4 (4sc, 1inc)*6 [36]
R5 1sc in each stitch [36]
R6 (5sc, 1inc)*6 [42]
R7-R8 1sc in each stitch (2 rounds) [42]
R9 (3sc, 1inc, 3sc)*6 [48]
R10-R11 1sc in each stitch (2 rounds) [48]
R12 (7sc, 1inc)*6 [54]
R13 1sc in each stitch [54]
R14 (4sc, 1inc, 4sc)*6 [60]
R15 1sc in each stitch [60]
R16 (4sc, 1dec)*10 [50]
R17 (3sc, 1dec)*10 [40]
R18 (6sc, 1dec)*5 [35]
R19 (3sc, 1dec)*7 [28]
Start stuffing and continue stuffing after each following rounds!
R20 (2sc, 1dec)*7 [21]
In R21, we’ll be adding little feet with cluster st.
R21 5sc, (5dc Bob st), 8sc, (5dc Bob st), 6sc [21]
Watch this part of the tutorial to see how to make Bob st for feet.
R22 (1sc, 1dec)*7 [14]
R23 7dec [7]
Cut the yarn, leaving a long tail. Using the darning needle, close the body. Watch this part of the tutorial to see how to close the amigurumi hole.
Hands (Make 2)
Start with green yarn.
Start with a slip knot.
Make 4ch.
1sc (starting from the 2 nd ch from the hook), 2hdc
Ch1 and cut the yarn, leaving a long tail.
Using the darning needle, sew the hands on R9 & R10 in line with the feet.
Watch this part of the tutorial to see how to sew the hands.
Face
Glue the eyes on R4 with 6sc apart.
Separate the brown yarn into 2 strands.
Using the darning needle, embroider the mouth as a V shape one round below the eyes.
Put some blusher under the eyes using a brush.
Watch this part of the tutorial to see how to make the face.
Belly Patch
Start with white yarn.
Start with a magic ring.
Make 2ch.
R1 12dc in mr, 1slst (into the first dc) [12dc]
R2 Ch2, 12dc inc, 1slst (into the first dc) [24dc]
Cut the yarn, leaving a long tail.
Using the darning needle, sew it in the center of the body.
Watch this part of the tutorial to see how to sew the belly patch to the body.
Scarf
Start with pink yarn.
Start with a slip knot.
Make 3ch.
R1 1sc in each ch (starting from the 2 nd ch from the hook) [2]
R2 Ch1, Turn, 1sc in each stitch [2]
Repeat R2 until you get around 13 inches (or your desired length for the scarf).
Cut the yarn and weave in the ends using the darning needle.
Bag
Start with brown yarn.
Start with a slip knot.
Make 7ch.
R1 5sc (starting from the 2 nd ch from the hook), 1inc (into the last ch) , 5sc (into lower part of each ch) , 1slst (into the first sc) [12sc]
R2-R4 Ch1, 1sc in each stitch, 1slst (into the first sc) (3 rounds) [12sc]
R5 Ch1, in BLO 5sc [5]
After R5, start Turning and continue other rows the same way to make the Flap!
R6-R7 Ch1, Turn, 1sc in each stitch (2 rows) [5]
Cut the yarn. Now we’ll crochet along the sides of the cover to smoothen out the edges.
Insert the hook into the right bottom of R5 and bring the brown yarn.
Ch1, 3sc (on the right side), 5sc (on the upper side), 3sc (on the left side) [11]
Cut the yarn and weave in the ends.
Watch this part of the tutorial to see how to do edging.
Add the strap to the bag. Insert the hook into the bag underneath the cover (on R4) and bring the brown yarn.
Make 45ch for the strap. Be careful for the strap not to be twisted and Connect with a slst to the other side of the bag.
Ch1, cut the yarn and weave in the ends.
Watch this part of the tutorial to see how to make the strap.
Assembly
- Using the darning needle, close the body.
- Using the darning needle, sew the hands on R9 & R10 in line with the feet.
- Glue the eyes on R4 with 6sc apart.
- Separate the brown yarn into 2 strands.
- Using the darning needle, embroider the mouth as a V shape one round below the eyes.
- Put some blusher under the eyes using a brush.
- Using the darning needle, sew the belly patch in the center of the body.
Tips
- Watch this part of the tutorial to see how to connect the ears.
- Watch this part of the tutorial to see how to make Bob st for feet.
- Watch this part of the tutorial to see how to close the amigurumi hole.
- Watch this part of the tutorial to see how to sew the hands.
- Watch this part of the tutorial to see how to make the face.
- Watch this part of the tutorial to see how to sew the belly patch to the body.
- Watch this part of the tutorial to see how to do edging.
- Watch this part of the tutorial to see how to make the strap.
FAQs
Can I use a different hook size?
The pattern specifies a 3mm hook. Using a larger hook may result in a loose fabric that doesn’t hold stuffing well, while a smaller hook may make the stitches too tight to work into. If you want to change the size of the frog, you will need to adjust the stitch counts accordingly.
How do I make the bobble stitch for the feet?
The bobble stitch (Bob) is created using 5 double crochets (dc) into the same stitch. For a visual guide on how to execute this stitch correctly to form the little feet, refer to the tutorial video linked in the pattern instructions.
What type of yarn is best for this pattern?
The pattern calls for thin chenille yarn. This yarn type provides a soft, fuzzy texture that enhances the cute appearance of the frog. Green, pink, white, and brown colors are recommended for the different parts.
How do I attach the ears to the body?
The ears are worked first, and the yarn is not cut after the second ear. In Round 3, you chain 3 and then work single crochets across the first ear, the chain, and the second ear to connect them seamlessly into the body. See the tutorial video for a demonstration of this connection.
How do I add the blusher to the face?
After embroidering the mouth and gluing the eyes, use a small brush to apply pink blusher under the eyes. This adds a subtle, cute flush to the frog’s face. Adjust the amount of blusher to achieve your desired level of “blush.”
Pin This Crochet Pattern!