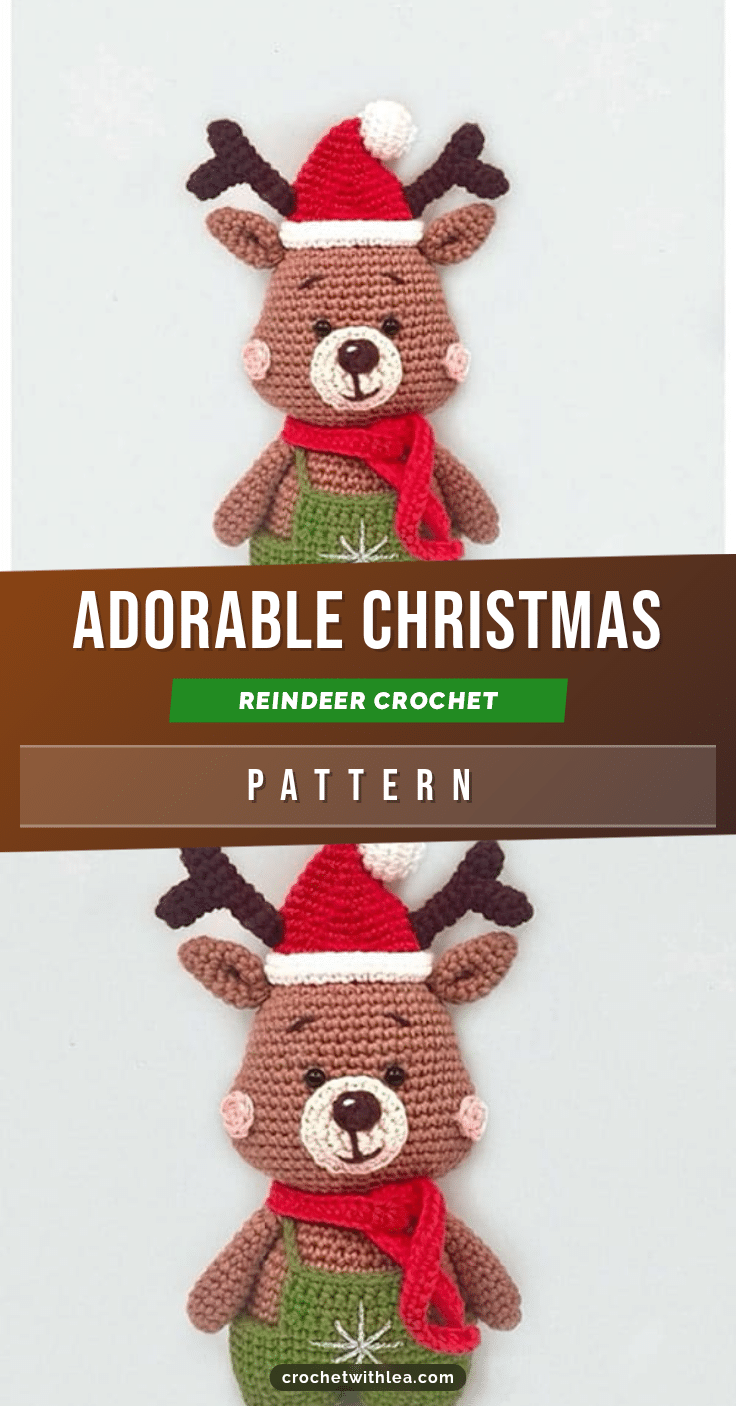
Yarn is draped across the table, the hook is already in your hand, and the first few stitches of the magic ring are just beginning to pull together. There is a specific kind of magic in amigurumi during the holidays, where the act of crocheting feels less like a project and more like a ritual of preparation. This Christmas reindeer pattern captures that cozy spirit perfectly. It is designed to be approachable for crocheters who enjoy creating festive characters, offering a structured path from individual components to a finished, huggable friend. As you work through the rounds, you will find the rhythm of the increases and decreases guiding you toward a charming holiday companion ready for your mantel or tree.
Why This Project Works
This reindeer stands out because it balances classic holiday aesthetics with a playful, modern twist. The inclusion of overalls and a knitted-style hat gives the character a distinct personality that goes beyond a standard animal shape. The color palette—using warm browns for the body, soft beige for the muzzle, and festive red and green for the accessories—creates a cohesive look that feels instantly seasonal. The project is also highly versatile; the separate construction of the hat, scarf, and overalls allows you to customize the reindeer’s outfit or swap colors to match your home decor. It is a satisfying make that results in a sturdy, well-proportioned amigurumi piece perfect for gifting or as a centerpiece for your holiday crafting.
Project Overview
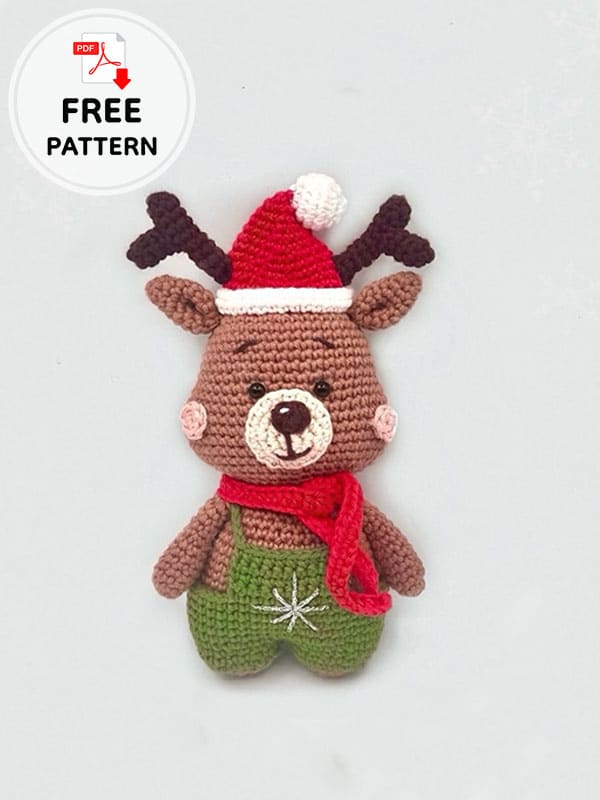
This pattern guides you through creating a complete Christmas reindeer amigurumi, including the body, head, limbs, and a full set of festive accessories like a hat, scarf, and overalls. The design relies on standard amigurumi techniques, making it an excellent project for intermediate crocheters looking to refine their shaping and assembly skills. All components are worked separately and then sewn together, allowing for precise stuffing and positioning.
Materials
- Yarn: Cotton ricorumi in brown, green, red, beige, dark brown, and pink.
- Crochet Hooks: 2.25 mm and 3 mm hooks.
- Notions:
- 6 mm safety eyes
- Stitch marker
- Yarn needle
- Fiberfill for stuffing
- Scissors
Gauge and Finished Size
Specific gauge measurements and finished dimensions are not provided in the source pattern. For best results, ensure your tension is consistent, particularly when working the body and head to ensure the pieces fit together correctly. Use the recommended hook sizes (2.25 mm and 3 mm) to maintain a tight fabric that prevents stuffing from showing.
Abbreviations
- Rnd: Round
- MR: Magic ring
- Ch: Chain
- Slst: Slip stitch
- Sc: Single crochet
- Inc: Increase
- Dec: Decrease
- BLO: Back loop only
- FLO: Front loop only
Pattern Notes
- All parts of the crochet reindeer are made and assembled separately.
- The legs and body are made the same.
- You will also be able to decorate your reindeer after learning how to make a scarf and a crocheted Christmas hat.
- Designer: les.mailles.du.rocher
Pattern Instructions
Head
Make a ch 6, crochet around the ch, start in the 2nd ch from hook.
- Rnd 1: inc, 3 sc, 3 sc in last stitch, on the other side 4 sc [12]
- Rnd 2: 2 inc, 3 sc, 3 inc, 3 sc, inc [18]
- Rnd 3: (2 sc, inc)* [24]
- Rnd 4: (3 sc, inc)* [30]
- Rnd 5: (2 sc, inc, 2 sc)* [36]
- Rnd 6: (5 sc, inc)* [42]
- Rnd 7-13: 42 sc [42]
- Rnd 14: 2 sc, 4 inc, 17 sc, 4 inc, 15 sc [50]
- Rnd 15-20: 50 sc [50]
- Rnd 21: 2 sc, 4 dec, 17 sc, 4 dec, 15 sc [42]
- Rnd 22: (dec, 2 sc) x 3, 9 sc, (dec, 2 sc) x 3, 9 sc [36]
- Rnd 23: (dec, 1 sc) x 3, 9 sc, (dec, 1 sc) x 3, 9 sc [30]
- Rnd 24: (3 sc, dec)* [24]
Insert safety eyes (between Rnds 13 & 14). Stuff firmly.
Ears (x2)
- Rnd 1: MR, 4 sc [4]
- Rnd 2: (1 sc, inc)* [6]
- Rnd 3: (2 sc, inc)* [8]
- Rnd 4: (3 sc, inc)* [10]
- Rnd 5: (4 sc, inc)* [12]
- Rnd 6: (5 sc, inc)* [14]
- Rnd 7: 14 sc [14]
- Rnd 8: (5 sc, dec)* [12]
Fasten off, leaving a long tail. Fold the ear in half before sewing.
Muzzle
In beige.
- Rnd 1: MR, 6 sc [6]
- Rnd 2: (inc)* [12]
- Rnd 3: (1 sc, inc)* [18]
- Rnd 4: 18 sc [18], 1 sl st. Fasten off, leaving a tail for sewing.
Nose: In dark brown. MR, crochet 4 sc, 1 sl st. Fasten off. Sew or glue to the muzzle.
Legs & Body
Make 2 legs.
- Rnd 1: MR, 8 sc [8]
- Rnd 2: (inc)* [16]
- Rnd 3-7: 16 sc [16]
- Rnd 8: (3 sc, inc)* [20]
Fasten off the 1st leg, don’t cut the 2nd. Keep the stitch marker at the end of Rnd 8.
- Rnd 9: continue crocheting 10 sc on 2nd leg, join to the 1st leg with 1 sc, then 19 sc around the 1st leg, 10 sc on remaining stitches of 2nd leg [40]. The beginning of the Rnd is on the side of the body.
- Rnd 10: 40 sc [40]
- Rnd 11: (4 sc, inc)* [48]
- Rnd 12-14: 48 sc [48]
- Rnd 15: (6 sc, dec)* [42]
- Rnd 16-20: 42 sc [42]
- Rnd 21: (5 sc, dec)* [36]
- Rnd 22: 36 sc [36]
- Rnd 23: (4 sc, dec)* [30]
- Rnd 24: 30 sc [30]
- Rnd 25: (3 sc, dec)* [24]. Fasten off, leaving a tail for sewing.
Arms (x2)
- Rnd 1: MR, 8 sc [8]
- Rnd 2: (3 sc, inc) [10]
- Rnd 3-7: 10 sc [10]
- Rnd 8: (3 sc, dec)* [8]
- Rnd 9-12: 8 sc [8]. Fasten off, leaving a tail for sewing.
Woods (Antlers)
In dark brown.
- Big: Rnd 1: MR, 6 sc [6]. Rnd 2-9: 6 sc [6]. Fasten off and sew to the hat.
- Small: Rnd 1: MR, 6 sc [6]. Rnd 2-4: 6 sc [6]. Sew to the big wood.
Hat
In red. Make a ch 36, join to first stitch with 1 sc (first of the Rnd).
- Rnd 1: 36 sc [36]
- Rnd 2: BLO (10 sc, dec)* [33]
- Rnd 3: 33 sc [33]
- Rnd 4: (9 sc, dec)* [30]
- Rnd 5: (4 sc, dec, 4 dec)* [27]
- Rnd 6: (7 sc, dec)* [24]
- Rnd 7: (3 sc, dec, 3 sc)* [21]
- Rnd 8: (5 sc, dec)* [18]
- Rnd 9: (4 sc, dec)* [15]
- Rnd 10: (3 sc, dec)* [12]
- Rnd 11: 12 sc [12]
- Rnd 12: (2 sc, dec)** [9]
- Rnd 13: (1 sc, dec)* [6]
- Rnd 14: 6 sc [6]
Change to white.
- Rnd 15: (inc)* [12]
- Rnd 16: (1 sc, inc)* [18]
- Rnd 17-18: 18 sc [18]
- Rnd 19: (1 sc, dec)* [12]
- Rnd 20: (dec)* [6]. Fasten off. Stuff. Fold the top and fix it to the side.
Border of the Hat
Take the white yarn on the 1st stitch of the beginning chain (top of the hat up, you crochet inside on the wrong side) and crochet 2 rounds of 36 sc. Bend the white border and use the visible front loops of Rnd 1, join by crocheting through both sides (border and front loops) 36 sl st. Fasten off, leaving a long tail to sew the hat to the head.
Scarf
In red. Make a ch 80 and crochet 79 half double crochet. Fasten off.
Overalls
In green. Take a bigger crochet hook or crochet more loosely.
- Make 2 legs: Ch 20, join to first stitch with 1 sc (first stitch of the Rnd).
- Rnd 1-2: 20 sc [20]. Fasten off the 1st leg, don’t cut the 2nd. Keep the marker at the end of Rnd 2.
- Rnd 3: continue crocheting 10 sc on 2nd leg, join to the 1st leg with 1 sc, then 19 sc around the 1st leg, 10 sc on remaining stitches of 2nd leg [40]. The beginning of the Rnd is on right side of the body.
- Rnd 4: (4 sc, inc)* [48]
- Rnd 5-8: 48 sc [48], sl st. Fasten off.
Count 6 stitches after Rnd 8. Take same yarn on 7th stitch, ch 1 and crochet in rows in the front:
- R1-4: 10 sc, ch 1, turn
At the end of Row 4, make a ch 26, put the chain round the neck, and attach to the other side in the front with 1 sc.
Cheeks
In pink. MR, 6 sc, slst. Fasten off.
Assembly
- Head: Attach the muzzle to the head. Attach the cheeks below the eyes. Attach the ears to the top of the head.
- Ears: Fold the ear in half before sewing to create a crease.
- Nose: Sew or glue to the muzzle.
- Antlers: Fasten off and sew the small wood to the big wood, then sew the antler assembly to the hat.
- Hat: Fasten off, leaving a long tail to sew the hat to the head.
- Body: Stuff the body firmly. Attach the arms to the sides of the body.
- Accessories: Wrap the scarf around the neck and secure it. Place the overalls on the body and secure them.
Tips
- When making the overalls, take a bigger crochet hook or crochet more loosely to ensure the fabric drapes well over the body.
- Use a stitch marker to keep track of the beginning of each round, especially when joining the legs to form the body.
- Ensure the hat is stuffed firmly before closing the top to maintain its shape on the reindeer’s head.
FAQs
What type of yarn is best for this pattern?
The pattern recommends Cotton ricorumi, which provides a nice stitch definition and durability. However, you can use any worsted weight cotton or acrylic yarn that fits your hook size recommendations.
Can I make the reindeer without the accessories?
Absolutely. The pattern is designed so that all parts are made separately. You can choose to make just the reindeer body and head, or add the hat, scarf, and overalls for a more detailed look.
How do I attach the legs to the body?
The pattern instructs you to crochet the second leg and then join it to the first leg in Round 9. This creates a continuous body shape. Ensure you keep your stitch marker at the end of Round 8 to maintain the correct stitch count.
What size safety eyes should I use?
The pattern specifies using 6 mm safety eyes. This size is proportional to the head, which finishes at 24 stitches in the final round.
How do I make the hat border?
Work into the inside of the hat on the wrong side. Crochet two rounds of single crochet, then bend the border down and slip stitch through both the border loops and the front loops of the hat’s base to create a neat, finished edge.
Pin This Crochet Pattern!