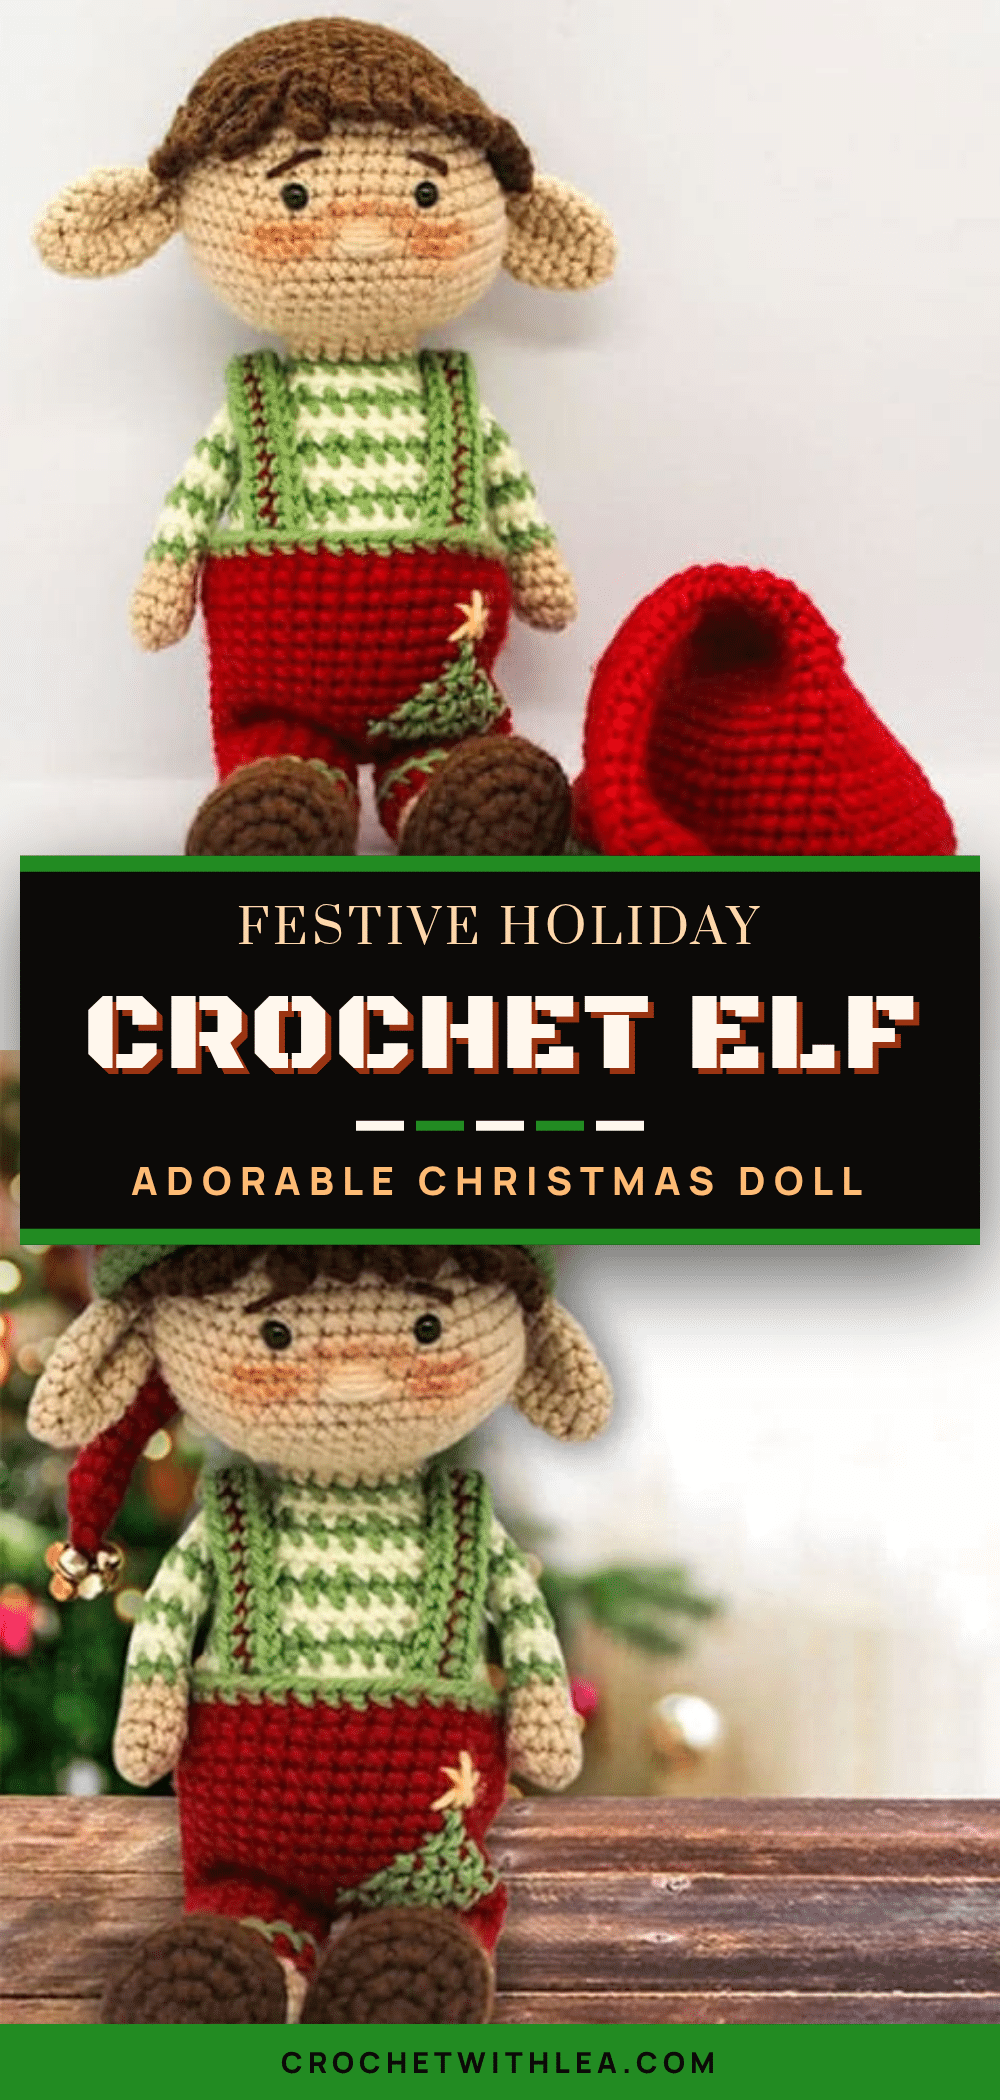
There is something deeply satisfying about the rhythmic build of an amigurumi project, where each round adds a layer of structure and character. This Crochet Christmas Elf Doll pattern is a delightful exercise in shaping, utilizing a mix of single crochet, half double crochet, and strategic increases to create a figure that is both sturdy and whimsical. The texture of the stitches comes alive as you work through the distinct sections, from the striped body to the intricate, layered hair, culminating in a charming holiday companion.
Texture and Stitch Notes
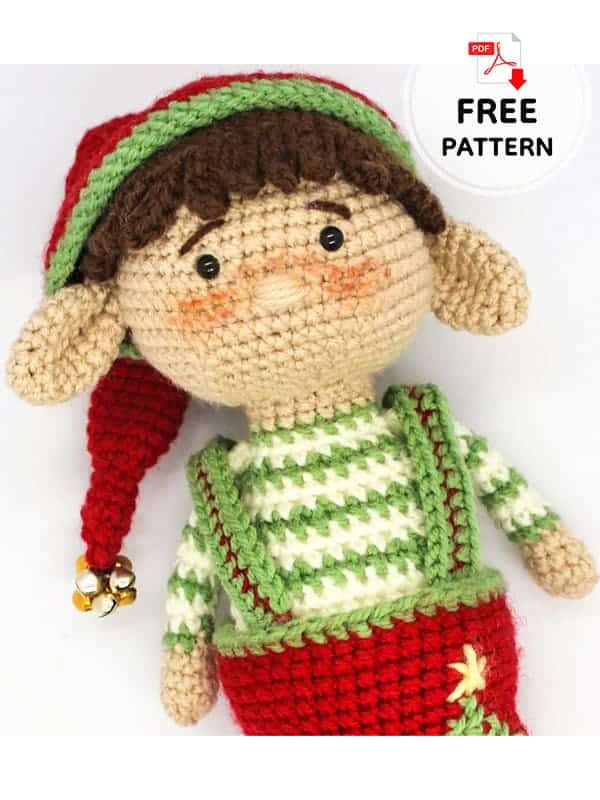
What makes this elf doll particularly engaging to crochet is the variety of textures and the clever construction of the hair. Unlike many amigurumi that use a simple cap or flat piece for hair, this design features individual strands worked in rows that create a dynamic, flowing look. The body utilizes a classic spiral technique with color changes, while the dungarees introduce half double crochet (hdc) for a slightly denser, more structured fabric. Paying attention to the stitch definition in the BLO (back loop only) rounds on the legs will give them a distinct “shoe” line, adding a professional touch to the finished doll.
Project Overview
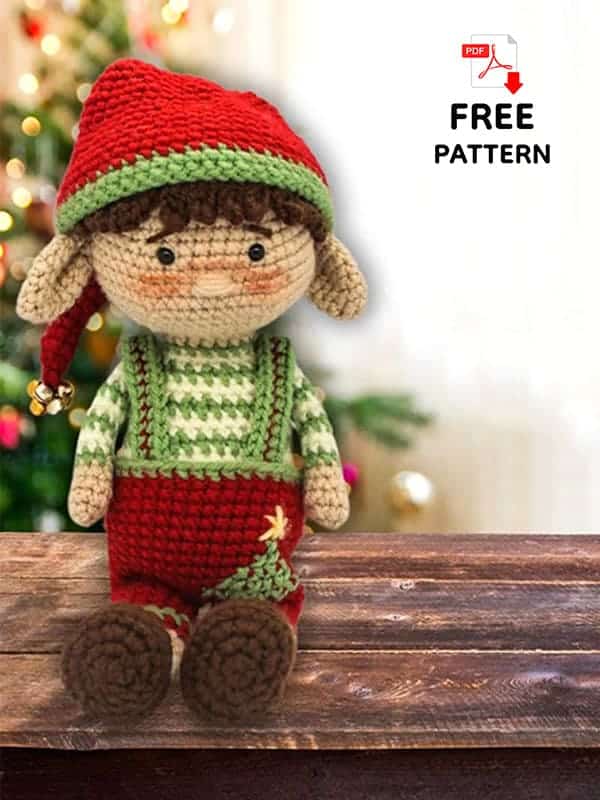
This free pattern guides you through creating a festive Christmas Elf Doll. Designed by tobbys_handcraft, this amigurumi features a striped body, detailed hair, and removable overalls. It is an excellent project for crocheters looking to practice color changes, shaping, and assembly techniques. The doll is designed to be a perfect Christmas gift or a cozy addition to your holiday decor.
Materials
- 4 mm crochet hook
- Stuffing
- Beige yarn
- Brown yarn
- Red yarn
- Green yarn
- White yarn
- Safety eyes
- Scissors
- Yarn needle
- Embroidery thread (for details)
- Fabric colors (optional, for shading)
- Bell (optional, for hat tip)
Gauge and Finished Size
Gauge and finished size measurements are not specified in the source pattern. The size of the finished elf will depend on your personal tension and the specific weight of the yarn used. Using a 4 mm hook and standard worsted weight yarn is recommended to achieve the intended proportions.
Abbreviations
- Ch – chain
- St – stitch
- Inc – increase
- Dec – decrease
- MR – magic ring
- Sc – single crochet
- BLO – back loop only
- FLO – front loop only
- Hdc – half double crochet
- Slst – slip stitch
Pattern Notes
- Design Credit: This pattern is designed by tobbys_handcraft.
- Hat Detail: The elf hat is a standout feature. For an extra festive touch, consider adding a small bell to the tip of the hat.
- Overalls: The dungarees (overalls) are worked separately from the body. You can customize them further by embroidering a Christmas tree or other holiday motifs onto the front.
- Assembly: The doll is assembled by sewing the head to the body, attaching the hair, and then sewing on the limbs and accessories.
Pattern Instructions
Legs (Make 2)
Start with brown yarn:
- R1. 6 sc in mr (6)
- R2. 2 inc 1 sc (10)
- R3. 4 inc 1 sc (18)
- R4. 2 sc, 1 inc (24)
- R5. 24 sc in BLO (24)
- R6. 24 sc (24)
- R7. 3 sc, 6 dec, 9 sc (18)
- R8. 4 sc, 2 dec, 10 sc (16)
- R9. 2 sc 1 dec (12)
- R10-24. 12 sc (12)
- Change to white yarn at row 13. Change to beige yarn at row 15.
- R25. 2 sc 1 dec (9)
- R26. 1 sc 1 dec (6)
- R27. 6 dec (3)
Close the leg sewing. Cut off the yarn.
Body
Start with beige yarn:
- R1. 6 sc in mr (6)
- R2. 6 inc (12)
- R3. 1 sc 1 inc (18)
- R4. 2 sc 1 inc (24)
- R5. 3 sc 1 inc (30)
- R6. 4 sc 1 inc (36)
- R7. 5 sc 1 inc (42)
- R8. 6 sc 1 inc (48)
- R9. 48 sc (48)
- R10. 6 sc 1 dec (42)
- R11-12. 42 sc (42)
- Changes alternating 1 round green and 2 round white.
- R13. 5 sc 1 dec (36)
- R14-15. 36 sc (36)
- R16. 4 sc 1 dec (30)
- R17-18. 30 sc (30)
- R19. 3 sc 1 dec (24)
- R20-21. 24 sc (24)
- R22. 2 sc 1 dec (18)
- Change to beige yarn:
- R23-24. 18 sc (18)
Leave the body open with 18 sc. Leave a long tail for sewing the head.
Head
With beige yarn:
- R1. 6 sc in mr (6)
- R2. 6 inc (12)
- R3. 1 sc 1 inc (18)
- R4. 2 sc 1 inc (24)
- R5. 3 sc 1 inc (30)
- R6. 4 sc 1 inc (36)
- R7. 36 sc (36)
- R8. 5 sc 1 inc (42)
- R9-10. 42 sc (42)
- R11. 6 sc 1 inc (48)
- R12. 48 sc (48)
- R13. 7 sc 1 inc (54)
- R14. 8 sc 1 inc (60)
- R15. 60 sc (60)
- R16. 8 sc 1 dec (54)
- R17. 7 sc 1 dec (48)
- R18. 6 sc 1 dec (42)
- R19. 5 sc 1 dec (36)
- R20. 4 sc 1 dec (30)
- R21. 3 sc 1 dec (24)
- R22. 2 sc 1 dec (18)
- R23. 1 sc 1 dec (12)
- R24. 6 dec (6)
Close the head and cut.
Arm (Make 2)
Start with beige yarn:
- R1. 6 sc in mr (6)
- R2. 6 inc (12)
- R3. 12 sc (12)
- R4. 12 sc (12)
- R5. 12 sc (12)
- Changes alternating 2 rounds with white yarn, 1 round with green yarn.
- R6. 12 sc (12)
- R7. 5 sc, 1 dec, 3 sc, 1 dec (10)
- R8-17. (10 rows): 10 sc (10)
- R18. 3 sc, 1 dec (8)
- R19. 2 sc, 1 dec (6)
Close the arm sewing. Leave a long tail for sewing. Filling with stuffing only half arm.
Ear (Make 2)
With beige color:
- R1. 6 sc in mr (6)
- R2. 1 sc, 1 inc (9)
- R3. 2 sc, 1 inc (12)
- R4-6. 12 sc (12)
- R7. 3 sc, 1 dec (9)
- R8. 2 sc, 1 dec (6)
Leave a long tail.
Hair
With brown yarn:
- R1. 6 sc in mr (6)
- R2. 6 inc (12)
- R3. 1 sc, 1 inc (18)
- R4. 2 sc, 1 inc (24)
- R5. 3 sc, 1 inc (30)
- H1-2. 9 ch, from the 2nd ch 8 sc, attach the hair to the base with a slip stitch.
- H3-4. 13 ch, 12 sc (12)
- H5-23. 23 ch, 22 sc (22)
- H24-25. 13 ch, 12 sc (12)
- H26-27. 9 ch, 8 sc (8)
Now you’re almost done and you’re back to the center of the base of the hair. Work 3 slip stitches to leave a central space between the shorter hair. Leave the thread long to sew the hair to the head.
Dungarees (Overalls)
With green yarn start 42 ch. Insert the hook in the first ch and join with a slst the foundation ch. Continue working in spiral.
- R1-10. (10 rows): 2 ch 41 hdc (42)
- Switch and continue with red in round 3 legs.
- R11. Divide the round indentifying 3 ch for front central space, 3 ch for the back and 18 ch for each leg.
- First leg: R11-15 (5 rows): 2 ch, 17 hdc (18). Changes to green on round 14. Changes with red color on round 15. Cut the yarn.
- Second leg: Rejoin the yarn. R11-15 (5 rows): 2 ch, 17 hdc (18). Changes to green on round 14. Changes with red color on round 15. Cut the yarn.
Sewing the 6ch, in the middle with a needle.
Suspenders (Make 2)
With the red color work a chain of 25 stitches and from the second, with the green, work 24 sc on each side.
Hat
With red yarn:
- R1. 4 sc in mr (4)
- R2. 1 sc 1 inc (6)
- R3-6. 6 sc (6)
- R7. 6 inc (12)
- R8-26. 12 sc (12)
- R27. 1 sc 1 inc (18)
- R28-29. 18 sc (18)
- R30. 2 sc 1 inc (24)
- R31-32. 24 sc (24)
- R33. 3 sc 1 inc (30)
- R34-35. 30 sc (30)
- R36. 4 sc 1 inc (36)
- R37-38. 36 sc (36)
- R39. 5 sc 1 inc (42)
- R40-41. 42 sc (42)
- R42. 6 sc 1 inc (48)
- R43-44. 48 sc (48)
- Change to green yarn
- R45. 7 sc 1 inc (54)
- R46-47. 54 sc (54)
Assembly
- Sew the head to the body with the needle following the 18 st left open. The part with the decreases is located at the base of the neck.
- Sew the hair to the top of the head.
- Attach the legs laterally to the base of the body by piercing it with a needle.
- Sew the arms 3 rows below the neck.
- Insert eyes between rounds 13 and 14, leaving 4 st between one eye and the other (the st can change depending the dimensions of the eyes).
- Sew the ears to the head.
- Sew the details with embroidery thread and enrich the christmas elf with shades using fabric colors (optional).
Tips
- Hat Bell: The elf hat detail is a favorite part of this design. Adding a small bell to the tip will enhance the festive look.
- Customization: The overalls are made separately, allowing for creative freedom. Consider embroidering a Christmas tree or other holiday symbols on the front of the dungarees.
- Stuffing: For the arms, stuff only half the arm to keep them flexible for posing.
FAQs
What type of yarn is best for this elf doll?
The pattern suggests using beige, brown, red, green, and white yarns. A standard worsted weight yarn (Category 4) works well with the recommended 4 mm hook to achieve a good balance between detail and speed.
How do I attach the hair to the head?
The hair is worked as a base with individual strands extending from it. Once complete, you use the long tail left at the end to sew the base of the hair to the top of the head, ensuring the strands are distributed evenly.
Can I make the elf smaller or larger?
Yes, you can adjust the size by changing the hook size or using a different yarn weight. However, be aware that changing the hook size may affect the stitch definition and the firmness of the stuffing.
How do I add the bell to the hat?
Once the hat is complete, simply thread a small piece of yarn or a thin ribbon through the tip of the hat and attach the bell securely. You can also sew it directly on if you prefer a more permanent attachment.
Are the overalls removable?
Yes, the dungarees are worked separately and are intended to be put on the elf doll like clothing. You can sew them on permanently if you prefer, but leaving them loose allows for easy washing or changing.
Pin This Crochet Pattern!