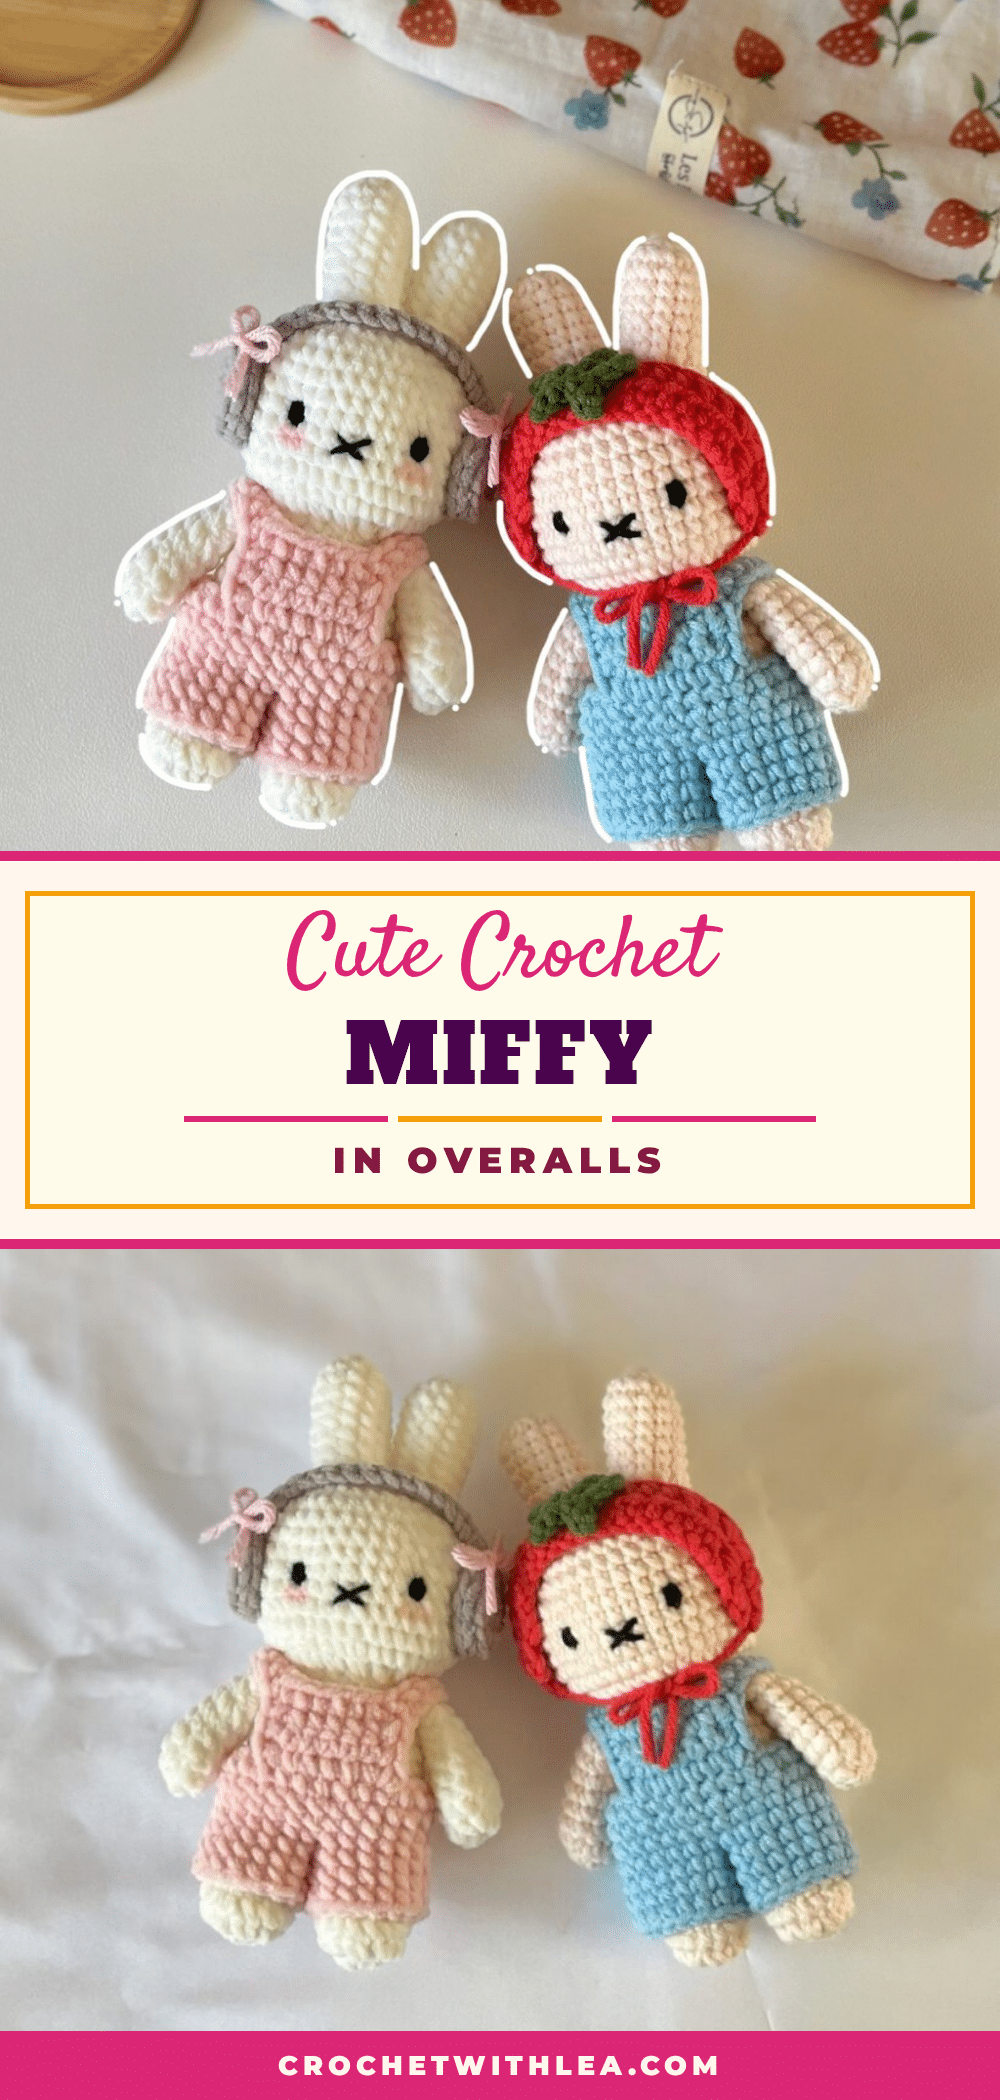
Have you ever finished a round only to realize you lost count and now your piece looks like a wobbly pancake? It happens to the best of us. Maybe you started with a magic ring that wouldn’t tighten, or perhaps you were worried that joining separate limbs would result in a lopsided friend. If that sounds familiar, take a deep breath. This Miffy pattern is designed to guide you through those tricky moments, turning potential frustration into a satisfying finish. You don’t need to be a perfectionist to make this adorable character; you just need patience and a willingness to learn.
Maker Notes
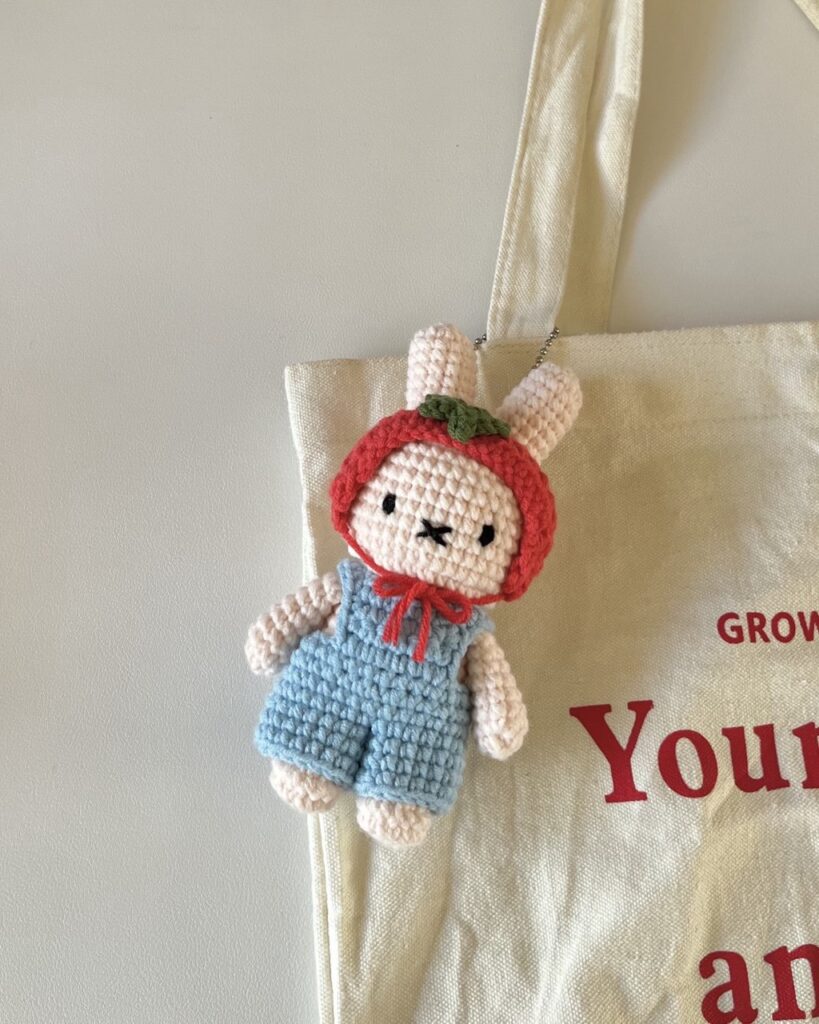
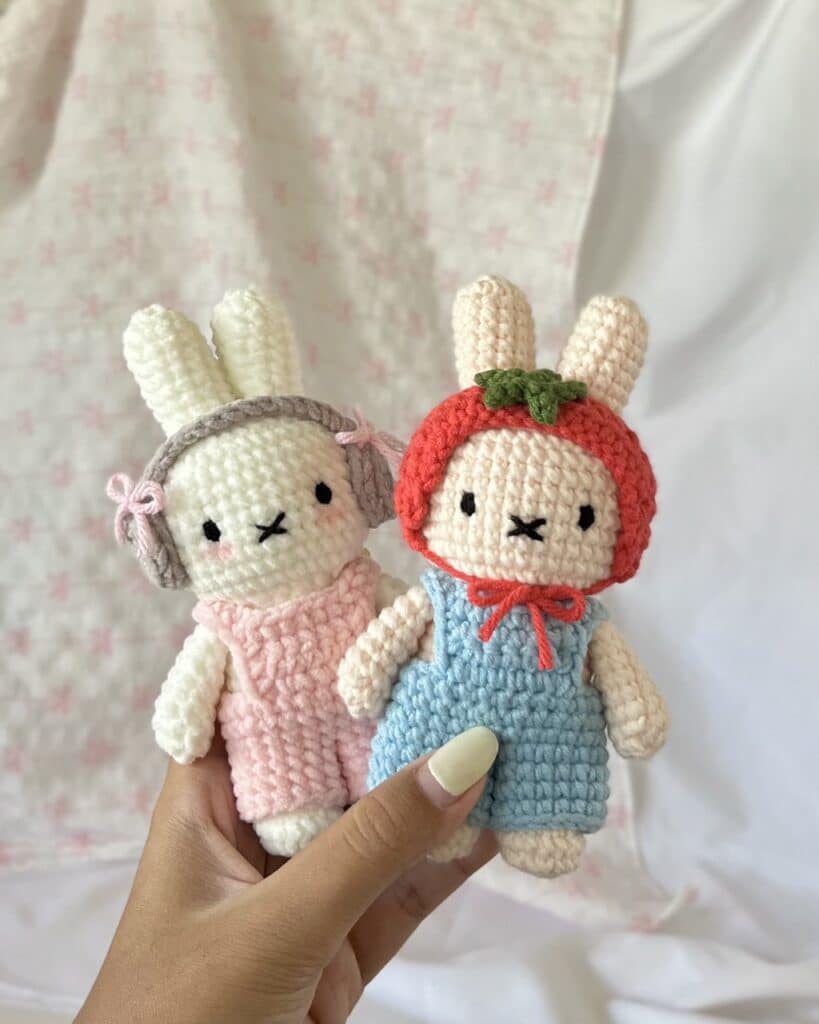
There is something undeniably charming about Miffy’s minimalist design. The stark contrast of her white form against the colorful overalls and accessories makes her a standout piece for any shelf. In this tutorial, the creator uses a light peach yarn for the body, which gives her a warm, skin-like tone that feels cozy and inviting. The choice of light blue for the overalls provides a classic, timeless look, but don’t be afraid to experiment with pastel pinks, yellows, or greens to match your own aesthetic.
What truly sets this pattern apart is the attention to detail in the accessories. Whether you choose to make the headphones or the tomato headband, these small additions transform a simple amigurumi into a character with personality. The texture of the chenille or sport yarn used here adds a softness that begs to be hugged. This project is a wonderful opportunity to practice joining techniques and embroidery, skills that will elevate all your future amigurumi work.
Project Overview
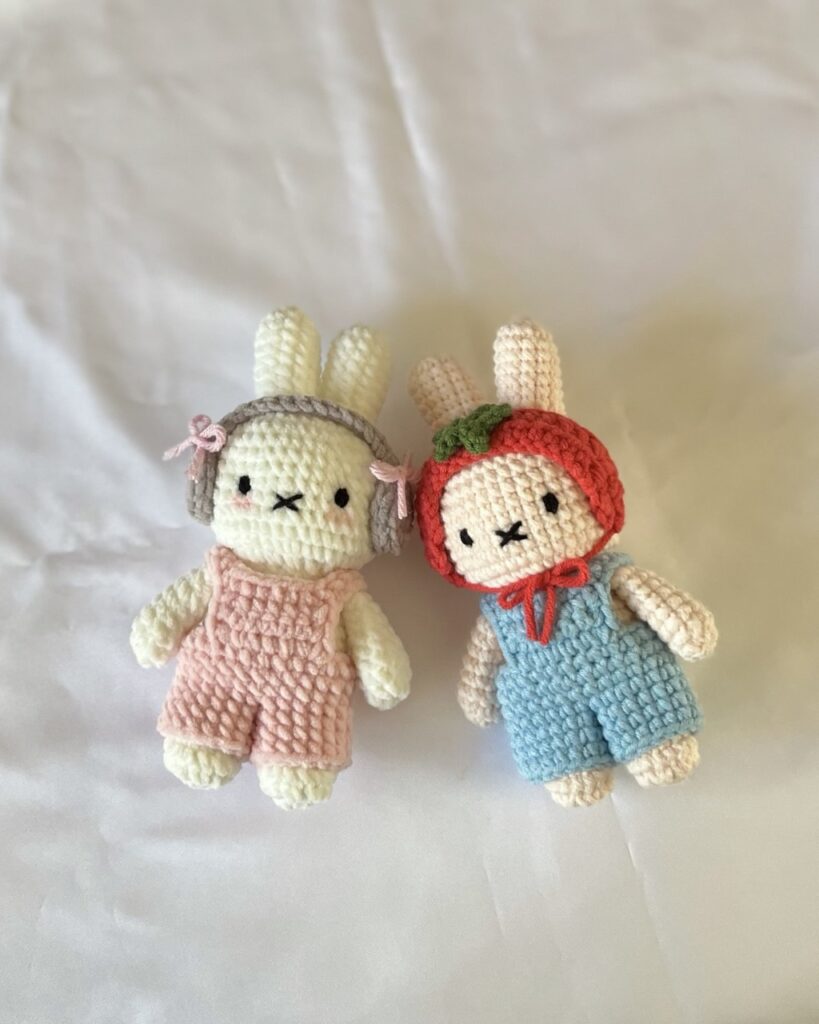
This pattern creates an adorable Miffy-inspired amigurumi figure dressed in overalls, complete with optional accessories like headphones or a tomato headband. The construction involves making separate parts for the arms, ears, and legs, which are then joined to form the body and head. The overalls are worked in joined rounds to create a seamless fit, and the accessories are attached at the end. This project is rated as intermediate level due to the assembly and joining techniques required.
Materials
- Yarn: Cotton (5ply), Acrylic, Sport, or Thin Chenille yarn in the following colors:
- Light Peach (Skin color)
- Blue (for overalls)
- Red (for tomato headband)
- Green (for tomato leaf)
- Light Grey (for headphones)
- Black (for embroidery)
- Hook: 3mm crochet hook
- Notions: Stuffing material, stitch markers, darning needle, and scissors
Gauge and Finished Size
Gauge and finished size measurements are not specified in the source pattern. Consistency in tension is key to ensuring the parts fit together correctly, especially when joining the legs and arms.
Abbreviations
The abbreviations are in US terminology.
- Ch – Chain
- st – stitch
- R – round / row
- mr – magic ring
- sc – single crochet
- inc – increase
- dec – decrease
- hdc – half double crochet
- BLO – back loop only
- slst – slip stitch
- * – repeat
- [] – total stitch count in each round/row
Pattern Notes
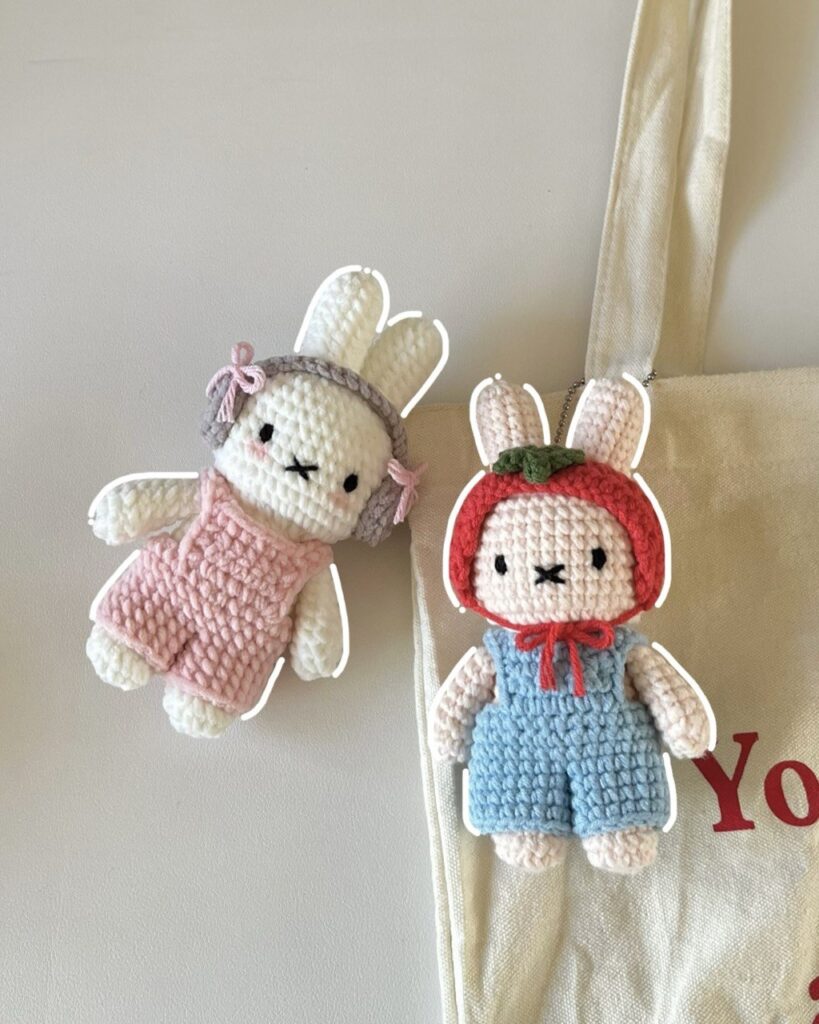
- Body Color: For the body, we will start making the separate parts like Arms and Ears. You can use any color of your choice to make the body. The tutorial uses light peach (skin-like color).
- Overalls Color: You can use any color of your choice to make the overalls. The tutorial uses light blue. Make sure to use the same type of yarn you used for the body to make the overalls as well.
- Joined Rounds: We use joined rounds for the overall, meaning to connect with a slst at the end of each round and start every new round with a Ch. Ch1 and slst are NOT included in our total stitch count.
- Starting: Start with a magic ring, using any color of your choice, unless specified otherwise.
Pattern Instructions
Arms
Starting with a magic ring.
- R1 8sc in mr [8]
- R2 (3sc, 1inc) *2 [10]
- R3-R8 10sc (6 rounds) [10]
- Do not stuff the arms. Close the arms by crocheting into opposite stitches together. You will get 4sc from this.
Ears
Start with a magic ring.
- R1 8sc in mr [8]
- R2 (1sc, 1inc) *4 [12]
- R3-R9 12sc (7 rounds) [12]
- Stuff the ears and cut the yarn, leaving a long tail.
Legs
Start with a magic ring.
- R1 8sc in mr [8]
- R2 8inc [16]
- R3 16sc [16]
- R4 4sc, 4dec, 4sc [12]
- R5 4sc, 2dec, 4sc [10]
- R6 10sc [10]
- After round 6, make 3 more sc and cut the yarn!
- Make the second leg repeating all the rounds including 3 more sc at the end, but DO NOT cut the yarn. (as we are joining two legs!)
Joining the Legs and Continuing to the Body
We will start counting again from R1 starting from the joining round! Mark the 6th sc on the 1st leg, counting backwards from where we cut the yarn.
- R1 Ch1 (on the 2nd leg), Starting from the sc marked on the 1st leg, 1sc into each stitch of the 1st leg, 1sc on the upper loop of the ch, 1sc into each stitch of the 2nd leg, 1sc on the lower loop of the ch. [22]
- R2 (10sc, 1inc) *2 [24]
- R3 (5sc, 1inc) *4 [28]
- R4-R8 28sc (5 rounds) [28]
- R9 (5sc, 1dec) *4 [24]
- We are joining the hands in R10!
- R10 4sc, 4sc (together with hand), 8sc, 4sc (together with hand), 4sc [24]
- R11 (2sc, 1dec) *6 [18]
- Starting from R12 to the end, we are making the head!
- R12 18inc [36]
- R13 (8sc, 1inc) *4 [40]
- R14-R21 40sc (8 rounds) [40]
- R22 (3sc, 1dec) *8 [32]
- R23 (1sc, 1dec, 1sc) *8 [24]
- R24 (1sc, 1dec) *8 [16]
- R25 8dec [8]
- Using the black yarn, embroider the eyes on R17 with 7sc apart between two eyes. Embroider the mouth one row down the eyes in the middle.
Overalls
You can use any color of your choice to make the overalls. I used light blue color in the tutorial. Make sure to use the same type of yarn you used for the body to make the overalls as well. We use joined rounds for this overall, meaning to connect with a slst at the end of each round and start every new round with a Ch. Ch1 and slst are NOT included in our total stitch count.
1st Trouser
Start with a slip knot and make 29ch.
- R1 Starting from the 2nd ch from the hook, 1sc into each ch, make a slst (into the 1st sc of R1) [28]
- R2-R3 Ch1, 28sc, 1slst (2 rounds) [28]
- After R3, we will divide two sections and work on the 1st trouser, then the 2nd trouser. We will start counting again from R1 for each trouser.
- R1 Continuing from the R3, Ch1, 14sc, Ch4, 1slst into the 1st sc [14sc, 4ch]
- R2 Ch1, 14sc, 4sc (on upper loops of the ch), 1slst [18]
- R3 – R4 Ch1, 18sc, 1slst (2 rounds) [18]
- Cut the yarn and weave in the end.
2nd Trouser
Start from the stitch next to the slst of R3!
- R1 Ch1, 1sc, 4sc on ch, 13sc, 1slst [18]
- R2-R4 Ch1, 18sc, 1slst (3 rounds) [18]
- Cut the yarn and weave in the end.
Bib
Put the overalls onto your plushie to find the 6 middle stitches on the very first row we started out. We are crocheting the bib directly onto that first row.
- R1 Ch1, 6sc [6]
- R2-R3 Ch1, Turn, 6sc (2 rounds) [6]
- Cut the yarn.
Edging and Adding Straps
Crochet along the three sides of the bib to make the edges look neater and also, to add the straps.
- Starting from the bottom of the 1st row of the bib, 3sc (on 1st side), 17ch, 16sc, 6sc (on the last row of the bib), 17ch, 16sc, 3sc (on the last side).
- Cut the yarn and weave in the ends.
Headphones
Start with a magic ring, using any color of your choice.
- R1 7sc in mr, 1slst [7]
- R2 Ch1, 7inc, 1slst [14]
- R3 BLO, Ch1,14sc, 1slst [14]
- Cut the yarn. Make another piece and DO NOT cut the yarn.
- On the 2nd piece, 15ch, make 2slst onto the 1st piece, crochet along each ch we made with 1slst to come back to the 2nd piece. When you reach back to 2nd piece, make 1slst and cut the yarn.
- Sew the headphone onto the head.
Tomato Headband
Start with a slip knot, using Red yarn.
- Ch 18
- R1 Starting from the 3rd ch from the hook, 16hdc. [16]
- R2 Ch2, Turn, 16hdc [16]
- Continue making 2sc on the side of each row, for a total of 4sc.
- Ch1, Turn, 2dec.
- Ch1, Turn, 1dec.
- Cut the yarn, leaving a long tail. Repeat the same step to the other side.
Tomato Leaf
- Into mr, (ch3, 1slst, 1sc, 1slst into mr) *5
- Cut the yarn, leaving a long tail.
- Sew the headband onto the head and then, the tomato leaf at the top.
Assembly
Assembly is integrated into the pattern instructions above. Key steps include:
- Joining Legs: Join the two legs using the chain stitches created at the end of the leg rounds, working into the upper and lower loops to create a seamless transition to the body.
- Joining Arms: Attach the arms during Round 10 of the body/head section by crocheting the arm stitches together with the body stitches.
- Embroidery: Embroider the eyes on Round 17 of the head with 7sc apart between the two eyes. Embroider the mouth one row down from the eyes in the middle.
- Accessories: Sew the headphones or tomato headband onto the head as desired.
Tips
- Don’t Fear Intermediate Patterns: The pattern is intermediate level and requires some sewing and stuffing skills, but don’t let that stop you if you’re a beginner! Trying intermediate-level patterns is how we grow as crocheters. Until you take on a challenge like this, you’ll stay in your comfort zone. So go for it—this could be your crochet graduation project from beginner to intermediate!
- Use Video Tutorials: Do not miss out any details! Open the accompanying video tutorial as you crochet along to make the process more effective and time-saving. This is especially helpful for joining legs and attaching accessories.
- Stitch Markers: Use stitch markers to keep track of your rounds, especially when working in joined rounds for the overalls.
- Yarn Consistency: Ensure you use the same type of yarn for the overalls as you did for the body to maintain a consistent look and texture.
FAQs
What type of yarn is best for this pattern?
The pattern suggests Cotton (5ply), Acrylic, Sport, or Thin Chenille yarn. Chenille yarn is popular for amigurumi because it creates a soft, fuzzy texture that hides stitch imperfections well.
Do I need to stuff the arms?
No, the pattern explicitly states not to stuff the arms. They are closed by crocheting into opposite stitches together to create a flat, floppy limb effect.
How do I join the legs correctly?
After making both legs, you make 3 additional sc on the first leg and cut the yarn. For the second leg, you make the same 3 additional sc but do not cut the yarn. You then join them by working single crochets into the stitches of the first leg, the chain loops, the stitches of the second leg, and the other chain loop.
Can I change the color of the overalls?
Yes, you can use any color of your choice for the overalls. Just ensure you use the same type of yarn as the body to keep the texture consistent.
Where do I embroider the eyes?
Using black yarn, embroider the eyes on Round 17 of the head. Place them 7 single crochets apart from each other.
Is this pattern suitable for absolute beginners?
While the pattern is rated as intermediate due to the joining and assembly steps, beginners are encouraged to try it as a growth project. Following the video tutorial closely can help manage the complexity.
Pin This Crochet Pattern!