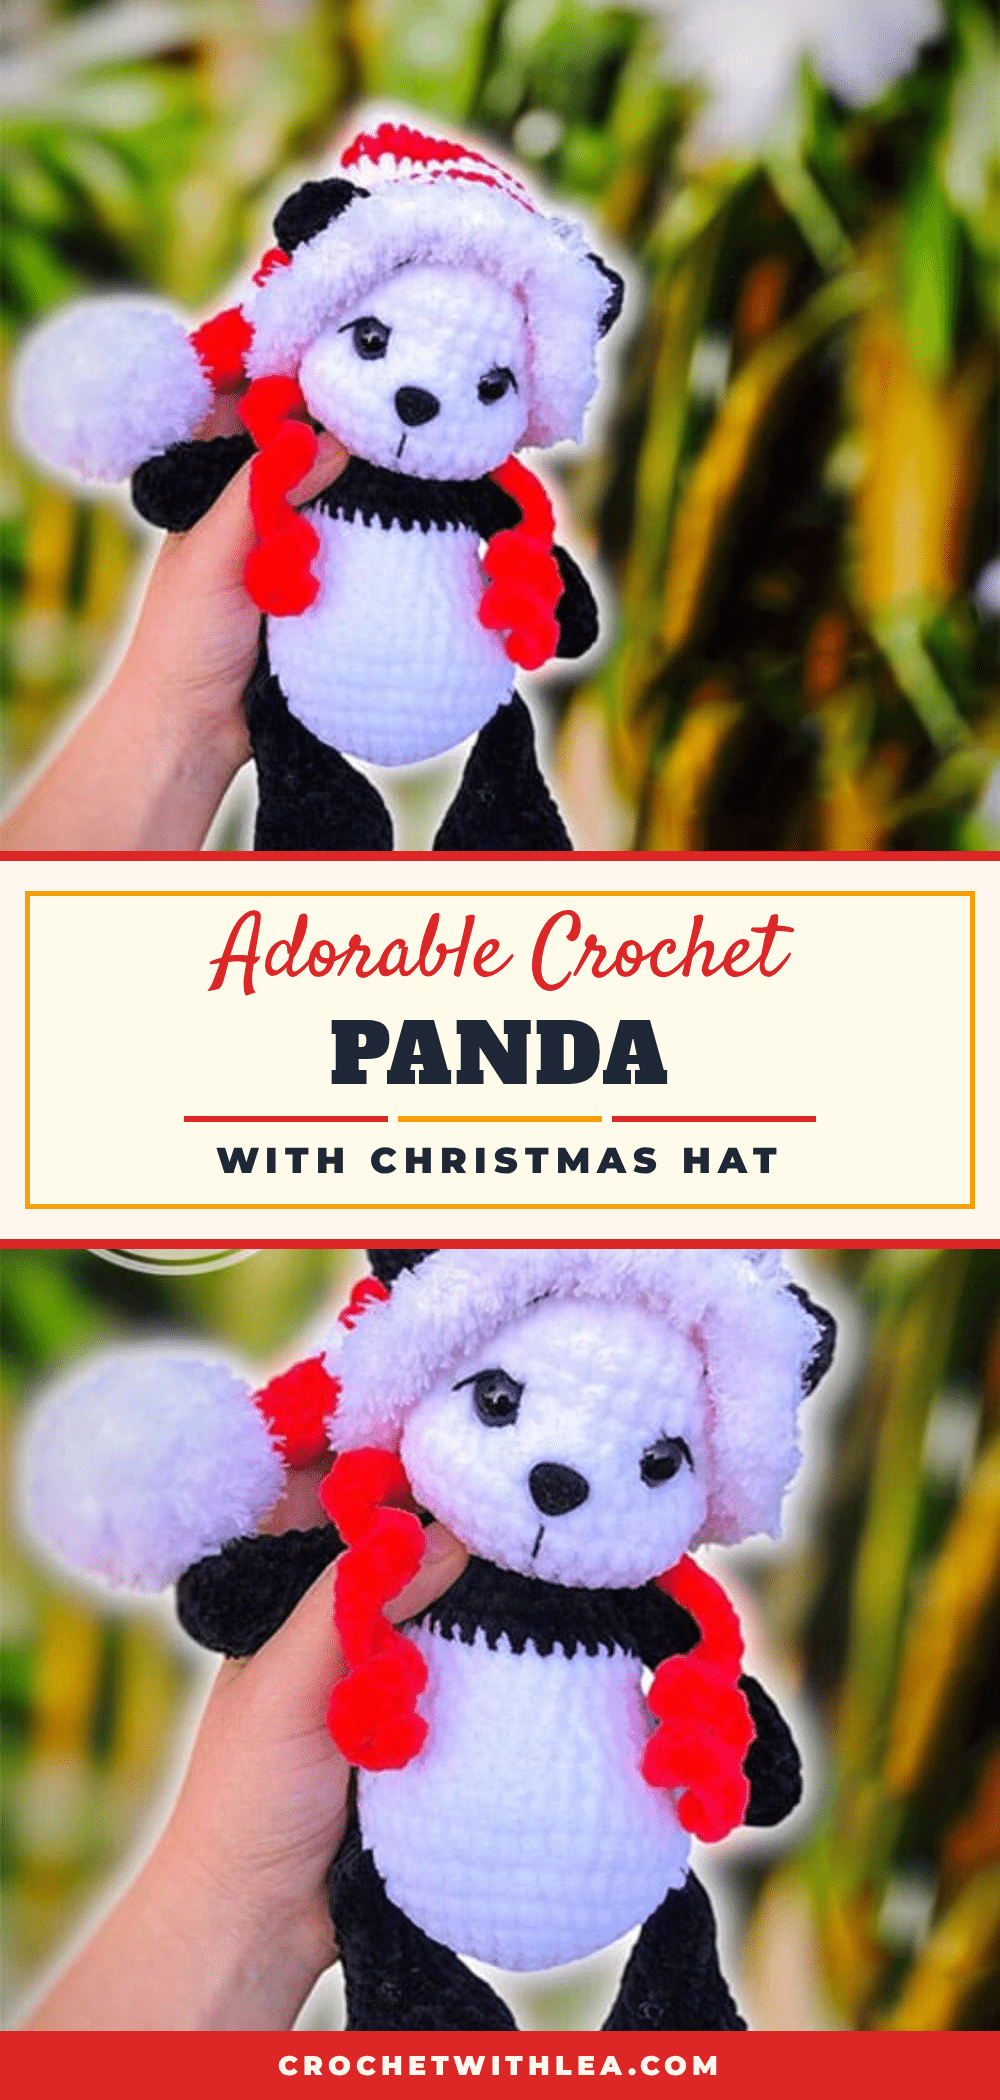
There is something deeply satisfying about the quiet rhythm of crochet during the holiday season. A soft ball of plush yarn, a reliable hook, and the gentle click of stitches forming a familiar shape can turn a busy evening into a moment of pure calm. This adorable crochet panda with a Christmas hat pattern is designed to fit perfectly into that cozy ritual. As you count the rounds and shape the little bear, you are not just making a toy; you are crafting a keepsake that brings warmth and whimsy to the holidays. Whether you are gifting it to a child or adding it to your own holiday decor, the process is as rewarding as the finished result.
Small Details That Make It Better
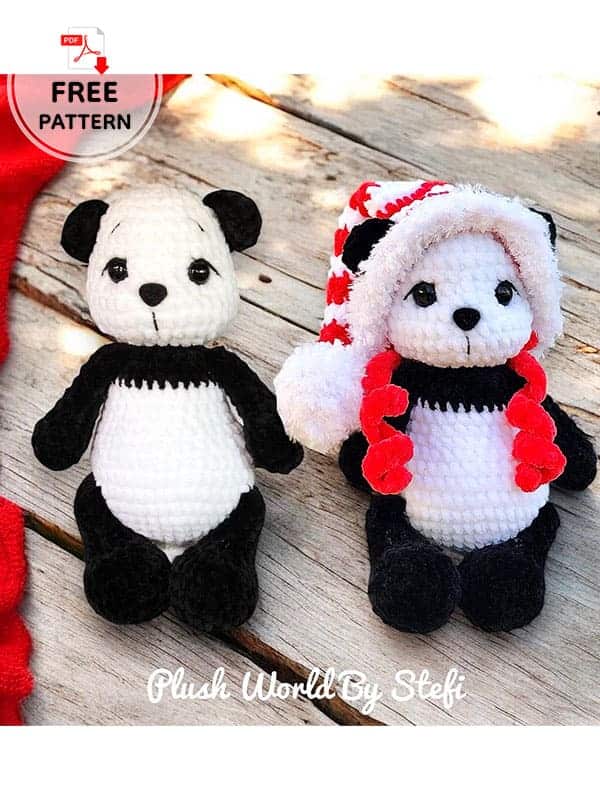
What truly elevates this amigurumi project is the thoughtful combination of textures and the clever design of the accessories. The pattern calls for plush yarn, which gives the panda a soft, cuddly appearance that is especially appealing to children. However, the real magic happens in the finishing touches. The face sculpting technique, using cotton yarn to tighten and shape the muzzle and eyelids, gives the panda a distinct personality that flat embroidery often lacks. Additionally, the Christmas hat is designed with ear holes, allowing the panda’s ears to poke through for a cute, integrated look. The fluffy pom-pom adds a tactile element that invites touch, while the red and white striped hat provides a festive pop of color against the black and white fur. These small details transform a simple bear into a character with charm.
Project Overview
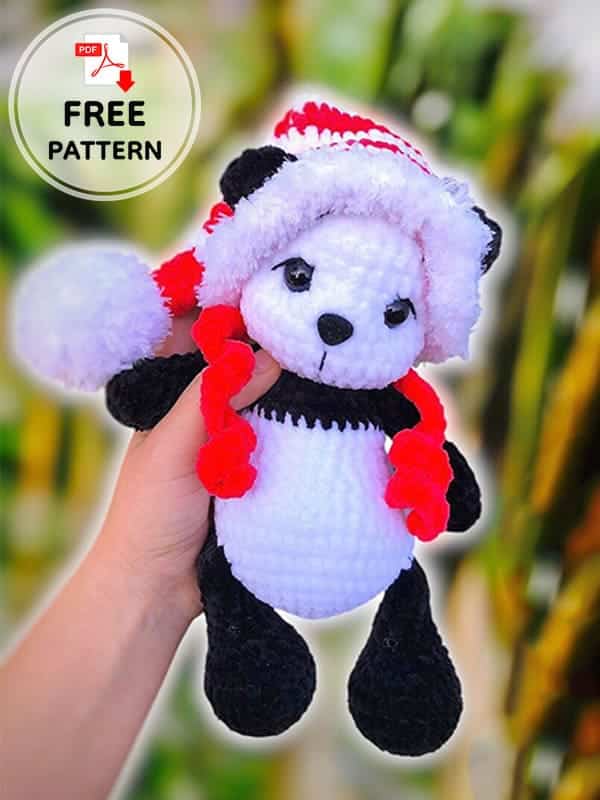
This free amigurumi pattern guides you through creating a plush panda bear complete with a festive Christmas hat. The project is designed to be made in separate components—the head, body, limbs, and hat—which are then assembled. The pattern includes specific instructions for face sculpting to give the panda character and a hat with ear holes for a unique fit. It is a beautiful project for the Christmas season that combines classic amigurumi techniques with holiday flair.
Materials
- Yarn: Plush yarn in white, black, and red. Fluffy yarn for the pom-pom (or use plush yarn with chain slip stitches as an alternative). Small amounts of black and white cotton yarn for face sculpting and embroidery.
- Hook: 3.5 mm crochet hook (or size matching your yarn).
- Notions:
- 12 mm safety eyes
- 12 mm safety nose
- Stitch marker
- Yarn needle
- Fiber filling (stuffing)
- Scissors
Gauge and Finished Size
Specific gauge and finished measurements are not provided in the source pattern. The finished size will depend on the specific yarn weight and tension used. Using the recommended 3.5 mm hook and plush yarn will yield the intended plush texture.
Abbreviations
- MR: Magic ring
- St/sts: Stitch/stitches
- Ch: Chain
- Sc: Single crochet
- Rnd: Round
- Inc: Increase
- Dec: Decrease
- Slst: Slip stitch
Pattern Notes
This pattern is designed to be made step-by-step, starting with the head. The panda is constructed from separate parts that are sewn together. The hat is made separately and features holes for the ears. You can choose to wear the hat on the panda or use the panda without it, though the hat completes the festive look. Face sculpting is required to achieve the intended expression.
Pattern Instructions
Head
Crochet with white color. Stuff as you go.
- Rnd 1: 6 sc in MR (6)
- Rnd 2: 6 inc (12)
- Rnd 3: (1 sc, inc)* 6 (18)
- Rnd 4: (2 sc, inc)* 6 (24)
- Rnd 5: (3 sc, inc)* 6 (30)
- Rnds 6-8: 30 sc (3 Rnds)
- Rnd 9: (4 sc, inc)* 6 (36)
- Rnds 10-13: 36 sc (4 Rnds)
Inserting Features: Insert the safety eyes between rounds 9-10, with a distance of 5 visible stitches between them. Insert the safety nose between rounds 11-12.
- Rnd 14: (4 sc, dec)* 6 (30)
- Rnd 15: (3 sc, dec)* 6 (24)
- Rnd 16: (2 sc, dec)* 6 (18)
- Rnd 17: (1 sc, dec)* 6 (12)
- Rnd 18: 6 dec (6)
Sew the hole closed. Fasten off and weave in the ends.
Face Sculpting
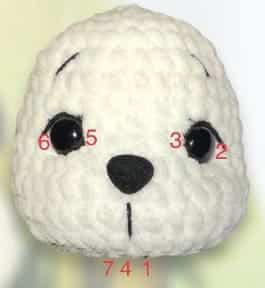
Follow the sculpting steps to shape the panda’s face. Tighten each end of the thread well, then tighten both ends at once to compress the face. Embroider eyelids and eyebrows. Embroider the muzzle below the nose. This step adds dimension and character to the panda.
Tail
Crochet with black color. Stuff as you go.
- Rnd 1: 6 sc in MR
- Rnd 2: 6 inc (12)
- Rnd 3: 12 sc
- Rnd 4: 6 dec
Fasten off and leave a tail for sewing. Sew the tail on the back between rounds 8 and 9.
Ears (Make Two)
Crochet with black color. Do not stuff.
- Rnd 1: 6 sc in MR
- Rnd 2: 6 inc (12)
- Rnd 3: 12 sc
Fold the ear and crochet 6 sc through both layers. Fasten off and leave a tail for sewing. Note: Don’t sew the ears until after making the hat to get correct fitting. The pattern suggests sewing them between rounds 5 and 9.
Arms (Make Two)
Crochet with black color. Stuff as you go, until round 7.
- Rnd 1: 6 sc in MR
- Rnd 2: 6 inc (12)
- Rnd 3: (1sc,inc)*6 (18)
- Rnd 4: (1sc,dec)*6 (12)
- Rnd 5: 3 sc, 3 dec, 3 sc (9)
- Rnd 6: 3 sc, dec, 4 sc (8)
- Rnds 7-11: 8 sc (5 rnds)
Fold the arm and crochet 4 sc through both layers. Fasten off and weave in the ends.
Legs (Make Two)
Crochet with black color. Stuff as you go until round 11.
- Rnd 1: 6 sc in MR
- Rnd 2: 6 inc (12)
- Rnd 3: (1sc,inc)*6 (18)
- Rnd 4: (2sc,inc)*6 (24)
- Rnds 5-6: 24 sc (2 rnds)
- Rnd 7: 6 sc, 6 dec, 6 sc (18)
- Rnd 8: 5 sc, 4 dec, 5 sc (14)
- Rnd 9: 5 sc, 2 dec, 5 sc (12)
- Rnds 10-14: 12 sc (5 rnds)
Fold the leg and crochet 6 sc through both layers. Fasten off and weave in the ends.
Body
Start with white color. Stuff as you go.
- Rnd 1: 6 sc in MR
- Rnd 2: 6 inc (12)
- Rnd 3: (1 sc, inc)* 6 (18)
- Rnd 4: (2 sc, inc)* 6 (24)
- Rnd 5: (3 sc, inc)* 6 (30)
- Rnd 6: (4 sc, inc)* 6 (36)
- Rnd 7: (5 sc, inc)* 6 (42)
Connecting Legs: In the next round, connect the legs.
- Rnd 8: 8 sc, 6 sc with the left leg, 14 sc, 6 sc with the right leg, 8 sc (42)
- Rnds 9-10: 42 sc (2 Rnds)
- Rnd 11: (5 sc, dec)* 6 (36)
- Rnd 12: 36 sc
- Rnd 13: 2 sc, dec, (4 sc, dec)* 5, 2 sc (30)
- Rnd 14: 30 sc
Change the color to black.
- Rnd 15: 30 sc
- Rnd 16: (3 sc, dec)* 6 (24)
Connecting Arms: In the next round, connect the arms. Place a stitch marker in the center of the back. Add or remove sc if necessary.
- Rnd 17: 4 sc, 4 sc with the left arm, 8 sc, 4 sc with the right arm, 4 sc (24)
- Rnd 18: (2 sc, dec)* 6 (18)
- Rnd 19: (1 sc, dec)* 6 (12)
Fasten off and leave a long tail for sewing the body with the head.
Hat
Start with red color.
- Rnd 1: 6 sc in MR
- Rnd 2: (2sc,inc)*2 (8)
- Rnd 3: 8 sc
- Rnd 4: (3sc,inc)*2 (10)
Change the color to white.
- Rnd 5: 10 sc
- Rnd 6: (4sc,inc)*2 (12)
Change the color to red.
- Rnd 7: 12 sc
- Rnd 8: (5sc,inc)*2 (14)
Change the color to white.
- Rnd 9: 14 sc
- Rnd 10: (6sc,inc)*2 (16)
Change the color to red.
- Rnd 11: 16 sc
- Rnd 12: (7sc,inc)*2 (18)
Change the color to white.
- Rnd 13: 18 sc
- Rnd 14: (8sc,inc)*2 (20)
Change the color to red.
- Rnd 15: 20 sc
- Rnd 16: (9sc,inc)*2 (22)
Change the color to white.
- Rnd 17: 22 sc
- Rnd 18: (10sc,inc)*2 (24)
Change the color to red.
- Rnd 19: 24 sc
- Rnd 20: (5sc,inc)*4 (28)
Change the color to white.
- Rnd 21: 28 sc
- Rnd 22: (6sc,inc)*4 (32)
Change the color to red.
- Rnd 23: 32 sc
- Rnd 24: (7sc,inc)*4 (36)
Change the color to white.
- Rnd 25: 36 sc
Ear Holes: In the next round, make the holes for the ears.
- Rnd 26: 8 sc, chain 6 (skip 6), 8 sc (between the ears), chain 6 (skip 6), 8 sc (36)
Change the color to red.
- Rnd 27: (5sc,inc)*6 (42)
- Rnd 28: (6sc,inc)*6 (48)
- Rnd 29: 48 sc
Brim: For the next round, crochet with fluffy yarn.
- Rnd 30: 48 inc
Alternative: If you crochet with plush yarn instead of fluffy yarn, make: Ch, slst all around the hat.
Pom-pom for the Hat
White color. Stuff as you go.
- Rnd 1: 6 sc in MR
- Rnd 2: 6 inc (12)
- Rnd 3: (1sc,inc)*6 (18)
- Rnd 4: (2sc,inc)*6 (24)
- Rnds 5-6: 24 sc (2 rnds)
- Rnd 7: (2sc,dec)*6 (18)
- Rnd 8: (1sc,dec)*6 (12)
- Rnd 9: 6 dec
Sew the hole closed. Fasten off and leave a tail for sewing. Sew the ball on round 1 of the hat. Fasten off and weave in the ends.
Straps (Make Two)
Crochet with red color. Attach the yarn on the side of the hat (round 29, right under the edge of the holes for the ears) and make chain 30, 1 sc in each loop and attach with slst to the hat (same loop).
Assembly
- Sew the tail on the back between rounds 8 and 9.
- Sew the head to the body using the long tail left from the body.
- Sew the ears between rounds 5 and 9 of the head (ensure correct fitting with the hat).
- Sew the arms and legs to the body as indicated in the pattern instructions.
- Sew the pom-pom to round 1 of the hat.
- Weave in all ends securely.
Tips
- Face Sculpting: Use cotton yarn for the face sculpting to create a firm, defined shape. Tighten the threads well to compress the face before embroidering the features.
- Stitch Markers: Use a stitch marker to keep track of the beginning of rounds, especially when joining limbs to the body.
- Hat Fit: The hat is designed with ear holes. If you prefer the ears to sit on top of the hat, you can adjust the sewing position of the ears accordingly, though the pattern suggests sewing them between rounds 5 and 9 for the intended look.
- Yarn Choice: The plush yarn gives a soft finish, but ensure it is not too thick for the 3.5 mm hook to maintain stitch definition.
FAQs
Can I use a different hook size?
You can use a different hook size if it matches your yarn weight, but the 3.5 mm hook is recommended for the plush yarn specified to ensure the correct gauge and tightness of stitches.
How do I make the hat brim fluffy without fluffy yarn?
If you do not have fluffy yarn, you can create a similar effect by chaining and slip stitching all around the hat in the final round instead of increasing.
Why do I need to wait to sew the ears?
The pattern suggests sewing the ears after making the hat to ensure the correct fitting. This allows you to see how the hat sits on the head and place the ears so they poke through the holes correctly.
What is the purpose of the cotton yarn?
The black and white cotton yarn is used for face sculpting and embroidery. It provides the necessary tension to shape the muzzle and eyelids and allows for detailed stitching of the mouth and eyebrows.
Can I make the panda without the hat?
Yes, the hat is an accessory. You can use the panda without it, though the pattern notes that it looks much better with the festive hat.
Pin This Crochet Pattern!