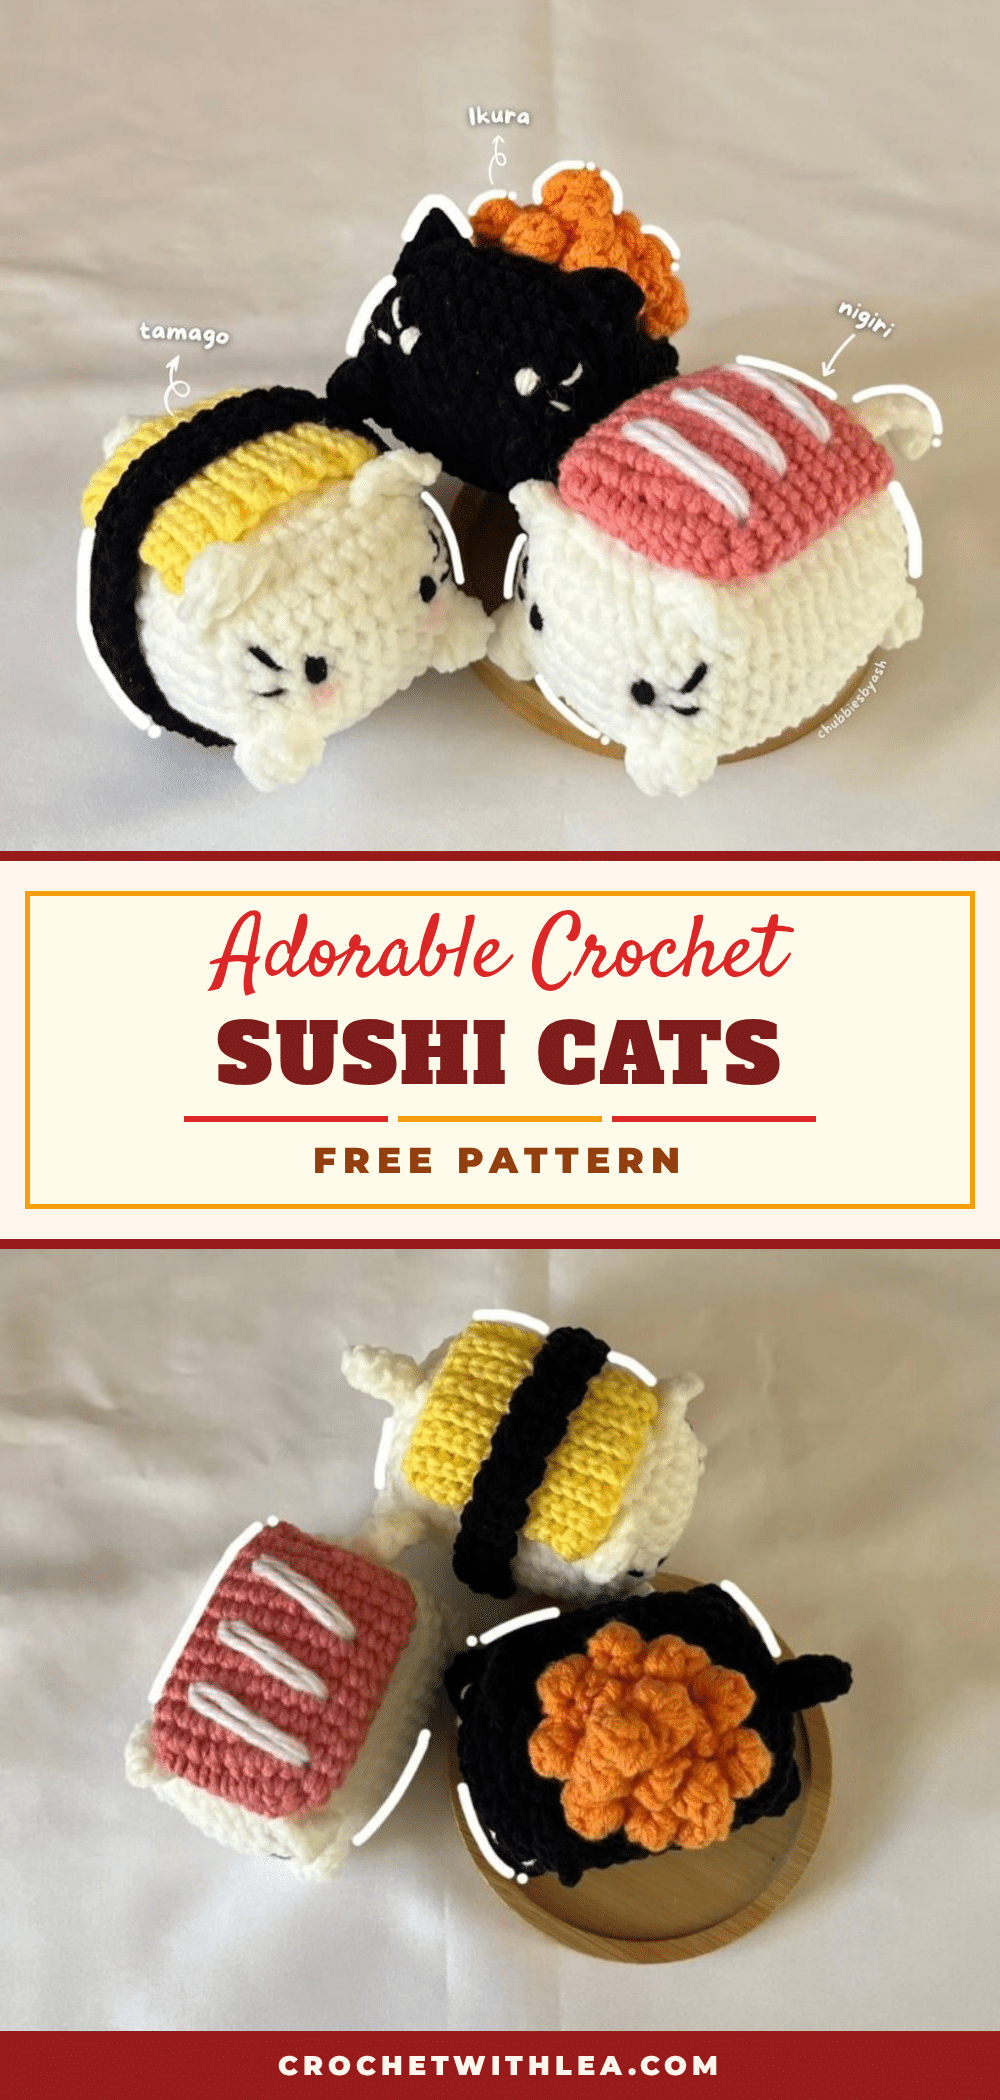
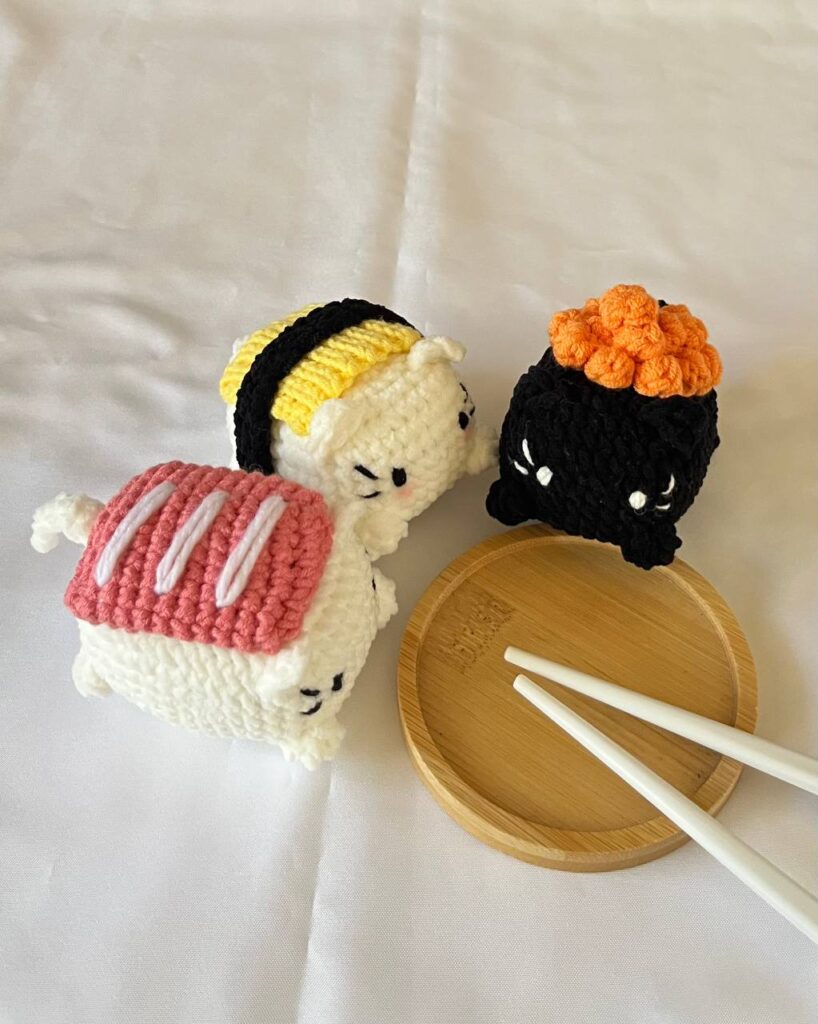
Looking for a playful handmade gift that brings a smile to any desk or shelf? These adorable crochet sushi cats are the perfect blend of kawaii charm and culinary creativity. Whether you are crafting for a sushi lover, a cat enthusiast, or simply want a unique addition to your own collection, this amigurumi project offers a delightful challenge. The combination of a plump cat body nestled inside a roll of sushi creates a whimsical character that is sure to be a conversation starter. This pattern guides you through creating the cat, the sushi fillings, and the assembly process, resulting in a charming piece of decor or a thoughtful present.
Our Touch: Gift and Use Ideas
These sushi cats are incredibly versatile when it comes to presentation and use. Because they are small and sturdy, they make excellent keychain accessories or bag charms when you attach a keyring to the tail or the seaweed strip. For a gift, consider creating a “Sushi Night” set by making a few different variations—one with salmon, one with omelet, and one with fish—to give as a bundle. Their flat bases allow them to sit upright on bookshelves, desks, or windowsills, adding a pop of color to your workspace. The soft texture also makes them suitable as a comforting fidget toy or a gentle plush for small children, provided safety eyes are secured properly or embroidered for younger kids.
Project Overview
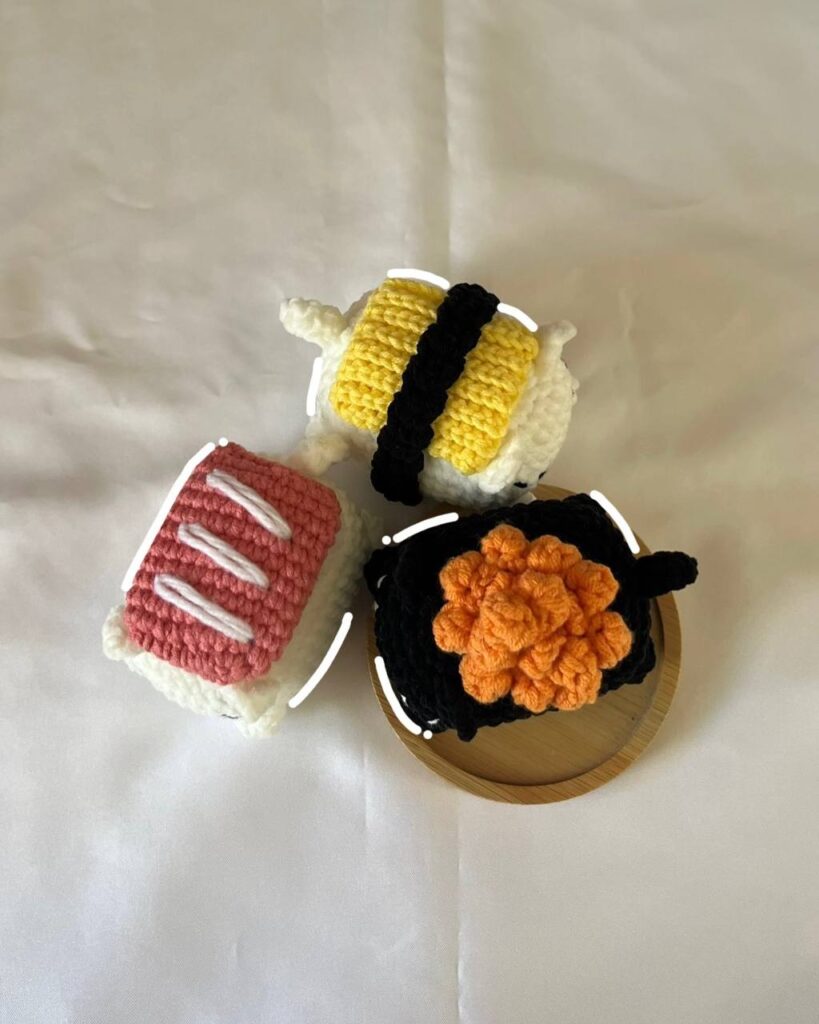
This pattern creates a whimsical amigurumi featuring a cat body integrated into a sushi roll. The project involves crocheting the cat’s body, ears, and tail, followed by creating the sushi components: salmon eggs, fish, omelet, and a seaweed strip. The final assembly requires attaching the food elements around the cat to complete the sushi look. The pattern utilizes joined rounds for the body and specific techniques for the bobble stitches that mimic the texture of the sushi filling.
Materials
- Yarn: Cotton (5ply), Acrylic, Sport, or Thin Chenille yarn in the following colors:
- White
- Black
- Orange
- Dark Pink
- Yellow
- Crochet Hook: 3mm
- Stuffing: Stuffing material
- Adhesive: UHU Glue (optional, for assembly)
- Tools: Stitch markers, darning needle, pins, and scissors
Gauge and Finished Size
Specific gauge and finished size measurements are not provided in the source pattern. It is recommended to adjust hook size if your tension differs significantly from the pattern’s intended shape, ensuring the cat fits comfortably within the sushi roll.
Abbreviations
- Ch: Chain
- st: Stitch
- mr: Magic ring
- sc: Single crochet
- inc: Increase
- dec: Decrease
- Bob: Bobble stitch
- dc: Double crochet
- BLO: Back loop only
- FLO: Front loop only
- slst: Slip stitch
- *: Repeat
- []: Total stitch count in each round/row
Pattern Notes
Joined Rounds: For the body section, this pattern uses joined rounds. This means you connect with a slst into the 1st sc after every round. Start every new round with a Ch1, and start again from the sc that you just made a slst into. Note that Ch1 and slst are NOT included in the total stitch count.
Starting the Body: Begin with a slip knot using black or white yarn. Make 10 chains.
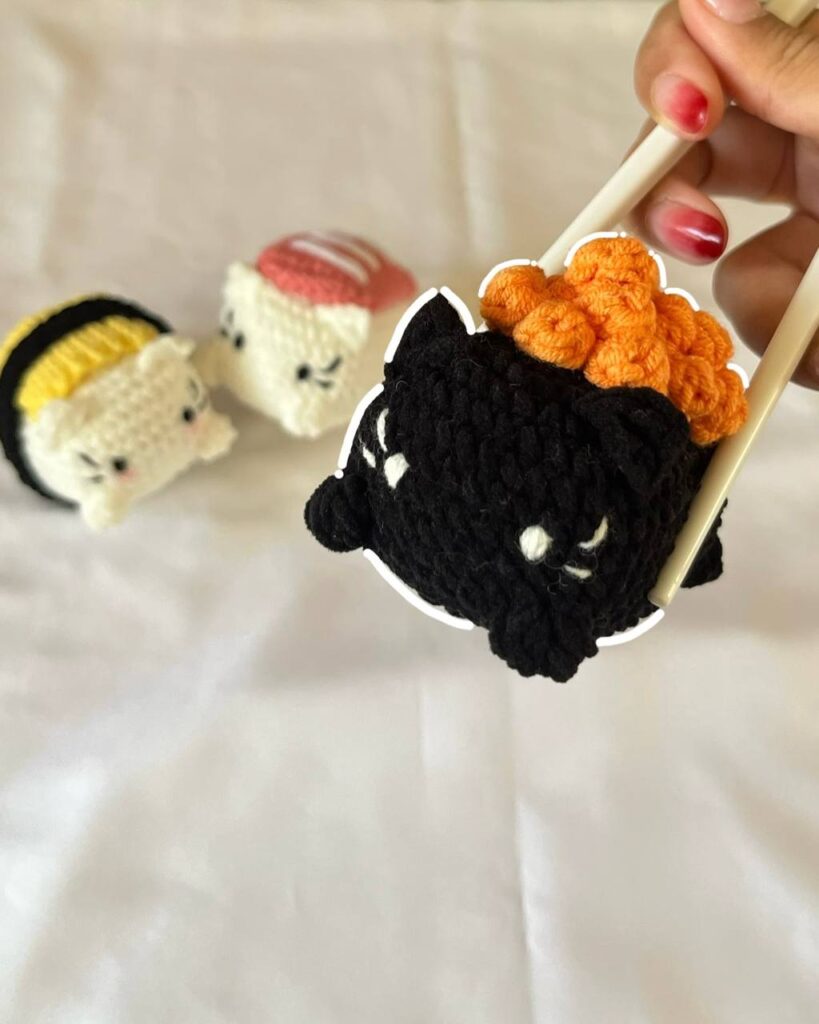
Bobble Stitch: The bobble stitches in Round 10 are made of 4 double crochets only. Refer to the creator’s tutorial video for a visual demonstration of how to make the 4dc bobble stitch.
Pattern Instructions
Body
Round 1: Starting from 2nd chain from the hook, 1 inc, 7 sc, (4 sc in one ch), 7 sc, 1 inc, 1 slst (into the 1st sc of R1) [22]
Round 2: Ch1, 1 sc, (3 sc in on st), 7 sc, (3 sc in on st), 2 sc, (3 sc in on st), 7 sc, (3 sc in on st), 1 sc, 1 slst [30]
Round 3: Ch1, 2 sc, (3 sc in on st), 9 sc, (3 sc in on st), 4 sc, (3 sc in on st), 9 sc, (3 sc in on st), 2 sc, 1 slst [38]
Round 4: Ch1, 3 sc, (3 sc in on st), 11 sc, (3 sc in on st), 6 sc, (3 sc in on st), 11 sc, (3 sc in on st), 3 sc, 1 slst [46]
Rounds 5-9: Ch1, 46 sc, 1 slst (5 rounds) [46]
Round 10: Ch1, 4 sc, 1 Bob, 13 sc, 1 Bob, 8 sc, 1 Bob, 13 sc, 1 Bob, 4 sc, 1 slst [46]
Round 11: Ch1, 3 sc, (3 sc dec), 11 sc, (3 sc dec), 6 sc, (3 sc dec), 11 sc, (3 sc dec), 3 sc, 1 slst [38]
Round 12: Ch1, 2 sc, (3 sc dec), 9 sc, (3 sc dec), 4 sc, (3 sc dec), 9 sc, (3 sc dec), 2 sc, 1 slst [30]
Stuffing Note: Start stuffing the body after Round 12 and continue stuffing after each following round.
Round 13: Ch1, (3 sc, 1 dec) * 6, 1 slst [24]
Round 14: Ch1, (2 sc, 1 dec) * 6, 1 slst [18]
Round 15: Ch1, (1 sc, 1 dec) * 6, 1 slst [12]
Round 16: Ch1, 6 dec [6]
Finishing Body: Cut the yarn leaving a long tail. Close the remaining hole using a darning needle.
Embroider the Face
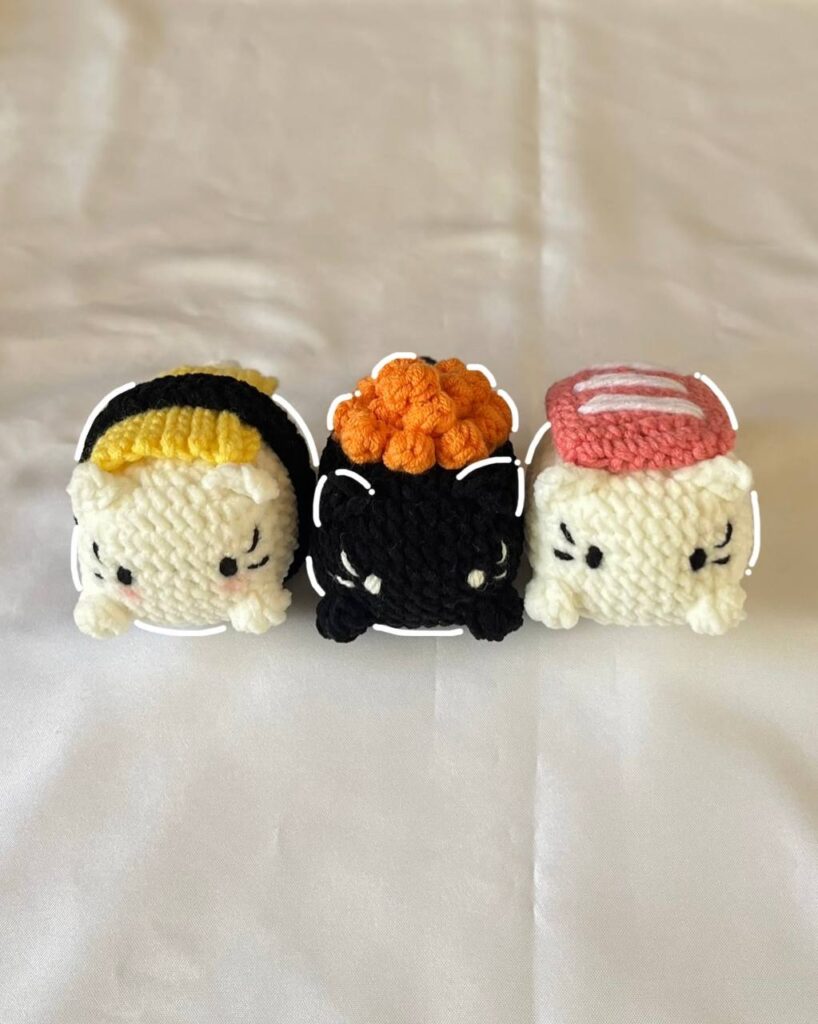
Using three strands of black yarn, embroider the eyes on Round 7 in the middle with 6 sc apart between the two eyes. Embroider two whiskers beside each eye using two strands of yarn.
Ears
Crochet the ears directly across Rounds 3 to 5 of the body.
Instructions: Ch3, starting from 2nd chain from the hook, 1 sc, 1 dc, skip 1 round (Round 4), 1 slst on the body.
Cut the yarn and weave in the ends.
Tail
Crochet the tail directly onto the body just like the ears, attaching it to Round 5 right in the middle.
Instructions: Ch6, starting from 2nd chain from the hook, 1 slst, 4 sc.
Cut the yarn and weave in the ends.
Salmon Eggs
Start with a slip knot using Orange yarn. Make 50 chains.
Instructions: Starting from 3rd chain from the hook, (3 dc cluster st, skip 1 ch, 1 sc) * 16.
Fish
Start with a slip knot using dark pink yarn. Make 7 chains.
Round 1: Starting from 2nd chain from the hook, 1 inc, 4 sc, (4 sc in one ch), 4 sc, 1 inc, 1 slst [16]
Round 2: Ch1, (3 sc, 1 inc) * 4, 1 slst [20]
Rounds 3-11: Ch1, 20 sc, 1 slst (9 rounds) [20]
Round 12: Ch1, (3 sc, 1 dec) * 4, 1 slst [16]
Finishing Fish: Cut the yarn leaving a long tail. Close the meat and embroider white stripes using the white yarn.
Omelet
Start with a slip knot using the Yellow yarn. Make 13 chains.
Round 1: Starting from 2nd chain from the hook, 12 slst.
Round 2: BLO, 12 slst.
Repeat Round 2 until you get the desired width (approximately 4cm). Cut the yarn leaving a long tail.
Seaweed Strip
Start with a slip knot using black yarn. Make 3 chains.
Round 1: Starting from 2nd chain from the hook, 2 sc [2].
Round 2: Ch1 & turn, 2 sc [2].
Repeat Round 2 until you get the desired length which fits perfectly for your sushi cat. Cut the yarn leaving a long tail.
Assembly
Assemble the sushi cat by attaching the food components to the body. You can use glue or sew the food together with the cats using the remaining yarn tails. A mix of glue and sewing is recommended for stability. Arrange the salmon eggs, fish, omelet, and seaweed strip around the cat body to create the sushi roll appearance. Ensure the cat is securely positioned inside the roll. Take your time with this step, as patience will result in a well-shaped and adorable final product.
Tips
- Refer to the accompanying video tutorial for visual guidance on the bobble stitch, face embroidery, and assembly techniques.
- When embroidering the face, ensure the eyes are centered on Round 7 for a balanced look.
- Use pins to hold the sushi components in place before gluing or sewing to ensure proper alignment.
- Do not miss any details in the stitch counts to maintain the correct shape of the body and components.
FAQs
What type of yarn is best for this pattern?
The pattern suggests Cotton (5ply), Acrylic, Sport, or Thin Chenille yarn. Cotton provides good stitch definition, while Chenille can give a softer, plushier finish.
How do I make the bobble stitch?
The bobble stitches in this pattern are made of 4 double crochets only. For a detailed visual explanation, please refer to the creator’s tutorial video linked in the source.
Can I use a different hook size?
While a 3mm hook is specified, you may adjust the hook size if your yarn weight or personal tension differs. However, changing the hook size may affect the final dimensions and how well the sushi components fit around the cat.
How do I attach the ears and tail?
The ears and tail are crocheted directly onto the body. The ears attach across Rounds 3 to 5, and the tail attaches to Round 5. Use slip stitches to connect them securely to the body.
Is this pattern suitable for beginners?
The pattern involves basic amigurumi stitches but includes joined rounds and bobble stitches. Beginners may find the assembly and shaping challenging, so patience and following the tutorial closely are recommended.
Pin This Crochet Pattern!