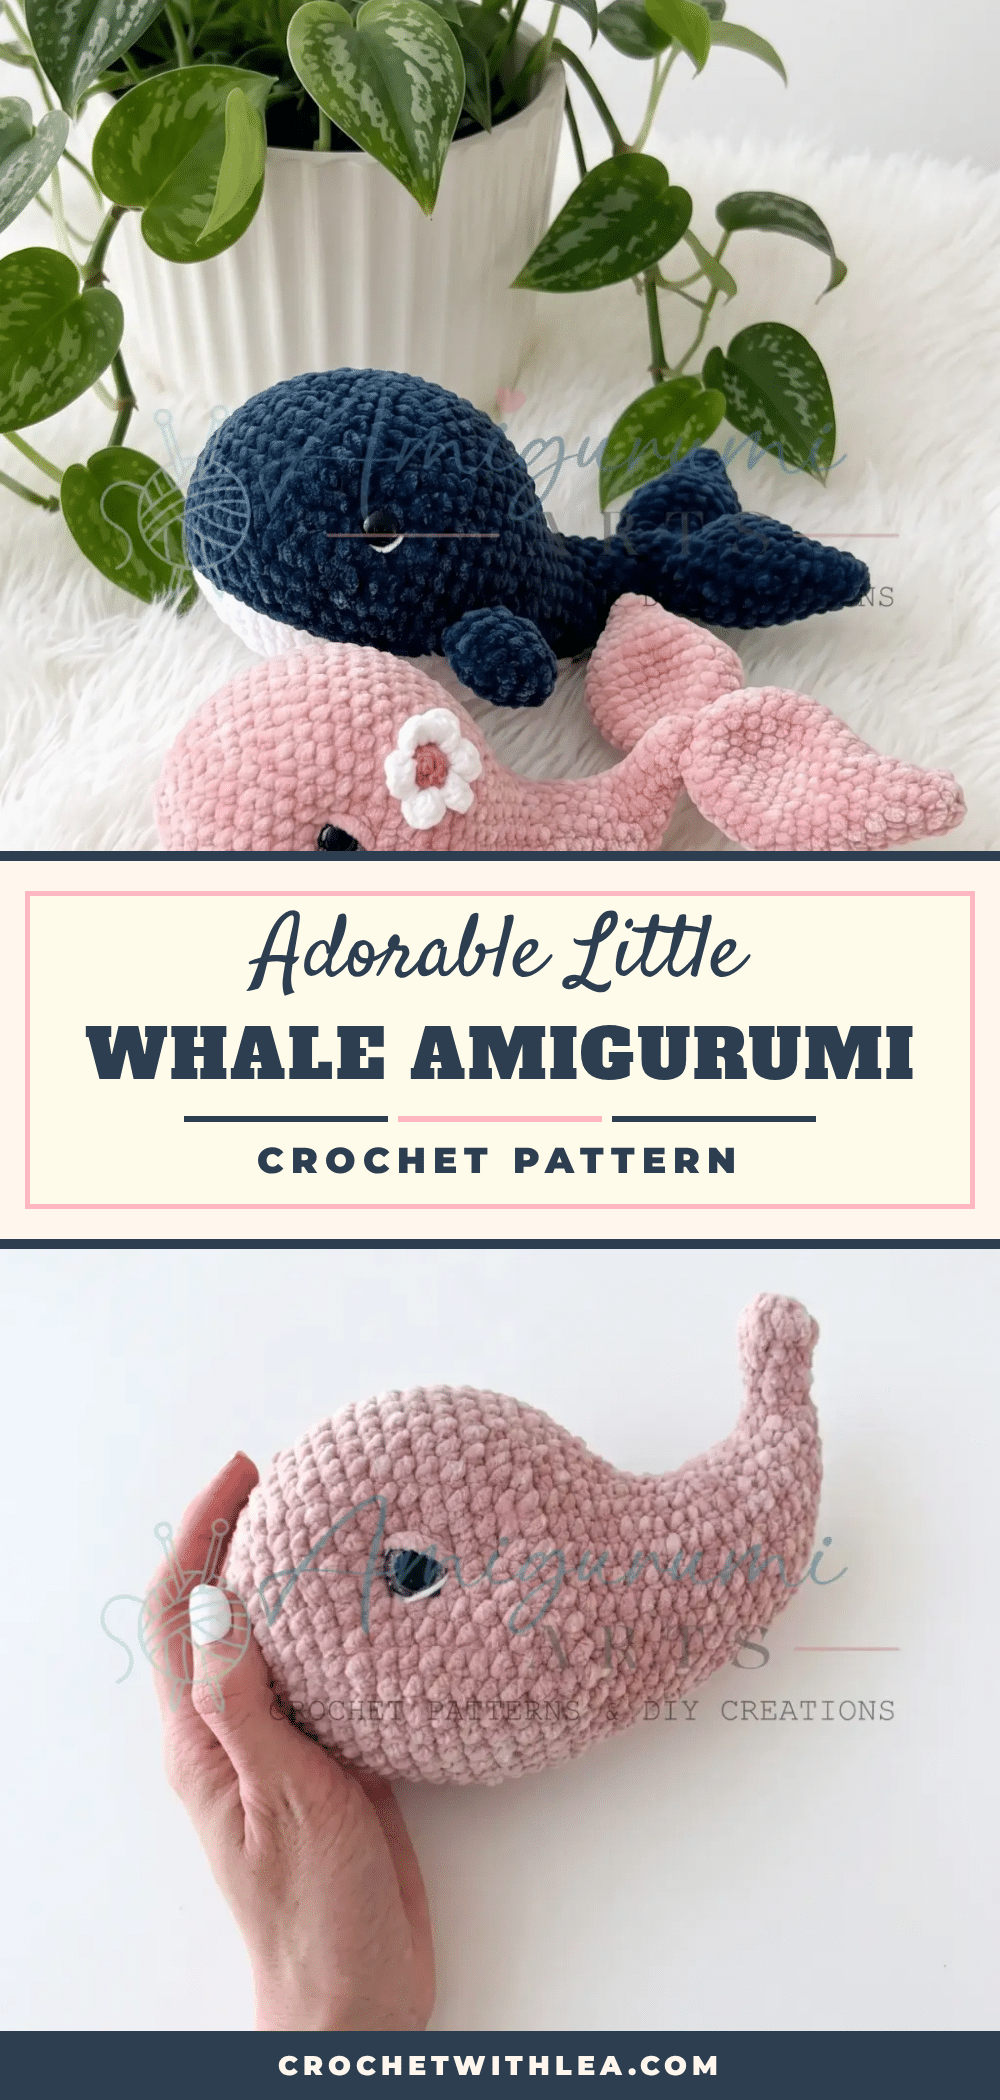
Yarn is on the table, hook is in hand, and the first magic ring is just beginning to take shape. There is a specific kind of magic in amigurumi where a simple circle transforms into a character with personality. This Little Whale Amigurumi pattern captures that moment perfectly. It is approachable enough for a confident beginner yet detailed enough to keep an intermediate crafter genuinely engaged from the first round to the last sewn-on fin. The body and tail are worked in a continuous spiral, while the belly is shaped flat in turning rows so you’ll get to practice both techniques in one sitting. By the time you stuff that rounded head and bend the tail wire into its gentle arc, you’ll have a finished piece that looks far more complex than it actually was to make.
Why This Project Works
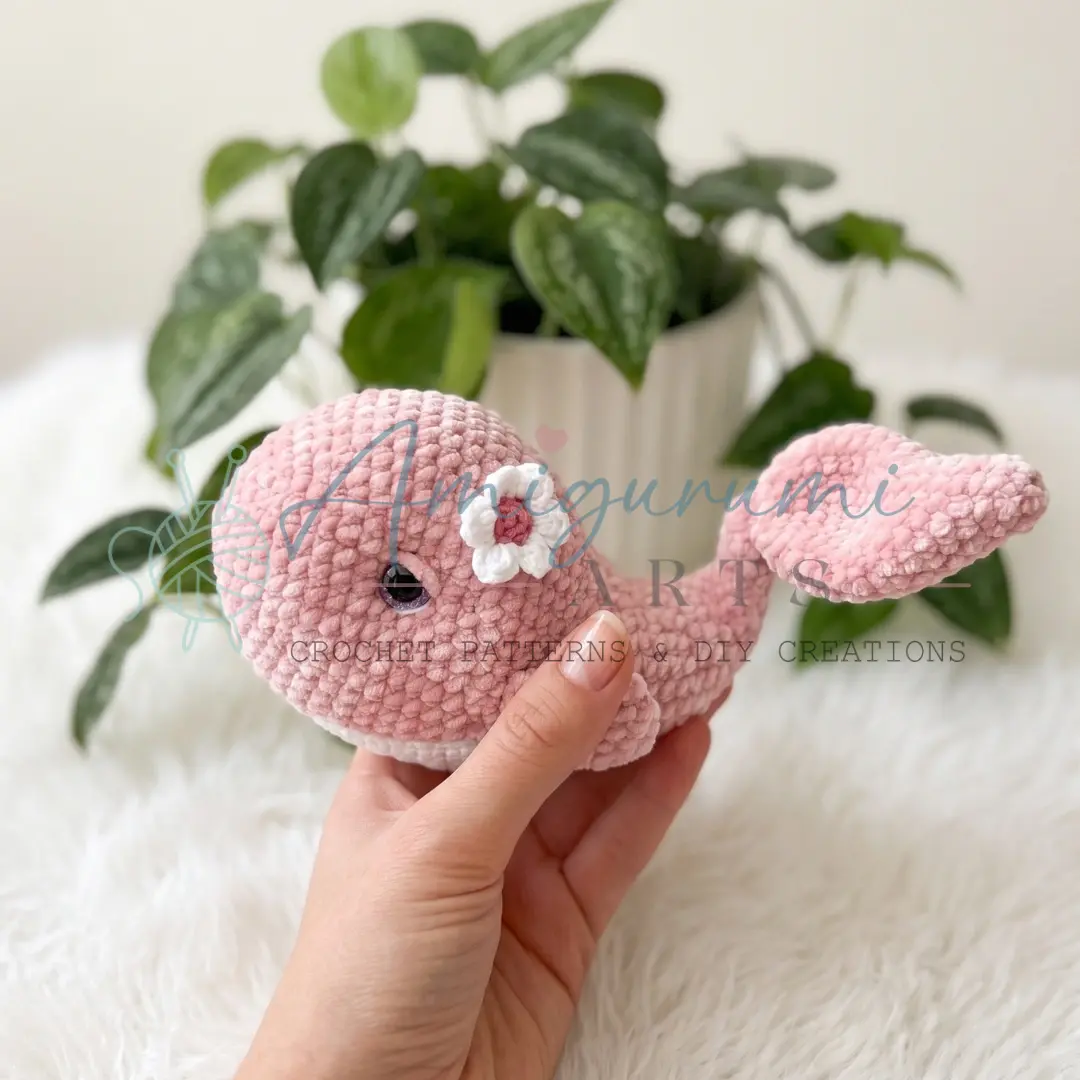
This chubby Little Whale Amigurumi is the kind of handmade gift that stops people in their tracks. The combination of plush, bulky-weight yarn for the body and a contrasting sport-weight cotton belly creates a lovely textural contrast that elevates the design. The inclusion of a wire-supported tail adds a dynamic element, allowing you to pose the whale in a swimming curve. The tiny flower accent and the option for glittery safety eyes give the maker room to personalize the character, making it a delightful addition to a nursery shelf or a unique gift for a sea-life enthusiast.
Project Overview
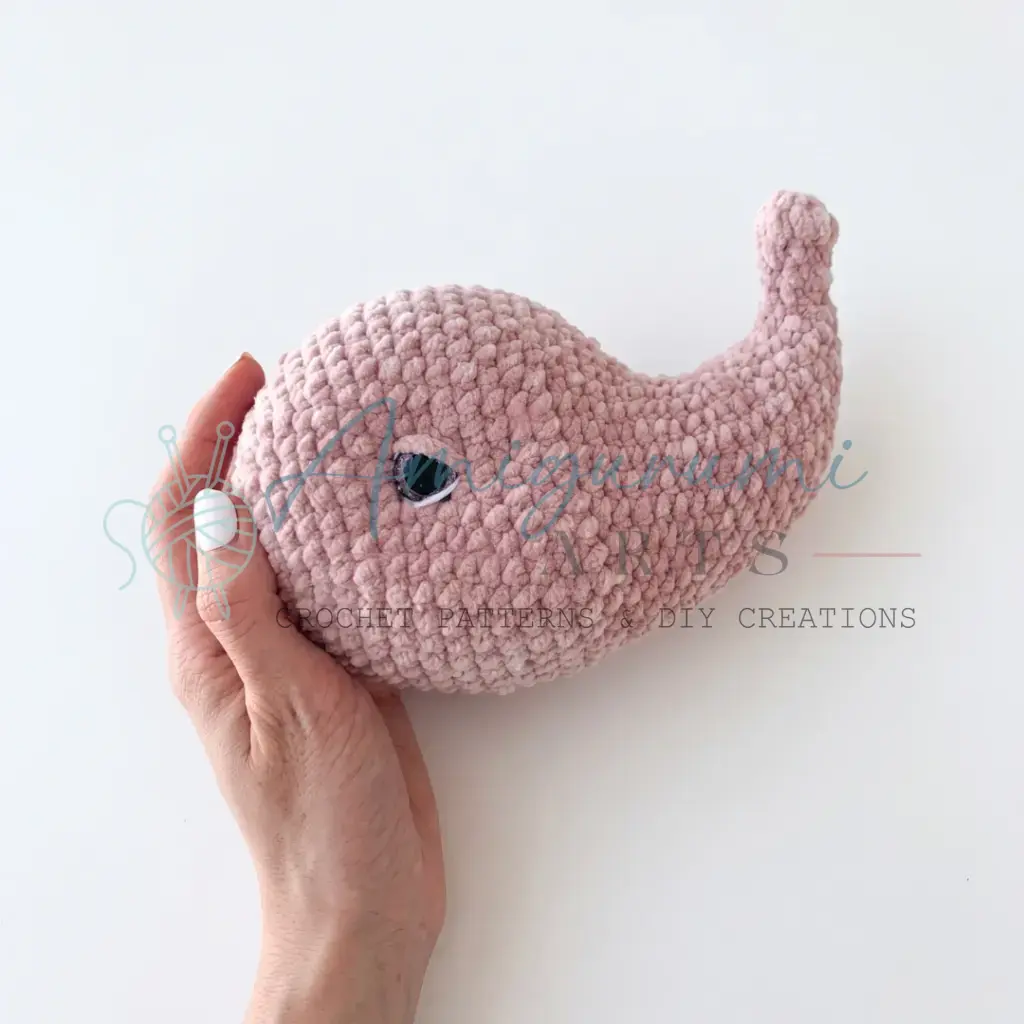
This pattern guides you through creating a whale with a wire-supported tail, a soft belly panel, and a tiny flower accent. It is written in US crochet terminology. The Body and all circular components are worked in joined rounds (sl st to join at the end of each round, beginning chain counts as first stitch where noted). The Belly is worked flat in turning rows; each new row begins with 1 ch (turning chain).
Materials
- Yarn (Main Color — Blue): Bulky-weight plush/chenille yarn, blue (one skein)
- Yarn (Secondary Color — Powder/Blush): Bulky-weight plush/chenille yarn, powder pink (one skein)
- Yarn (Accent — White/Belly): Sport-weight cotton or cotton-blend yarn, white (small amount)
- Yarn (Flower Center): Sport-weight yarn, pink (small amount)
- Hook: E-4 / 3.5 mm
- Safety eyes: 16 mm with sparkle/glitter pupil — 2
- Fiberfill stuffing
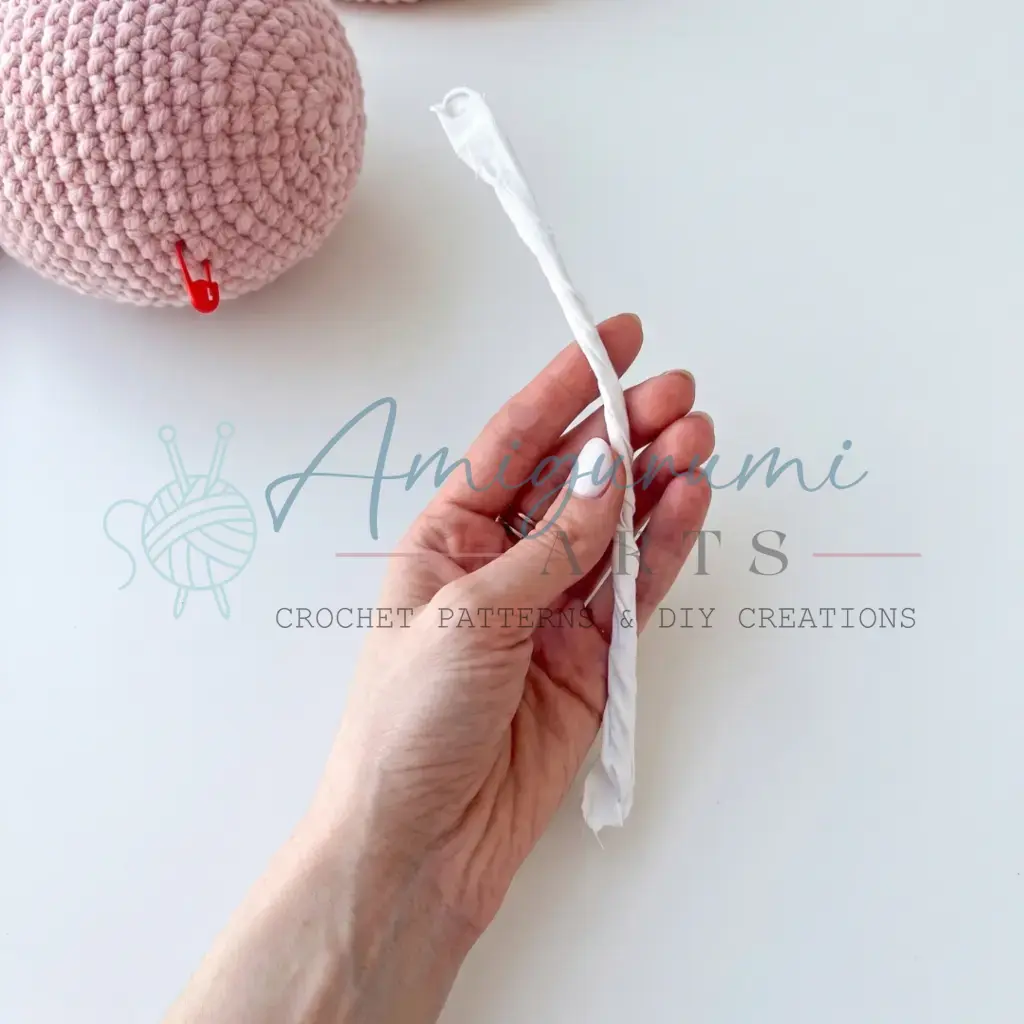
- Floral wire: 1.2 mm gauge, approx. 18 cm (two pieces)
- Medical/fabric tape: (adhesive bandage tape) for wrapping wire ends
- Stitch markers
- Yarn needle / tapestry needle
- Long needle: (for eye indentation/pull-through)
- Scissors
Gauge and Finished Size
Gauge is not critical for this project, but your fabric should be dense enough that stuffing does not show through. Tighten your tension if you see gaps.
Abbreviations
- ch — Chain
- dec — Invisible Decrease (insert hook through front loops of next 2 sts, yo, pull through both, yo, pull through 2 loops)
- dc — Double Crochet
- hdc — Half Double Crochet
- inc — Increase (2 sc in same stitch)
- MR — Magic Ring
- sc — Single Crochet
- sk — Skip
- sl st — Slip Stitch
- st / sts — Stitch / Stitches
Pattern Notes
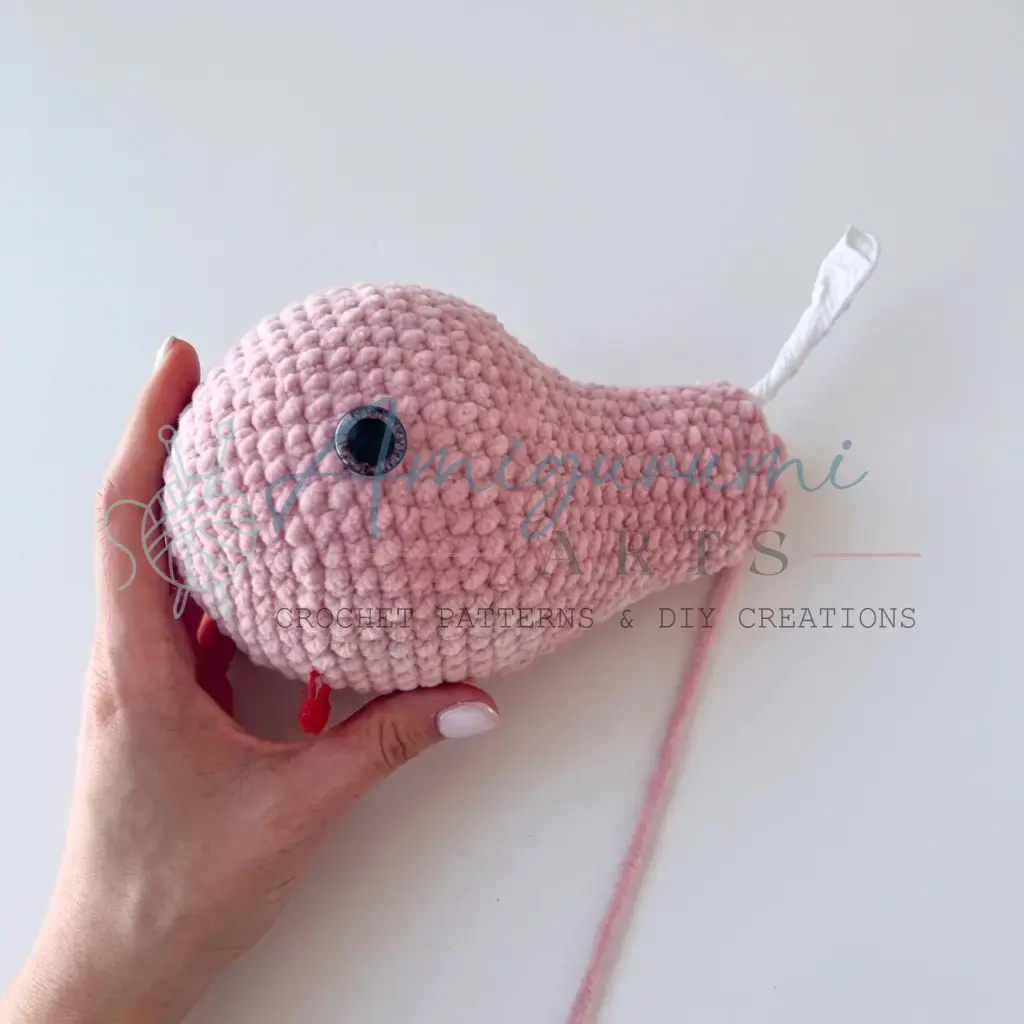
Stitch counts are given at the end of each round or row in parentheses: (##). Insert 16 mm safety eyes between Rounds 12 and 13 of the Body, spaced 24 sts apart, before working the decrease rounds. The tail wire (approx. 18 cm, wrapped in medical tape with extra attention to the tips) is inserted during Body Round 33 and crocheted around as you continue the tail section. Stuff the tail firmly as you go. The tail fins and small side fins are not stuffed.
Pattern Instructions
Body
Rnd 1: Ch 2, work 6 sc into the 2nd ch from hook, sl st to join. (6)
Rnd 2: Inc in each st around, sl st to join. (12)
Rnd 3: Sc, inc repeat 6 times around. (18)
Rnd 4: 2 sc, inc repeat 6 times around. (24)
Rnd 5: 3 sc, inc repeat 6 times around. (30)
Rnd 6: 4 sc, inc repeat 6 times around. (36)
Rnd 7: Sc in each st around. (36)
Rnd 8: 5 sc, inc repeat 6 times around. (42)
Rnd 9: Sc in each st around. (42)
Rnd 10: 6 sc, inc repeat 6 times around. (48)
Rnds 11–17: Sc in each st around. (48) 7 rounds total.
After completing Rnd 17, insert safety eyes between Rnds 12 and 13, spacing them exactly 24 sts apart.
Rnd 18: 6 sc, dec repeat 6 times around. (42)
Rnd 19: Sc in each st around. (42)
Rnd 20: 5 sc, dec repeat 6 times around. (36)
Rnd 21: Sc in each st around. (36)
Begin stuffing the head firmly now. Continue adding stuffing as you close the piece.
Rnd 22: 16 sc, dec, dec, 16 sc. (34)
Rnd 23: 15 sc, dec, dec, 15 sc. (32)
Rnd 24: 12 sc, dec, dec, dec, dec, 12 sc. (28)
Rnd 25: Sc in each st around. (28)
Rnd 26: 12 sc, dec, dec, 12 sc. (26)
Rnds 27–28: Sc in each st around. (26)
Rnd 29: 11 sc, dec, dec, 11 sc. (24)
Rnd 30: Sc in each st around. (24)
Rnd 31: 10 sc, dec repeat 2 times. (22)
Rnd 32: 9 sc, dec repeat 2 times. (20)
Rnd 33: 8 sc, dec repeat 2 times. (18)
At this point, insert the prepared wire. Cut a piece of floral wire approximately 18 cm long. Wrap it thoroughly with medical/fabric tape, paying special attention to both tips so no sharp ends are exposed. Screw one end into the stuffing already inside the body, leaving approximately 5–6 cm of wire extending beyond the crocheted fabric. Bend this free end upward (you can also adjust the bend at the very end). Continue crocheting the remaining rounds around the wire, stuffing the tail section firmly as you go.
Rnd 34: 7 sc, dec repeat 2 times. (16)
Rnd 35: 2 sc, dec repeat 4 times. (12)
Rnd 36: Sc in each st around. (12)
Rnd 37: 4 sc, dec repeat 2 times. (10)
Rnd 38: 1 sc, dec, 3 sc, dec, 2 sc. (8)
Rnds 39–41: Sc in each st around. (8)
Using your yarn needle, close the opening by drawing through the front loops only of each stitch and pulling tight. If the wire tip is not fully enclosed after Rnd 41, simply work a few additional rounds of 8 sc until it is completely covered before closing.
Tail Fin (Make 2)
The tail is made of two identical fins that are sewn to the wire tip of the body.
Rnd 1: Ch 2, work 6 sc into the 2nd ch from hook, sl st to join. (6)
Rnd 2: 5 sc, inc. (7)
Rnd 3: 6 sc, inc. (8)
Rnd 4: 3 sc, inc repeat 2 times. (10)
Rnd 5: 4 sc, inc repeat 2 times. (12)
Rnd 6: 5 sc, inc repeat 2 times. (14)
Rnd 7: 5 sc, inc, inc, 7 sc. (16)
Rnd 8: 6 sc, inc, inc, 8 sc. (18)
Rnd 9: 7 sc, inc, inc, 9 sc. (20)
Rnd 10: 8 sc, inc, inc, 10 sc. (22)
Rnd 11: 9 sc, inc, inc, 11 sc. (24)
Rnds 12–14: Sc in each st around. (24) 3 rounds total.
Rnd 15: 4 sc, dec repeat 4 times. (20)
Rnd 16: 3 sc, dec repeat 4 times. (16)
Rnd 17: 2 sc, dec repeat 4 times. (12)
Rnd 18: Dec 6 times around, sl st to join. (6)
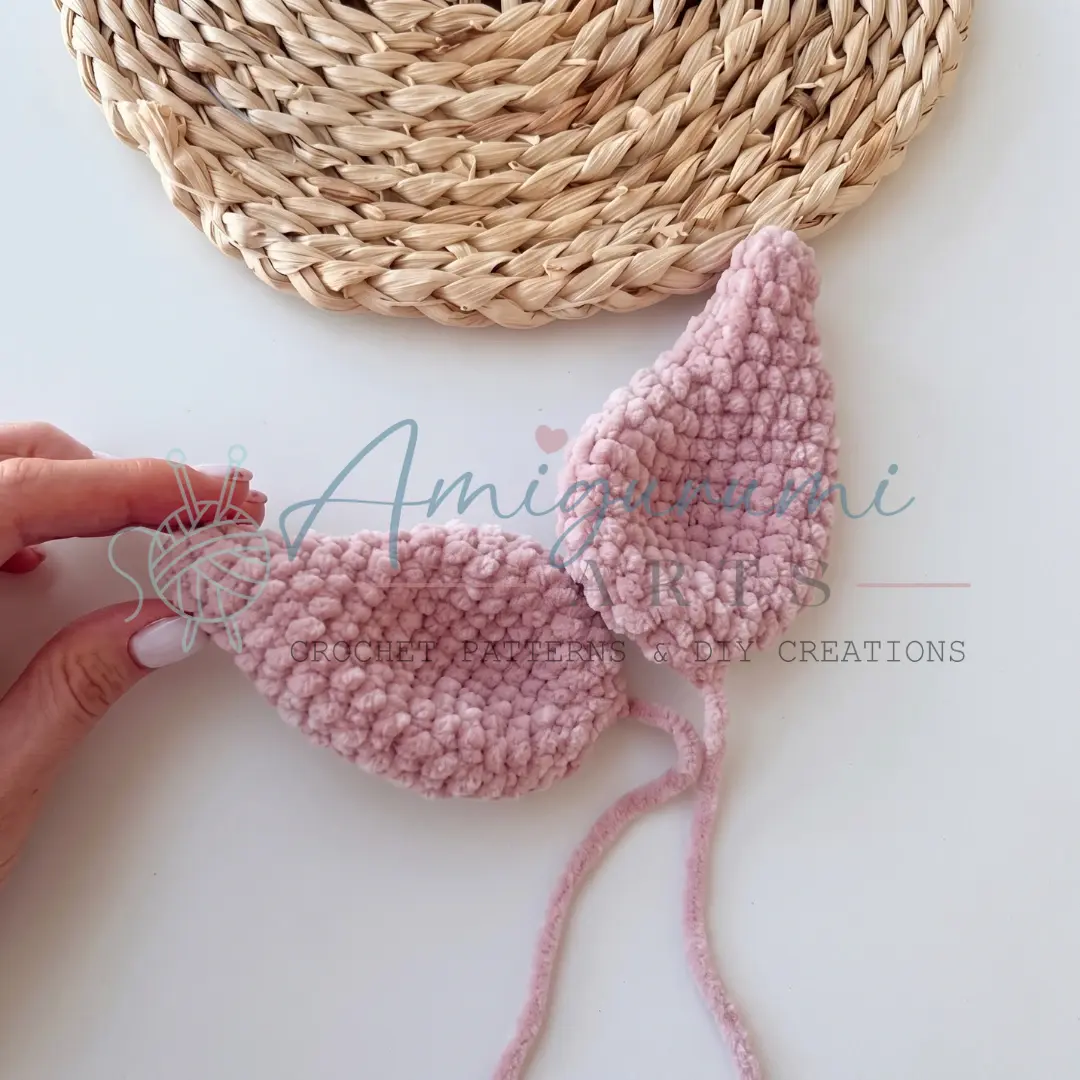
Do not stuff the fins. If attaching with plush yarn, cut yarn and leave a long tail for sewing. If attaching with sport-weight cotton yarn, use your needle to weave the tail end inside the fin before sewing.
Small Side Fins (Make 2)
Rnd 1: Ch 2, work 6 sc into the 2nd ch from hook, sl st to join. (6)
Rnd 2: Sc, inc repeat 3 times. (9)
Rnd 3: 2 sc, inc repeat 3 times. (12)
Rnds 4–5: Sc in each st around. (12)
Rnd 6: 2 sc, dec repeat 3 times. (9)
Rnd 7: Sc, dec repeat 3 times. (6)
Do not stuff. Fold the fin flat and work 2–3 sc through both layers to close.
Belly
The Belly is worked flat in turning rows. Begin with a foundation chain, then work back-and-forth. Each new row starts with 1 ch (turning chain, does not count as a stitch).
Row 1: Ch 9, turn. Starting in the 2nd ch from hook, work 8 sc. (8)
Row 2: Ch 1, turn. 8 sc. (8)
Row 3: Ch 1, turn. 1 sc, inc, 6 sc. (9)
Row 4: Ch 1, turn. 1 sc, inc, 7 sc. (10)
Row 5: Ch 1, turn. 2 sc, inc, 7 sc. (11)
Row 6: Ch 1, turn. 2 sc, inc, 8 sc. (12)
Row 7: Ch 1, turn. 3 sc, inc, 8 sc. (13)
Row 8: Ch 1, turn. 3 sc, inc, 9 sc. (14)
Row 9: Ch 1, turn. 4 sc, inc, 9 sc. (15)
Row 10: Ch 1, turn. 4 sc, inc, 10 sc. (16)
Row 11: Ch 1, turn. 5 sc, inc, 10 sc. (17)
Row 12: Ch 1, turn. 5 sc, inc, 11 sc. (18)
Row 13: Ch 1, turn. 1 sc, inc, 16 sc. (19)
Row 14: Ch 1, turn. 1 sc, inc, 17 sc. (20)
Rows 15–22: Ch 1, turn. Sc in each st across. (20) 8 rows total.
Row 23: Ch 1, turn. 1 sc, dec, 14 sc, dec, 1 sc. (18)
Row 24: Ch 1, turn. 1 sc, dec, 12 sc, dec, 1 sc. (16)
Row 25: Ch 1, turn. 1 sc, dec, 10 sc, dec, 1 sc. (14)
Row 26: Ch 1, turn. 1 sc, dec, 8 sc, dec, 1 sc. (12)
Row 27: Ch 1, turn. 1 sc, dec, 6 sc, dec, 1 sc. (10)
Row 28: Ch 1, turn. 1 sc, dec, 4 sc, dec, 1 sc. (8)
Rows 29–30: Ch 1, turn. Sc in each st across. (8)
Do not cut yarn. Continue working sc evenly around the entire perimeter of the belly piece. Leave a long yarn tail for sewing.
Flower (Optional Embellishment)
Rnd 1: Work 6 sc into a MR, pull ring closed. Switch to white yarn. (6)
Rnd 2: Ch 4, sl st into the next st repeat 6 times. 6 chain-space loops formed.
Rnd 3: For each loop, work: ch 3, 5 dc with a shared top closure (all drawn together into the same chain-space loop), ch 3, sl st into the same chain-space loop. Repeat for all 6 loops. 6 petals formed.
For a more raised center: separately work 6 hdc into a MR using pink yarn, pull ring closed, and sew this small circle onto the center of the flower.
Assembly
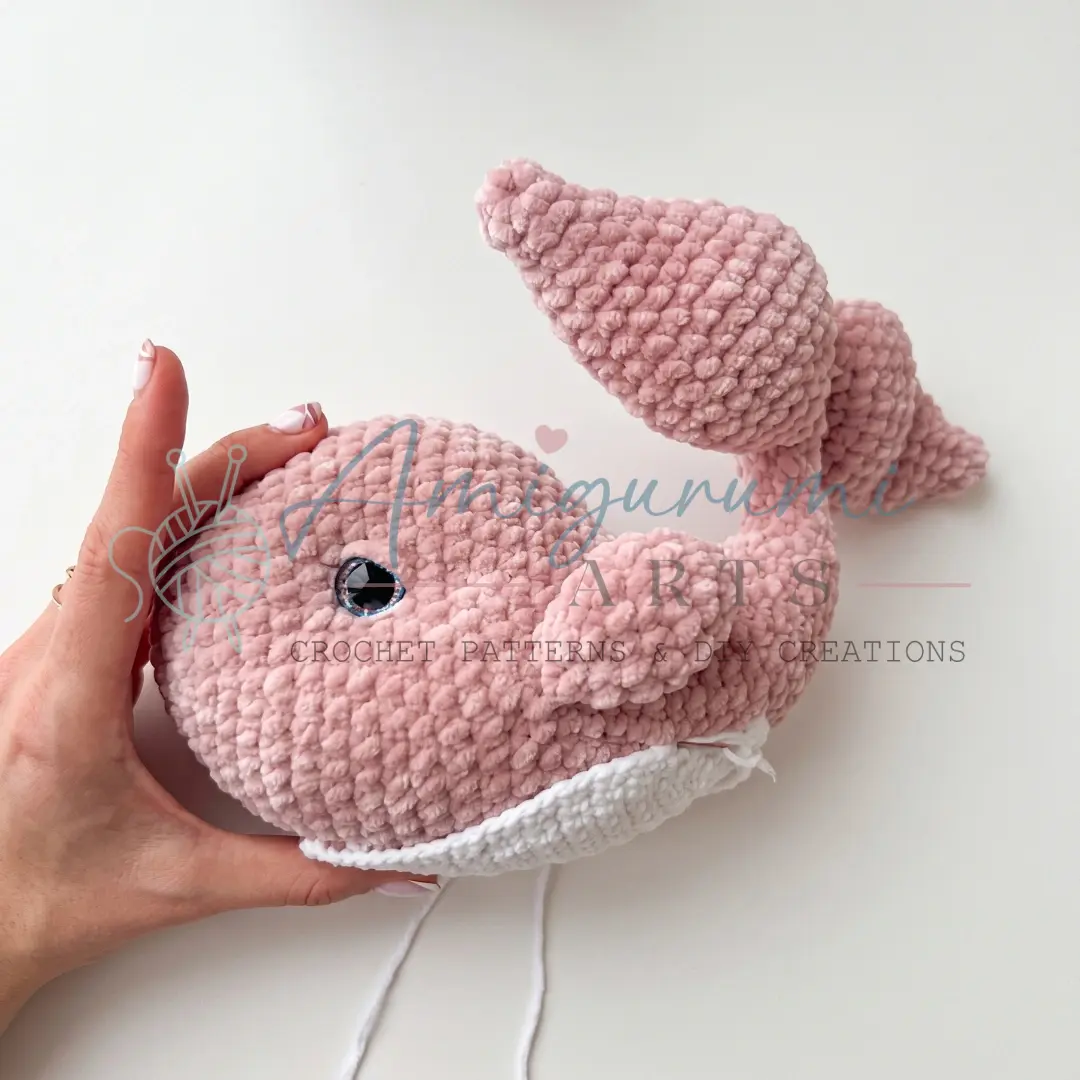
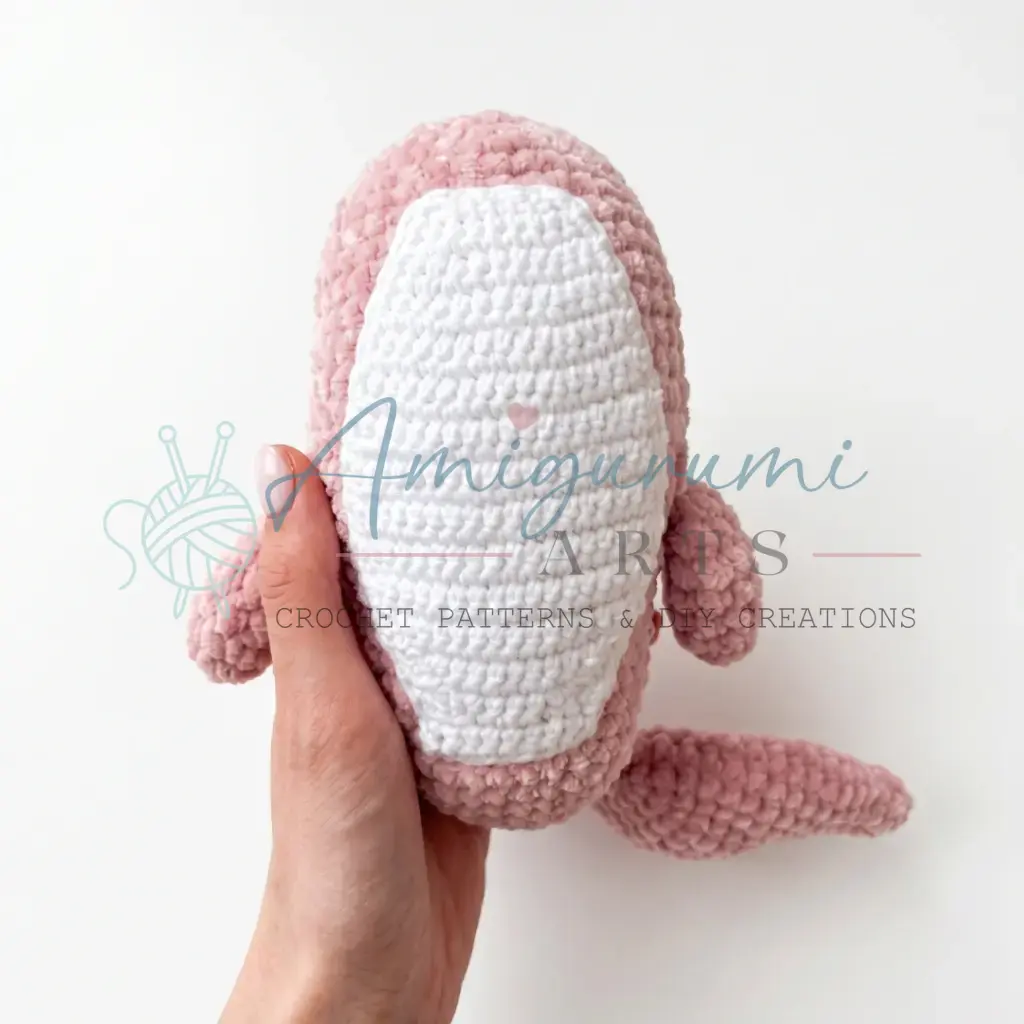
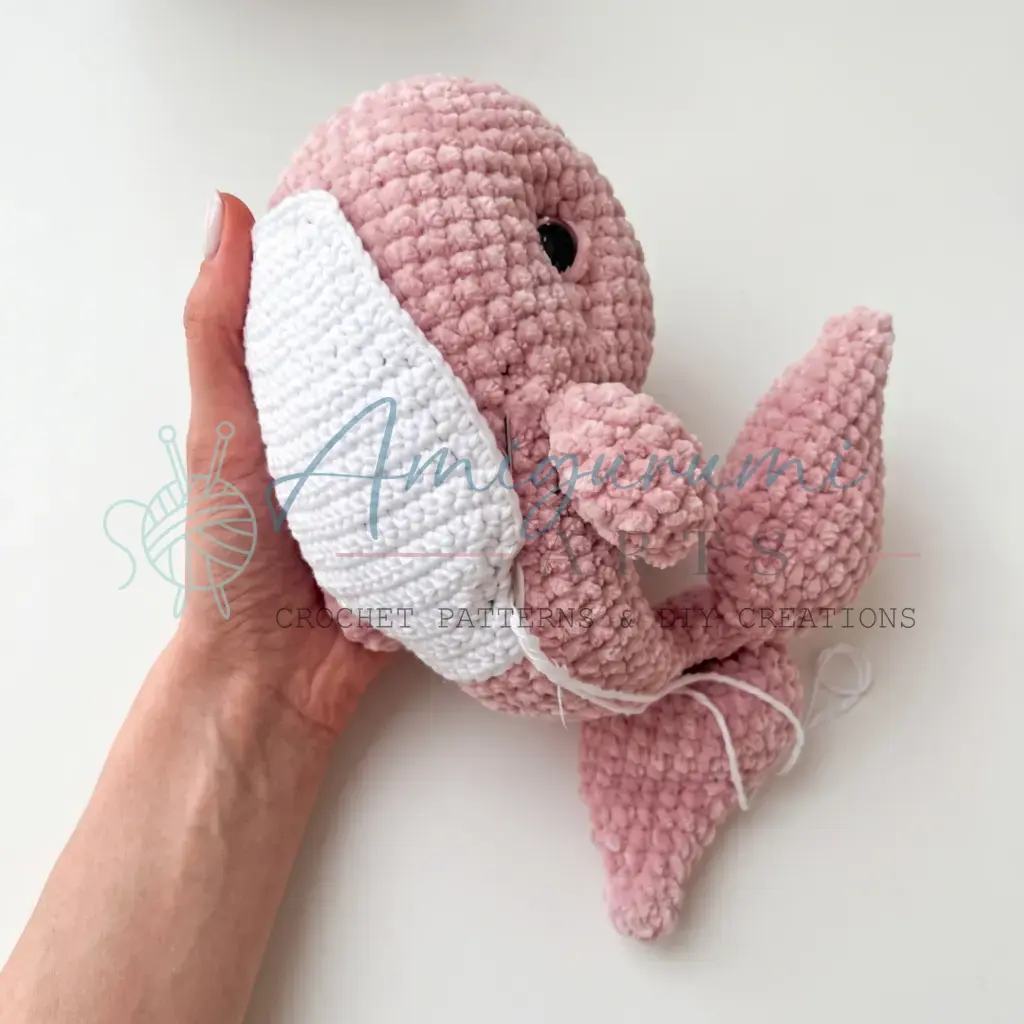
Optional: Use a long needle and a length of yarn to pull the safety eyes inward slightly, creating a gentle eye indentation for a more dimensional face. Embroider or wrap the upper eyelids using body-color yarn; define the lower eyelid with a few stitches of white cotton yarn. Sew the two tail fins to the wire tip at the end of the body, with the curved/wavy edges facing upward. Sew the two small side fins to the body between Rounds 19 and 20, one on each side. Pin the belly panel to the body, aligning it between Rows 8 and 29 of the belly with the corresponding rounds on the body. Sew in place using the long yarn tail and a whipstitch or mattress stitch around the entire perimeter. Sew or pin the flower embellishment to the body in your preferred position. Weave in all remaining yarn ends securely.
Tips
- Keep your tension tight throughout the body. Plush/chenille yarn has a forgiving texture but can hide gaps that let stuffing peek through on closer inspection. Work your sc snugly — if you can see daylight through the fabric, go down a hook size.
- Prepare the wire carefully before you need it. Wrap the full length in medical tape before you reach Round 33 — rushing this step risks a sharp tip poking through the fabric later. Focus extra tape on both ends, doubling up the coverage there.
- Stuff the head before the decreases become too small. By Round 22 the opening is closing quickly. Pack the head firmly and evenly — a lopsided whale head is hard to fix once sewn up. A pencil eraser or chopstick helps push stuffing into the nose area.
- The belly’s turning chain does not count as a stitch. This is easy to lose track of, especially once the shaping begins. Place a stitch marker in the first true stitch of each row so you always know where to start and stop.
- When sewing on the belly, pin it generously before committing to a single stitch. The belly panel needs to lie flat and centered on the body’s underside. A few locking stitch markers or straight pins placed every 4–5 rows before you sew will save you from pulling the whole seam out and starting over.
Frequently Asked Questions
What type of yarn is best for the body?
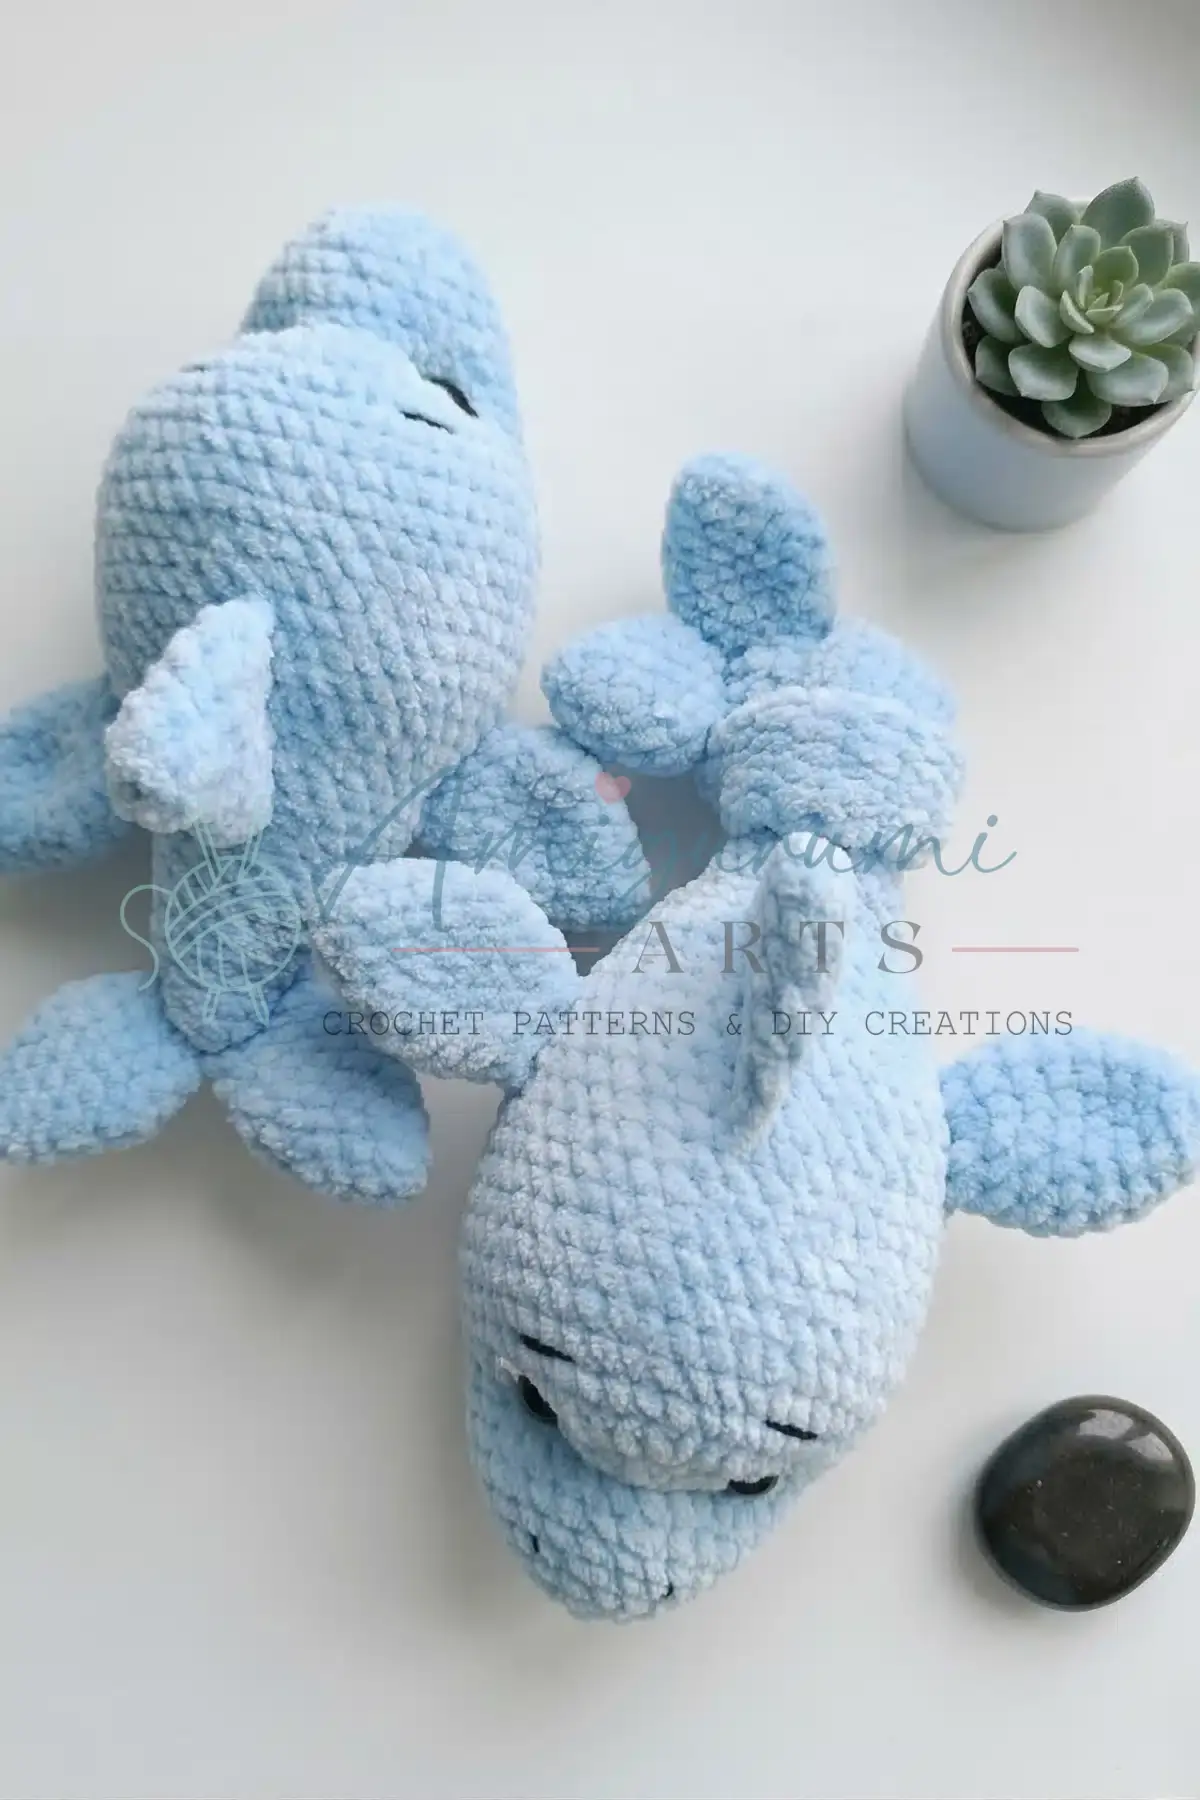
The pattern calls for bulky-weight plush or chenille yarn. This creates a soft, dense fabric that hides the stitches well, giving the amigurumi a professional finish.
How do I insert the tail wire safely?
Cut a piece of floral wire approximately 18 cm long. Wrap it thoroughly with medical or fabric tape, paying special attention to both tips so no sharp ends are exposed. Screw one end into the stuffing inside the body before crocheting the final rounds.
Do I stuff the fins?
No, the tail fins and small side fins are not stuffed. The tail fins are sewn to the wire tip, and the side fins are folded flat and stitched closed.
How do I attach the belly?
Pin the belly panel to the body, aligning it between Rows 8 and 29 of the belly with the corresponding rounds on the body. Sew in place using the long yarn tail left on the belly piece and a whipstitch or mattress stitch around the entire perimeter.
Can I make the whale without the flower?
Yes, the flower is an optional embellishment. You can skip it if you prefer a simpler look or want to use the yarn for something else.
Pin This Crochet Pattern!