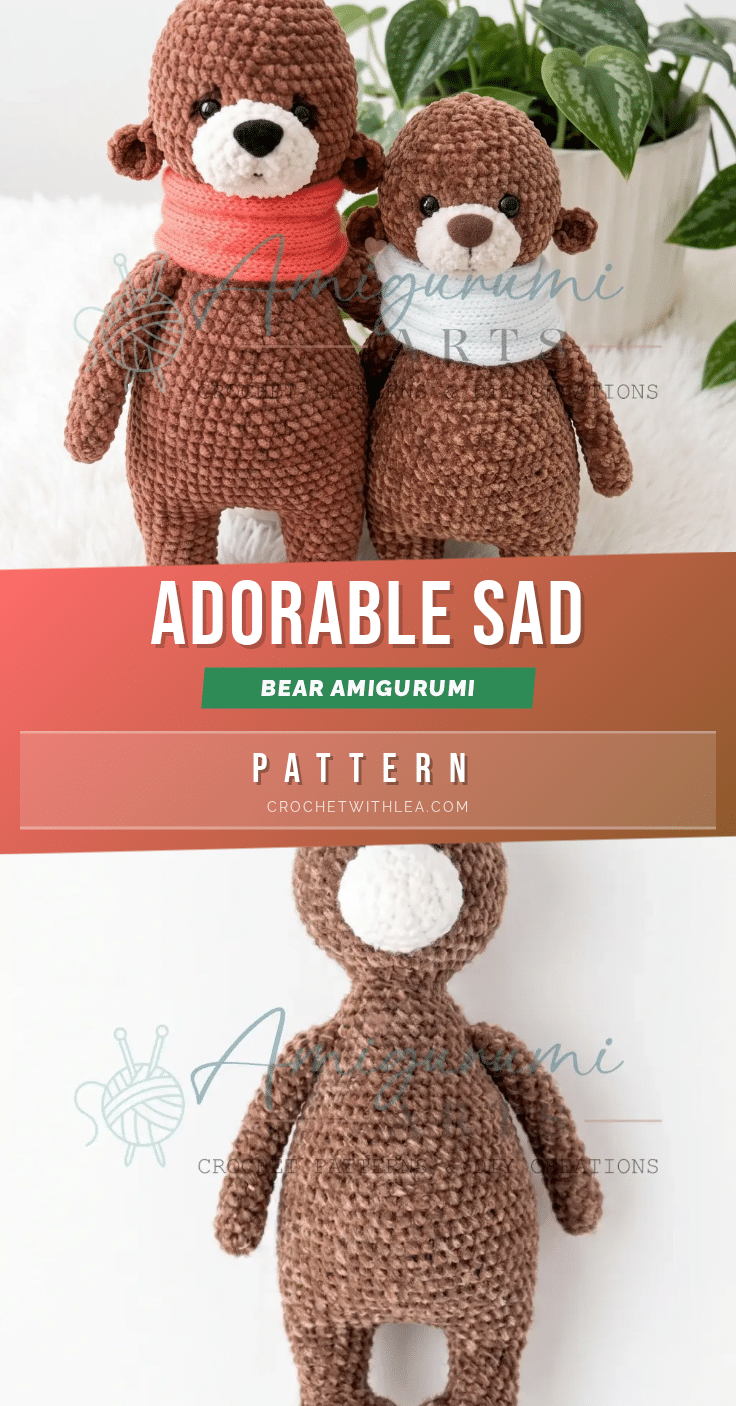
There is something undeniably magnetic about the way stitches stack up to create form. When you work in continuous spirals, watching a flat circle expand into a rounded sphere, or a narrow tube swell into a plump body, the texture of the yarn becomes the star of the show. With plush velour, every single crochet stitch catches the light, highlighting the precision of your tension and the neatness of your decreases. It is the little details—the invisible decreases that vanish into the fabric, the firm stuffing that gives the shape its character, and the way the yarn tail disappears into the seams—that make crocheters want to keep going. This project invites you to slow down, appreciate the tactile nature of the materials, and build a character with genuine personality, one round at a time.
Texture and Stitch Notes
The Sad Bear is designed to be a study in softness and structure. Because the pattern utilizes a velour-weight yarn, the finished fabric has a luxurious, fuzzy hand that hides minor tension inconsistencies better than cotton or acrylic. However, this texture also demands attention to stitch definition. The “sad” expression relies heavily on the placement of the eyes and the subtle dimples in the cheeks, which are created through specific tucking techniques rather than complex stitch patterns. The continuous spiral construction from the feet up to the head means you are building a seamless shell. This method reduces the number of seams you need to sew later, allowing the focus to remain on the shaping. The pigeon-toed feet and the drooping ears are not just stylistic choices; they are structural elements that give the bear its distinctive, endearing slump. Working with this yarn allows for a dense, professional finish that protects the stuffing while maintaining a cuddly appearance.
Project Overview
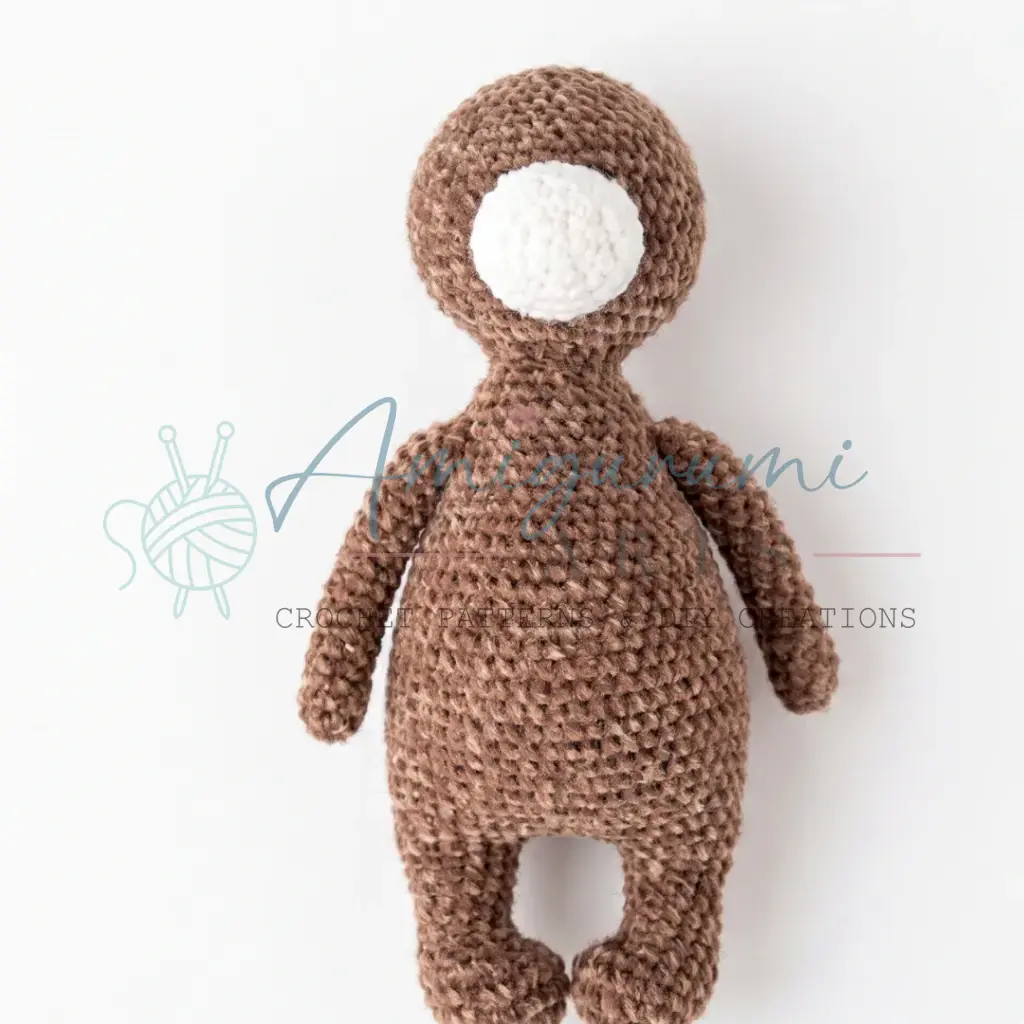
This adorable amigurumi pattern creates a bear with a downturned expression and pigeon-toed feet. It is an intermediate-level project that works almost entirely in one continuous piece from the feet up through the body and into the head. This construction method minimizes sewing and allows the bear to take shape organically as you crochet. The arms are worked separately and attached during the body shaping, while the snout and ears are small, quick additions that complete the character’s droopy charm.
Materials
- Yarn: Velour-weight yarn (such as Ice Velour, 300 m / 100 g) or any soft, plush yarn like Alize Softy. Choose your preferred bear color.
- Hook: Size appropriate to your yarn (typically C-2 / 2.5 mm for velour/soft yarns — check your yarn label).
- Safety Eyes: 5 mm, quantity 2.
- Stuffing: Polyester fiberfill.
- Stitch Markers: At least 2.
- Yarn Needle / Tapestry Needle: For weaving in ends and assembly.
- Scissors: For cutting yarn.
- Velour Fabric Strip: 5 cm × 40 cm (for the snood / neck scarf).
- Needle and Thread: For sewing the fabric snood seam.
- Blush or Chalk Pastel: For shading/tinting the face dimples.
Gauge and Finished Size
Gauge is not critical for this project, but your fabric should be tight enough that stuffing does not show through the stitches. A dense fabric is essential for a clean, professional finish, especially when working with plush yarns.
Abbreviations
- ch — Chain
- dec — Invisible Decrease (insert hook in front loop of next 2 sts, pull up a loop, yo and draw through all 3 loops)
- inc — Increase (2 sc in same stitch)
- MR — Magic Ring
- sc — Single Crochet
- sk — Skip
- sl st — Slip Stitch
- SM — Stitch Marker
- st / sts — Stitch / Stitches
Pattern Notes
This sad bear amigurumi pattern is written in US crochet terminology. The body is worked in a continuous spiral (no joining, no turning chains) from the feet up through the head. Place a stitch marker at the beginning of each round and move it up as you go. The arms are worked separately in a continuous spiral, then attached to the body during the shaping rounds. Stitch counts are given at the end of each round in parentheses: (##). Stuff the body continuously as you work — do not wait until the end. Stuff firmly but not so hard that the fabric distorts. Install safety eyes at Round 52 or 53 before the head is closed. Place dimple tucks (see Assembly) and apply blush shading before attaching the snout.
Pattern Instructions
Arms (Make 2)
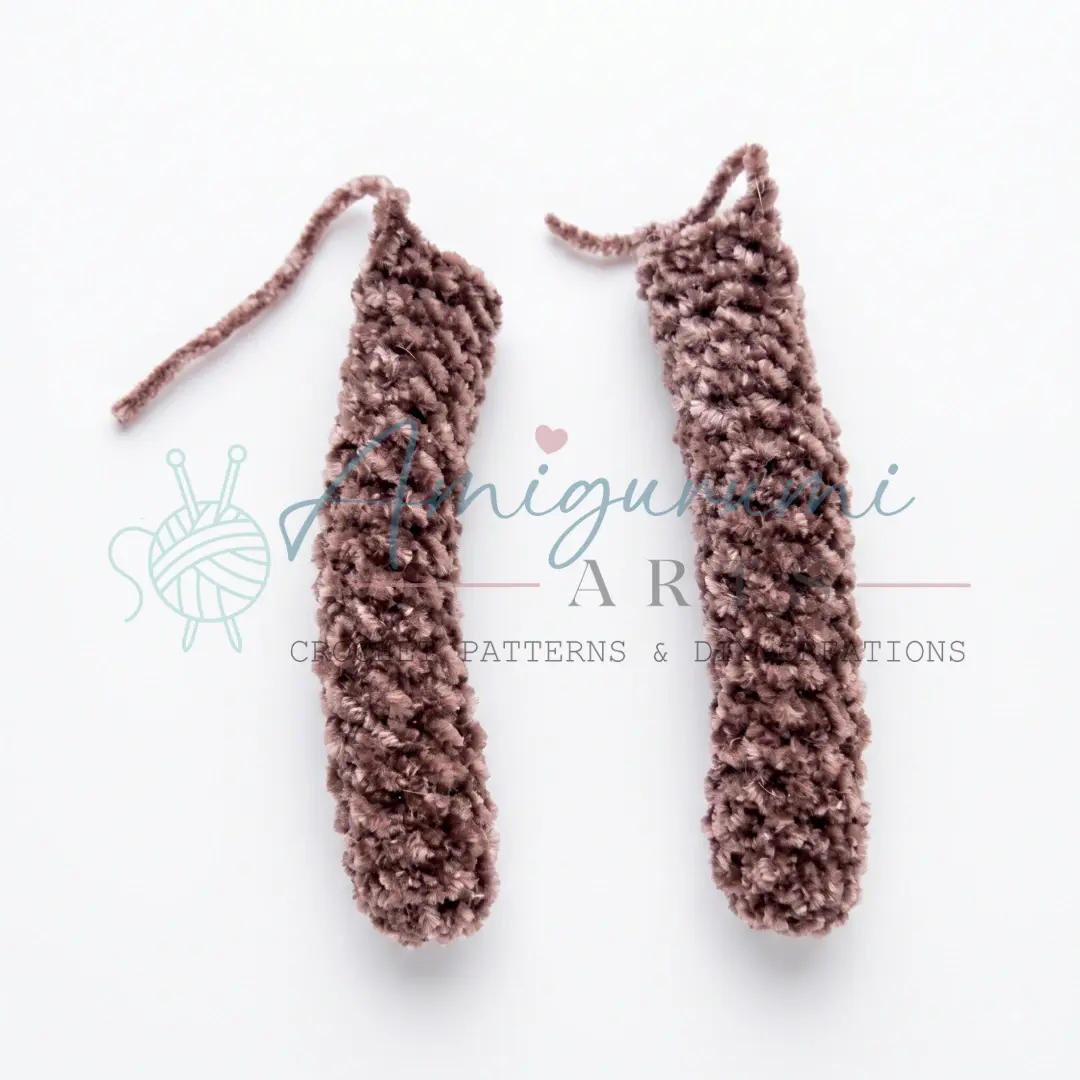
Rnd 1: Start with a foundation chain of 2 ch, then work 8 sc into the second chain from the hook. (8)
Rnds 2–19: Sc in each st around. (8)
Stuff the arm lightly. Flatten the open end so the edges meet, then crochet through both layers — working 4 sc across — to close the arm.
Body & Head (Worked in one continuous piece, starting from the legs)
First Leg
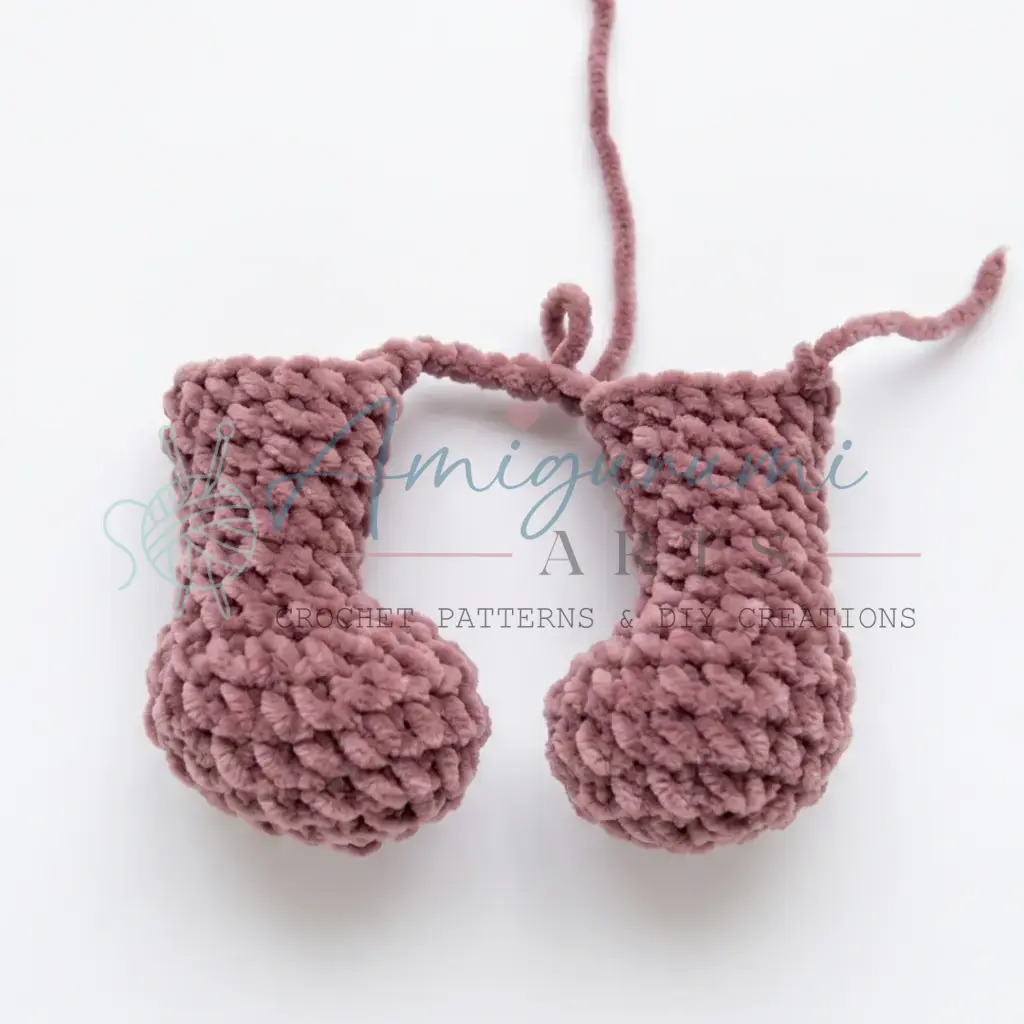
Rnd 1: Ch 5. Starting in the second ch from the hook: 3 sc, 3 sc in the last ch (corner), 2 sc along the other side of the chain, inc in the final st. (10)
Rnd 2: Inc, 2 sc, inc 3 times, 2 sc, inc 2 times. (16)
Rnd 3: 1 sc, inc, 2 sc, 1 sc, inc repeat 3 times, 2 sc, 1 sc, inc repeat 2 times. (22)
Rnd 4: Sc in each st around. (22)
Rnd 5: 5 sc, dec 6 times, 5 sc. (16)
Rnd 6: 5 sc, dec 3 times, 5 sc. (13)
Rnds 7–9: Sc in each st around. (13)
Rnd 10: 6 sc, inc, 6 sc. (14)
Rnd 11: Sc in each st around. (14)
Rnd 12: 6 sc, inc repeat 2 times. (16)
Rnd 13: Sc in each st around. (16)
Cut yarn and fasten off. Set aside.
Second Leg
Work Rnds 1–13 exactly as for the First Leg. Do not cut yarn.
Joining the Legs
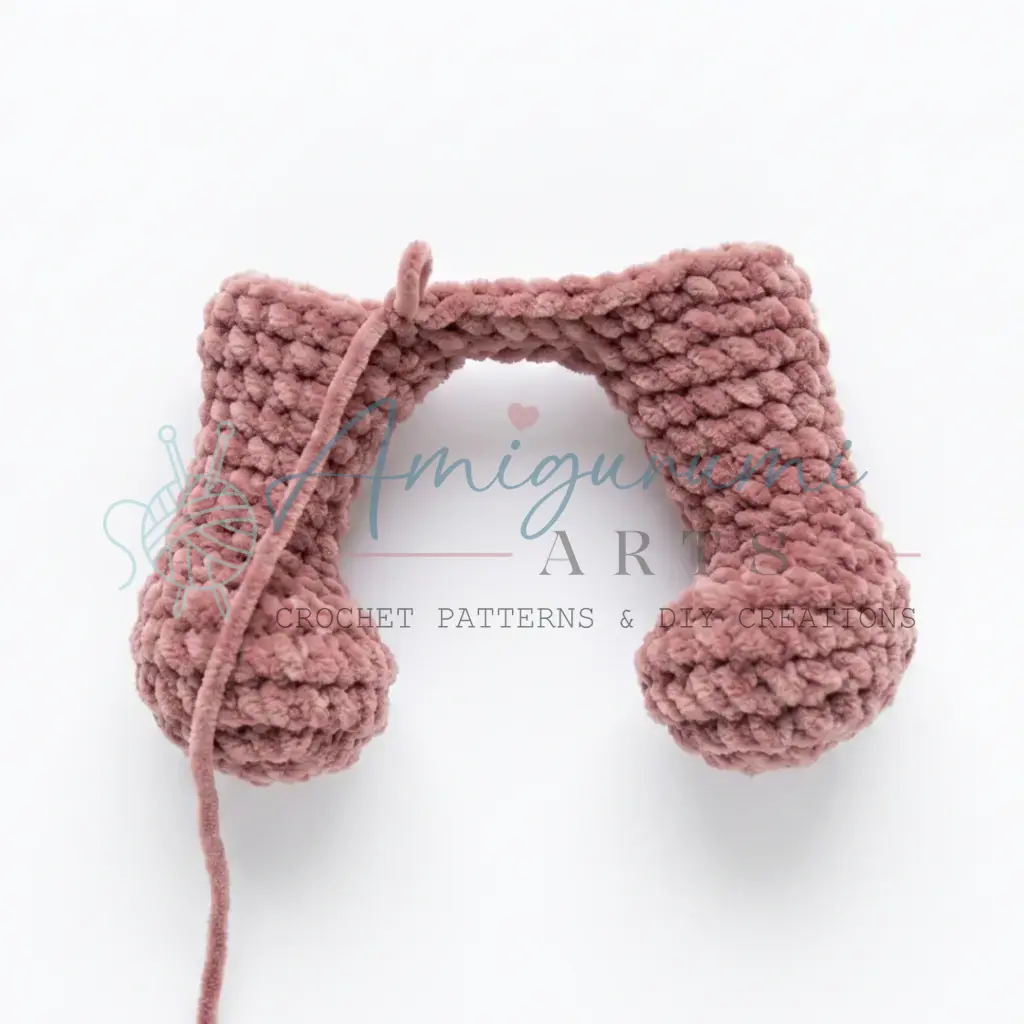
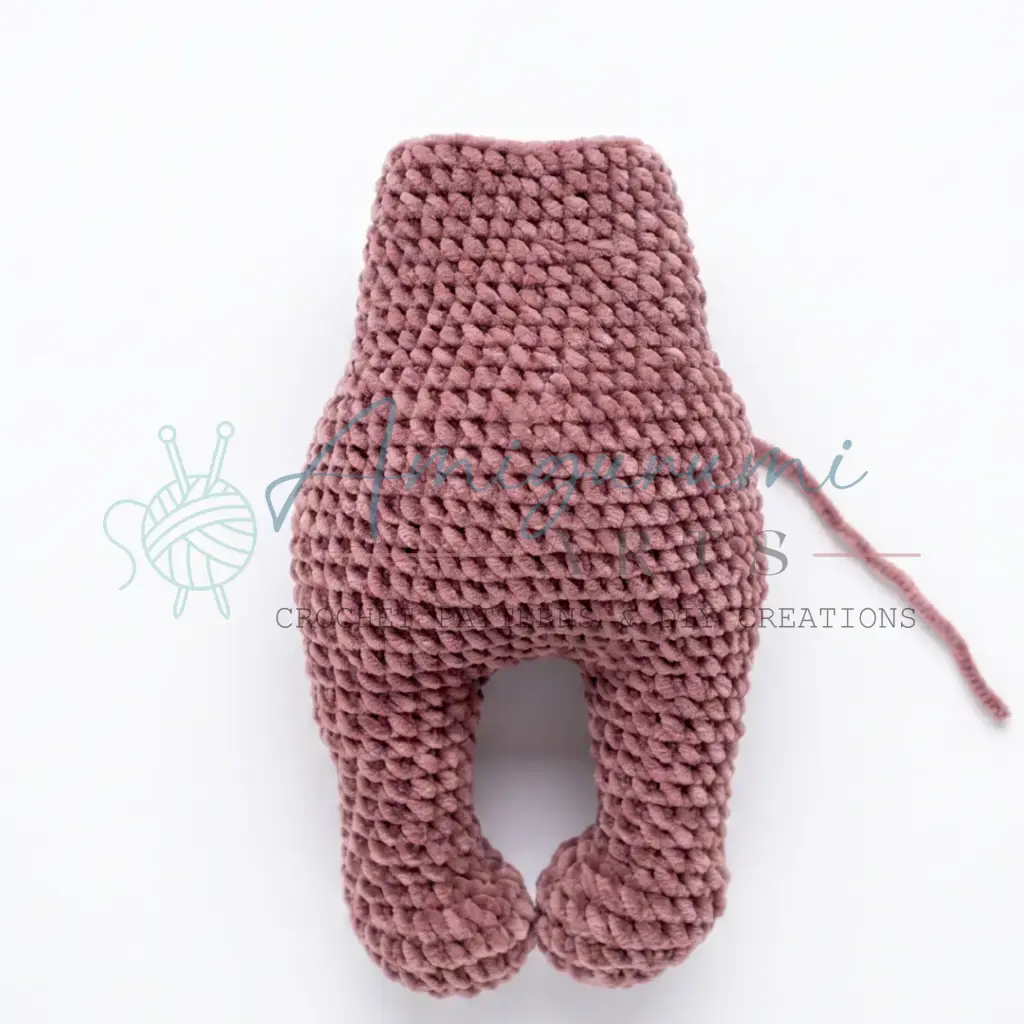
Work 8 sc along the second leg, then chain 5. Join to the first leg so that the toes of both legs face toward each other (pigeon-toed). Continue around.
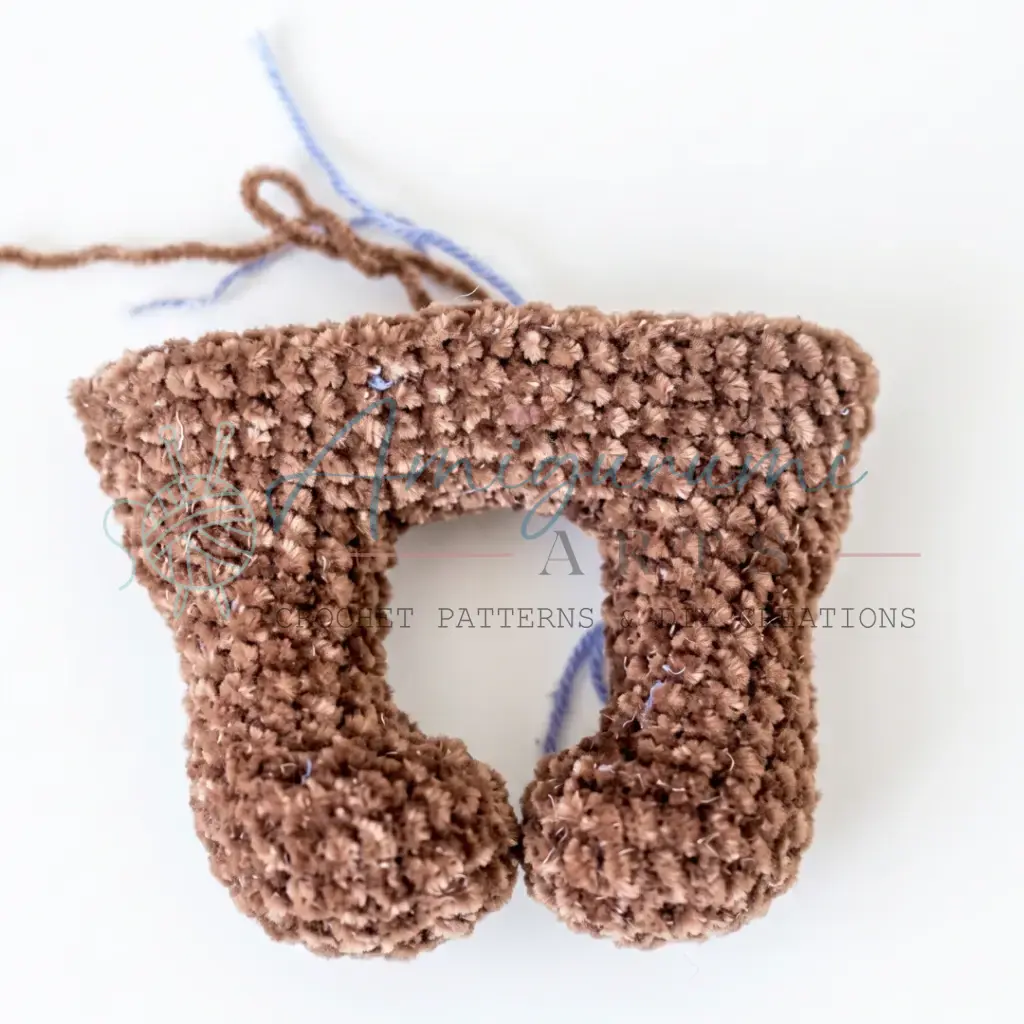
Rnd 14: 16 sc around the first leg, 5 sc along the chain bridge, 16 sc around the second leg, 5 sc along the other side of the chain bridge. (42)
Rnd 15: Sc 40 sts, then place a stitch marker here — this point is now the new beginning of the round (center back). (42)
Lower Body
Rnd 16: 6 sc, inc repeat 6 times. (48)
Rnd 17: Sc in each st around. (48)
Rnd 18: 7 sc, inc repeat 6 times. (54)
Rnds 19–20: Sc in each st around. (54)
Rnd 21: Sc 54 sts around, then ch 4 and work 3 sc back along those chains. This forms the small tail.
Rnds 22–26: Sc in each st around. (54)
Upper Body
Rnd 27: 7 sc, dec repeat 6 times. (48)
Rnd 28: Sc in each st around. (48)
Rnd 29: 1 sc, dec repeat 3 times, 30 sc, dec, 1 sc repeat 3 times. (42)
Rnds 30–32: Sc in each st around. (42)
Rnd 33: 5 sc, dec repeat 6 times. (36)
Rnds 34–36: Sc in each st around. (36)
Rnd 37: 4 sc, dec repeat 6 times. (30)
Rnd 38: Sc in each st around. (30)
Continue stuffing as you work.
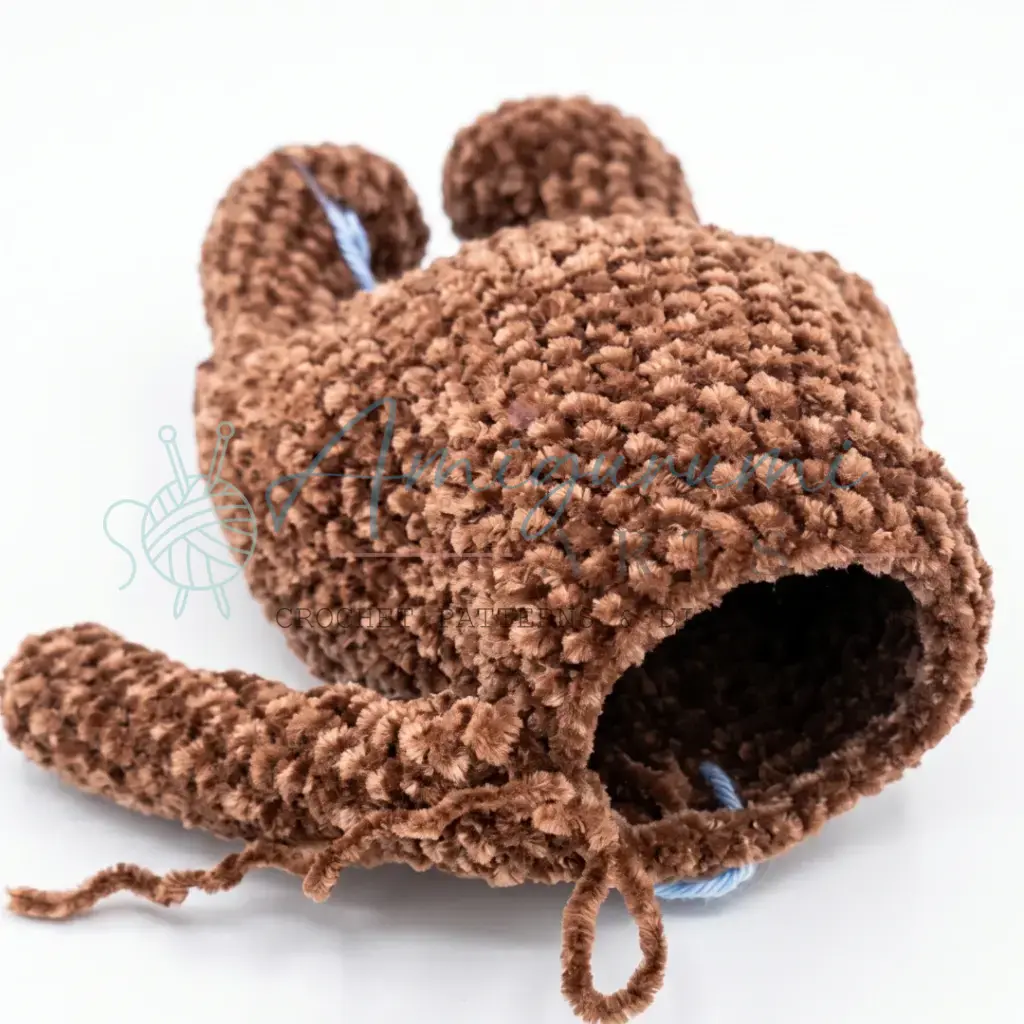
Rnd 39: 6 sc, then work 4 sc joining the next 4 body sts together with the 4 closing sts of the first arm, 10 sc, then work 4 sc joining the next 4 body sts together with the 4 closing sts of the second arm, 6 sc. (30)
Rnd 40: Sc in each st around. (30)
Rnd 41: 3 sc, dec repeat 6 times. (24)
Rnd 42: 2 sc, dec repeat 6 times. (18)
Rnds 43–44: Sc in each st around. (18)
Head (continuing from body neck)
Rnd 45: 2 sc, inc repeat 6 times. (24)
Rnd 46: 3 sc, inc repeat 6 times. (30)
Rnd 47: 4 sc, inc repeat 6 times. (36)
Rnd 48: 5 sc, inc repeat 6 times. (42)
Rnd 49: 6 sc, inc repeat 6 times. (48)
Rnds 50–55: Sc in each st around. (48)
Install the 5 mm safety eyes at Round 52 or 53 before continuing.
Rnd 56: 6 sc, dec repeat 6 times. (42)
Rnd 57: Sc in each st around. (42)
Rnd 58: 5 sc, dec repeat 6 times. (36)
Rnd 59: Sc in each st around. (36)
Rnd 60: 4 sc, dec repeat 6 times. (30)
Rnd 61: Sc in each st around. (30)
Rnd 62: 3 sc, dec repeat 6 times. (24)
Rnd 63: 2 sc, dec repeat 6 times. (18)
Rnd 64: 1 sc, dec repeat 6 times. (12)
Continue working decreases until the opening is fully closed. Fasten off and weave in the end.
Snout
Rnd 1: Start with a foundation chain of 2 ch, then work 6 sc into the second chain from the hook. (6)
Rnd 2: Inc in each st around. (12)
Rnd 3: 1 sc, inc repeat 6 times. (18)
Rnds 4–5: Sc in each st around. (18)
Do not stuff. Leave a long yarn tail for sewing.
Ears (Make 2)
Rnd 1: Start with a foundation chain of 2 ch, then work 6 sc into the second chain from the hook. (6)
Rnd 2: Inc in each st around. (12)
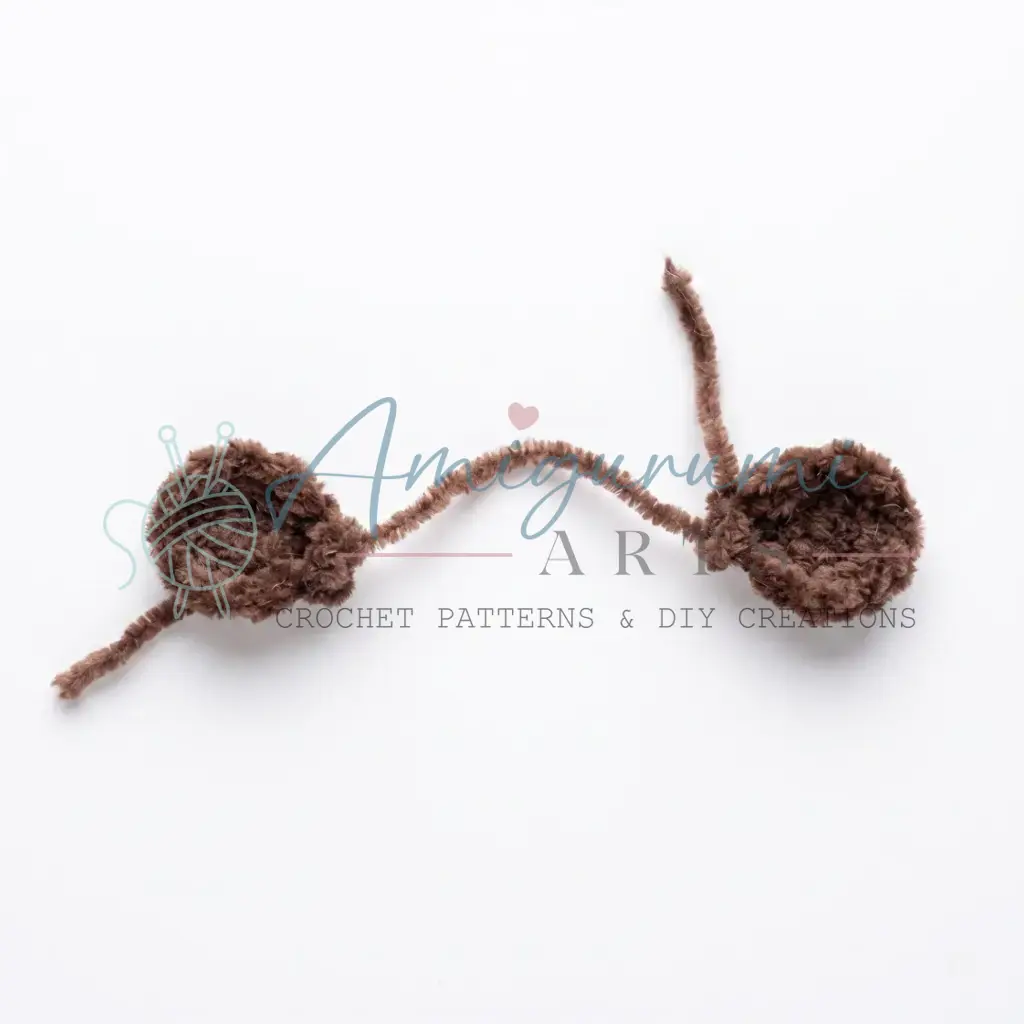
Flatten the ear so both edges meet. Working through both layers, join with 1 sc across to close. Leave a long yarn tail for sewing.
Assembly
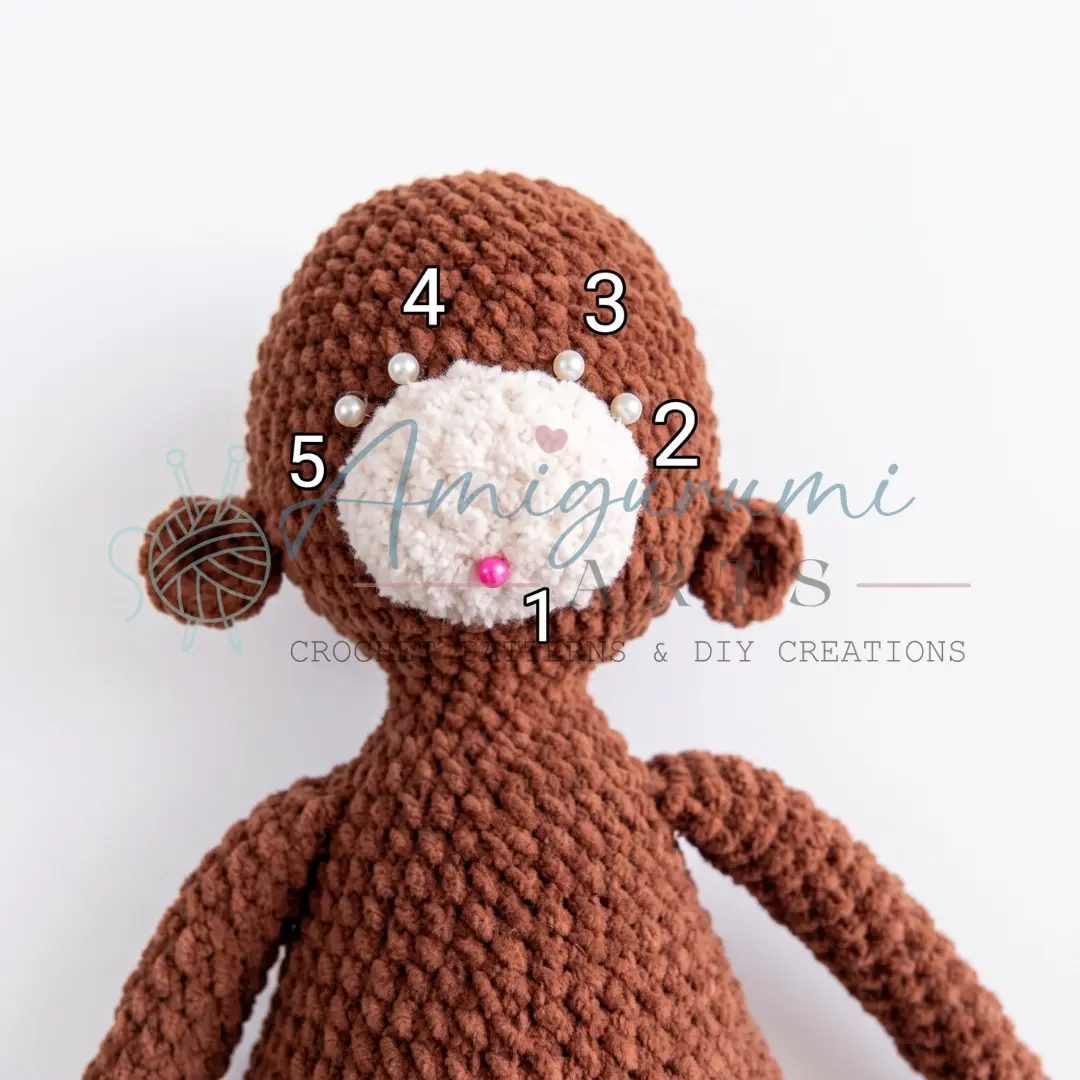
- Dimple tucks: Thread a yarn needle with a length of yarn. Insert the needle at point 1 (a dimple location on the face) and bring it out at point 2. Insert at point 3 and bring back out at point 1. Pull gently to create the first dimple, tie a secure knot — do not cut the yarn yet. Insert again at point 1, bring out at point 4, insert at point 5, and return through point 1. Pull to form the second dimple, tie a knot, then cut the yarn and bury both ends inside the head.
- Shading: Use blush or chalk pastel to lightly tint the dimple areas and give the bear his sorrowful expression.
- Safety eyes: If not already installed, set the 5 mm safety eyes at Round 52 or 53, positioning them on either side of where the snout will sit.
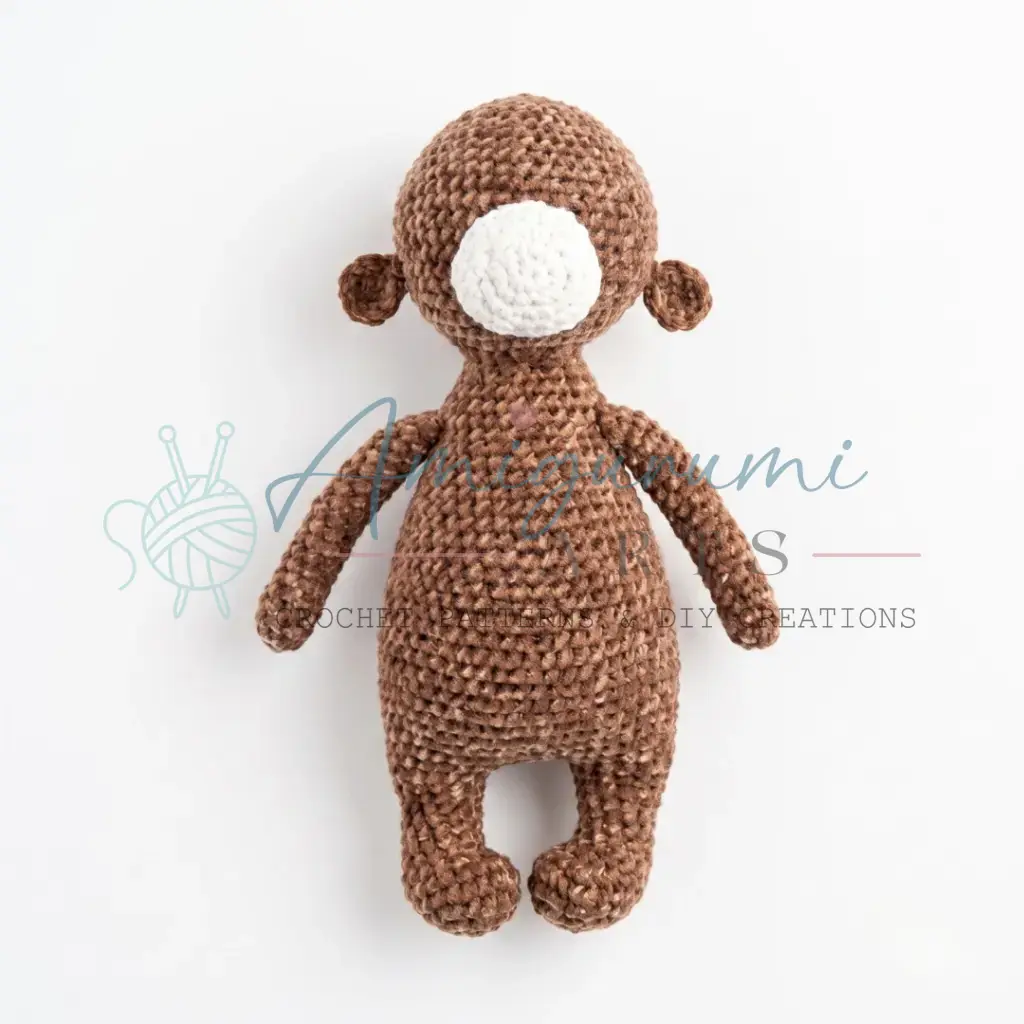
- Snout: Pin the snout to the head, centered between Rounds 48 and 53. Sew around the entire edge using a whipstitch, leaving a small gap to add a tiny amount of stuffing before closing completely.
- Ears: Sew one ear on each side of the head at approximately Round 49 or 50, angling them slightly downward to complement the sad expression.
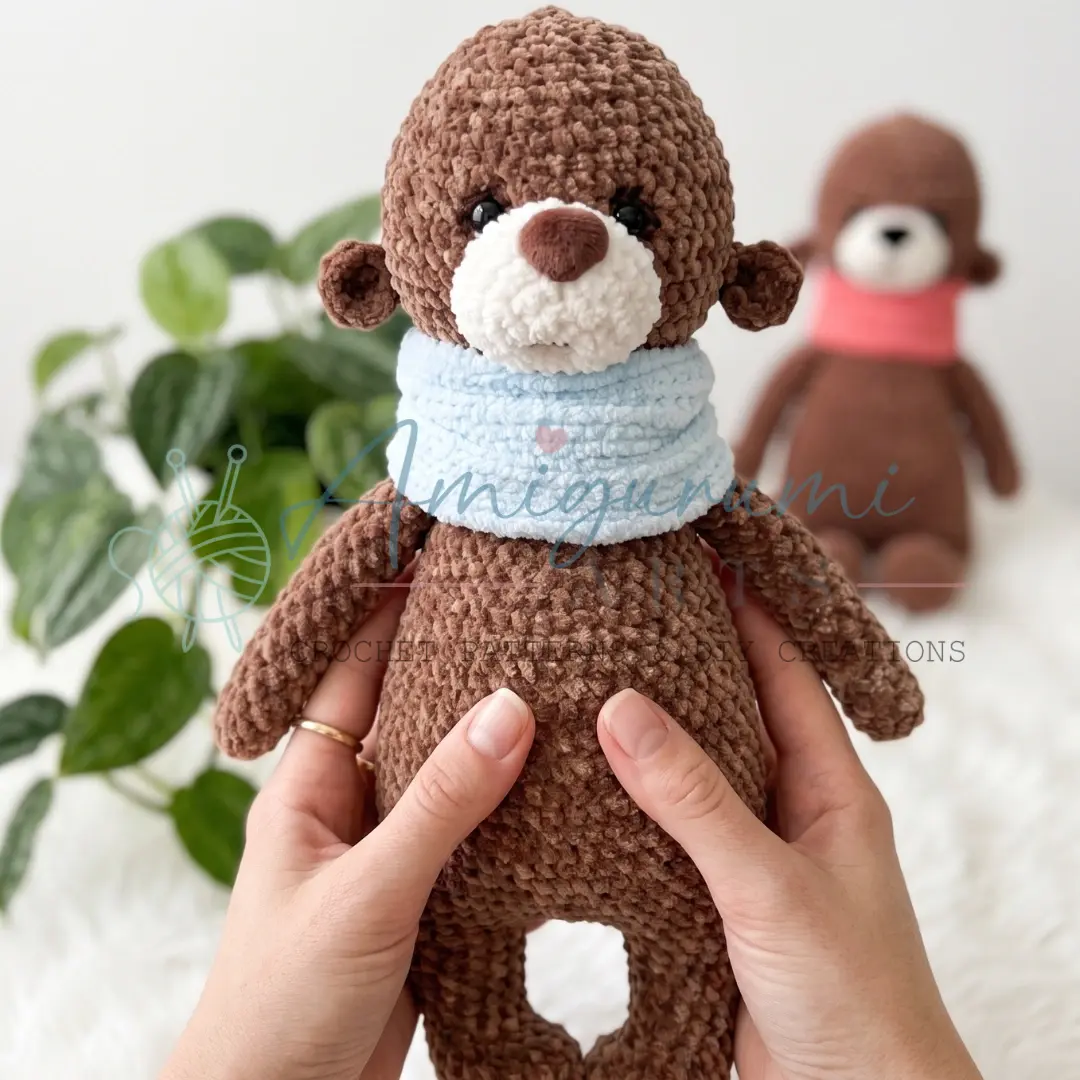
- Snood: Fold the 5 cm × 40 cm velour fabric strip in half lengthwise. Sew the long edge closed to form a tube. Wrap around the bear’s neck and adjust to sit naturally.
- Finishing: Weave in all remaining yarn ends.
Tips
- Keep your tension tight. Velour and soft plush yarns are forgiving but can gap if your tension is too loose. Go down a hook size if you can see fiberfill through the stitches — a dense fabric is what gives amigurumi their clean, professional finish.
- Work the invisible decrease correctly. Insert your hook through the front loop only of the first stitch, then the front loop only of the second stitch, pull up one loop, yarn over, and draw through all three loops. This keeps the decrease tidy and virtually invisible from the outside — especially important on the head where shaping is prominent.
- Stuff the body gradually. Because this bear is worked in one continuous piece from feet to head, you need to add stuffing as you go rather than at the end. Stuff the legs firmly, the body moderately, and the head firmly. Uneven stuffing is the most common reason amigurumi look lumpy, so take your time here.
- The leg join at Round 14 can feel awkward. When you connect the two legs with the chain bridge, use a stitch marker to keep track of where you are. Work slowly through the first few rounds after the join to make sure your count is correct — the pigeon-toed angle makes it easy to lose your place.
- Sewing on the snout neatly. Use the yarn tail from the snout and a tapestry needle to sew around the outer edge with small, even stitches. Pull each stitch just snug enough to hold — pulling too tight will pucker the velour fabric and distort the round shape you worked hard to achieve.
Frequently Asked Questions
What type of yarn is best for this pattern?
The pattern is designed for velour-weight yarns like Ice Velour or soft plush yarns like Alize Softy. These yarns provide the soft, fuzzy texture that enhances the bear’s cuddly appearance. Always check your yarn label for the recommended hook size.
Do I need to join rounds or make turning chains?
No. The body and head are worked in a continuous spiral without joining or turning chains. This creates a seamless tube that is essential for the pattern’s construction. Remember to move your stitch marker up each round to keep track of your starting point.
When should I install the safety eyes?
Install the 5 mm safety eyes at Round 52 or 53, before the head is fully closed. This ensures they are securely placed and allows you to position them correctly relative to the snout and dimples.
How do I create the sad expression?
The sad expression is achieved through a combination of the drooping ears, the placement of the eyes, and the cheek dimples. The dimples are created by tucking yarn through the head and tying it off inside. You can enhance this effect by lightly applying blush or chalk pastel to the dimple areas.
Can I use a different hook size?
While you can use a hook size appropriate for your yarn, it is crucial to maintain tight tension. If your stitches are too loose, the stuffing may show through. If you see gaps, consider going down a hook size to create a denser fabric.
Pin This Crochet Pattern!