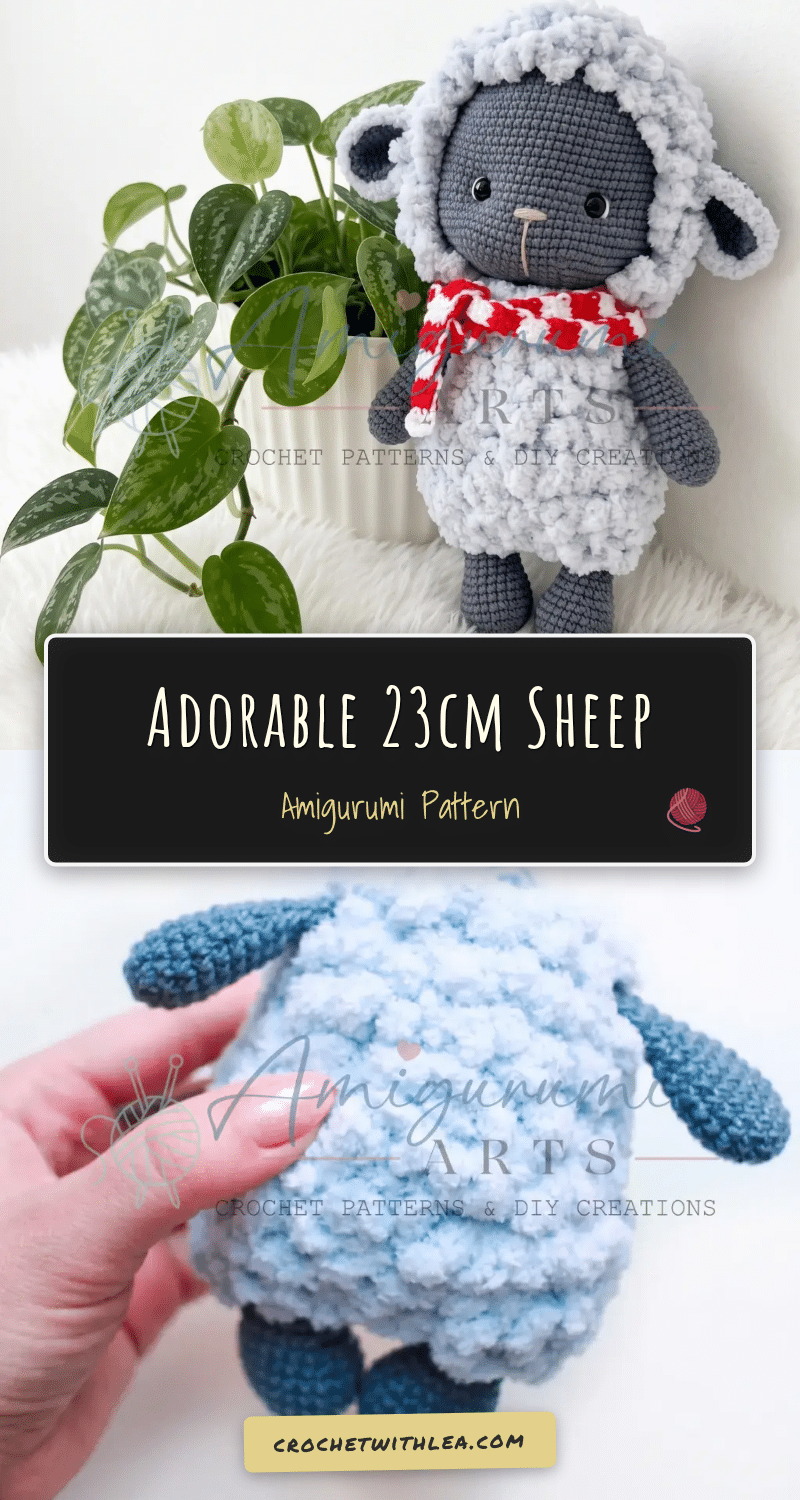
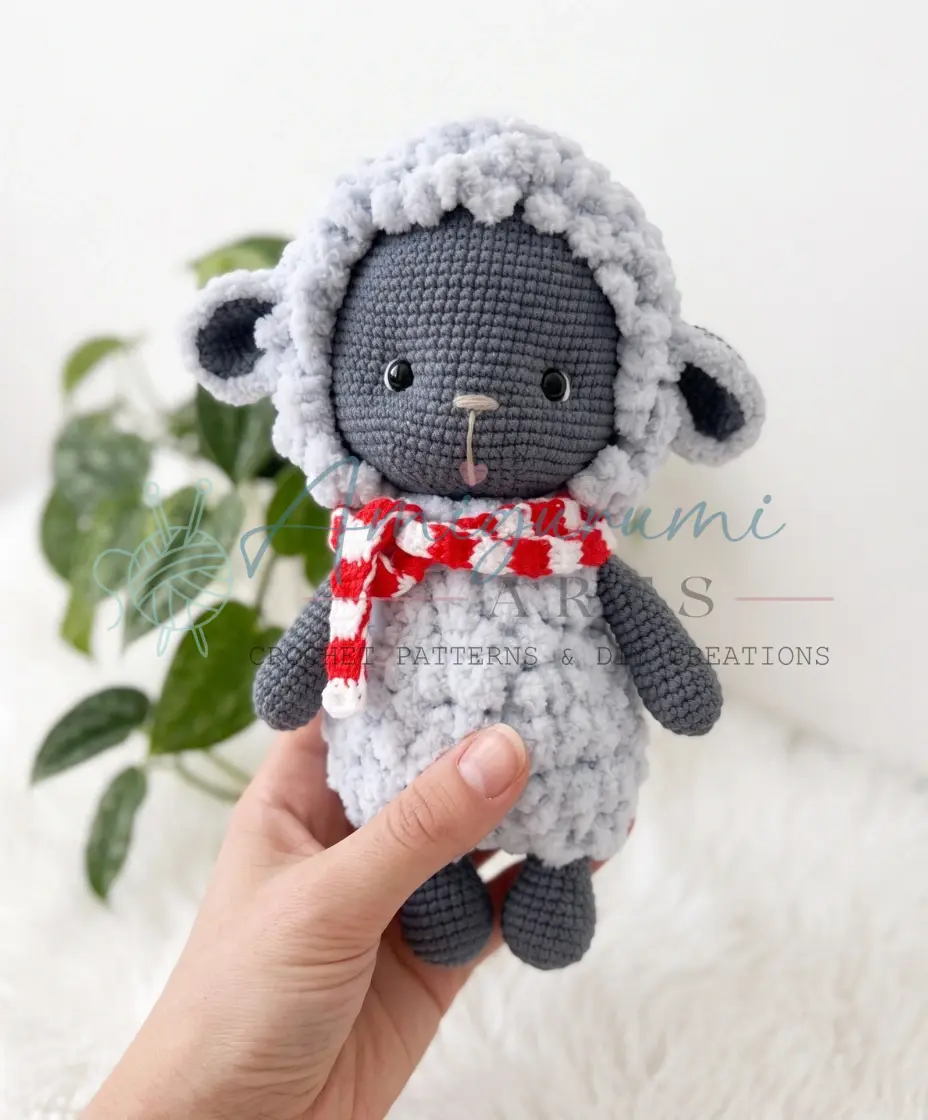
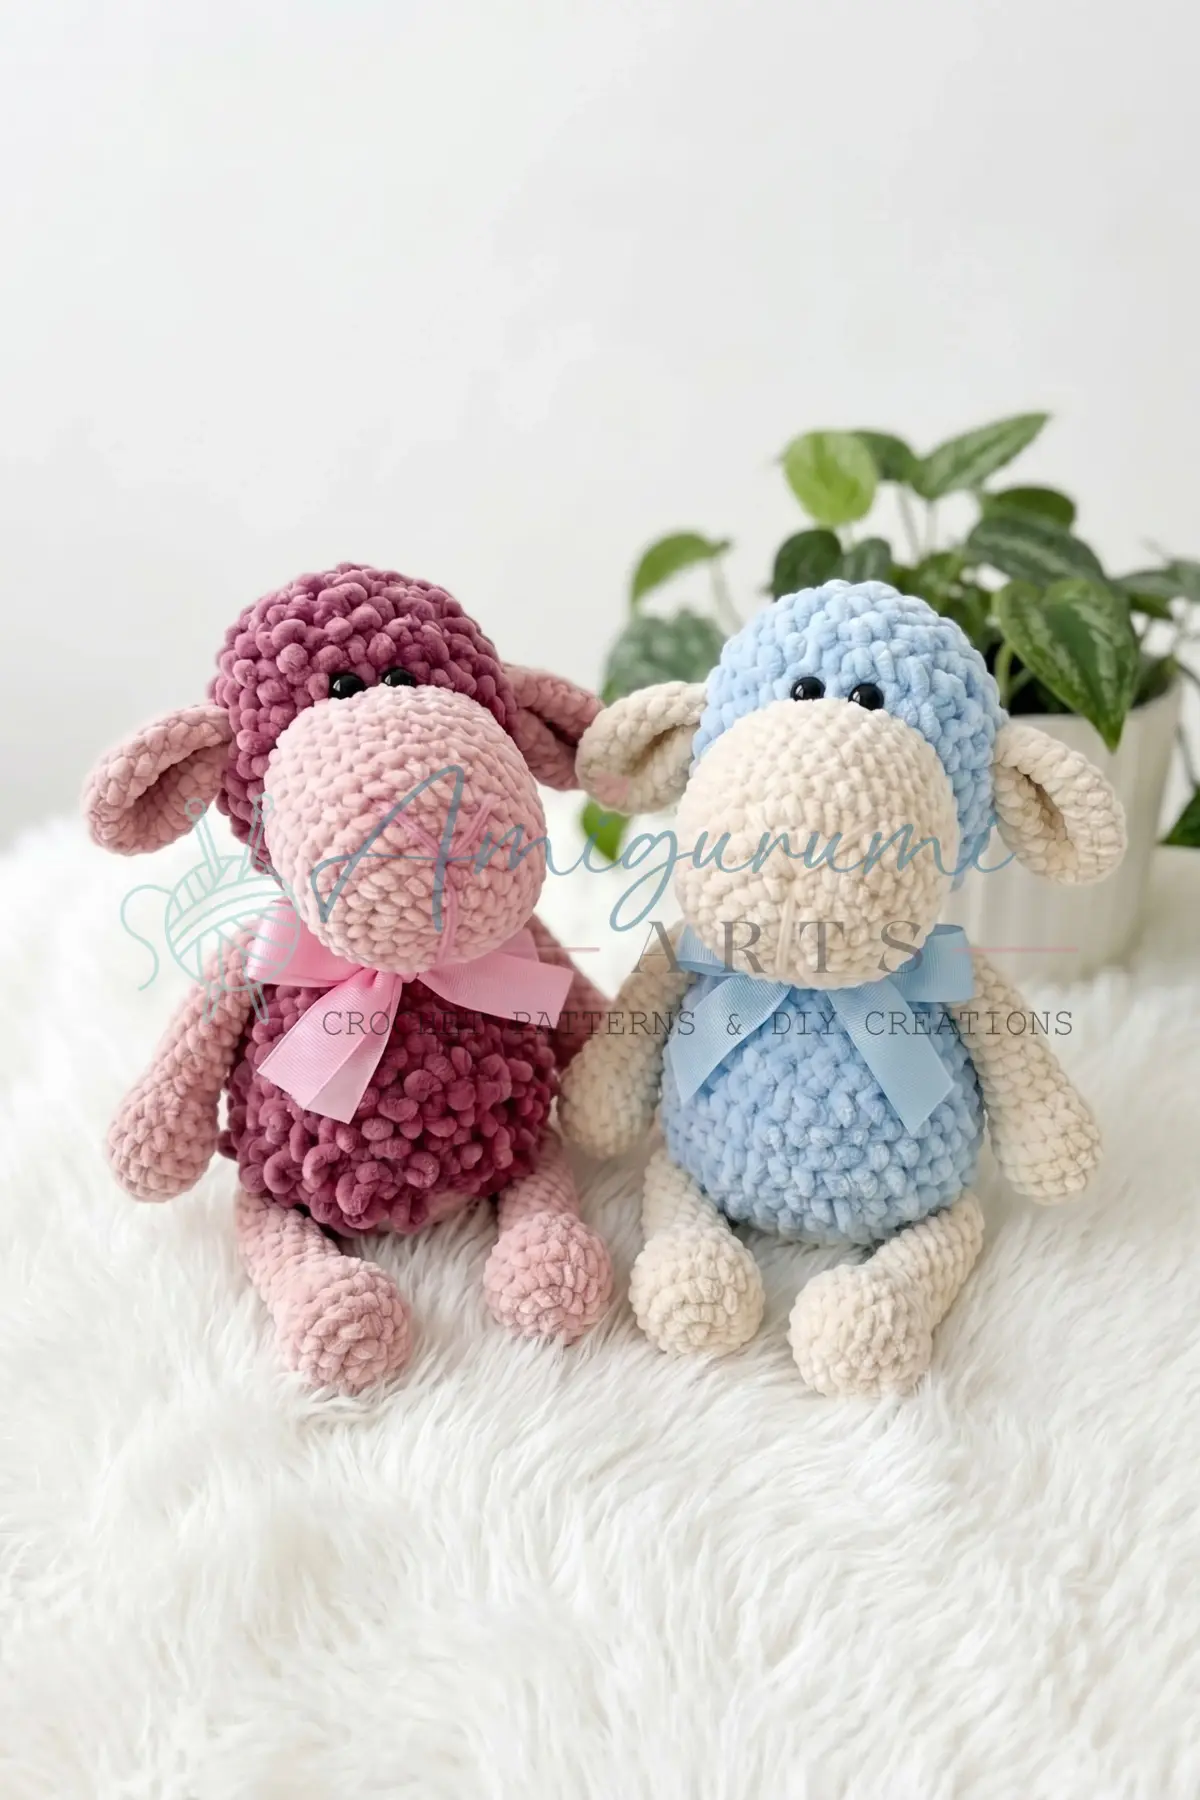
There is something deeply satisfying about the rhythm of amigurumi shaping—the gradual increase of stitches to form a curve, the steady rounds that build height, and the final decreases that bring a shape to a point. This sheep pattern captures that magic, blending smooth, rounded body work with the playful, tactile texture of a loop-stitch fleece coat. The little details, from the embroidered eyelids to the striped scarf, are what make crocheters want to keep going until the very last stitch.
Texture and Stitch Notes
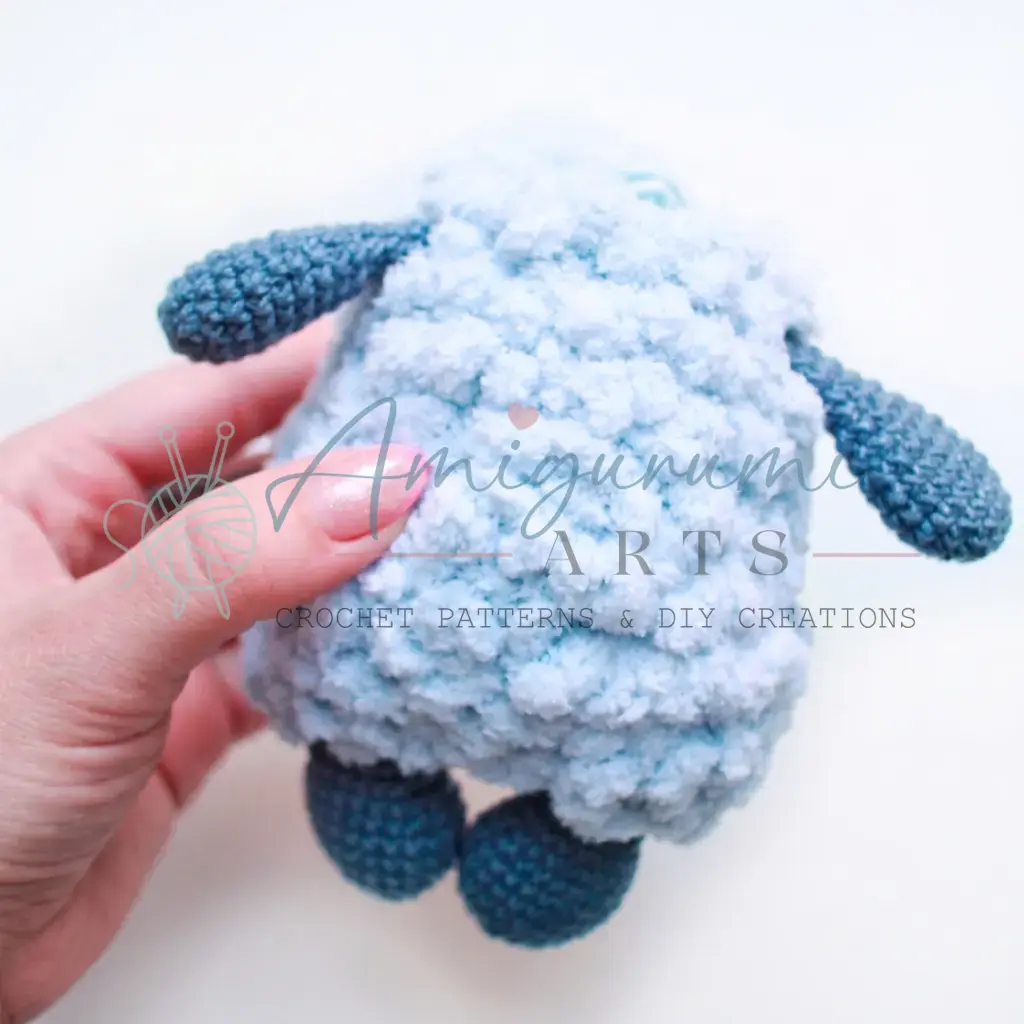
What truly sets this sheep apart is the “fleece coat” technique. Instead of relying solely on the texture of the yarn, this pattern uses a chain-loop method to create a fluffy, dimensional exterior. It transforms a standard amigurumi into a plush, tactile toy. The body and head are built with a structured underlayer, ensuring the sheep stands upright and holds its shape, while the loop-stitch overlay adds that signature softness. We also love the clean integration of the limbs; by joining the legs and arms directly into the body rounds, you avoid bulky seams and achieve a seamless, professional finish.
Project Overview
This adorable sheep amigurumi stands approximately 23 cm (about 9 inches) tall. It is designed for crocheters who are comfortable with basic shaping and are eager to learn a few satisfying new techniques, such as the shift stitch and integrated limb joining. The pattern is written in US crochet terminology and uses a continuous spiral for the main body parts, with flat rows reserved for the scarf.
Materials
- Textured yarn: Alize Softy, color #416 — 1 skein (used for the fleece coat on the body and head, and the ear edging)
- Main color yarn: YarnArt Jeans, color #68 — 30–35 g (used for the legs, arms, ears, head, and body base)
- Coordinating color yarn: YarnArt Jeans, color #75 — 30–35 g (used for the body underlayer and head base, to coordinate with the Alize Softy fleece)
- Scarf yarn: Two colors of Alize Cotton Gold — colors #55 (white) and #56 (red)
- Embroidery yarn: A few meters of any yarn in white and in your main color, for embroidering the eye whites, eyelids, and nose
- Hook: US B-1 / 2.25 mm (or 2.3 mm if available)
- Stuffing: Polyester fiberfill
- Safety eyes: 9 mm, 1 pair
- Stitch markers: At least 2
- Tools: Tapestry needle / large-eye embroidery needle, scissors, sewing pins (for positioning ears and mapping the fleece base on the head)
- Optional: Fabric disappearing marker or a thin contrast thread for marking the fleece outline on the head
Gauge and Finished Size
The finished sheep stands approximately 23 cm (about 9 inches) tall. Gauge is not critical for this project, but your fabric should be tight enough that stuffing does not show through. If you can see daylight through the stitches, go down half a hook size.
Abbreviations
- BLO — Back Loop Only
- ch — Chain
- dec — Invisible Decrease (insert hook through front loops of next 2 sts, pull up a loop, yarn over and draw through all 3 loops)
- FLO — Front Loop Only
- inc — Increase (2 sc in same stitch)
- MR — Magic Ring
- sc — Single Crochet
- sk — Skip
- sl st — Slip Stitch
- SM — Stitch Marker
- st / sts — Stitch / Stitches
Pattern Notes
All pieces are worked in a continuous spiral (no joining slip stitch, no turning chain) unless specifically noted otherwise. The scarf is worked in flat rows with a turning chain. Stitch counts are given in parentheses at the end of each round or row: (##).
Shift stitch: At certain points, you’ll work one extra sc to prevent the spiral from twisting visibly. This stitch is worked exactly like a regular sc but is not counted in the stitch total for that round. It is noted in the instructions wherever it appears.
Stuffing: Stuff all pieces loosely — overstuffing will distort the shape. Stuff the body and head as you go, adding fiberfill gradually as you close each section.
Safety Eyes: Safety eyes are set between rounds 18 and 19 of the head, spaced 14 stitches apart on the front face. Insert them before completing the decrease rounds, as the opening will be too small to reach inside later.
Body Construction: The body is worked from the bottom up. The legs and arms are joined directly into the body rounds as you work — their yarn tails are hidden inside the body, not sewn on afterward.
Pattern Instructions
Legs (make 2)
Use main color yarn. Stuff lightly when instructed.
Rnd 1: Ch 4. Starting in the 2nd ch from hook: sc in next 2 sts, 3 sc in last ch. Continue along the second side of the foundation chain: sc in next 1 st, inc in last st. (8)
Rnd 2: inc, 2 sc, inc 2 times, 2 sc, inc. (12)
Rnd 3: sc, inc repeat 6 times around. (18)
Rnd 4: inc, 6 sc, inc, 1 sc, inc, 6 sc, inc, 1 sc. (22)
Rnds 5–7: sc in each st around. (22) [3 rounds total]
Rnd 8: dec, 6 sc, dec, 1 sc, dec, 6 sc, dec, 1 sc. (18)
Rnd 9: sc in each st around. (18)
Rnd 10: dec, 5 sc, dec, 9 sc. (16)
Rnd 11: dec, 3 sc, dec, 1 sc, dec, 3 sc, dec, 1 sc. (12)
Rnds 12–13: sc in each st around. (12) [2 rounds total]
Stuff the leg lightly with fiberfill.
Rnd 14: Fold the leg flat so both sides align. Working through both layers at once: 6 sc. (6)
Cut yarn, leaving a 4–5 cm tail. Do not fasten off tightly — the tail will be used when joining to the body.
Arms (make 2)
Use main color yarn. Stuff lightly when instructed.
Rnd 1: Ch 2. Work 6 sc in the 2nd ch from hook. (6)
Rnd 2: inc in each st around. (12)
Rnd 3: inc, 5 sc repeat 2 times. (14)
Rnd 4: inc 2 times, 5 sc, inc 2 times, 5 sc. (18)
Rnds 5–6: sc in each st around. (18) [2 rounds total]
Rnd 7: dec, 9 sc, dec, 5 sc. (16)
Rnd 8: sc in each st around. (16)
Rnd 9: 1 sc, dec, 5 sc, dec, 6 sc. (14)
Rnd 10: dec, 5 sc repeat 2 times. (12)
Rnd 11: dec, 1 sc repeat 4 times. (8)
Rnds 12–16: sc in each st around. (8) [5 rounds total]
Work 1 shift stitch after completing Rnd 16. This extra sc is not counted in the stitch total.
Stuff the arm lightly with fiberfill.
Rnd 17: Fold the arm flat so both layers align. Working through both layers at once: 4 sc. (4)
Cut yarn, leaving a 4–5 cm tail.
Body
Use the coordinating color yarn (color #75 — the shade that matches the Alize Softy fleece). Stuff as you go, adding fiberfill loosely to maintain the shape without overfilling.
Rnd 1: Ch 15. Starting in the 2nd ch from hook: inc, 12 sc, 4 sc in last ch. Continue along the second side of the foundation chain: 12 sc, inc. (32)
Rnd 2: inc, 1 sc repeat 16 times around. (48)
Rnd 3: 1 sc, then work the next 6 sc simultaneously through both the leg stitches and the body stitches to join the first leg, 10 sc in body sts only, then work the next 6 sc simultaneously through both the leg stitches and the body stitches to join the second leg, 25 sc. (48)
Tuck the yarn tails from the legs to the inside of the body. Secure them neatly with small knots so they don’t work loose.
Rnd 4: Work this entire round in BLO: sc in each st around. (48)
Rnd 5: sc in each st around. (48)
Rnd 6: 6 sc, inc, 10 sc, inc, 30 sc. (50)
Rnd 7: Work this entire round in BLO: dec, 9 sc, inc, 2 sc, inc, 9 sc, dec, 24 sc. (50)
Rnds 8–9: sc in each st around. (50) [2 rounds total]
Rnd 10: Work this entire round in BLO: sc in each st around. (50)
Rnd 11: sc in each st around. (50)
Rnd 12: 1 sc, dec, 21 sc, dec, 24 sc. (48)
Rnd 13: Work this entire round in BLO: sc in each st around. (48)
Rnds 14–15: sc in each st around. (48) [2 rounds total]
Rnd 16: Work this entire round in BLO: dec, 6 sc repeat 6 times around. (42)
Rnds 17–18: sc in each st around. (42) [2 rounds total]
Rnd 19: Work this entire round in BLO: dec, 5 sc repeat 6 times around. (36)
Rnds 20–21: sc in each st around. (36) [2 rounds total]
Rnd 22: Work this entire round in BLO: dec, 4 sc repeat 6 times around. (30)
Rnd 23: Work the next 4 sc simultaneously through both the arm stitches and the body stitches to join the first arm, 9 sc in body sts only, work the next 4 sc simultaneously through both the arm stitches and the body stitches to join the second arm, 13 sc. (30)
Tuck the yarn tails from the arms inside the body and secure with small knots.
Rnd 24: sc in each st around. (30)
Rnd 25: Work this entire round in BLO: dec, 3 sc repeat 6 times around. (24)
Rnds 26–28: sc in each st around. (24) [3 rounds total]
Sl st to close. Cut yarn and fasten off.
Fleece Coat on Body
Use Alize Softy textured yarn.
Join the yarn to the outermost front loop of Rnd 3 of the body, starting at the back.
Ch 7, sl st into the next available front loop. You have made one loop. Ch 7, sl st into the next front loop. Another loop is complete.
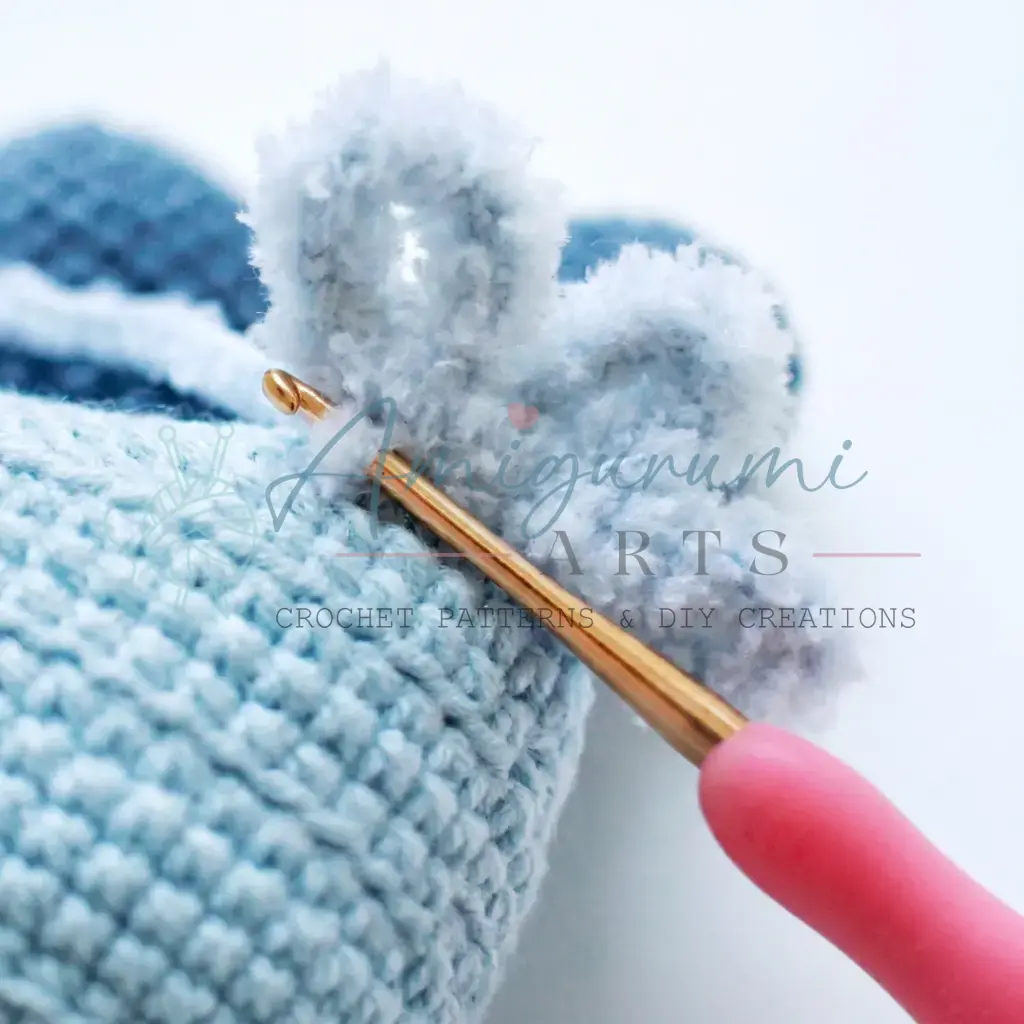
Continue in this way — chain 7, sl st into the next front loop — all the way around the body, working in a continuous spiral without joining or turning chains. The textured loops create the fluffy fleece effect.
At the end, fasten off and weave in the end.
Ears (make 2)
Use main color yarn. Do not stuff.
Rnd 1: Ch 2. Work 6 sc in the 2nd ch from hook. (6)
Rnd 2: inc in each st around. (12)
Rnd 3: 1 sc, inc repeat 6 times around. (18)
Rnd 4: 2 sc, inc repeat 6 times around. (24)
Rnd 5: 3 sc, inc repeat 6 times around. (30)
Rnds 6–7: sc in each st around. (30) [2 rounds total]
Rnd 8: dec, 3 sc repeat 6 times around. (24)
Rnds 9–11: sc in each st around. (24) [3 rounds total]
Rnd 12: dec, 2 sc repeat 6 times around. (18)
Rnds 13–14: sc in each st around. (18) [2 rounds total]
Rnd 15: Fold the ear flat so both layers align. Working through both layers at once: 9 sc. (9)
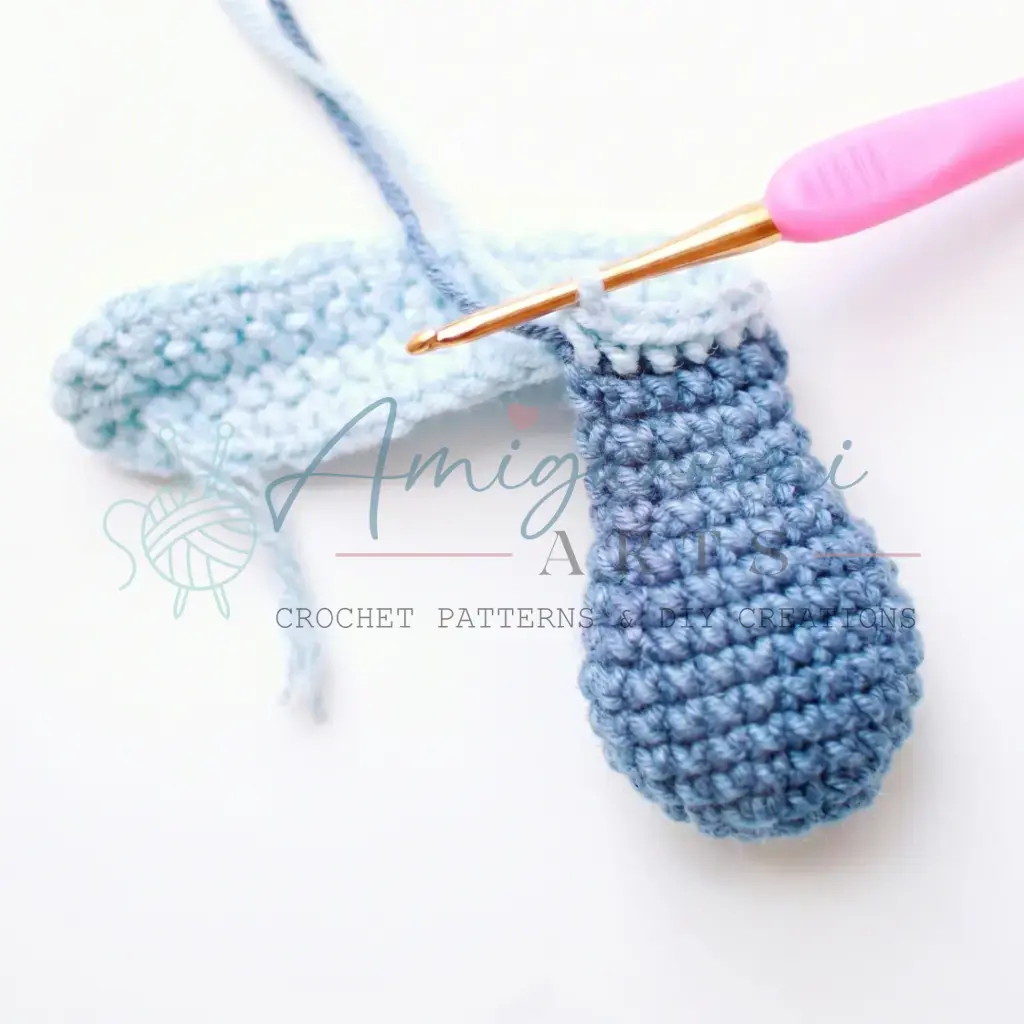
Join Alize Softy yarn to the edge stitches of the ear at Rnd 14, along the side edge. Work 1 round of sc edging along the visible edge, ending at Rnd 14 on the opposite side. Fasten off and weave in all ends.
Head
Use main color yarn. Stuff as instructed.
Rnd 1: Ch 11. Starting in the 2nd ch from hook: 9 sc, 3 sc in last ch. Continue along the second side of the foundation chain: 8 sc, inc. (22)
Rnd 2: inc, 8 sc, inc, 1 sc, inc, 8 sc, inc, 1 sc. (26)
Rnd 3: inc 2 times, 8 sc, inc 2 times, 1 sc, inc 2 times, 8 sc, inc 2 times, 1 sc. (34)
Rnd 4: 1 sc, inc 2 times, 10 sc, inc 2 times, 3 sc, inc 2 times, 10 sc, inc 2 times, 2 sc. (42)
Rnd 5: sc in each st around. (42)
Rnd 6: 1 sc, inc 2 times, 14 sc, inc 2 times, 3 sc, inc 2 times, 14 sc, inc 2 times, 2 sc. (50)
Rnd 7: sc in each st around. (50)
Rnd 8: 1 sc, inc 2 times, 17 sc, inc, 1 sc 2 times, 1 sc, inc 2 times, 17 sc, inc, 1 sc 2 times. (58)
Rnd 9: inc, 28 sc, inc, 28 sc. (60)
Rnd 10: sc in each st around. (60)
Place a stitch marker in the 15th stitch of this round. The side of the head with the marker is the front (right side).
Rnd 11: 1 sc, inc, 28 sc, inc, 29 sc. (62)
Rnd 12: sc in each st around. (62)
Work 1 shift stitch after completing this round. This extra sc is not counted.
Rnd 13: 1 sc, inc, 29 sc, inc, 30 sc. (64)
Rnds 14–15: sc in each st around. (64) [2 rounds total]
Rnd 16: 2 sc, inc, 30 sc, inc, 30 sc. (66)
Rnd 17: inc, 10 sc repeat 6 times around. (72)
Rnds 18–24: sc in each st around. (72) [7 rounds total]
Work 1 shift stitch after completing Rnd 24. This extra sc is not counted.
This is the right moment to set the safety eyes. Pin the eye positions between Rnds 18 and 19 on the front of the head, with 14 stitches between them. Temporarily remove the fiberfill from the head, push the eye posts through from the outside, then snap the washers onto the posts from the inside. Re-stuff the head firmly before continuing. Continue to add fiberfill as you close subsequent rounds.
Rnd 25: dec, 10 sc repeat 6 times around. (66)
Rnd 26: dec, 9 sc repeat 6 times around. (60)
Rnd 27: dec, 8 sc repeat 6 times around. (54)
Rnd 28: dec, 7 sc repeat 6 times around. (48)
Rnd 29: dec, 6 sc repeat 6 times around. (42)
Rnd 30: dec, 5 sc repeat 6 times around. (36)
Rnd 31: dec, 4 sc repeat 6 times around. (30)
Rnd 32: dec, 3 sc repeat 6 times around. (24)
Sl st to close. Cut yarn and weave in end.
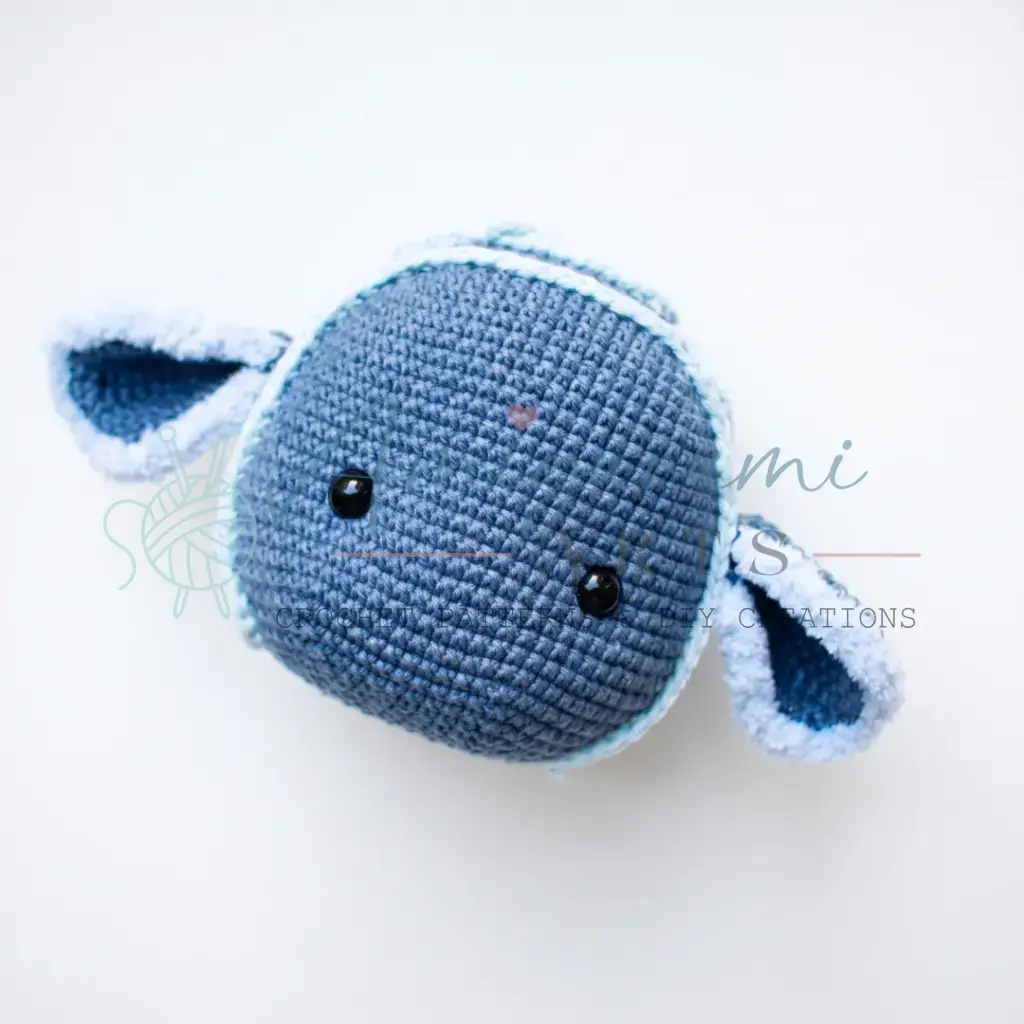
Head Fleece Base
Use coordinating color yarn (color #75). This base creates a structured underlayer for the Alize Softy fleece on the head.
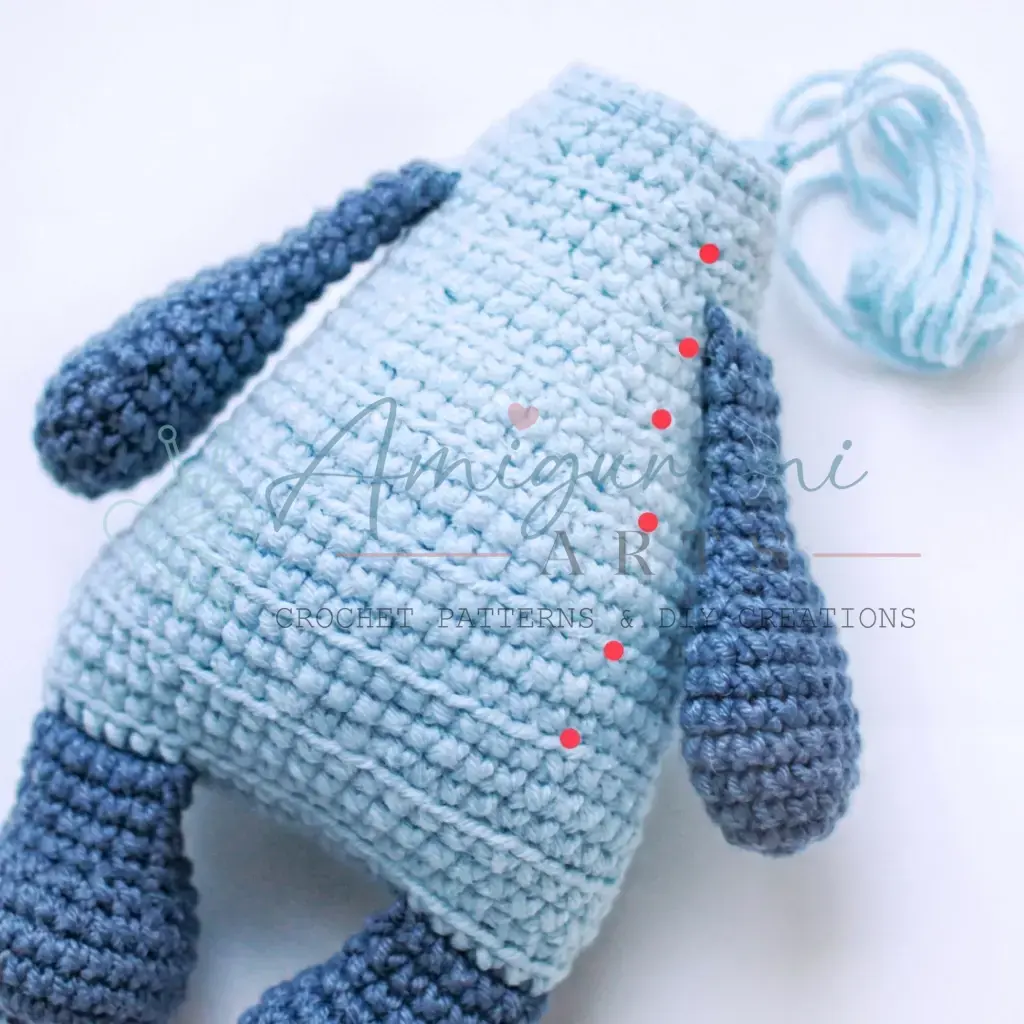
Before beginning, mark the outline of the fleece area with pins, a thin contrast thread, or a fabric disappearing marker:
- Top point: Center of Rnd 3 of the head (crown area)
- Side points: 7 stitches outward from each eye
- Bottom points: Count 9 rounds down from each eye (this lands on Rnd 28 of the head), then 3 stitches to the side from each eye
Add additional guide pins between these key points to keep your line smooth.
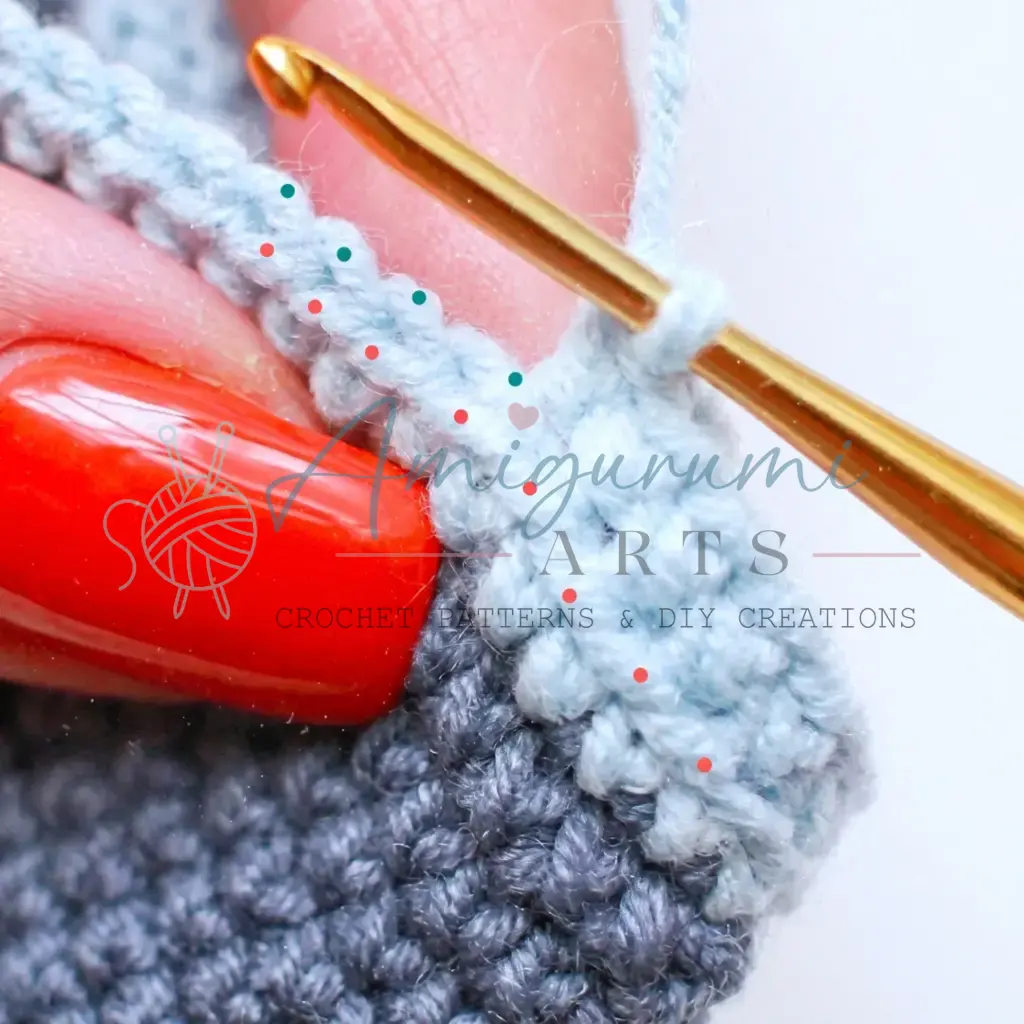
Join the yarn to Rnd 28 of the head on the right side (from your perspective), working counterclockwise. Sc along the marked outline all the way to Rnd 28 on the opposite side of the head. Without cutting the yarn, turn the piece and sc along the back of the head (the back-of-skull section). Stop when you are 3 stitches away from the edge of the outline stitches. Work 3 sc upward (across 3 rounds of the head), then turn and sc back across in the opposite direction, stopping again 3 stitches before the outline edge.
Continue this back-and-forth pattern across the entire back of the head — horizontal rows are spaced 3 rounds apart, vertical columns are spaced 3 stitches apart — until the entire fleece base area is covered.
Fasten off and weave in the end. The fleece base is complete.
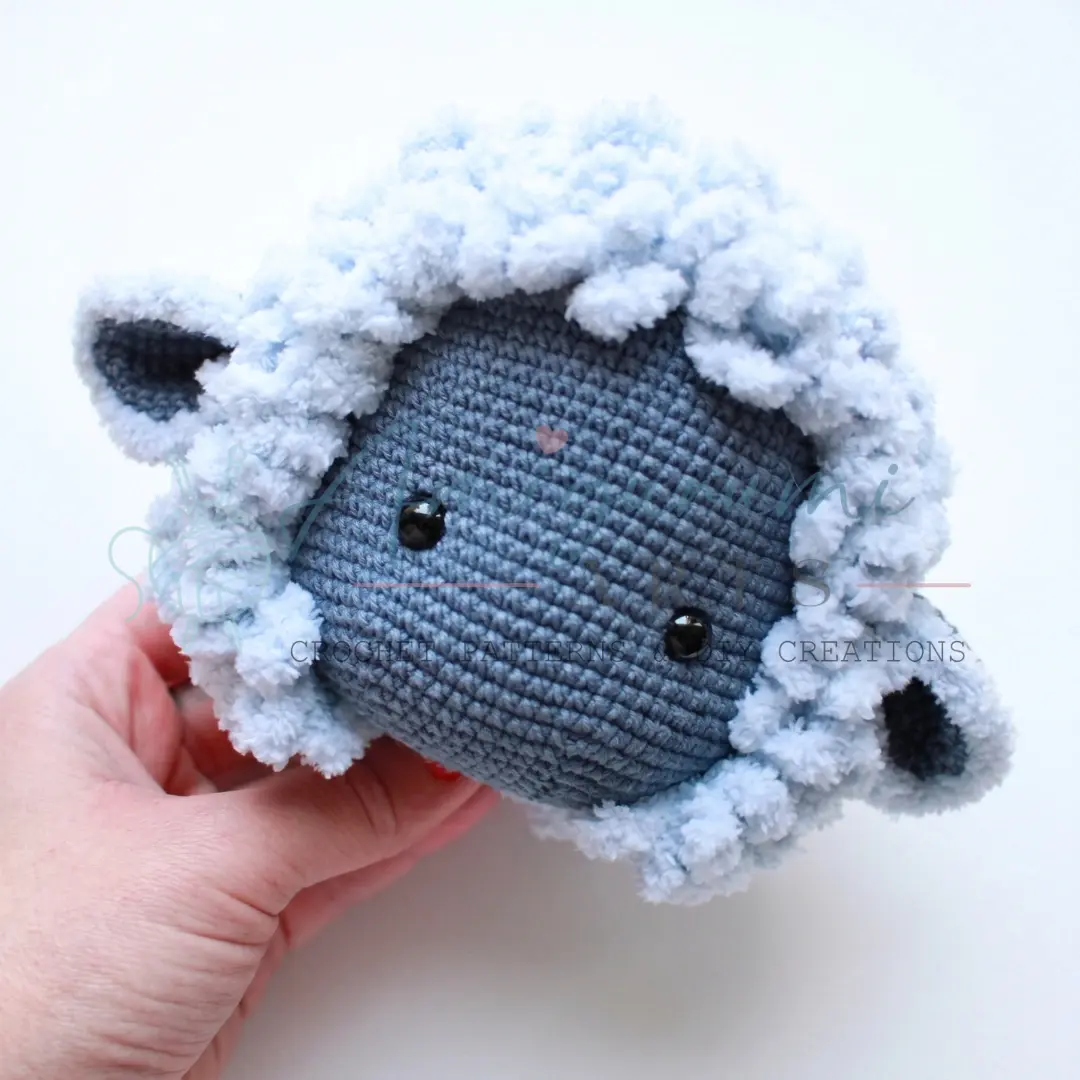
Fleece Coat on Head
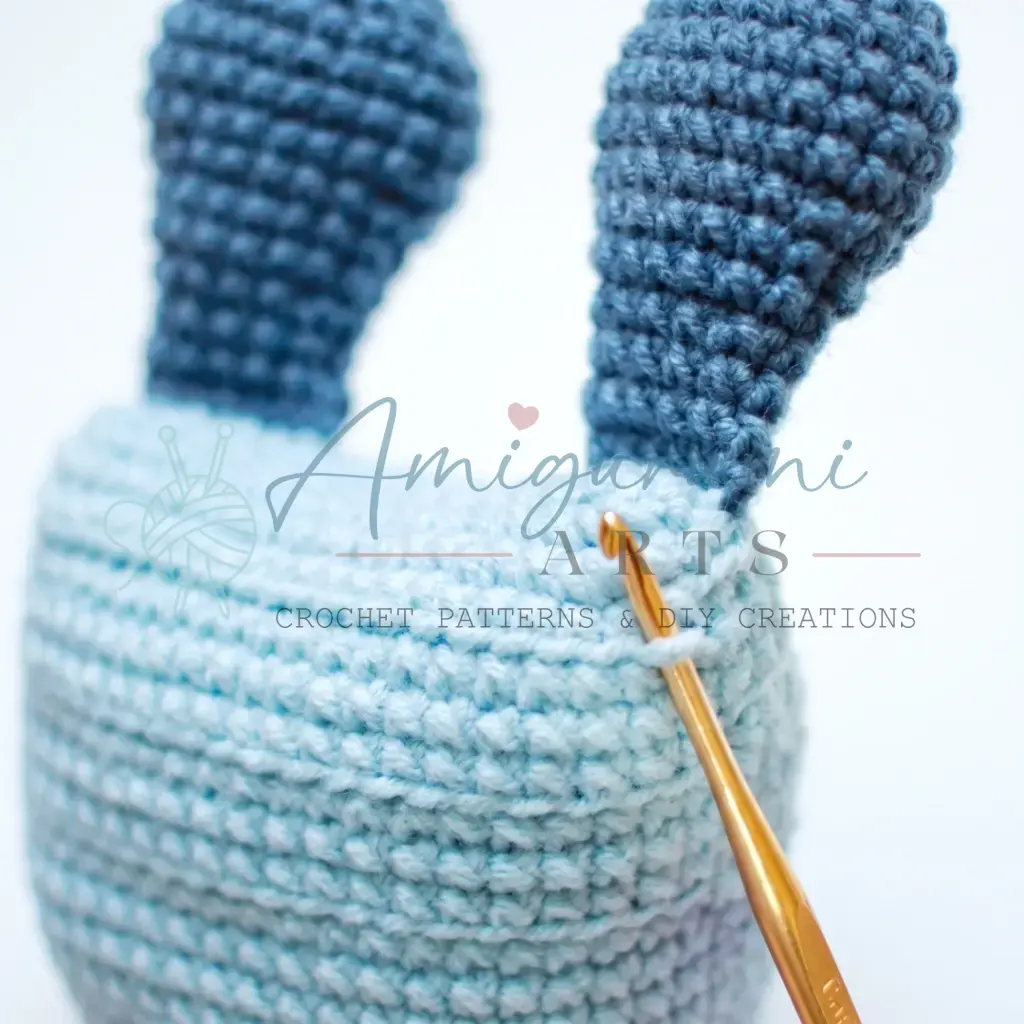
Now attach the ears: position them at approximately Rnds 13–14 of the head using pins, then sew them in place securely.
Use Alize Softy textured yarn.
Join the yarn to the very first stitch of the fleece base (the sc where you originally began working the base).
Ch 8, sl st into the next base stitch. One loop complete. Ch 7, sl st into the next base stitch. Another loop complete.
Continue alternating chains of 8 and 7 in a random order, sl st into each successive base stitch, until all base stitches are covered.
Fasten off and weave in the end.
Face Embroidery
Use a tapestry needle or large-eye embroidery needle throughout.
Eye whites: Using white yarn, embroider 2 short straight stitches on the side of each eye, pulling the yarn slightly taut to create a gentle indentation. Repeat on the second eye.
Eyelids: Using main color yarn, embroider 2 stitches over the white stitches on each eye, following the eye’s upper curve as a reference. Repeat on the second eye.
Nose: Position the nose between Rnds 20 and 21 of the head, centered between the eyes. Work 4 horizontal straight stitches — the nose spans 4 stitches in width. Then add one vertical stitch running from the center of the nose down through Rnds 21 to 28 of the head, forming the characteristic lamb’s nose line.
Scarf
All rows from Row 2 onward are worked in BLO. Begin with white yarn.
Row 1: Ch 4. Starting in the 2nd ch from hook: 3 sc. Ch 1, turn.
Row 2: 3 sc in BLO. Switch to red yarn. Ch 1, turn.
Row 3: 3 sc in BLO. Ch 1, turn.
Row 4: 3 sc in BLO. Switch to white yarn. Ch 1, turn.
Row 5: 3 sc in BLO. Ch 1, turn.
Row 6: 3 sc in BLO. Switch to red yarn. Ch 1, turn.
Continue this two-row stripe sequence — two rows of one color, switch — through Row 118. Fasten off and weave in all ends.
Assembly
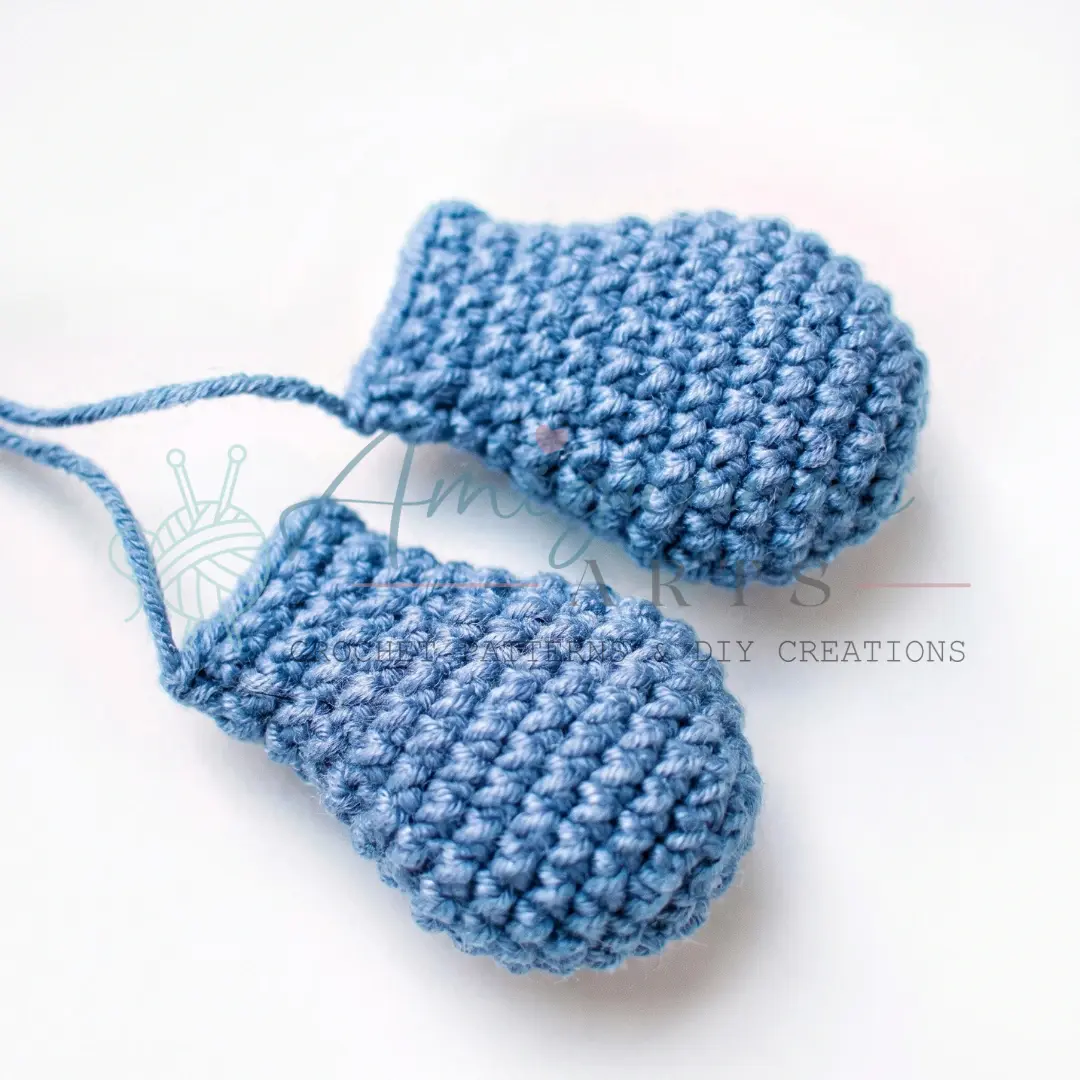
- Attach the head to the body: Sew the head to the top of the body using the remaining loops of the last rounds of both pieces. Use a whipstitch or mattress stitch for a secure join, pulling stitches snug to avoid a gap at the neck.
- Confirm ear placement: The ears should already be attached to the head (Rnds 13–14, one on each side). Check that they are even and symmetrical before proceeding.
- Wrap the scarf: Drape the finished scarf around the sheep’s neck. Tie it loosely or tack it in place with a few invisible stitches if you’d like it to stay put.
- Weave in all remaining ends on every piece. Use your tapestry needle to run each tail back through at least 2–3 cm of fabric before trimming.
Tips
- Keep your tension firm: Amigurumi fabric needs to be tight enough to hold fiberfill without gapping. If you find your stitches are looser than you’d like, try holding the yarn with slightly more tension or drop down to a 2.0 mm hook. The goal is a dense, even fabric — especially on the head where the safety eyes sit.
- The shift stitch is your best friend: Those single extra sc stitches placed after certain rounds exist specifically to prevent the spiral seam from drifting visibly across the face or body. Work them just like a regular sc, but don’t count them in your total — and don’t skip them. They make a real difference in the finished look.
- Set the safety eyes before you lose access: Once you’re past Rnd 30 on the head, the opening is too small to fit your hand inside to snap on the washers. Set the eyes during Rnd 28 as directed — temporarily remove the stuffing, position the eyes, lock the washers, then re-stuff firmly before continuing.
- Attaching the fleece coat evenly: When working the chain loops on the body and head, keep your tension consistent on every chain so the loops are roughly the same length and create a uniform fleece texture. If some loops are noticeably longer, the coat will look uneven. It helps to count each chain aloud as you make it.
- Joining the limbs cleanly: When you work through both the leg/arm stitches and the body stitches simultaneously in Rnds 3 and 23 of the body, the seam is essentially invisible because it’s integrated into the fabric rather than sewn on top. Make sure the flat edge of each limb faces the correct direction (toes forward, palms facing the body) before you begin that round, since you can’t easily reposition once it’s worked in.
Frequently Asked Questions
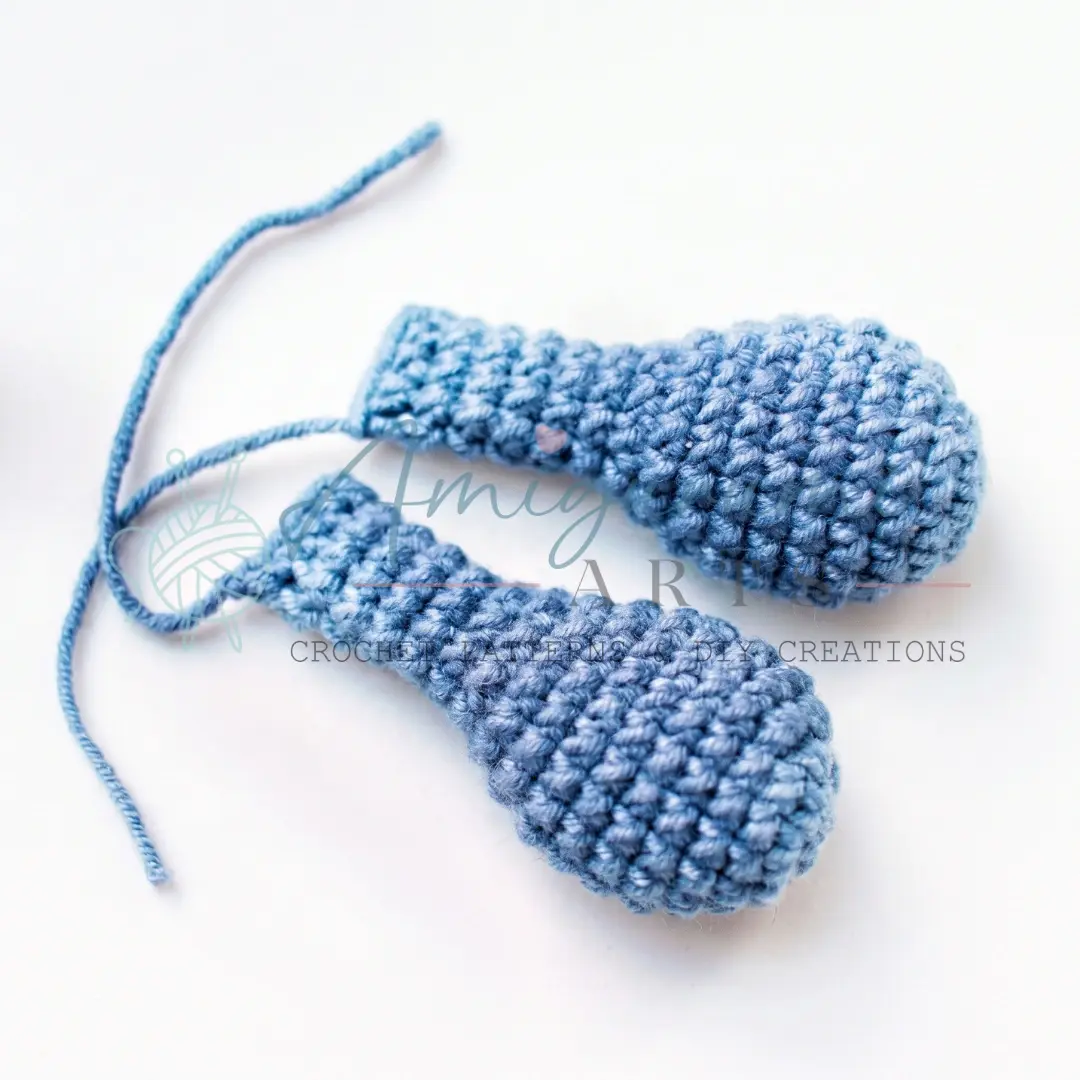
Why am I seeing a twisted seam on my sheep?
This usually happens when the spiral seam drifts. The pattern includes a “shift stitch” at specific rounds to correct this. Make sure you are working that extra sc (without counting it in your total) exactly where the instructions indicate.
Can I use a different hook size?
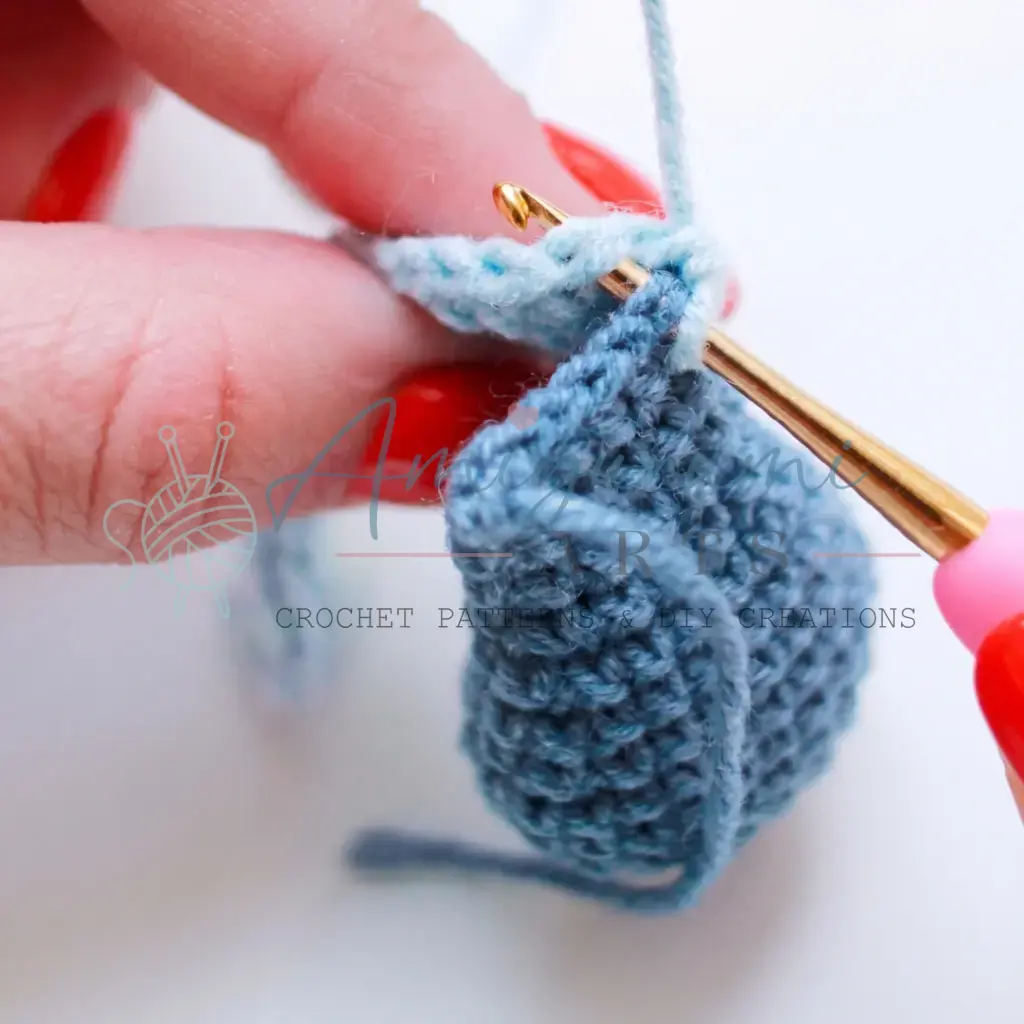
You can use a 2.3 mm hook if 2.25 mm is unavailable, but ensure your fabric remains tight. If you can see daylight through the stitches, go down half a hook size to prevent stuffing from showing.
How do I join the legs and arms without sewing them on later?
The pattern instructs you to work through both the limb stitches and the body stitches simultaneously in specific rounds. This integrates the limb directly into the body fabric, hiding the yarn tails inside for a seamless look.
What if I don’t have Alize Softy yarn?
You can substitute with any textured or loop yarn that creates a similar fluffy effect. The key is to use a yarn that will hold the chain loops securely without unraveling.
How do I mark the fleece outline on the head?
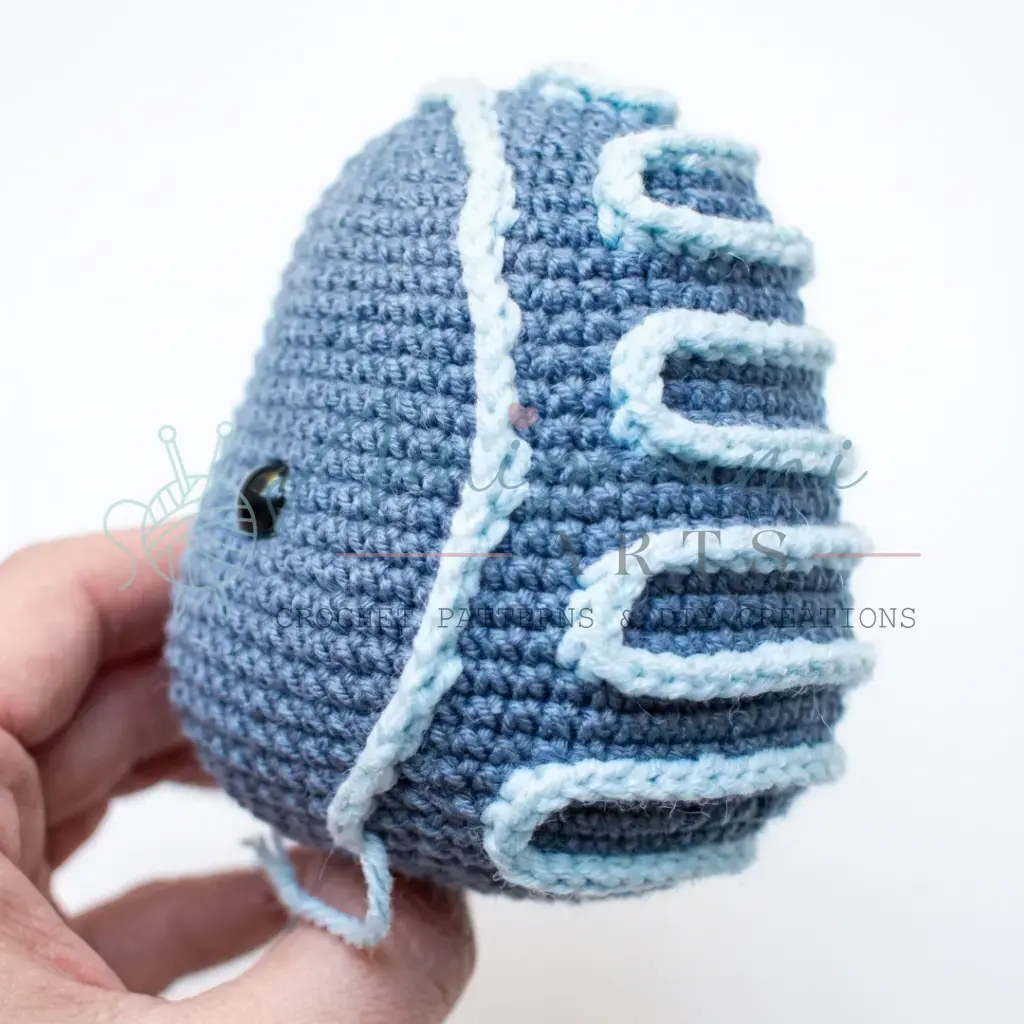
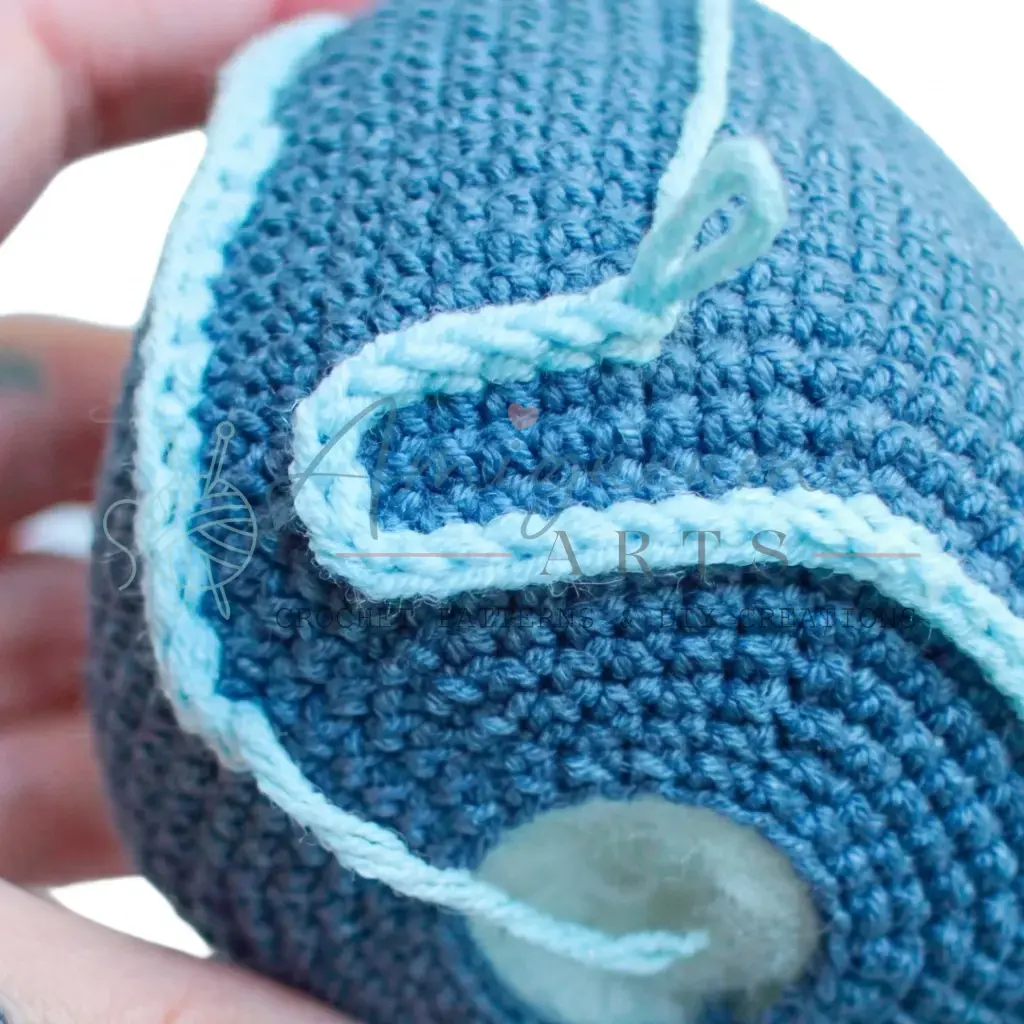
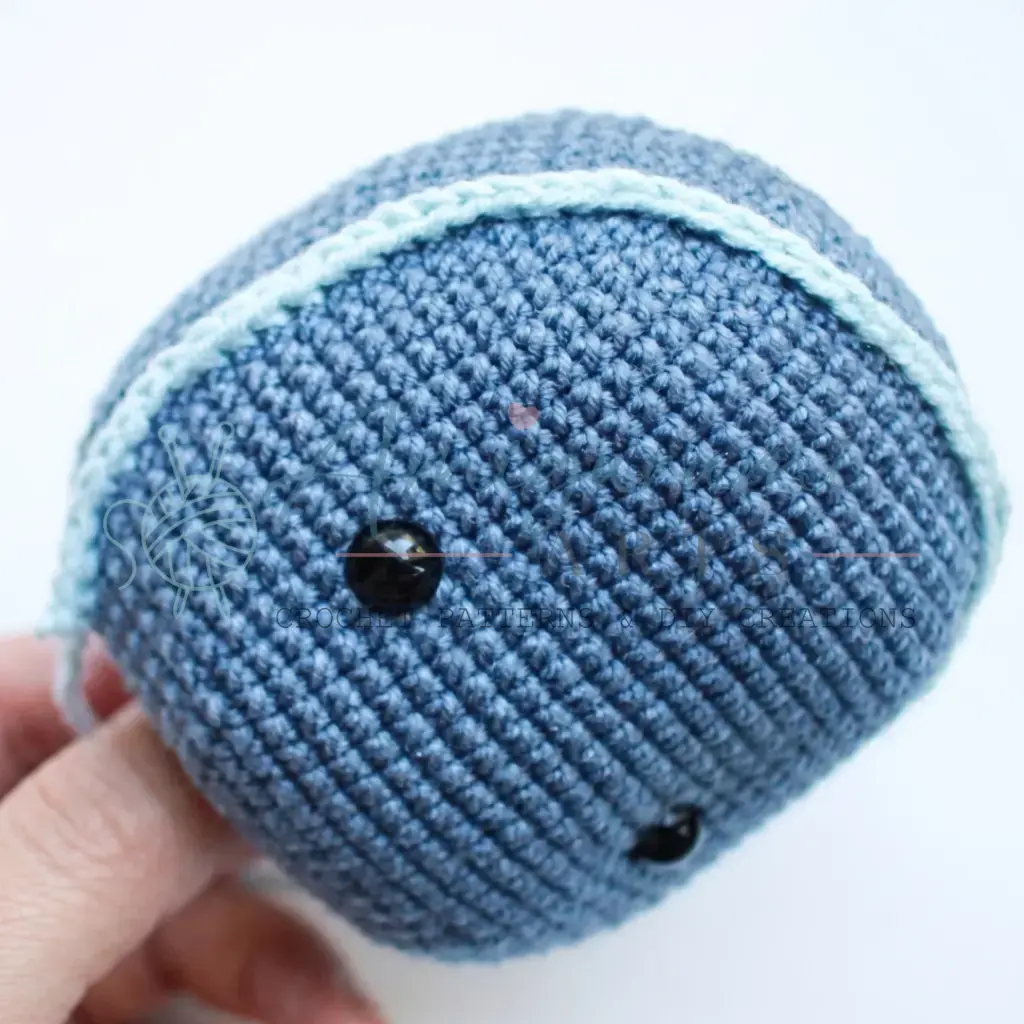
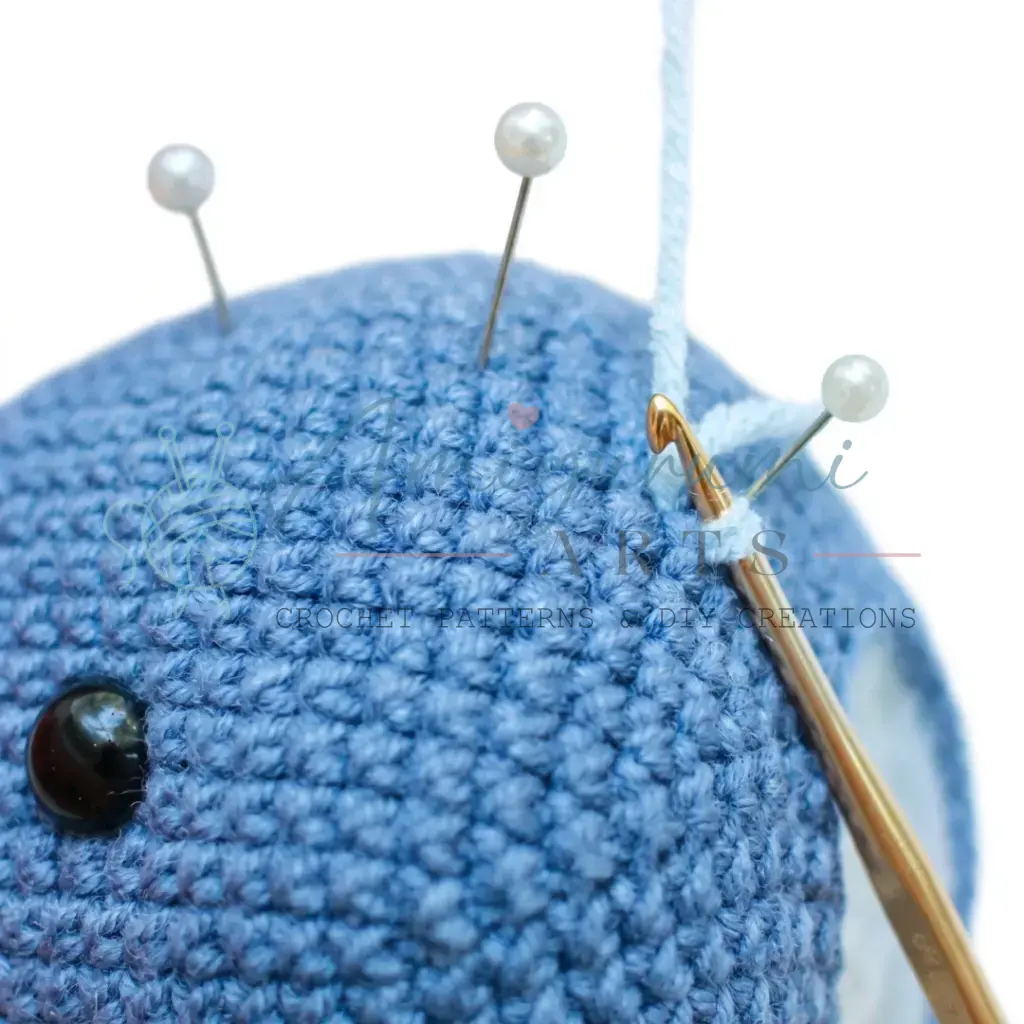
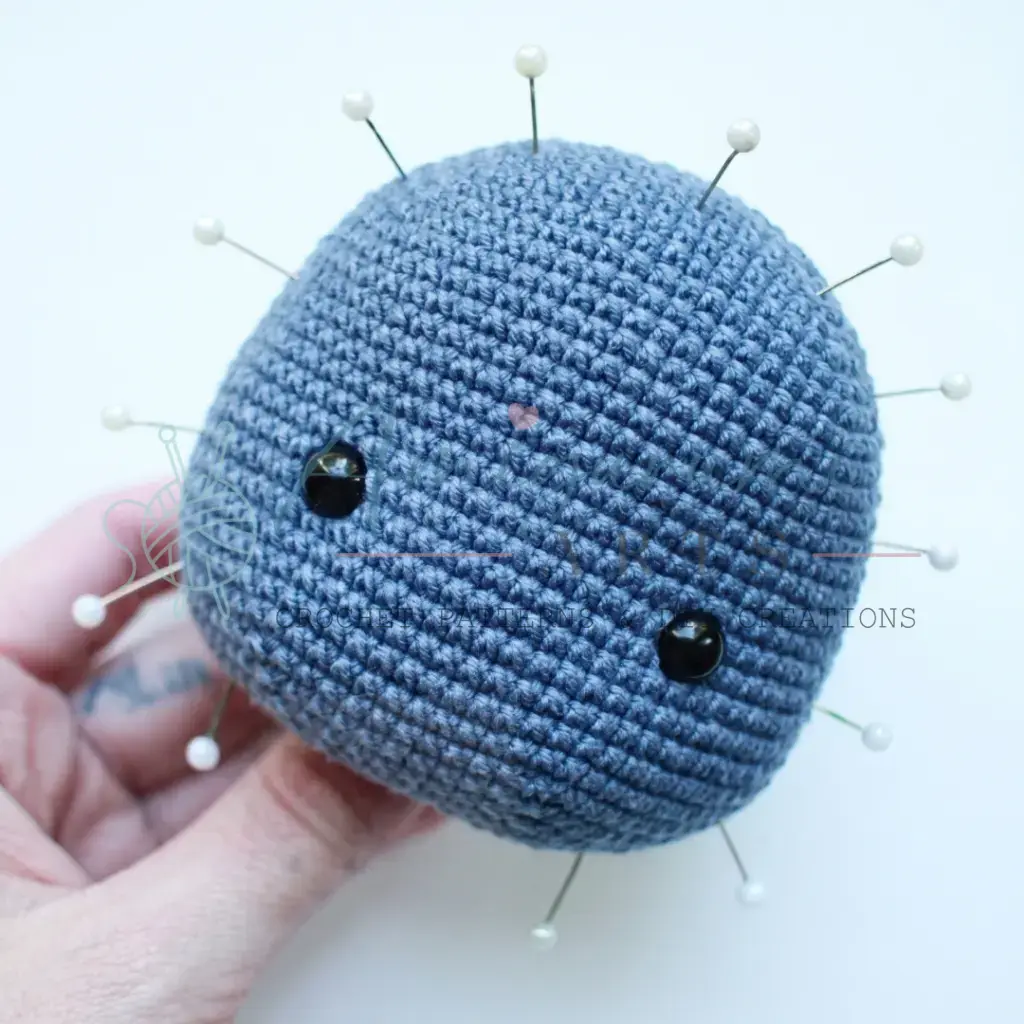
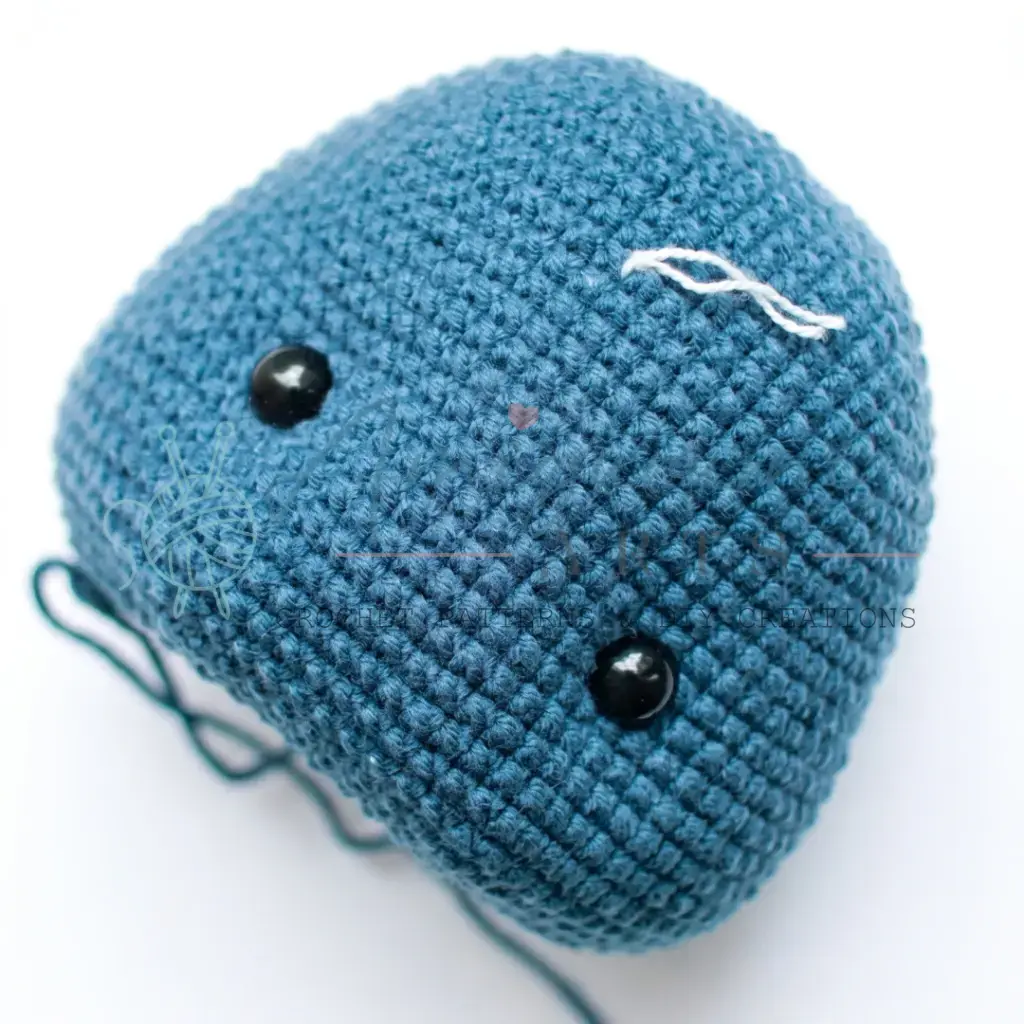
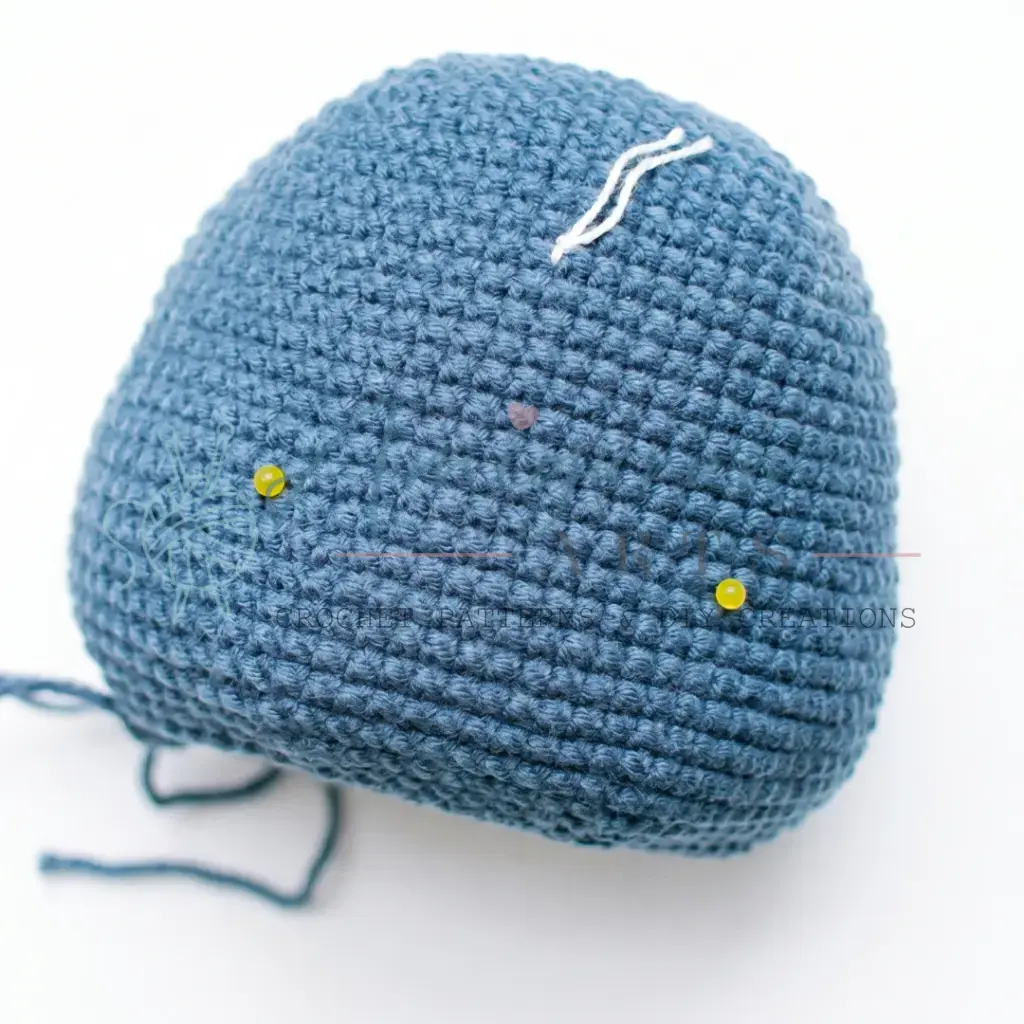
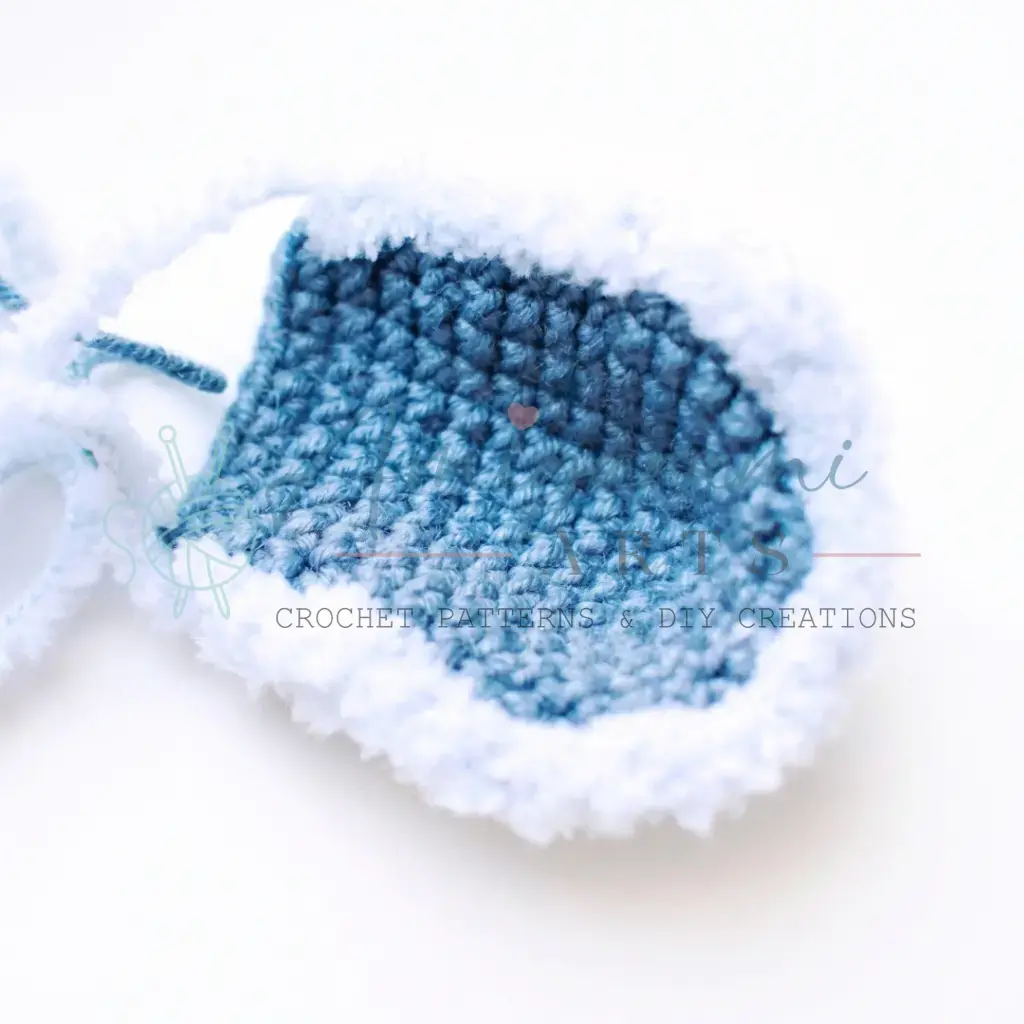
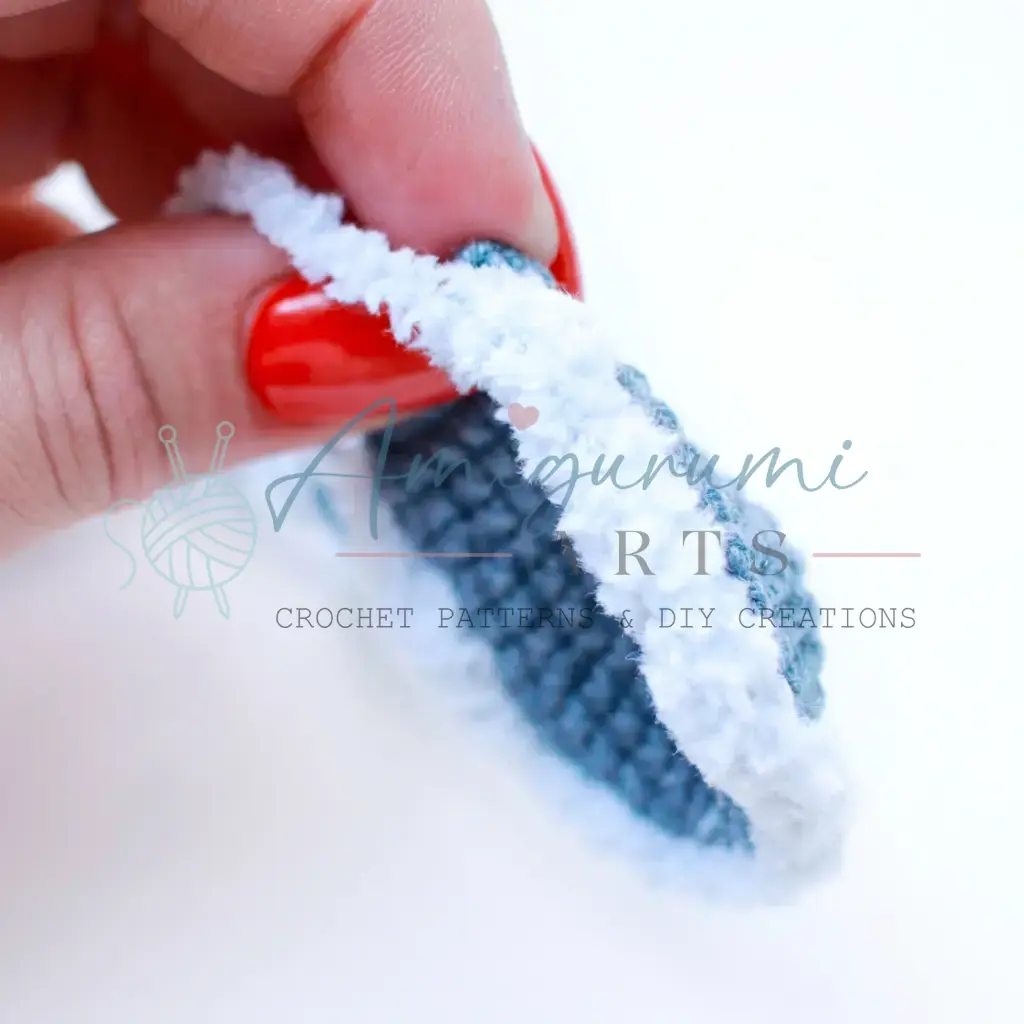
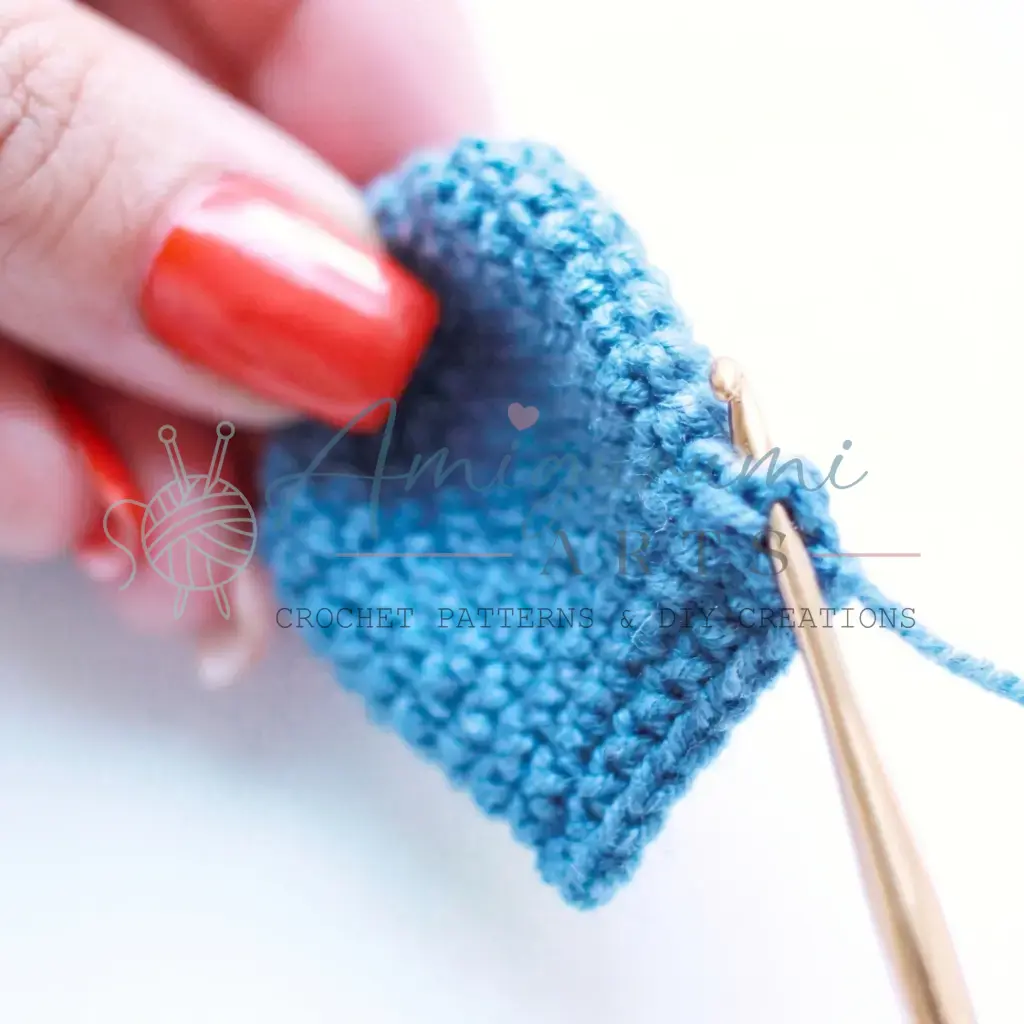
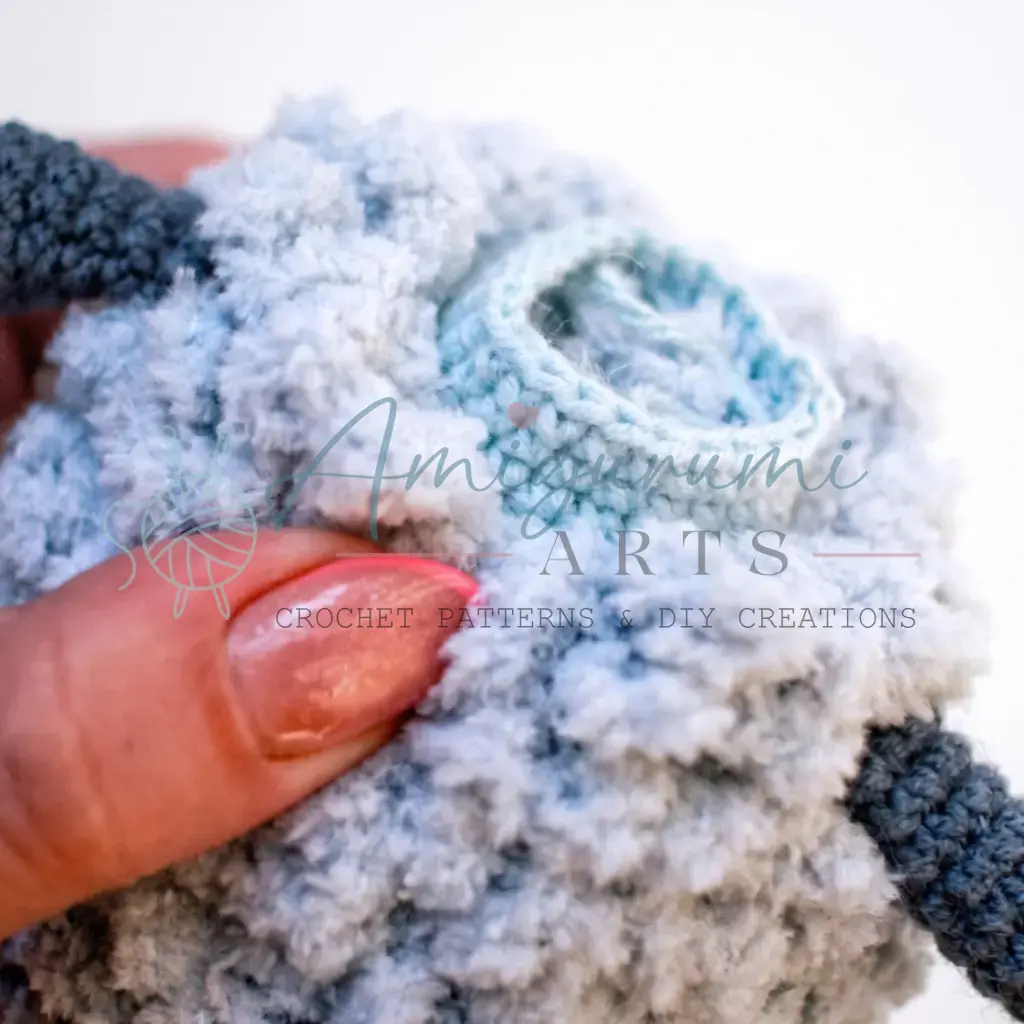
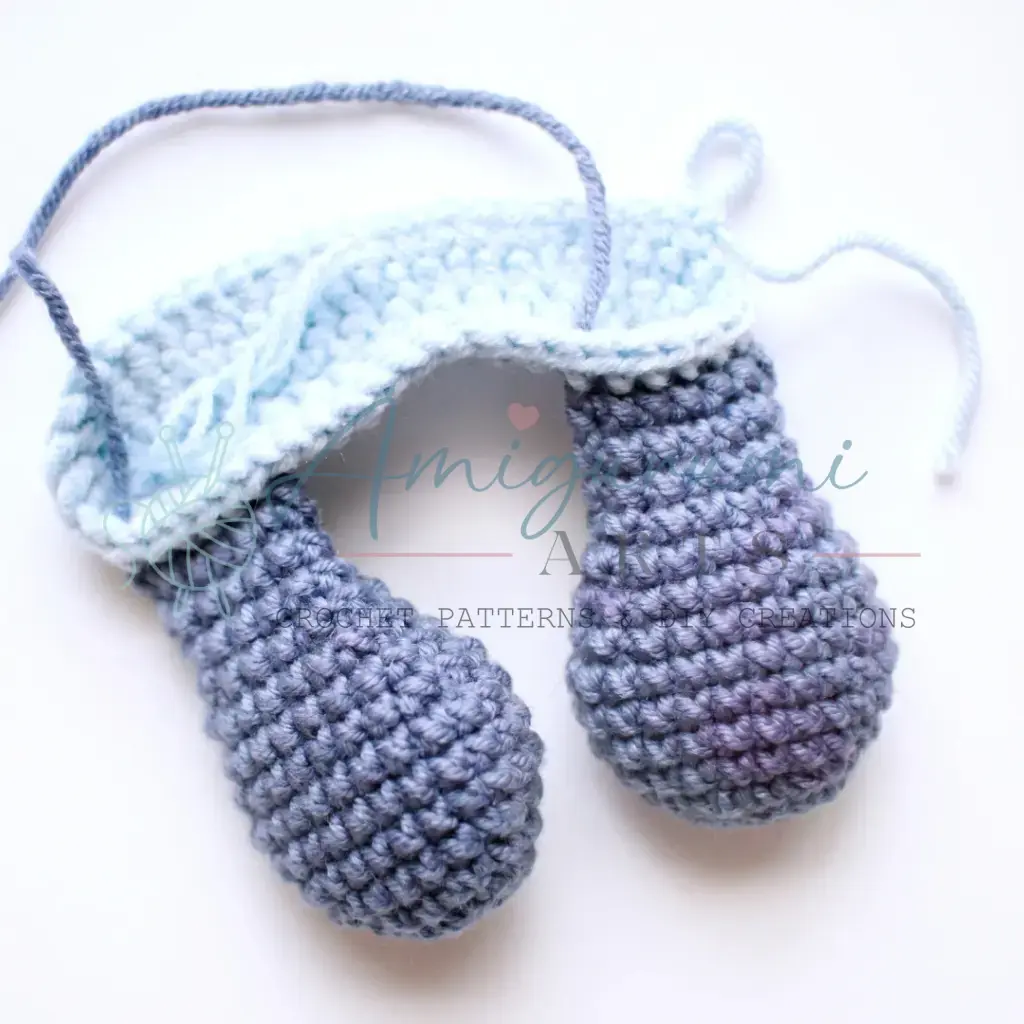
Use sewing pins, a thin contrast thread, or a fabric disappearing marker to mark the top, side, and bottom points of the fleece area before you begin crocheting the base.
Pin This Crochet Pattern!