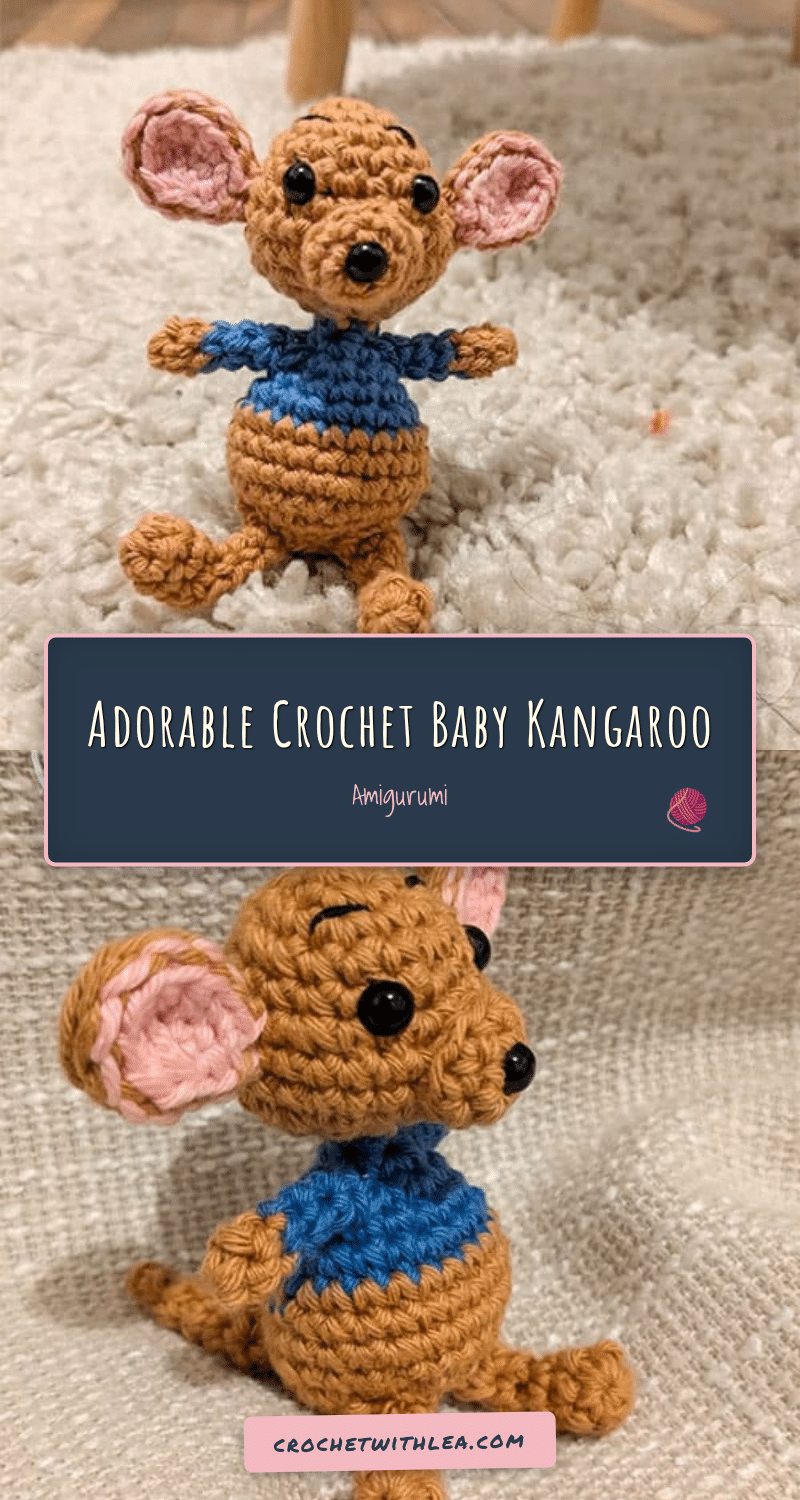
There is something deeply soothing about the rhythm of crochet, especially when you are working on a small, portable project. A quiet evening, a small ball of yarn, and the steady click of the hook create a perfect ritual for relaxation. Counting stitches and following a simple repeat allows the mind to unwind while your hands create something tangible and sweet. This tiny baby kangaroo is the perfect companion for such moments. It is compact enough to keep in your knitting bag and simple enough to finish in a few short sittings, making it an ideal way to end the day with a sense of accomplishment.
Small Details That Make It Better
While this little kangaroo is undeniably cute, it is the specific design choices that give it character. The source pattern notes that the baby kangaroo is quite small, which might lead some to mistake it for a mouse at first glance. However, the distinct coloring and structure clarify its identity. The use of a soft blue for the belly provides a gentle contrast to the brown body, mimicking the natural palette of a joey. The ears are a standout feature; by joining pink and brown yarns, the pattern creates a two-toned effect that adds depth and realism without requiring complex shaping. These small touches transform a simple amigurumi into a charming keepsake.
Project Overview
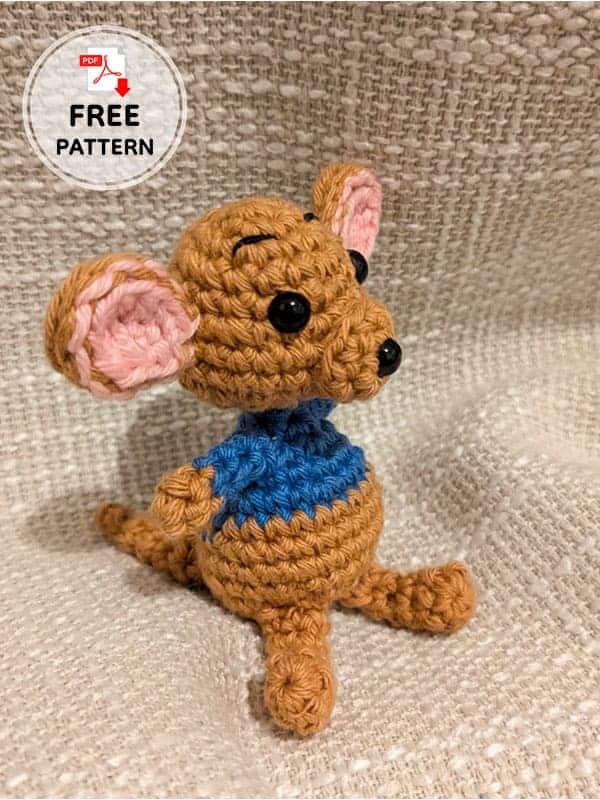
This pattern creates a tiny, adorable baby kangaroo amigurumi. The project is designed for beginners and intermediate crocheters, featuring simple stitches and clear instructions. The kangaroo is constructed with a head and body made as a single continuous piece, while the muzzle, ears, arms, tail, and legs are crocheted separately and assembled later. The pattern uses basic crochet stitches and includes safety eyes for a polished finish.
Materials
- Yarn: Brown, Blue, and Pink yarn.
- Notions: Safety eyes (size not specified in source, standard small size recommended for this scale).
- Hook: Appropriate hook size for your yarn weight (specific hook size not provided in source).
- Other: Stuffing, tapestry needle for assembly, and embroidery thread for eyebrows.
Gauge and Finished Size
Specific gauge measurements and finished dimensions are not provided in the source pattern. Because amigurumi is typically worked in continuous rounds and stuffed, gauge is less critical than in flat projects, but maintaining consistent tension will ensure your kangaroo matches the intended small size.
Abbreviations
- sc: single crochet
- ch: chain
- slst: slip stitch
- inc: increase
- dec: decrease
- dc: double crochet
- hdc: half double crochet
Pattern Notes
This pattern creates a cute little baby crochet kangaroo. All parts of the kangaroo are crocheted separately and then assembled together, with the exception of the head and body, which are made as one piece. The pattern is designed to be easy to follow, and the small size makes it a quick project. Remember to stuff the pieces firmly before closing them for the best shape.
Pattern Instructions
Muzzle
Work in Brown.
- Rd 1: In a magic loop, 5 sc (5)
- Rd 2: 1 inc, 2 sc, 1 inc, 1 sc (7)
- Rd 3: 1 sc, 1 inc, 1 sc, 1 inc, 1 sc
Head
Work in Brown.
- Rd 1: In a magic loop, 6 sc (6)
- Rd 2: 6 inc (12)
- Rd 3: (1 sc, 1 inc) x 6 (18)
- Rd 4-5: 18 sc (18)
- Rd 6: (1 sc, 1 inc, 1 sc) x 6 (24)
- Rd 7: 1 inc, 9 sc, 1 inc, 13 sc (26)
- Rd 8: 26 sc (26)
- Rd 9: (1 dec, 1 sc, 1 dec, 1 sc, 1 dec, 2 sc, 1 dec, 1 sc) x 2 (18)
Assembly Step: Sew the muzzle to the head. Add safety eyes between Rd 5 and Rd 6, with 4 stitches in between. Embroider eyebrows. Stuff the head.
- Rd 10: (1 sc, 1 dec) x 6 (12)
- Rd 11: 6 dec (6)
Body
Work in Blue for Rd 12-16, then switch to Brown for Rd 17-23.
- Rd 12: In Blue, 6 hdc (6)
- Rd 13: 6 inc (12)
- Rd 14: (1 sc, 1 inc) x 6 (18)
- Rd 15: 18 sc (18)
- Rd 16: (1 sc, 1 inc, 1 sc) x 6 (24)
- Rd 17-18: In Brown, 24 sc (24)
- Rd 19: (3 sc, 1 inc) x 6 (30)
- Rd 20: (3 sc, 1 dec) x 6 (24)
- Rd 21: (1 sc, 1 dec, 1 sc) x 6 (18)
Assembly Step: Stuff the body firmly.
- Rd 22: (1 sc, 1 dec) x 6 (12)
- Rd 23: 6 dec (6)
Ears (Make 2)
Work in Pink and Brown.
- Part 1 (Pink): 5 ch, in the 2nd st from the hook 1 slst, 1 sc, 1 hdc, 5 dc in the same st, 1 hdc, 1 sc, 1 slst.
- Part 2 (Brown): 5 ch, in the 2nd st from the hook 1 slst, 1 sc, 1 hdc, 5 dc in the same st, 1 hdc, 1 sc, 1 slst.
- Join the pink and the brown piece with slst all around.
Arms (Make 2)
Work in Brown.
- Rd 1: In a magic loop, 5 sc (5)
- Rd 2: 3 sc, 1 dec (4)
- Rd 3-5: 4 sc (4)
Tail
Work in Brown.
- Rd 1: In a magic loop, 8 sc (8)
- Rd 2-3: 8 sc (8)
- Rd 4: (1sc, 1dec, 1sc)x2 (6)
- Rd 5: 6 sc (6)
- Rd 6: (1sc,1dec)x2 (4)
- Rd 7: 1 sc, 1 dec, 1 slst.
Legs (Make 2)
Work in Brown.
- Rd 1: In a magic loop, 6 sc (6)
- Rd 2-3: 6 sc (6)
- Rd 4: 4 sc, 2 ch, skip 2 st, 1 slst.
- Rd 5: Turn, continue in the 2 ch just made and 2 skipped st: 4 sc (4)
- Rd 6: (1sc,1inc)x2 (6)
- Rd 7: 6 sc (6)
Assembly
- Sew the muzzle to the head.
- Embroider eyebrows above the safety eyes.
- Stuff the head and body firmly.
- Attach the ears, arms, tail, and legs to the body using a tapestry needle and yarn ends. Ensure the legs are positioned correctly for standing or sitting.
Tips
- Consistent Tension: Since this is a small project, keeping your tension even will help the pieces lie flat and assemble neatly.
- Stuffing: Use firm stuffing for the body and head to help the kangaroo maintain its shape, especially if you want it to sit upright.
- Ear Construction: The two-toned ear is created by joining the pink and brown sections with slip stitches. Be sure to join them securely so the colors stay distinct.
FAQs
Is this pattern suitable for beginners?
Yes, the pattern uses basic stitches like single crochet, increase, and decrease, making it accessible for those new to amigurumi.
Why does the kangaroo look like a mouse?
The source pattern notes that the baby kangaroo is very small, which can make it resemble a mouse at first glance. The specific coloring and ear shape help distinguish it as a joey.
How do I make the two-toned ears?
You crochet a pink piece and a brown piece using the same chain and stitch sequence, then join them together all around with slip stitches.
Can I use a different yarn weight?
While the source does not specify a hook size or yarn weight, you can use any yarn weight you prefer. Just adjust your hook size accordingly to maintain a tight fabric that won’t show stuffing.
How do I attach the legs?
The legs are crocheted separately. After stuffing the body, sew the legs to the bottom of the body. The chain stitches at the base of the leg help create a flat surface for attachment.
Pin This Crochet Pattern!