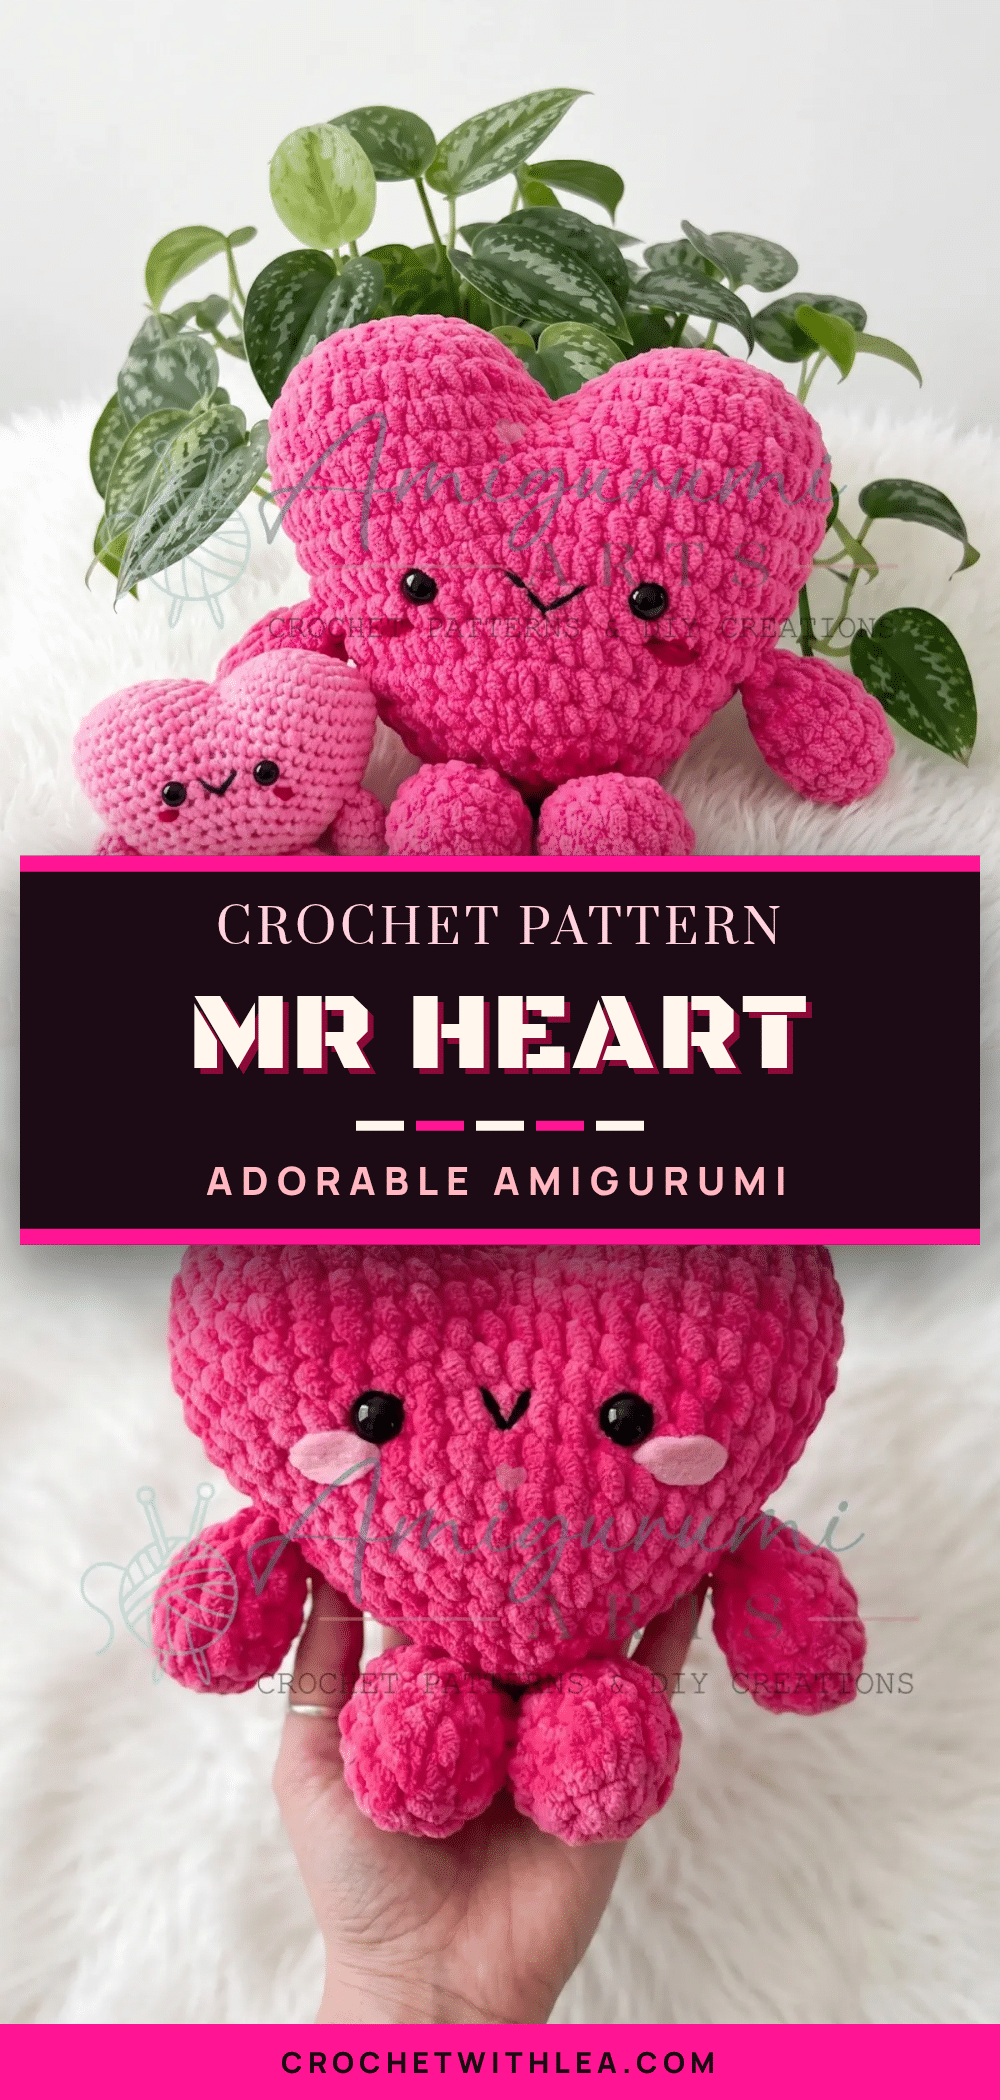
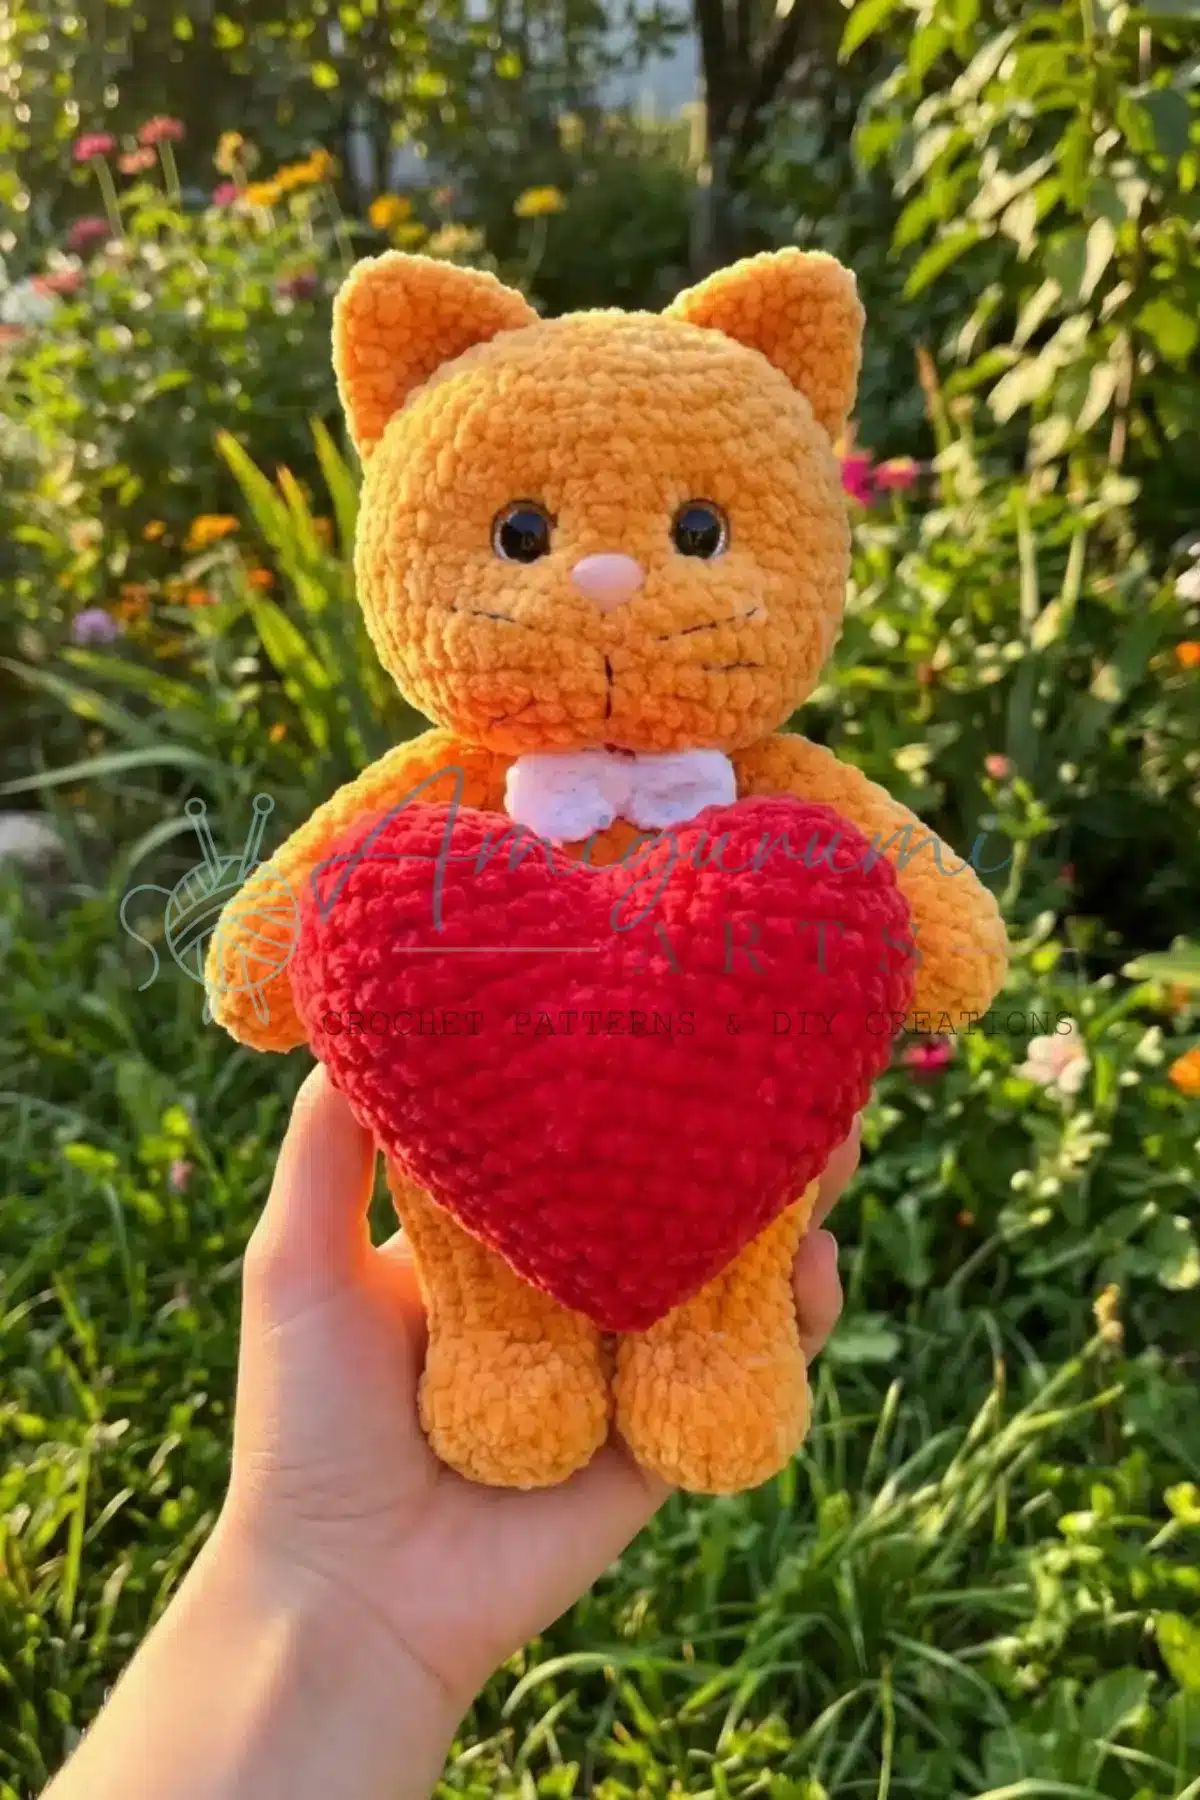
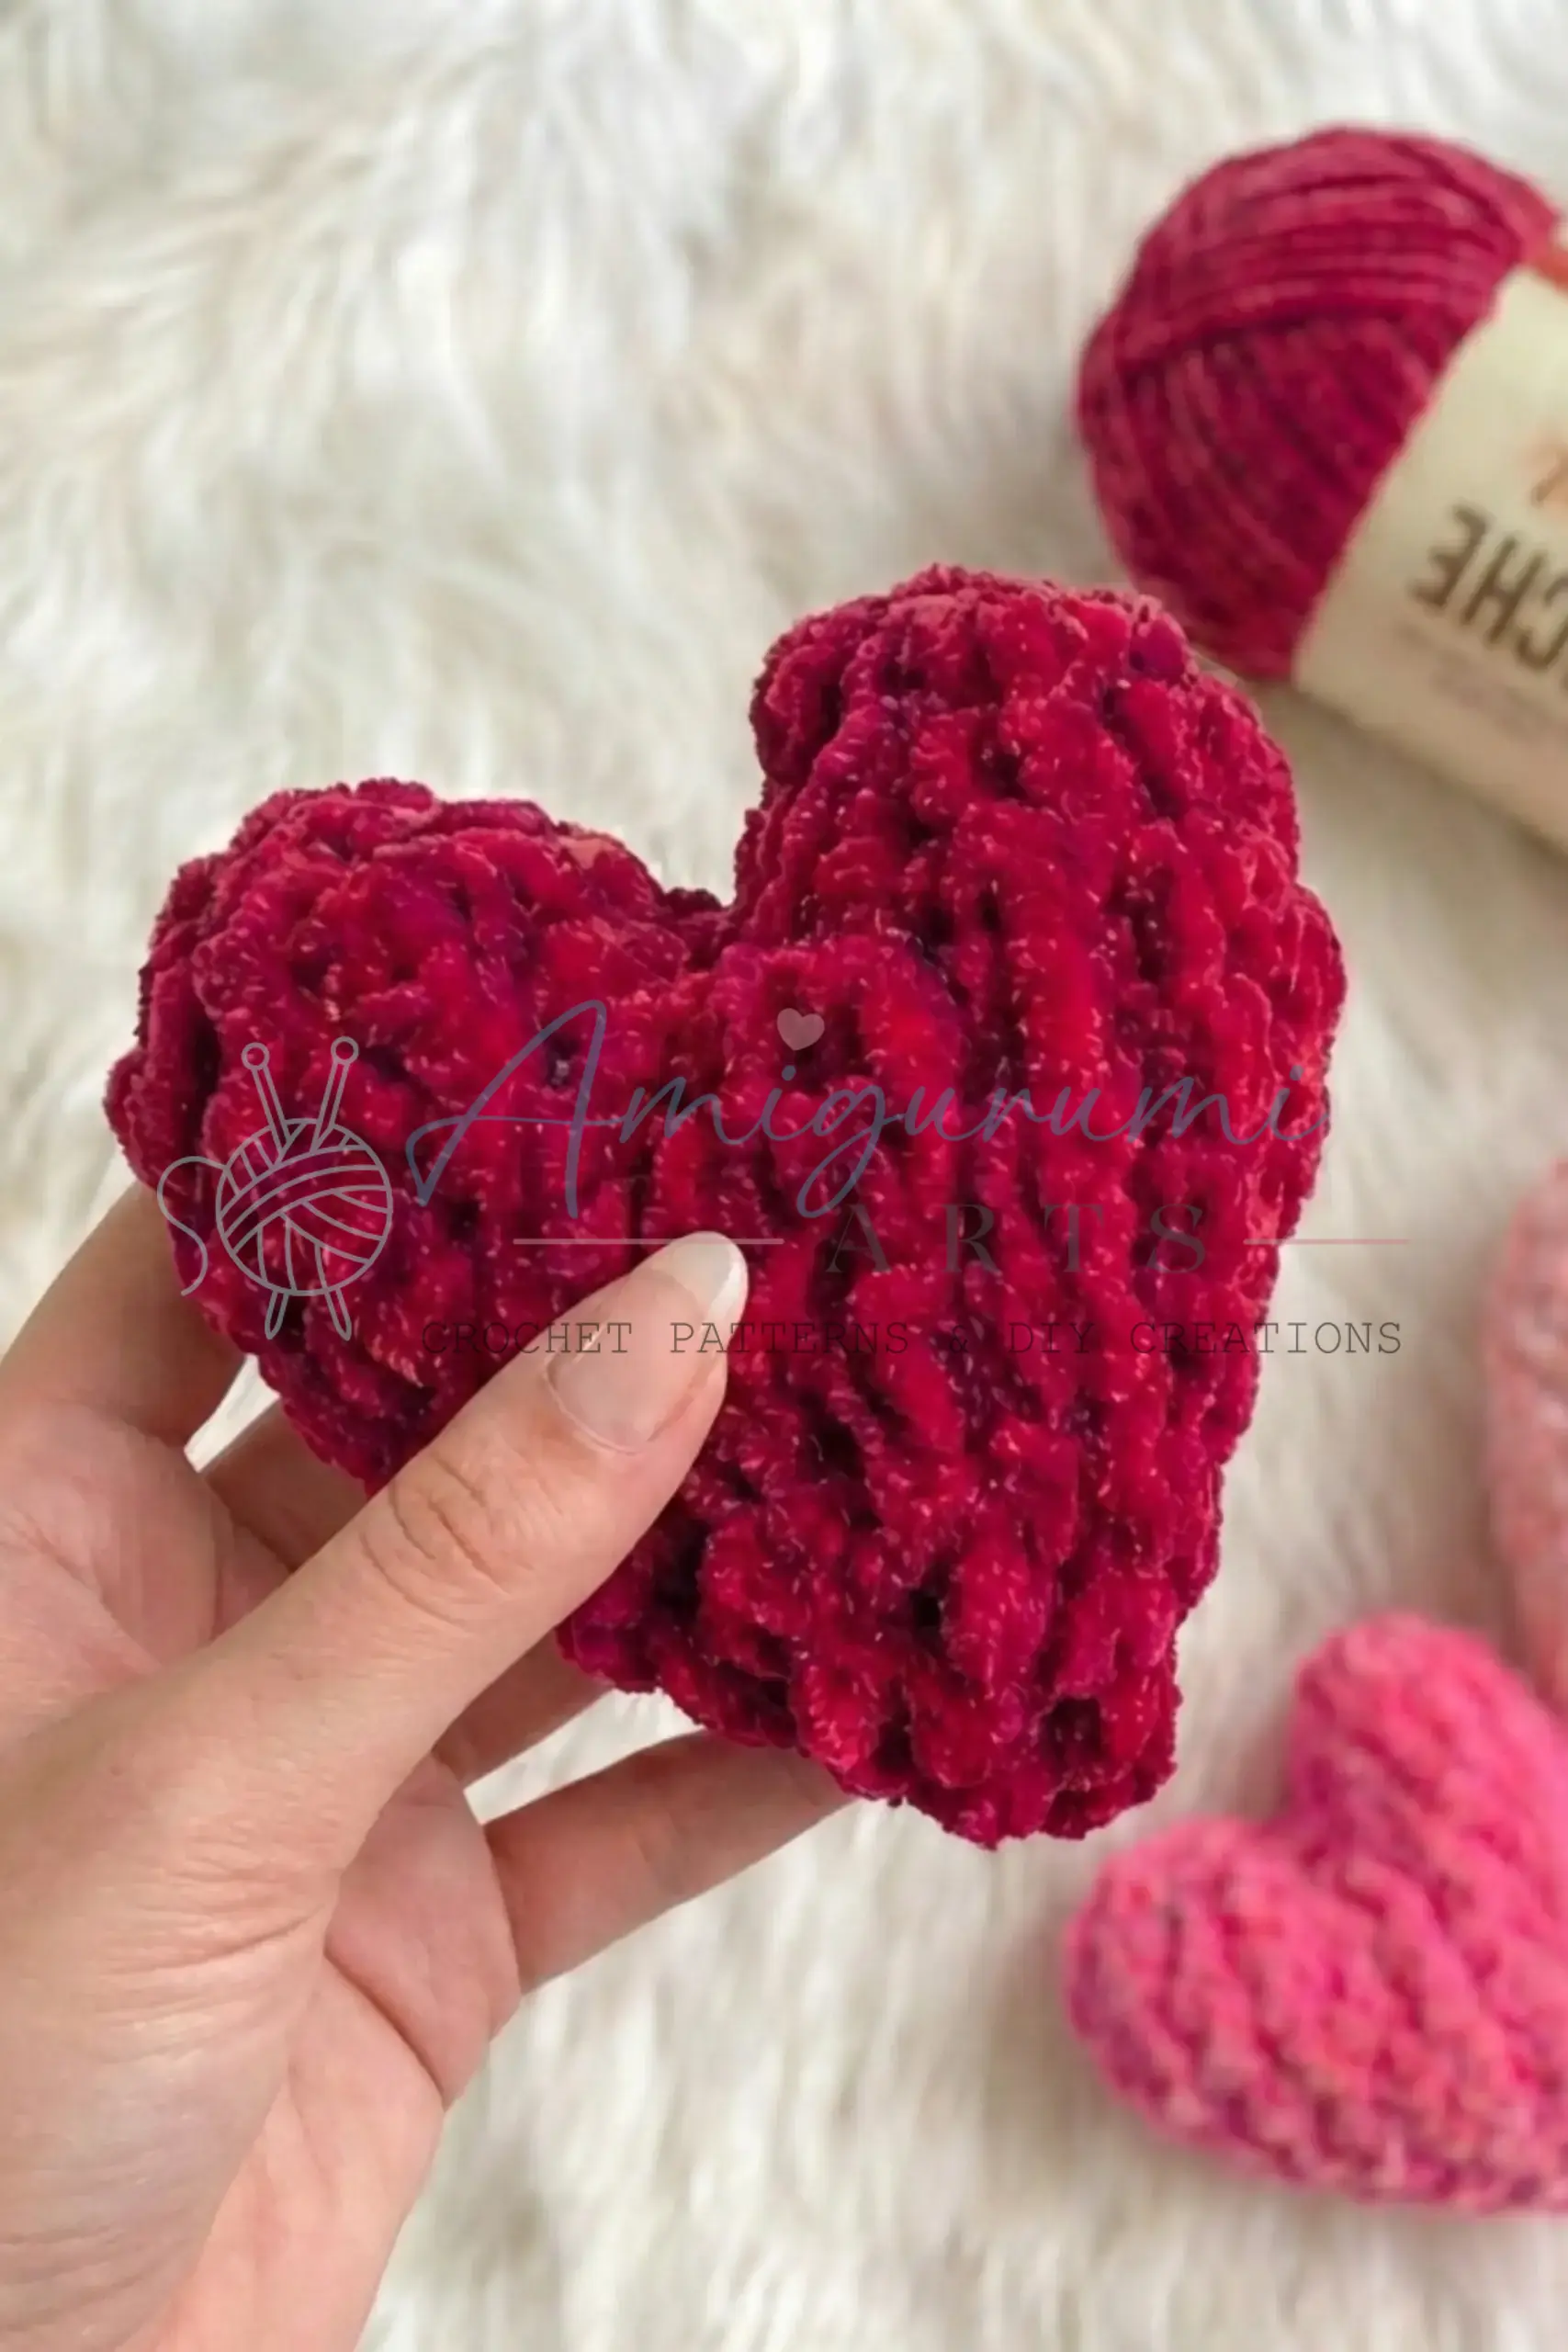
Hold a finished Mr. Heart amigurumi in your hands, and you will immediately notice the satisfying weight of it—stuffed firmly, with a tidy, gap-free surface that begs to be squeezed. The two-lobe construction creates a perfectly symmetrical heart shape that looks as though it was designed for cuddling, while the chubby little limbs give it a playful, display-worthy personality. Whether you are planning to tuck this into a Valentine’s Day card or simply want a snuggly companion for your desk, the finished piece is undeniably cute, useful, and ready to be loved.
Why the Finished Piece Stands Out
What makes this project truly special is the clever construction method that gives Mr. Heart his iconic silhouette. Unlike standard amigurumi shapes that are worked in a single spiral from the top down, this pattern utilizes a unique two-top joining technique. By creating two separate heart-lobe tops and crocheting them together, the maker achieves that deep, centered indentation that defines a classic heart shape. This structural choice not only adds visual interest but also provides a satisfying “aha!” moment during the assembly process. The result is a plush toy that feels professional and polished, with a texture that remains smooth thanks to the tight fabric required for this design.
Project Overview
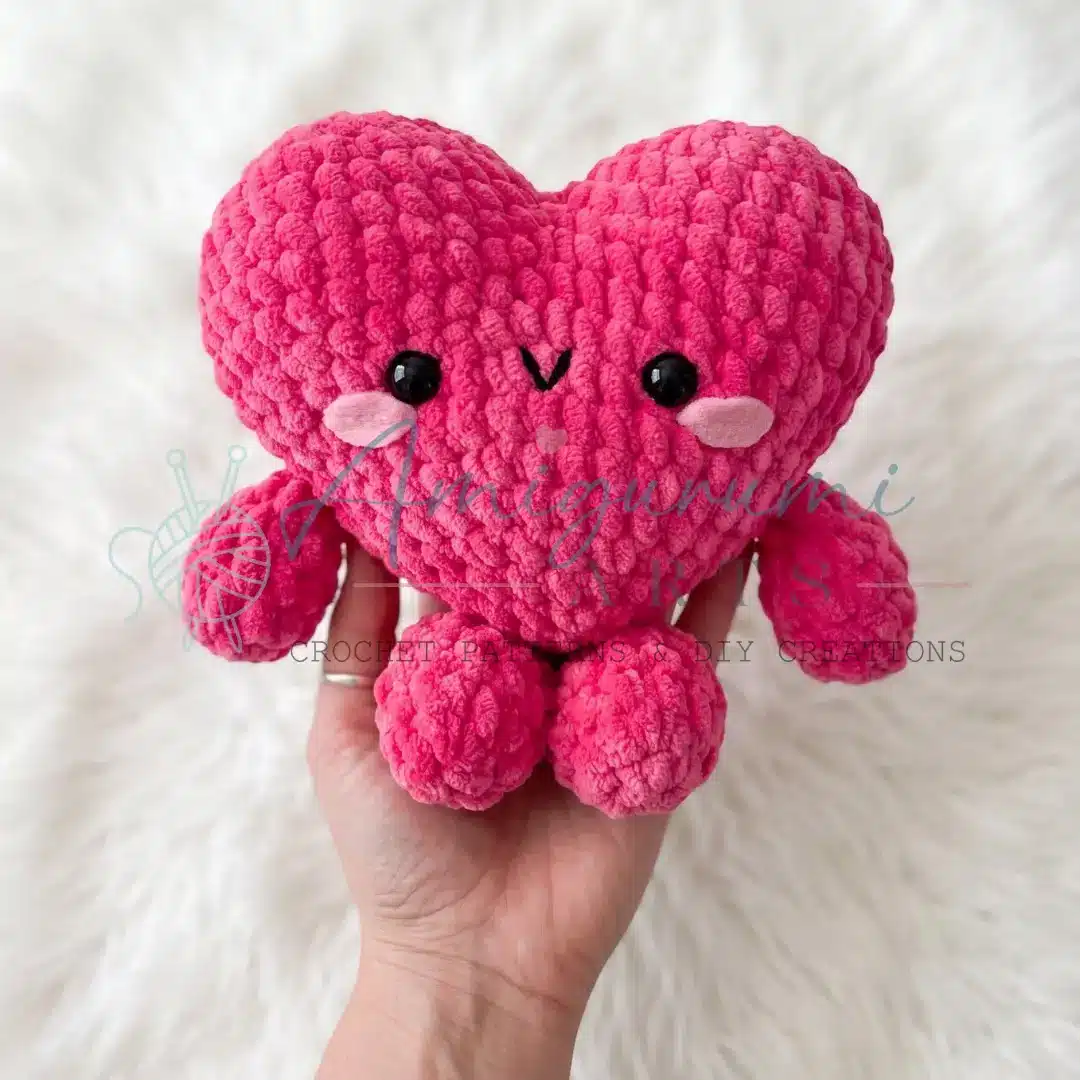
This beginner-friendly amigurumi pattern guides you through creating a charming heart character with four limbs and a sweet embroidered face. The project is worked in US crochet terminology using a continuous spiral. The construction is distinct: two small heart-lobe tops are made separately, then joined to form the upper body before continuing downward into a rounded heart shape. With clear stitch counts and a straightforward assembly process, this is an ideal weekend project for crocheters looking to create a gift or a decorative piece.
Materials
- Yarn: Worsted weight yarn in red (main color) and any contrast color for embroidered facial details; small amount needed.
- Hook: E-4 / 3.5 mm (or size needed to achieve a tight, stuffing-concealing fabric).
- Safety Eyes: 2 safety eyes, approximately 8–10 mm.
- Stuffing: Polyester fiberfill.
- Stitch Markers: 1–2 to mark the beginning of rounds.
- Needle: Yarn needle / tapestry needle.
- Other: Scissors.
Gauge and Finished Size
Gauge is not critical for this project, but your fabric should be tight enough that no stuffing shows through. If stuffing is visible, go down a hook size. The finished size is not specified, but the compact nature of the pattern makes it a perfect handheld amigurumi.
Abbreviations
- ch — Chain
- dec — Invisible Decrease (insert hook in FLO of next 2 sts, yo, pull through both loops, yo, pull through remaining 2 loops)
- inc — Increase (2 sc in same stitch)
- MR — Magic Ring
- sc — Single Crochet
- sl st — Slip Stitch
- st / sts — Stitch / Stitches
Pattern Notes
This pattern is written in US crochet terminology. The body is worked in a continuous spiral — do not join at the end of each round and do not chain up. Use a stitch marker to track the first stitch of each round. The two heart-lobe tops are made separately, then joined by crocheting through both layers before continuing the body as one piece. Stitch count is given at the end of each round in parentheses: (##).
Gauge is not critical for this project, but your fabric should be tight enough that no stuffing shows through. If stuffing is visible, go down a hook size. Insert safety eyes between Rounds 10 and 11, approximately 7 stitches apart, before the opening becomes too small to reach inside comfortably. Begin stuffing at Round 19 (the first decrease round after the body join) and continue adding fiberfill as you close the piece. Stuff firmly but not so tightly that it distorts the shape.
Pattern Instructions
Body Top — Make 2
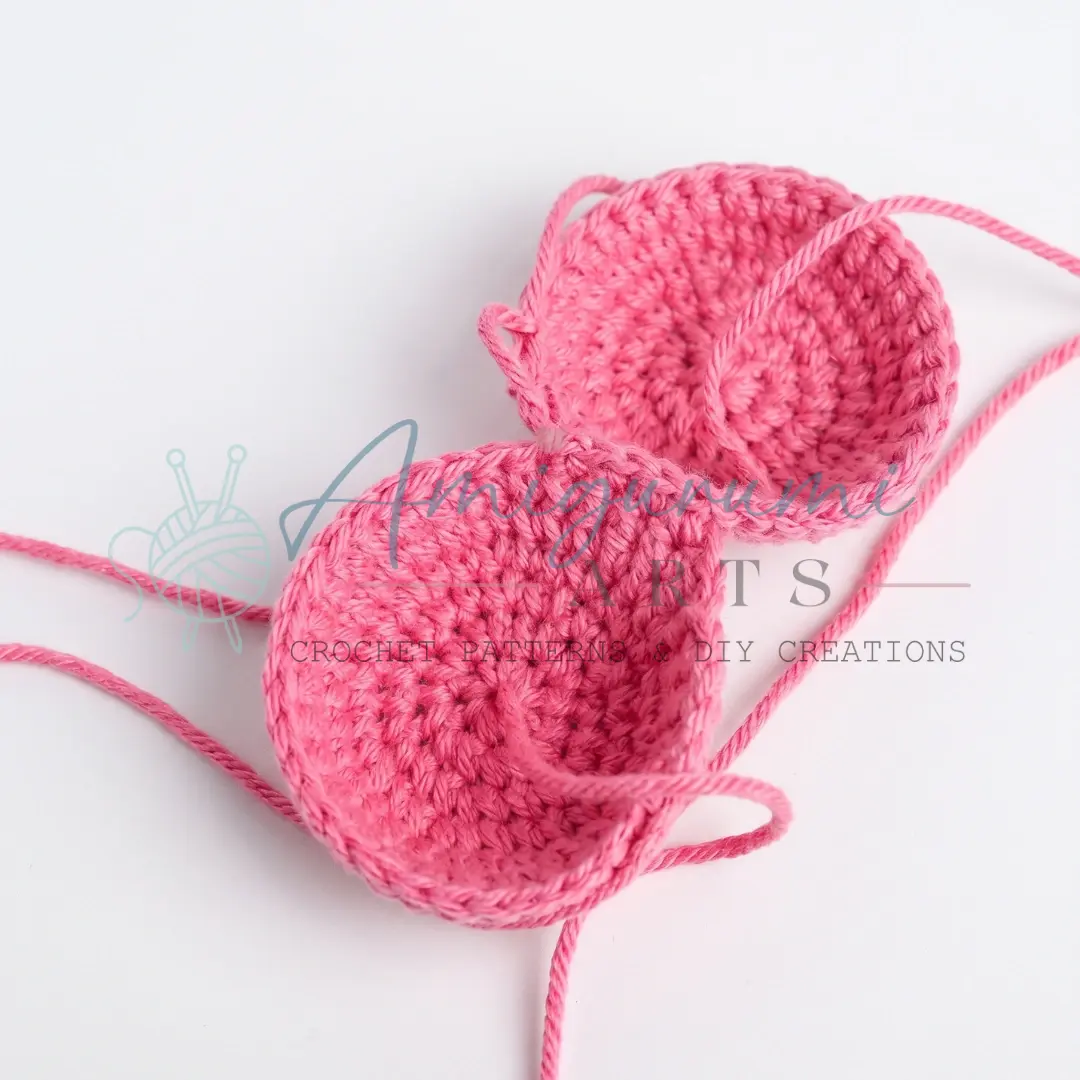
Make both tops before beginning the body join. Fasten off and weave in ends on the first top only; leave a working yarn tail on the second top.
- Rnd 1: 8 sc in MR. (8)
- Rnd 2: inc in each st around. (16)
- Rnd 3: sc, inc repeat 8 times around. (24)
- Rnd 4: 2 sc, inc repeat 8 times around. (32)
- Rnds 5–6: sc in each st around. (32)
First top: fasten off and weave in ends securely. Second top: do not fasten off — you will use this working yarn to join the two tops together.
Body (Joined from the Two Tops)
Hold both tops with their right sides facing out and align them so that 4 stitches on each side meet at the center indentation of the heart shape. Using the working yarn from the second top, crochet through both layers at the join point.
- Joining round: Working through both layers at the joined edges, sc through 4 sts. Then work 28 sc across the first top, 28 sc across the second top. (The 4 joining sc count as part of each top’s edge — do not rework those stitches.) (56)
- Rnd 8: sc in each st around. (56)
- Rnd 9: 5 sc, dec repeat 8 times around. (48)
- Rnd 10: sc in each st around. (48)
- Rnd 11: 4 sc, dec repeat 8 times around. (40)
- Rnd 12: sc in each st around. (40)
- Rnd 13: 3 sc, dec repeat 8 times around. (32)
- Rnd 14: sc in each st around. (32)
Insert safety eyes between Rounds 10 and 11, spacing them approximately 7 stitches apart. Secure the backs firmly.
- Rnd 15: 2 sc, dec repeat 8 times around. (24) Begin stuffing now and continue adding fiberfill as you work the remaining rounds.
- Rnd 16: sc in each st around. (24)
- Rnd 17: sc, dec repeat 8 times around. (16)
- Rnd 18: sc in each st around. (16)
- Rnd 19: dec 8 times around. (8)
Fasten off, leaving a long yarn tail. Close the remaining opening and use the tail to pull the top between the two lobes closed if a gap is visible there.
Arms and Legs — Make 4
All four limbs are made the same way. Stuff before closing.
- Rnd 1: 6 sc in MR. (6)
- Rnd 2: inc in each st around. (12)
- Rnds 3–4: sc in each st around. (12)
Stuff the limb firmly.
- Rnd 5: dec 6 times around. (6)
- Rnd 6: sc in each st around. (6)
Fasten off, leaving a long yarn tail for sewing.
Assembly
- Attach the arms: Sew the two arms to the sides of the body between Rounds 11 and 12, positioning one on each side. Use the yarn tail and a tapestry needle with a whipstitch, pulling the tail through the body before weaving in to secure.
- Attach the legs: Sew the two legs to the bottom of the heart body, placing them approximately 2 stitches apart at the center-bottom. Angle them slightly outward for a natural standing pose.
- Embroider the face: Using a contrast color yarn and a tapestry needle, embroider a small smile and any blush marks or additional features you’d like. Satin stitch works well for cheeks; a simple backstitched curve creates a sweet smile.
- Weave in all remaining ends securely throughout the body.
Tips
- Keep your tension tight throughout. Amigurumi looks its best when the fabric has no gaps — if you can see daylight through your stitches, go down half a hook size. A firm fabric also means the stuffing stays put and the shape holds over time.
- Use the invisible decrease consistently. For a smooth, professional finish, always insert your hook through the front loops only of the next two stitches when working a decrease. This eliminates the telltale “ear” that a standard decrease creates and keeps the surface of Mr. Heart looking tidy.
- Don’t rush the join. The two-top joining round is the most unique step in this pattern. Take a moment before you start to pin or hold the tops together and confirm the 4 overlapping stitches line up symmetrically — that centered indent is what gives your heart its recognizable silhouette.
- Stuff the limbs before closing. It sounds obvious, but it’s easy to work past Round 4 without thinking about it. A small pinch of fiberfill in each arm and leg gives them a satisfying, rounded look. Too much stuffing makes them stiff; a light, even fill is ideal.
- Embroider the face last. Wait until the body is fully assembled and all limbs are attached before adding the facial details. Seeing the finished shape helps you judge placement — a smile that sits slightly lower than you expect often looks more natural once everything is in place.
FAQs
Can I use a different yarn weight for Mr. Heart?
While the pattern specifies worsted weight yarn, you can substitute other weights by adjusting your hook size. However, keep in mind that using a lighter yarn will result in a smaller finished amigurumi, while a heavier yarn will make it larger. Always aim for a tight fabric to prevent stuffing from showing.
How do I ensure the two heart tops join correctly?
The key is alignment. Before you start the joining round, hold both tops with right sides facing out and align them so that 4 stitches on each side meet at the center indentation. This creates the classic heart dip. Take your time to pin or hold them in place to ensure the 4 overlapping stitches line up symmetrically.
What if I don’t have safety eyes?
You can substitute safety eyes with embroidered eyes using black yarn. This is often preferred for amigurumi intended for young children, as it eliminates small hard parts. Use a backstitch to create the eyes, placing them where the pattern indicates the safety eyes should go.
How tight should I stuff Mr. Heart?
Stuff the body firmly but not so tightly that it distorts the shape. For the limbs, a light, even fill is ideal to keep them soft and poseable. If you stuff too loosely, the fabric may sag; if you stuff too tightly, the shape may become misshapen.
Why is the joining round important?
The joining round is what gives Mr. Heart his unique heart shape. By crocheting through both layers of the two tops, you create the structural integrity needed for the heart lobes and the central indentation. This step transforms two simple circles into a recognizable heart silhouette.
Pin This Crochet Pattern!